Table of Contents
Advertisement
Advertisement
Table of Contents

Related Manuals for Microdot Microdot

Summary of Contents for Microdot Microdot
- Page 2 Welcome ® microdot You have chosen the Blood Glucose microdot ® Monitoring System. is very easy to use and is designed to help you manage your blood sugar level and control your diabetes. This manual contains important information about ®...
-
Page 3: Table Of Contents
Table of Contents Page Getting Started ..............® microdot Blood Glucose Meter ........ ® microdot Meter Display ..........® microdot Test Strip ............Before Testing ..............Check the Display ............Code the Meter ..............Performing a Control Solution Test ...... - Page 4 Stored Insulin Data .........25 14-Day Average ..........25 Downloading Results to a Computer..27 Setting the Meter ..........29 Setting the Time, Date, Year, Beeper and Alarms .........29 Selecting Insulin data, Average, Event and Alarm ..........38 Caring for Your Meter ........41 Changing the battery ........42 Display Messages and Problem Solving..43 Message, What it means, Action Problem Solving ..........51...
-
Page 5: Getting Started
Getting Started ® microdot Blood Glucose Monitoring System microdot ® consists of three main products: the Blood ® ® microdot microdot Glucose Meter, test Strips, and Normal Control Solution. These products have been designed to work together to give accurate blood glucose ®... -
Page 6: Microdot Blood Glucose Meter
C BUTTON M BUTTON Used to set meter Used to enter function and to memory mode review test results in memory EJECT BUTTON TEST PORT To discard used Insert microdot strip after use test strip here Meter Back Battery Door... -
Page 7: Microdot Meter Display
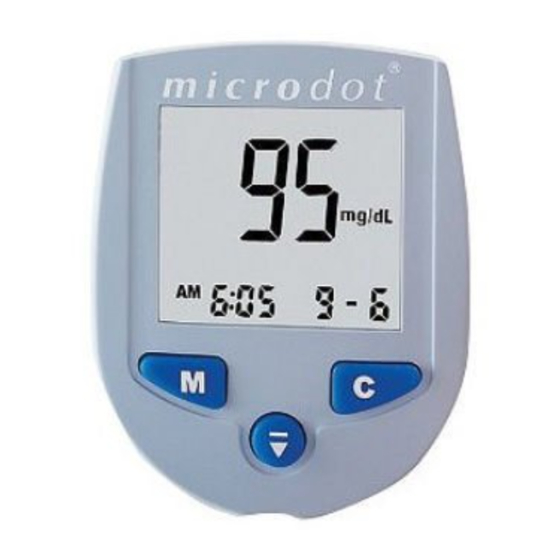
® microdot Meter Display MEMORY SYMBOL CODE For test results stored Appears with code number in Memory for test strips in current use 14-day average INSULIN SYMBOL TEST RESULT AREA Appears with Insulin data UNIT Appears with Insulin data FLASHING DROP... -
Page 8: Microdot Test Strip
Test Strips ® The microdot system is designed to measure glucose in capillary whole blood. You must apply the blood by holding it against the top edge of the test zone you will see on the test strip. Do not attempt to smear or put the blood on the strip. - Page 9 Important Information about the Test Strip Keep the test strips in their original container in a cool, dry place between 10° and 30°C (50° and 86°F). Keep away from direct sunlight and heat. Do not refrigerate. Check the expiration date on the vial. If the expiration date is passed do not use the strips.
-
Page 10: Before Testing
Before Testing Check the Display. When a strip is inserted into the meter, the meter performs a system check. You will see all the display segments appear for 2 seconds. When the system check is completed, the strip code number (example 82) will appear. - Page 11 STEP 2 Match the Code Numbers. Do they match? Compare the code number on the display with the code number shown on the vial label. If the code number on the meter display matches the code number on the vial, you may begin testing.
-
Page 12: Performing A Control Solution Test
Performing a Control Solution Test Practice with control solution before you test your microdot ® blood with the System for the first time. When you can do three tests in a row correctly with the control solution you are ready to test with your own blood. - Page 13 25°C (68° to 77°F) before testing. Shake the vial, discard the first drop of ® microdot Control Solution, and wipe off the dispenser tip to ensure a good sample and an accurate result. Use only for three months after first opening.
-
Page 14: How To Do A Control Solution Test
How to do a control solution test STEP 1 Insert Test Strip. ® Insert a test strip into the microdot meter. Be sure the black contact bars go in first and that the “test zone” is facing you. Push the strip in firmly. Be sure it can go no further. - Page 15 OR you can leave a drop hanging at the tip. When the drop of blood symbol flashes, hold the drop close to the edge of the test strip and allow the sample to wick automatically into the test zone. When the test zone is full, the meter will beep (if enabled) and then count down in seconds 10, 9, 8…2, 1 on the display.
-
Page 16: Comparing Control Solution Results
Comparing Control Solution Results You should get results within the expected range printed on the test strip vial. If this is not so, repeat the test. If the results are out of the range printed on the control solution vial, check the following: Was the vial at room temperature? Did you shake the vial vigorously before using? Did you discard the first drop of control solution and... -
Page 17: Testing Your Blood
Testing Your Blood Preparing the Lancing Device STEP 1 Unscrew and remove the adjustable tip of the lancing device. STEP 2 Insert a new disposable lancet firmly into the lancet holder. STEP 3 Twist off and remove the protective disk from the lancet. - Page 18 STEP 4 Replace the adjustable tip. Choose the penetration depth until the setting number matches the arrow. Settings are based on skin type: 1-2 for soft skin, 3 for average skin, 4-5 for thick or callused skin. STEP 5 Hold the adjustable tip in one hand and pull the top of the sleeve with the other hand.
-
Page 19: Getting A Drop Of Blood
Getting a drop of blood STEP 1 Wash your hands in warm, soapy water. Dry thoroughly. STEP 2 Hold your hand down at your side for a s h o r t t i m e ( 1 5 s e c o n d s i s good.) STEP 3 Lance a puncture site on your finger. -
Page 20: Performing Test Procedure
STEP 4 Squeeze gently until you get a rounded drop of blood. Be careful not to squeeze the finger too hard. Performing Test Procedure STEP 1 Insert Test Strip. Take a test strip from the vial and put it into the meter. Be sure you do this with the black contact bars facing the meter and the “test zone”... - Page 21 Check that the code number on the screen and the code number printed on the vial are the same. If they are not the same, code the meter, following instructions on page 7. After the code number appears, the drop of blood symbol will appear and begin to flash.
- Page 22 Do not smear or attempt to scrape blood into the strip. Once, the test zone of the strip is full, the meter will beep (if enabled) and the 10 seconds count down will start. If the “test zone” does not fill up, stop the test and retest with a new strip.
-
Page 23: Marking Result
STEP 4 Optional: Marking Result ( to enable go to page 39) The Result can be marked as an Event “E” (i.e. after meal) by pressing the C button once. Pressing the C button three times will remove the marking. A marked result will not be included in your 14-day average. - Page 24 The instrument can handle up to 4 different insulin types. Press the M Button once the correct Pen- identification number is selected. Set the correct number of Units by pressing the C button accordingly. Press the M button once the correct amount of units is displayed, the flashing will stop.
-
Page 25: Removing Test Strip
STEP 6 Removing Test Strip You can now eject the strip into a safe disposal bin by pressing on the handy eject button at the bottom of the meter. To eject the strip hold the meter vertically above the disposal container with the strip pointing into the safe disposal bin and push the eject button. -
Page 26: Special Messages
Special Messages The Meter displays results between 1 . 1 a n d 2 9 . 2 m m o l / L ( 2 0 t o 525mg/dL). If your test result is lower than 1.1mmol/L (20mg/dL), “Lo” will appear on the meter display. -
Page 27: Using Meter Memory
Using Meter Memory microdot ® Your Meter stores the 500 most recent blood glucose and control solution test results AND insulin data with date and time in its memory. It also provides you with 14-day averages of your blood glucose test results. You can review the test results in memory with these easy steps. -
Page 28: Recall Test Results
STEP 2 Recall Test Results Previous results can be displayed by pressing the C button. As long as the C button is held, the meter will s c r o l l t h r o u g h t h e m e m o r y displaying the result and the memory location, 001 indicates the last (most recent) result. -
Page 29: Stored Insulin Data
STEP 3 Stored Insulin Data Pressing the M button again will lead to the display of stored insulin data. Insulin data will be displayed with time and date. Pen identification number and Units will be alternately displayed. Previous insulin data can be displayed by pressing the C button As long as the C button is held the memory location number is displayed instead of time and date. - Page 30 Once the actual average changes by more than 5% compared to the average of 3 days ago, the meter will display a Trend Arrow, indicating the change direction (up or down). A HI result will be included in your averages as 29.2mmol/L (525mg/dL) and a LO result as 1.1mmol/L (20 mg/dL).
-
Page 31: Downloading Test Results To A Computer
Downloading Test Results to a Computer This option for transferring your test results with date and time from the meter memory to your personal computer requires software and an interface cable. Contact your Customer Service for more information. When you connect the interface cable to your meter data port and a personal computer, the meter will display “PC”... - Page 32 When the download is complete, The display will show “OK”. NOTE: If the meter is in either memory or setting mode and it is connected to a PC, it will automatically enter the PC communication mode. However if a strip is inserted while in PC communication mode, the meter will switch off and enter the test mode.
-
Page 33: Setting The Meter
Setting the Meter ® Before using the microdot meter the first time you should set the actual Time and Date and Year. The unit of measurement is pre-set and cannot be changed. Setting the Time, Date, Year, Beeper and Alarms Enter the Set mode. - Page 34 Int.: 24h Time format, dd.mm. (Begins with Blank Setting) To accept the desired setting, press the M button. STEP 2 Set the Hour The Hour will start to flash. It can now be changed by pressing the C button. The US setting will begin at 12:01 AM and will move to PM.
- Page 35 STEP 4 Set the Year The Year will start to flash, it can now be changed by pressing the C button. To accept the correct setting, press the M button. STEP 5 Set the Month The Month will start to flash and can now be changed by pressing the C button.
- Page 36 STEP 7 Set the BEEPER The sound symbol will appear and can now be changed by pressing the C button. To accept the setting, press the M button. This option is used to switch on or off the beeper. When turned on, a sound will be heard when blood or control solution is applied to the strip and when the test is finished.
- Page 37 STEP 8 Set Alarms Four alarm settings are available and can be used as reminders for taking medication or carrying out a test. When an alarm is triggered, the meter will display the alarm symbol, “AL” will flash and the beeper will always sound if enabled.
- Page 38 The minutes will start to flash. To change the minute setting, press the C button. To accept the correct setting, press the M button. The meter will display “AL2” with the alarm symbol and OFF. Pressing the C button will toggle between the alarm time flashing and OFF.
- Page 39 The minutes will start to flash. To change the minute setting, press the C button. To accept the correct setting, press the M button. The meter will display “AL3” with the alarm symbol and OFF. Pressing the C button will toggle between the alarm time flashing and OFF.
- Page 40 The minutes will start to flash. To change the minute setting, press the C button. To accept the correct setting, press the M button. The meter will display “AL4” with the alarm symbol and OFF. Pressing the C button will toggle between the alarm time flashing and OFF.
- Page 41 The minutes will start to flash. To change the minute setting, press the C button. To accept the correct setting, press the M button. The meter will display “End” and Switch off. The alarms will trigger automatically when the time corresponds to the time set for each alarm.
-
Page 42: Selecting Insulin Data, Average
Selecting Options: Insulin data input, Average, Event and Alarm. ® Your microdot Blood Glucose meter has optional functions that can help you and your healthcare professional manage your diabetes STEP 1 Select Insulin data input Hold the C button down for 3 seconds and the insulin data symbol will appear with either “ON”... - Page 43 STEP 2 Select Average (14-day average) The Avg symbol will appear with either “ON” or “OFF” flashing. To change the setting, press the C button. To accept the correct setting, press the M button. STEP 3 Select Event The Event symbol will appear with either “ON” or “OFF” flashing.
- Page 44 STEP 4 Select Alarm The Alarm symbol will appear with either “ON” or “OFF” flashing. To change the setting, press the C button. To accept the correct setting, press the M button. Finally, the meter will display End and Switch off.
-
Page 45: Caring For Your Meter
Your Meter is a precision instrument. Please handle it with care. Do not use the meter with test strips ® microdot other than brand test strips. Battery Your Meter comes with one installed 3.0 V (CR2032) -
Page 46: Changing The Battery
To replace the battery, turn the meter over and locate the battery compartment. Changing the Battery STEP 1 Open the battery compartment by sliding the cover out towards you. STEP 2 Remove the old battery by pulling it upward. Insert one 3.0 V (CR2032) lithium battery, making sure the positive “+”... -
Page 47: Display Messages And Problem Solving
Display Messages and Problem Solving Following is a summary of all display messages and symbols. These messages help to identify certain problems but do not appear in all cases when a problem has occurred. Improper use may cause an inaccurate result without producing an error message or a symbol. In the event of a problem, refer to the information under ACTION. - Page 48 Message What it Means Action This is the code Make sure that this number stored in code number matches the meter the code number on the The system is vial of the test strips you ready to accept a are using. You may now blood sample.
- Page 49 Message What it Means Action This message indicates Your blood glucose very low blood sugar. level is lower than Recheck and if “Lo”, call 20 mg/dL(1.1 your doctor immediately mmol/L). and/or treat according to the recommendations of your healthcare professional. There is no test No action required.
- Page 50 Message What it Means Action No action required. A test result marked as an “Event”, for example after a meal, stored in memory. An insulin type No action required. record in the meter memory. Example shows P2 that refers to the insulin type as labeled by the user.
- Page 51 Message What it Means Action Test results will still be The battery sign accurate, but replace the appears on the battery as soon display. as possible. The power of the battery is getting low. You can complete about 50 more tests from the time this symbol first appears.
- Page 52 Message What it Means Action No action required. The average of all blood glucose test results taken in the last 14 days. The arrow up shows that the average has changed by more than 5% compared to the average of 3 days ago.
- Page 53 Message What it Means Action Repeat the test with a Error message that new test strip. If the error indicates that there message appears again, is a problem with contact Customer the test strip. Service. Error message If error persists, indicates serial contact Customer communications...
- Page 54 Message What it Means Action No action required This display indicates that the meter is downloading data to the PC. This display No action required indicates that the data download is completed. Press M or C button The flashing “AL” with the alarm symbol to turn off the alarm or indicates that a pre-...
-
Page 55: Problem Solving
Problem Solving If the meter does not display a message after inserting a test strip. PROBABLE CAUSE WHAT TO DO a. Battery exhausted Replace battery b. Battery incorrectly Check that the battery is installed or absent. correctly installed with the positive “+”... -
Page 56: Specifications
Specifications Operating Ranges: Temperature: 50°F-104°F(10°C-40°C ) Relative Humidity: 20-90% Haematocrit: 25-55% Result Range: 20 to 525 mg/dL (1.1 to 29.2 mmol/L) Calibration: Plasma-equivalent Sample: Fresh capillary whole blood Sample Size: Minimum 0.6 microliter (600 nanoliters) Test Time: 10 seconds Assay Method: Glucose dehydrogenase biosensor Power Source: One replaceable 3.0V (CR2032 or equivalent) lithium battery Battery Life: 1,500 tests, or about one year at three... -
Page 57: Guarantee
Guarantee ® The makers guarantee that the microdot Meter shall be free of defects in material and workmanship for a period of three years. This guarantee is valid from the date of purchase. The guarantee extends only to the original purchaser and is not transferable. -
Page 58: Packing Symbols
Packaging Symbols Lot Number Expiry Date For in vitro diagnostic use Caution symbol: See Instructions for use Manufactured by Storage Temperature Product fulfils the requirement of EC Directive 98/79/EC concerning in vitro diagnostic medical devices. - Page 59 If you are experiencing symptoms that are not consistent with your blood glucose test results AND you have followed all instructions ® described in the microdot Blood Glucose Monitoring System User Manual, call your healthcare professional.
-
Page 60: Intended Use
Meters read the glucose level of a capillary blood sample on a ® ® microdot Test Strip. Use only microdot Test ® Strips with the microdot Blood Glucose Meter. ® microdot Test Strips are plasma calibrated to allow easy comparison of results with laboratory ®... - Page 61 Notes...
- Page 62 Notes...
- Page 63 Notes...
- Page 64 Customer Service Deudraa Impex Limited Shivaji's Enclave, 23 Rathenam Street, Gopalapuram, Chennai 600 086. Phone : 044-32519225 www.microdot.co.in Cambridge Sensors Limited Cambridgeshire PE29 2XG United Kingdom www.cs-limited.co.uk LBL-130-06A...
Need help?
Do you have a question about the Microdot and is the answer not in the manual?
Questions and answers