Advertisement
Advertisement
Table of Contents

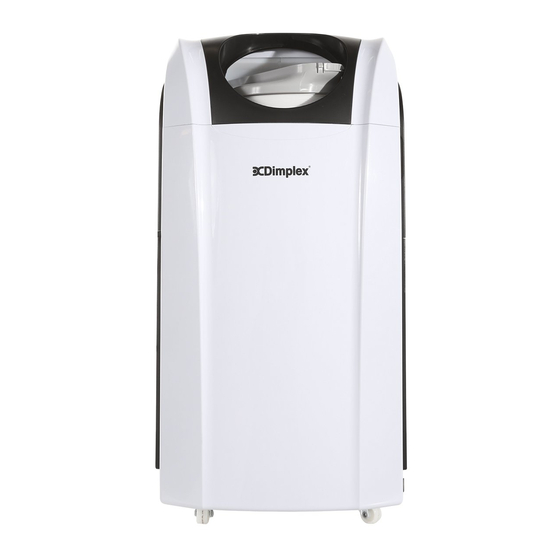
Summary of Contents for Dimplex DC10RCDH
- Page 1 MODEL: DC10RCDH / DC12RCDH INSTRUCTION MANUAL PORTABLE AIR CONDITIONER...
- Page 2 IMPORTANT INFORMATION Carefully read this instruction manual before you install or use your portable air conditioner. Please retain this manual for product warranty and for future reference. CAUTION 1. Make sure the inlet and outlet vents are never blocked. 2. Ensure the appliance is on a stable, even surface when operating to avoid water leakage.
-
Page 3: Package Contents
PACKAGE CONTENTS Portable air conditioner Remote control User manual Extendable window kit PARTS Control panel Remote control receiver Adjustable air vent Window kit adaptor Exhaust hose Hot air filter Hot air inlet Home for remote control Hot air outlet 10. Water filler(for humidifying function)... -
Page 4: Controls And Display
CONTROLS AND DISPLAY 1. POWER Press the POWER button to turn the unit "ON" or "OFF". ※ The portable air conditioner is fitted with a compressor delay protection circuit. This protects the unit from possible damage due to rapid starting and stopping of its compressor. - Page 5 3. (TEMP+) In cooling mode, this button raises the set temperature by 1°C each time it is pressed to a maximum of 30°C. In heating mode, this button raises the set temperature by 1°C each time it is pressed to a maximum of 25°C. 4.
- Page 6 is reached. The fan operates at the selected speed. 7. TIMER ON/OFF button for the programmable timer. The timer can be used to turn the unit on automatically after a set time delay is complete. 1. With the unit OFF, press the "TIMER" button to set the desired time delay before you wish the unit to start.
-
Page 7: Remote Control Function
set the number of hours required by using the TIMER function. The hours set will be shown on the display by pressing either the TEMP+ or TEMP- buttons. REMOTE CONTROL FUNCTION On/Off switch Function “MODE” selector Hourly programming Automatic fan speed Turbo fan speed High fan speed Low fan speed... -
Page 8: Installation
INSTALLATION Unit Setup 1. Remove the water tank and take out the exhaust hose. 2. Remove the outlet grille and install the exhaust tube by rotating it clockwise onto the rear air outlet. Please ensure it is fully inserted before use. To remove the exhaust hose, please rotate in an anti-clockwise direction. - Page 9 ADJUSTABLE WINDOW SLIDER KIT The adjustable window slider kit is installed as shown below. HEATING / COOLING / DEHUMIDIFYING When using the heating function, remove the exhaust hose (Fig. 2) and replace the opening (Fig. 3) with the outlet grille as shown in Fig. 4. On the opposite end, install the exhaust hose attachment (Fig.
-
Page 10: Continuous Drainage
Once complete, ensure the outlet exhaust is attached to the window when using the heating function. Reverse the process for cooling or dehumidification. HUMIDIFYING When using the humidifying function, remove the exhaust hose and fix the outlet grille on the unit. Fill the water filler and select humidifier function. -
Page 11: Maintenance
Draining tube should be placed lower than the draining hole to allow the water to flow out effectively. MAINTENANCE WARNING: ALWAYS UNPLUG THE UNIT BEFORE MOVING OR CLEANING. CLEANING Air filters The air filters are located on the left and right side of the unit. To remove the air filters, please follows the arrow directions below by pulling out the filters in an upward direction. -
Page 12: Care Of The Unit
CARE OF THE UNIT 1. Only plug the unit into a suitable 220-240V~ 50Hz AC 10 AMP power supply. 2. Hold the plug when unplugging the unit, never pull on the cord. 3. Do not place the unit in direct sunlight. This can fade the plastic case. 4. -
Page 13: Troubleshooting
The batteries are flat. Replace the batteries. If you have any issues with your unit, please contact Glen Dimplex on 1300 556 816 for your nearest service agent. Proof of purchase is required at the time of service. -
Page 14: Warranty
WARRANTY The warranty period is 24 months from the date of purchase. Glen Dimplex Australia Pty Ltd. Glen Dimplex New Zealand Ltd. Unit 1, 21 Lionel Road. 38 Harris Road, East Tamaki, Mount Waverley VIC 3149. Manukau, Auckland 2013 Australia... -
Page 15: Specification
SPECIFICATION Model No. DC10RCDH DC12RCDH Power Source 220-240V~50Hz 220-240V~50Hz Power Consumption 1153W/967W 1346W/1129W (EN14511) Rated Power 1280W/1100W 1480W/1300W (EN60335) Cooling/Heating 3000W/3000W 3500W/3500W Capacity Humidifying 0.2L/H 0.2L/H Capacity Air Flow 360M³/H 450M³/H Moisture 50 L/day 60 L/day Removed Water Tank 2.4L 2.4L...


Need help?
Do you have a question about the DC10RCDH and is the answer not in the manual?
Questions and answers