Roundup VCT-2000 Owner's Manual
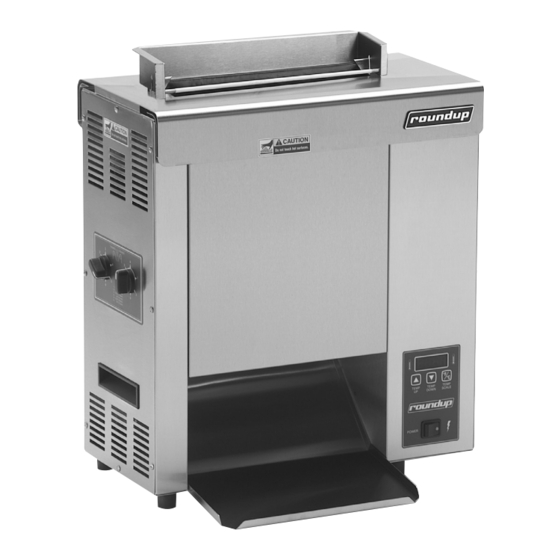
Vertical contact toaster
Hide thumbs
Also See for VCT-2000:
- Owner's manual (28 pages) ,
- Owner's manual (28 pages) ,
- Owner's manual (22 pages)

Related Manuals for Roundup VCT-2000


Summary of Contents for Roundup VCT-2000
- Page 1 MANUFACTURING NUMBERS: 9210104 9210209 VERTICAL CONTACT TOASTER Model VCT-2000 P/N 1010775 Rev. J 10/13 Burger King Owner s Manual ’...
-
Page 2: Table Of Contents
Temperature Adjustments ..........8 OWNER INFORMATION General Warranty Information The Vertical Contact Toaster Model VCT-2000 is Please read the full text of the Limited Warranty in this designed for contact toasting of buns. The toaster manual. design allows the operator to place buns on both If the unit arrives damaged, contact the carrier imme- sides of the heated platen at the same time. -
Page 3: Owner Information
Service/Technical Assistance Refer to the service agency directory included with your unit. If you experience any problems with the installation or operation of your unit, contact your local Roundup Authorized Service Agency Authorized Service Agency. Name: Fill in the information below and have it handy when Phone No.:... -
Page 4: Important Safety Information
VERTICAL CONTACT TOASTER IMPORTANT SAFETY INFORMATION In addition to the warnings and cautions in this manual, • Bread may burn. Therefore toasters must use the following guidelines for safe operation of the not be used near or below curtains or other unit. -
Page 5: Specifications
Electrical Specifications at Listed Voltages Electrical Cord & Plug Configurations Model & Model & Description Configuration Voltage Watts Amps Hertz Mfg. No. Mfg. No. VCT-2000 L6-30P, 30 3291 15.8 9210104 VCT-2000 Amp., 250 VAC., VCT-2000 9210104 Straight Twist 3291 14.3 9210209 Lock. -
Page 6: Installation
VERTICAL CONTACT TOASTER INSTALLATION Unpacking CAUTION Failure to use Release Sheets may result in 1. Remove unit and all packing materials from damage to the unit and loss of warranty coverage. shipping carton. 2. Open the included large box. It should contain CAUTION the following: Bread may burn. -
Page 7: Installation
Conveyor Belt Chain Front Conveyor Conveyor Belt Chain Safety Interlock Switch Rear Conveyor Cover Assembly Front (with Roller Cleated Belt Tensioner) Wrap Front Conveyor Chute Cover Assembly Roller Tensioner Figure 1. VCT-2000 Toaster P/N 1010775 Rev. J 10/13 Burger King... -
Page 8: Operation
lined in the Maintenance section of this manual. Temperature Adjustments The VCT-2000 uses a Platen Heater and two Auxiliary Air Heaters. The Platen Heater consists of a heating element built into the Platen to toast the cut side of ... -
Page 9: Toaster
VERTICAL CONTACT TOASTER OPERATION (continued) TEMPERATURE CONTROL PANEL “Heat On” LED will blink on/off during warm-up and when either platen or auxiliary air heaters are calling for heat. NOTE: The term “set point temperature” refers to the desired temperature setting. To display the actual Platen temperature—providing it SP - P is over 440°F (227°C)—press the TEMP UP button. -
Page 10: Hi-Limit Reset Button
VERTICAL CONTACT TOASTER OPERATION (continued) Hi-Limit Reset Button A Hi-Limit Control turns off electrical power to the heater and control circuits if the unit overheats. To reset the control, allow 10–15 minutes for the unit to cool, then locate the Reset Button at the rear of the unit. -
Page 11: Maintenance
VERTICAL CONTACT TOASTER MAINTENANCE 9. Close the rear Conveyor Cover. Reinstall the WARNING Heat Shield, plug in the power cord, turn the unit Turn the power off, unplug the power cord, and on, count 15 seconds, then turn the unit off and allow the unit to cool down 30 minutes before per- unplug the unit. -
Page 12: Replacing The Black And Silver Release Sheet (Every 4-6 Weeks)
VERTICAL CONTACT TOASTER MAINTENANCE (continued) Replacing the Black and Silver Release 7. Close the Conveyor Cover(s), set the Compression Sheet (Every 4–6 Weeks) Control Knobs back to their normal settings and reinstall the Heat Shield and Bun Feeder. NOTE: Depending on toaster usage and on how well it is cleaned daily, the black and silver Release Sheet should last between 45–60 days. -
Page 13: Checking The Conveyor Belt Chains (Every 3-6 Months)
VERTICAL CONTACT TOASTER MAINTENANCE (continued) Checking the Conveyor Belt Chains (Every 3–6 Months) MEASURING CONVEYOR BELT CHAINS 1. Turn the unit off, unplug the power cord, and allow the unit to cool. 2. Remove the Bun Feeder and Heat Shield (Figure 1) and set the Bun Thickness Compression Knobs to 6 &... -
Page 14: Checking The Roller Tensioners (Every 3-6 Months)
VERTICAL CONTACT TOASTER MAINTENANCE (continued) Checking the Roller Tensioners (every 3–6 months) MEASURING THE ROLLER TENSIONERS 1. Measure the Roller Tensioner on both inner Conveyor Covers (Figure 10) using a U.S Nickel. 2. The space between the inner Conveyor Cover and bottom of the Tensioner wheel should be 13/16”... -
Page 15: Troubleshooting
VERTICAL CONTACT TOASTER TROUBLESHOOTING WARNING To avoid possible personal injury and/or damage to the unit, inspection, test, and repair of electrical equip- ment should be performed by qualified service personnel. The unit should be unplugged when servicing, except when electrical tests are required. Use extreme care during electrical circuit tests. Live circuits will be exposed. - Page 16 VERTICAL CONTACT TOASTER TROUBLESHOOTING (continued) Problem Possible Cause Corrective Action Conveyor does not Safety Interlock Switch is not Reposition the Heat Shield properly. turn. activated. Heat Shield is bent or damaged Replace Heat Shield (P/N 0011528). Damaged or Missing Roller Adjust or replace Roller Tensioner(s).
- Page 17 VERTICAL CONTACT TOASTER (continued) Problem Possible Cause Corrective Action Crowns and/or Heels Belt Wraps not being cleaned prop- Clean Belt Wraps as described in the Maintenance must be forced into erly. section of this manual. the toaster. Buns Conveyor Belt Wraps are not tacky/ Clean Belt Wraps.
- Page 18 VERTICAL CONTACT TOASTER TROUBLESHOOTING (continued) Problem Possible Cause Corrective Action Toaster makes unusu- Compression Settings are too tight. Set Compression Settings to the correct (or larger) al sounds. setting. Conveyor Belt Wrap is installed Belt Wraps must be installed as described in the incorrectly.
-
Page 19: Replacement Parts
VERTICAL CONTACT TOASTER REPLACEMENT PARTS Parts Identification Platen Safety Interlock Switch Front Auxiliary Air Heater Rear Auxiliary Air Heater Auxiliary Air Thermocouple Drive Chain Idler Sprocket Transformer Front Drive Rear Sprocket Drive Sprocket Auxiliary Relay Platen Thermocouple Platen Relay Temperature Control Hi-Limit Capillary Probe... - Page 20 VERTICAL CONTACT TOASTER REPLACEMENT PARTS (continued) P/N 1010775 Rev. J 10/13 Burger King...
- Page 21 VERTICAL CONTACT TOASTER REPLACEMENT PARTS (continued) P/N 1010775 Rev. J 10/13 Burger King...
- Page 22 VERTICAL CONTACT TOASTER REPLACEMENT PARTS (continued) 30, 94 31, 95 P/N 1010775 Rev. J 10/13 Burger King...
- Page 23 VERTICAL CONTACT TOASTER REPLACEMENT PARTS (continued) Item Part No. Description Qty. Item Part No. Description Qty. 0011266 Conveyor Belt (Incl. items below) 2100252 Tape 0800204 1/2” Pitch Link, Small 0503359 Bracket, Relay 0800121 3/4” Pitch Link, Large 0503150 Heater Clip 2150117 Idler Shaft 303P127*...
-
Page 24: Wiring Diagram
VERTICAL CONTACT TOASTER WIRING DIAGRAM **MOTOR CONNECTIONS: 50hz requires male to male adapter (not included). P/N 1010775 Rev. J 10/13 Burger King... - Page 25 VERTICAL CONTACT TOASTER WIRING DIAGRAM (continued) P/N 1010775 Rev. J 10/13 Burger King...
-
Page 26: Notes
2. Before installing General new conveyor This addendum describes how to install the new belt wraps, wipe clip stile belt wraps (P/N 7000964) on the VCT-2000 conveyers chain toaster. links with sani- tized towel (see If you experience any problems with these instructions,... -
Page 27: Notes
VERTICAL CONTACT TOASTER ADDENDUM - INSTALLING CLIP STYLE BELT WRAPS 4. Verify both clips on the belt wraps are secured to 5. Verify belt alignment is even from side to side of the links on the conveyor chains. Then position each belt. - Page 28 VERTICAL CONTACT TOASTER ADDENDUM - INSTALLING CLIP STYLE BELT WRAPS 1. Apague el tostador completamente y déjelo 3. Para instalar la banda, conecte el gancho supe- enfriar. Coloque las perillas de tensión en el rior en cada pinza a uno de los enlaces de unión número 6 y F.
- Page 29 VERTICAL CONTACT TOASTER ADDENDUM - INSTALLING CLIP STYLE BELT WRAPS 4. Asegúrese que los dos ganchos en la banda es- 5. Verifique la alineación y posición de la banda tén bien conectados al cinturón de alambre. Junte asegurándose que este bien centrada. Instale las los dos extremos de la banda alineando la grapa cubiertas en su respectivo lugar.
-
Page 30: Limited Warranty
This warranty does not cover Travel Time & Mileage in excess of 2 hours (100 miles/160 km) round trip from the nearest authorized service agency. 2. Roundup reserves the right to make changes in design or add any improvements on any product. The right is always reserved to modify equipment because of factors beyond our control and government regulations.
Need help?
Do you have a question about the VCT-2000 and is the answer not in the manual?
Questions and answers