Lexmark C540n Service Manual
Hide thumbs
Also See for C540n:
- Service manual (270 pages) ,
- Setup manual (28 pages) ,
- Specifications (6 pages)
Table of Contents
Advertisement
Quick Links
Revision: October 2, 2009
™
Lexmark
C540n, C543dn, C544n, C544dn,
C544dtn, C544dw, and C546dtn
5025-2xx, 4xx
• Table of contents
• Start diagnostics
• Safety and notices
• Trademarks
• Index
Lexmark and Lexmark with diamond design are
trademarks of Lexmark International, Inc., registered
in the United States and/or other countries.
Advertisement
Table of Contents

Related Manuals for Lexmark C540n


Summary of Contents for Lexmark C540n
- Page 1 C544dtn, C544dw, and C546dtn 5025-2xx, 4xx • Table of contents • Start diagnostics • Safety and notices • Trademarks • Index Lexmark and Lexmark with diamond design are trademarks of Lexmark International, Inc., registered in the United States and/or other countries.
- Page 2 Lexmark, Lexmark with diamond design, and MarkVision are trademarks of Lexmark International, Inc., registered in the United States and/or other countries. PCL® is a registered trademark of the Hewlett-Packard Company. PCL is Hewlett-Packard Company’s designation of a set of printer commands (language) and functions included in its printer products.
-
Page 3: Table Of Contents
5025-2xx, 4xx Table of contents Table of contents ............iii Notices and safety information . - Page 4 5025-2xx, 4xx Bin-full/narrow media sensor service check ......... 2-23 Dead printer service check .
- Page 5 5025-2xx, 4xx Hardware Tests ..............3-11 Panel Test .
- Page 6 5025-2xx, 4xx Updating printer firmware ............. 3-28 From a flash drive .
- Page 7 5025-2xx, 4xx Image transfer unit (ITU) removal ..........4-40 Imaging unit (IU) removal .
- Page 8 5025-2xx, 4xx viii Service Manual...
-
Page 9: Notices And Safety Information
10-2-2009 5025-2xx, 4xx Notices and safety information The laser notice label may be affixed to this printer. Laser notice The printer is certified in the U.S. to conform to the requirements of DHHS 21 CFR Subchapter J for Class I (1) laser products, and elsewhere is certified as a Class I laser product conforming to the requirements of IEC 60825-1. - Page 10 5025-2xx, 4xx 10-2-2009 Avisos sobre el láser Se certifica que, en los EE.UU., esta impresora cumple los requisitos para los productos láser de Clase I (1) establecidos en el subcapítulo J de la norma CFR 21 del DHHS (Departamento de Sanidad y Servicios) y, en los demás países, reúne todas las condiciones expuestas en la norma IEC 60825-1 para productos láser de Clase I (1).
- Page 11 10-2-2009 5025-2xx, 4xx Laserilmoitus Tämä tulostin on sertifioitu Yhdysvalloissa DHHS 21 CFR Subchapter J -standardin mukaiseksi luokan I (1) - lasertuotteeksi ja muualla IEC 60825-1 -standardin mukaiseksi luokan I lasertuotteeksi. Luokan I lasertuotteita ei pidetä haitallisina. Tulostimen sisällä on luokan IIIb (3b) laser, joka on nimellisteholtaan 5 mW:n galliumarsenidilaser ja toimii 645 - 670 nanometrin aallonpituuksilla.
- Page 12 5025-2xx, 4xx 10-2-2009 Avís sobre el Làser Segons ha estat certificat als Estats Units, aquesta impressora compleix els requisits de DHHS 21 CFR, apartat J, pels productes làser de classe I (1), i segons ha estat certificat en altres llocs, és un producte làser de classe I que compleix els requisits d’IEC 60825-1.
- Page 13 10-2-2009 5025-2xx, 4xx xiii Notices and safety information...
- Page 14 5025-2xx, 4xx 10-2-2009 Service Manual...
-
Page 15: Safety Information
10-2-2009 5025-2xx, 4xx Safety information • The safety of this product is based on testing and approvals of the original design and specific components. The manufacturer is not responsible for safety in the event of use of unauthorized replacement parts. •... - Page 16 5025-2xx, 4xx 10-2-2009 Sicherheitshinweise • Die Sicherheit dieses Produkts basiert auf Tests und Zulassungen des ursprünglichen Modells und bestimmter Bauteile. Bei Verwendung nicht genehmigter Ersatzteile wird vom Hersteller keine Verantwortung oder Haftung für die Sicherheit übernommen. • Die Wartungsinformationen für dieses Produkt sind ausschließlich für die Verwendung durch einen Wartungsfachmann bestimmt.
- Page 17 10-2-2009 5025-2xx, 4xx Informació de Seguretat • La seguretat d'aquest producte es basa en l'avaluació i aprovació del disseny original i els components específics. El fabricant no es fa responsable de les qüestions de seguretat si s'utilitzen peces de recanvi no autoritzades. •...
-
Page 18: Preface
5025-2xx, 4xx 10-2-2009 Preface This manual contains maintenance procedures for service personnel. It is divided into the following chapters: General information contains a general description of the printer and the maintenance approach used to repair it. Special tools and test equipment, as well as general environmental and safety instructions, are discussed. -
Page 19: General Information
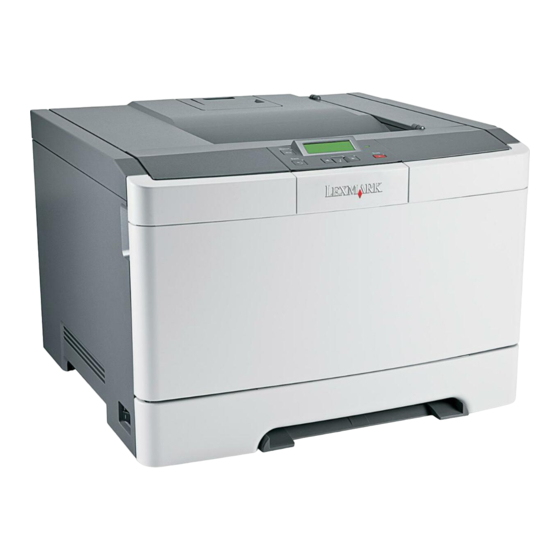
5025-2xx, 4xx 1. General information The Lexmark™ C54x printer (5024-2xx, 4xx) is a color network printer in a compact size. Some models have internal duplex printing, USB-A host ports for flash drives on the operator panel, and an optional 650-sheet Duo Drawer with 550 sheets in the input tray and 100-sheets for the multipurpose feeder. -
Page 20: Options And Features
Dual Inline Memory Module. An optional memory card that can be plugged into an available memory slot. The maximum usable DDRSDRAM is standard (soldered) plus 512MB. The Lexmark C546dtn ships with a 128MB DIMM in the extra memory slot. Increasing memory beyond standard 256MB require the removal of this DIMM. -
Page 21: Print Quality
CANNOT be installed post- manufacturing. While other USB flash drives have not been tested, and therefore cannot be approved by Lexmark, these products may function if the storage device meets the following qualifications: • Supports the USB 2.0 specification supporting the Full-Speed mode •... -
Page 22: Operating Modes
• The operator panel back light is off. • Power supply energy consumption is reduced. • Energy + Paper All of the above. Data streams ✔ —Supported ✘ Lexmark C540n, Lexmark C544n, —Not supported Lexmark C546dtn C543dn C544dn, C544dwn Data streams ✔... -
Page 23: Dimensions
5025-2xx, 4xx Dimensions Models Height Width Depth Weight Lexmark C540n, C543dn, 291 mm (11.5 in.) 424 mm (16.7 in.) 400 mm (15.7 in.) 21 kg (46.2 lbs) C544n, C544dn(w) Lexmark C546dtn (includes 422 mm (16.6 in.) 424mm (16.7 in.) 416 mm (16.4 in.) -
Page 24: Power And Electrical Specifications
18 W 18 W 18 W Ready 34 W 36 W 36 W Automatic duplex is not supported on the C540n and C544n. Typical electricity consumption Power supply voltage (kwh) Model Mode 100 V/50 Hz 115 V/60 Hz 230 V/50 Hz Lexmark C540n and C543dn 3.73 kwh... -
Page 25: Acoustics
All acoustic measurements are made in accordance with ISO 7779-1999 and reported in conformance with ISO9296:1988-04-15. Operating mode 1-Meter average sound pressure at 4800 CQ Lexmark Lexmark Lexmark Lexmark Lexmark C540n C543dn C544n C544dn C546dtn Printing (simplex) 47 dBA 47 dBA 49 dBA... -
Page 26: Media Handling
Only one 650-sheet Duo Drawer can be used on a printer. If a third tray is needed, the third one needs to be an optional 550-sheet drawer. The third drawer is compatible only with the Lexmark C546dtn model. Service Manual... -
Page 27: Duplex Capability
5025-2xx, 4xx Duplex capability ✔ —Supported ✘ —Not supported Models Duplex capability ✘ Lexmark C540n ✔ Lexmark C543dn ✘ Lexmark C544n ✔ Lexmark C544dn ✔ Lexmark C544dw ✔ Lexmark C546dtn Media output size and type There is a single 100-sheet output bin on this printer, and no additional output options. - Page 28 5025-2xx, 4xx ✔ —Supported without size sensing ✘ —Not supported Input source Universal ✔ ✔ ✔ ✔ ✔ 148 x 210mm to ✘ 216 x 356mm (5.8 x 8.3 in. to 8.5 x 14 in.) ✘ ✘ ✘ ✘ ✔ ✔...
-
Page 29: Media Input Type Specifications
5025-2xx, 4xx Media input type specifications ✔ —Supported ✘ —Not supported Input type ✔ ✔ ✔ ✔ ✔ ✔ Plain paper ✘ ✔ ✔ ✔ ✔ ✔ Card stock ✘ ✔ ✔ ✔ ✔ ✔ Transparency ✔ ✔ ✔ ✔ ✔... -
Page 30: Media Guidelines
(16–28 pound) grain long bond. The duplex unit does not support card stock, transparencies, envelopes, or labels. Lexmark transparency part numbers 12A8240 and 12A8241 are supported from the standard tray, manual slot, and the multi-purpose feeder. Paper 90 to 104.9 g/m (23.9 to 27.8 lb) must be printed with Paper Type set to Heavy Paper. -
Page 31: Unacceptable Paper
5025-2xx, 4xx • Smoothness—Paper smoothness directly affects print quality. If paper is too rough, toner cannot fuse to it properly. If paper is too smooth, it can cause paper feeding or print quality issues. Always use paper between 100 and 300 Sheffield points; however, smoothness between 150 and 200 Sheffield points produces the best print quality. -
Page 32: Storing Paper
US fed as well as non-recycled paper. However, no blanket statement can be made that all recycled paper will feed well. Lexmark consistently tests its printers with recycled paper (20–100% post-consumer waste) and a variety of test paper from around the world, using chamber tests for different temperature and humidity conditions. -
Page 33: Tools Required For Service
5025-2xx, 4xx Tools required for service Flat-blade screwdrivers, various sizes #1 Phillips screwdriver, magnetic #2 Phillips screwdriver, magnetic #2 Phillips screwdriver, magnetic short-blade Long-shank Phillips screwdriver at least 8 in. or 200 mm long, preferably magnetized 7/32 inch (5.5 mm) open-end wrench 7.0 mm nut driver Needlenose pliers Diagonal side cutters... -
Page 34: Acronyms
5025-2xx, 4xx Acronyms BLDC Brushless DC Motor Cyan DIMM Dual Inline Memory Module DRAM Dynamic Random Access Memory EEPROM Electrically Erasable Programmable Read-Only Memory ElectroPhotographic Electrostatic Discharge Field Replaceable Unit Gigabyte HVPS High-Voltage Power Supply Image Transfer Unit Imaging Unit Japanese Industry Standard Black LASER... -
Page 35: Diagnostic Information
5025-2xx, 4xx 2. Diagnostic information Start CAUTION Unplug power cord from the electrical outlet before you connect or disconnect any cable or electronic board or assembly for personal safety and to prevent damage to the printer. Disconnect any connections between the printer and PCs/peripherals. Begin here to locate the service error code, user status message, user error message, symptom table, service checks, and diagnostic aids in this chapter to determine the corrective action necessary to repair a malfunctioning printer. -
Page 36: Por (Power-On Reset) Sequence
5025-2xx, 4xx POR (Power-On Reset) sequence The following is an example of the events that occur during the POR sequence for the base machine with no paper handling options installed. When you turn the printer on, it performs a Power-On Self Test. Check for correct POST functioning of the base printer by observing the following: The LED turns on. -
Page 37: Symptom Tables
5025-2xx, 4xx Symptom tables Printer symptom table Symptom Action Dead printer Go to “Dead printer service check” on page 2-24. Operator panel—one or more buttons do Go to “One or more operator panel buttons fail” on not work. page 2-33. Operator panel—display is blank. -
Page 38: Print Quality Symptom Table
5025-2xx, 4xx Print quality symptom table Symptom Action Background Go to “Print quality—background” on page 2-41. Blank page Go to “Print quality—blank page” on page 2-42. Blurred or fuzzy print Go to “Print quality—blurred or fuzzy print” on page 2-43. Color matching problems “Color theory”... -
Page 39: Error Codes And Messages
5025-2xx, 4xx Error codes and messages User status and customer attendance messages User primary Explanation message Busy Wait for the message to clear. Calibrating The printer is performing a color adjustment. Wait for the message to clear. Close door Message clears when front cover, right cover, and toner door are closed or securely fastened. - Page 40 5025-2xx, 4xx User primary Explanation message Load <source> Printer does not detect media meeting the size or type requested in the source <type> <size> indicated. • Load the input source with the correct type and size media. • Press Stop ( ), and then press Select ( ) to cancel printing.
- Page 41 5025-2xx, 4xx User primary Explanation message Remote Management The printer is offline while it configures settings. Wait for the message to clear. Active Remove paper from The following actions can be taken: standard output bin • Remove paper from the standard exit bin to clear the message and continue printing.
- Page 42 5025-2xx, 4xx User primary Explanation message 31.xx Defective Defective imaging kit. Imaging Kit The following actions can be taken: • Open and close the top cover. • Remove and re-install the imaging kit. • Turn the printer power off, and after a few seconds, turn the printer power back If the message persists, determine if the imaging kit counter is greater than 15,000 cycles.
- Page 43 5025-2xx, 4xx User primary Explanation message 38 Memory Full This message is displayed when the printer is processing an incoming job and there is not enough memory available to continue processing the job. The following actions can be taken: • Determine how to make more memory available to your print job by: - Deleting fonts and other data in RAM.
- Page 44 5025-2xx, 4xx User primary Explanation message 54 Standard network The printer detects a network port, but cannot communicate with it. The printer software error disables all communication to the associated network interface. The following actions can be taken: • Press Select ( ) to clear the message and continue printing.
-
Page 45: Paper Jam Messages
5025-2xx, 4xx User primary Explanation message 88.xx <color> The term <color> includes black, cyan, magenta, and yellow. Replace the toner Cartridge is low cartridge, and then close the toner door to clear the message and continue printing. 88 Replace <color> The term <color>... - Page 46 5025-2xx, 4xx Paper jam messages (2xx) (continued) Error code Description Action 243.xx Paper Jam A single or multiple page media jam in Open the door, and remove all the jammed Check <area> the optional 550-sheet drawer (tray 3). pages. See “242 paper jam in the 650- sheet Duo Drawer”...
-
Page 47: Service Error Messages
5025-2xx, 4xx Service error messages Service error messages (1xx, 9xx) Error code Description Action 106.xx Service Yellow printhead error. Perform a POR. If the problem persists, go Yellow Printhead “Printhead service check” on page 2-49. 106.01 Service The yellow printhead lost HSYNC. Perform a POR. - Page 48 5025-2xx, 4xx Service error messages (1xx, 9xx) (continued) Error code Description Action 107.08 Service The cyan laser showed bad in testing. Perform a POR. If the problem persists, go Cyan Printhead “Printhead service check” on page 2-49. 107.11 Service Failure writing data tot he printhead. Perform a POR.
- Page 49 5025-2xx, 4xx Service error messages (1xx, 9xx) (continued) Error code Description Action 109.02 Service The black printhead failed to complete Perform a POR. If the problem persists, go Black Printhead servo. “Printhead service check” on page 2-49. 109.03 Service The black printhead mirror motors Perform a POR.
- Page 50 5025-2xx, 4xx Service error messages (1xx, 9xx) (continued) Error code Description Action 122.12 Service Fuser under temperature error while Go to “Fuser service check” on Fuser Error printing. page 2-28. 122.13 Service Fuser open thermistor check failed for Go to “Fuser service check”...
- Page 51 5025-2xx, 4xx Service error messages (1xx, 9xx) (continued) Error code Description Action 150.07 Service Motor stalled in time-based Go to “Main drive gear assembly (EP Black/ITU cartridge commutation. drive) service check” on page 2-30. Motor 152.xx Service Go to “Main drive gear assembly (EP CMY Cartridge Motor drive) service check”...
- Page 52 5025-2xx, 4xx Service error messages (1xx, 9xx) (continued) Error code Description Action 930.xx Service Low voltage power supply did not Replace the LVPS. See “Low-voltage LVPS detect zero crossing. power supply (LVPS) assembly removal” on page 4-47. 930.09 Service Fuser zero crossings out of range. Go to “Fuser service check”...
- Page 53 5025-2xx, 4xx Service error messages (1xx, 9xx) (continued) Error code Description Action 955.xx Service The Code ROM or NAND flash failed Code CRC <loc> the Cyclic Redundancy Check (CRC) check or the NAND experienced an uncorrectable multi-bit failure. <loc> indicates the source of the failure and has one of the following values: •...
- Page 54 5025-2xx, 4xx Service error messages (1xx, 9xx) (continued) Error code Description Action 959.21 Service System did not respond to command Replace the controller board. See System Board request. “Controller board removal” on page 4-20. 959.22 Service Challenge Secret Failure. ASIC/SP mismatch. System Board 959.23 Service System self test failure during...
- Page 55 5025-2xx, 4xx Service error messages (1xx, 9xx) (continued) Error code Description Action 976.xx Service Unrecoverable software or error in If unable to clear the error message, check Standard Network network or network card x. the following: • If installed, check network card for correct installation.
-
Page 56: Service Checks
5025-2xx, 4xx Service checks 90x.xx error Step Questions / actions Turn the printer off, and remove the rear Replace the controller Securely make all the shield. See “Top cover assembly removal” board. See “Controller connections. POR the on page 4-13. Check the cable connections. board removal”... -
Page 57: 950.Xx Nvram Failure Service Check
5025-2xx, 4xx 950.xx NVRAM Failure service check Warning: Replace one of the following components, and perform a POR before replacing a second component. Never replace both of the components without performing a POR after installing each one, or the printer will be rendered inoperable: •... -
Page 58: Dead Printer Service Check
5025-2xx, 4xx Dead printer service check A dead printer is one which, when powered on from a known good electrical outlet, displays no indication of power to the printer by changes to the LCD, LED, or any movement of the fan or motors. If the printer appears dead but makes a beeping sound, check the operator panel. -
Page 59: Duplex/Manual Feed Sensor (S1) Service Check
5025-2xx, 4xx Duplex/manual feed sensor (S1) service check Step Questions / actions Is the printer setting on a hard, flat surface? Go to step 2. Make sure the printer is setting on a level, flat surface. Enter Diagnostics Menu (turn the printer off, Go to step 3. -
Page 60: Front Door Sensor Or Switches Service Check
5025-2xx, 4xx Front door sensor or switches service check Step Questions / actions Enter Diagnostics Menu (turn the printer off, Sensor, toner door, and Go to step 2. press and hold , turn the printer on, right doors are OK. and then release the buttons when the installed memory and processor speed displays). -
Page 61: Fuser Exit Sensor Service Check
5025-2xx, 4xx Step Questions / actions Close the front cover and the toner door. Be Contact your next level of Replace the front cover sure the right cover is in place. Turn the printer support. assembly. See “Front off, and then disconnect the cables at JINT1 cover assembly removal”... -
Page 62: Fuser Service Check
5025-2xx, 4xx Step Questions / actions Turn the printer on, and check the values at Replace the fuser exit Replace the controller JBIN1: sensor. See “Fuser exit board. See “Controller sensor removal” on board removal” on JBIN1 page 4-33. page 4-20. -
Page 63: Input (S2) Sensor Service Check
5025-2xx, 4xx Step Questions / actions Check the following values at JFUSES1: Go to step 6. Replace the controller board. See “Controller JFUSES1 board removal” on page 4-20. Value +24 V dc (doors closed) +24 V dc (doors closed) +24 V dc (doors closed) +24 V dc (doors closed) Between 0.6 and 3.28 V dc Ground... -
Page 64: Main Drive Gear Assembly (Ep Drive) Service Check
5025-2xx, 4xx Step Questions / actions Turn the printer on, and check the voltage at Replace the paper pick Replace the controller JSP1 pin 15. motor drive assembly. See board. See “Controller “Paper pick motor drive board removal” on Is the voltage approximately +5 V dc? assembly removal—... -
Page 65: Networking Service Check
Have the network administrator verify that the device is using the correct SSID, and wireless security protocols. For more network troubleshooting information, consult the Lexmark Network Setup Guide. Step... - Page 66 5025-2xx, 4xx Step Questions / actions Try using a different ethernet cable. Problem resolved Go to step 14. Did this remedy the situation? Have the network administrator check the Replace the controller Contact the network network drop for activity. board. See “Controller administrator.
-
Page 67: Operator Panel Service Check
5025-2xx, 4xx Operator panel service check Warning: Replace one of the following components, and perform a POR before replacing a second component. Never replace both of the components without performing a POR after installing each one, or the printer will be rendered inoperable: •... -
Page 68: Operator Panel Display Blank, Five Beeps
5025-2xx, 4xx Operator panel display blank, five beeps Service tip: The printer has detected a problem with the controller board, the operator panel assembly cable (part of the front cover assembly), or the operator panel assembly if POST does not complete. The printer emits five beeps, and sticks in a continuous pattern until the printer is turned off. -
Page 69: Operator Panel Display Blank, Printer Beeps Five Times And Pauses
5025-2xx, 4xx Operator panel display blank, printer beeps five times and pauses Step Questions / actions Turn the printer off, and remove the rear Go to step 2. Replace the controller shield. See “Top cover assembly removal” board. See “Controller on page 4-13. -
Page 70: Operator Panel Displays All Diamonds, No Beeps
5025-2xx, 4xx Operator panel displays all diamonds, no beeps Step Questions / actions Turn the printer off, and remove the rear Go to step 2. Replace the controller shield. See “Top cover assembly removal” board. See “Controller on page 4-13. board removal”... -
Page 71: Operator Panel Displays All Diamonds, Five Beeps
5025-2xx, 4xx Operator panel displays all diamonds, five beeps Step Questions / actions Turn the printer off, and remove the rear Go to step 2. Replace the controller shield. See “Top cover assembly removal” board. See “Controller on page 4-13. board removal”... -
Page 72: Operator Panel Display Is Dim And Unchanging
5025-2xx, 4xx Operator panel display is dim and unchanging Step Questions / actions Turn the printer off, and remove the rear Go to step 2. Replace the controller shield. See “Top cover assembly removal” board. See “Controller on page 4-13. board removal”... -
Page 73: Paper Pick Motor Drive Assembly Service Check
5025-2xx, 4xx Paper pick motor drive assembly service check Note: The input (S2) sensor is part of the paper pick motor drive assembly, and is not available separately. Step Questions / actions Turn the printer off, and then remove the rear Go to step 3. - Page 74 5025-2xx, 4xx – RGB Brightness, RGB Contrast, RGB Saturation: Set to 0. – Color Balance: Select Reset Defaults to zero out all colors. – Check the paper type, texture, and weight settings against what is loaded in the printer. Once the printer has been restored to its default levels, do the following: Inspect the imaging unit for damage, including the developers and toner cartridges.
-
Page 75: Print Quality-Background
Service tip: Some background problems can be caused by using rough paper or incorrectly setting the operator panel settings to rough texture when the texture is not rough. Using non-Lexmark toner cartridges may also cause the problem. Some slick or coated papers may also cause background problems. Some problems occur by running a large amount of graphics in a humid environment. -
Page 76: Print Quality-Blank Page
5025-2xx, 4xx Print quality—blank page Step Questions / actions Is all the packing material for the imaging unit Go to step 2. Remove the packing in question removed? material. Print a document that requires all four colors Replace the developer unit Go to step 3. -
Page 77: Print Quality-Blurred Or Fuzzy Print
5025-2xx, 4xx Step Questions / actions Remove the developer unit. See “Developer Go to step 6. Clean the developer unit removal” on page 4-21. Check the cartridge contacts. See developer cartridge contacts from the HVPS to “Developer unit removal” the IU. on page 4-21. -
Page 78: Print Quality-Horizontal Banding
5025-2xx, 4xx Print quality—horizontal banding Print the Print Defect Page: At the Ready prompt, press Menu ( Select Reports, and press Select ( Select Print Defects, and press Select ( Step Questions / actions Measure the distance between repeating Replace the photoconductor Go to step 2. -
Page 79: Print Quality-Insufficient Fusing
5025-2xx, 4xx Print quality—insufficient fusing Step Questions / actions Is the printer setup to use the correct media? Go to step 2. Change the settings to indicate the correct media. Check the fuser connections on the left and Go to step 3. Properly reconnect or right side of the printer. -
Page 80: Print Quality-Narrow Vertical Line
5025-2xx, 4xx Print quality—narrow vertical line ABCDE ABCDE ABCDE Step Questions / actions Replace the photoconductor unit. See Problem resolved. Replace the developer unit. “Imaging unit (IU) removal” on page 4-45. “Developer unit removal” on page 4-21. Print quality—random marks Service tip: The primary cause of random marks is loose material moving around inside the printer and attaching to the photoconductor unit, developer roll, or transfer belt. -
Page 81: Print Quality-Residual Image
5025-2xx, 4xx Print quality—residual image ABCDE ABCDE ABCDE Step Questions / actions Check the condition of the imaging unit using Go to step 2. Replace the imaging unit or the customer menus (administrative menus): the photoconductor unit. “Imaging unit (IU) 1. -
Page 82: Print Quality-Solid Color Page
5025-2xx, 4xx Print quality—solid color page Service tip: A solid color page is generally caused by a problem in the high-voltage controller or an incorrect high-voltage in the printing process resulting in toner development on the entire photoconductor drum. Step Questions / actions Replace the photoconductor unit (part of the Problem resolved. -
Page 83: Printhead Service Check
5025-2xx, 4xx Printhead service check This service check includes the following errors: Error code Color 106.xx Yellow 107.xx Cyan 108.xx Magenta 109.xx Black Step Questions / actions Turn the printer off, and remove the rear Replace the printhead. See Go to step 2. shield. -
Page 84: Toner Meter Cycle (Tmc) Card
5025-2xx, 4xx Toner meter cycle (TMC) card Step Questions / actions Perform the Base Sensor Test: Replace the toner cartridge. Replace the toner meter cycle (TMC) card. See 1. Enter Diagnostics menu (turn the printer “Toner meter cycle (TMC) off, press and hold and Select ( ), turn card removal”... -
Page 85: Transfer Roll Service Check
5025-2xx, 4xx Transfer roll service check Step Questions / actions Remove the ITU. See “Image transfer unit Replace the ITU. See Problem resolved. (ITU) removal” on page 4-40. Check the “Image transfer unit (ITU) contacts between the HVPS and the ITU. removal”... - Page 86 5025-2xx, 4xx Step Questions / actions Check the vertical wall at the right rear of the Replace the tray. Go to step 3. tray for damage. Is the tray damaged? Check for a dislodged tray present sensor. Replace the option tray Contact the next level of present sensor.
-
Page 87: Trays 2 And 3 (Optional) Service Check
5025-2xx, 4xx Step Questions / actions 1. Turn off the printer Problem resolved. Replace the controller board. See “Controller 2. Remove the rear shield. See “Top cover board removal” on assembly removal” on page 4-13. page 4-20. 3. Disconnect the cable at JTRAY1 connector for tray1 or JOPT1 for tray 2 and 3 on the controller board. -
Page 88: Usb Service Check
5025-2xx, 4xx Step Questions / actions Print a menu settings page. Go to step 9. • If the 550 sheet option failed to appear, go to Note: If two option trays are used, the 650 step 9. sheet will appear as tray 2, and the 550 sheet •... -
Page 89: User Operator Panel And Administration Menus
5025-2xx, 4xx User operator panel and Administration menus Printer operator panel The printer operator panel has a two-line, back lit, grayscale text display. The Back, Menu, and Stop buttons are located to the left of the display and the navigation buttons are located below the display. Menu Indicator light... -
Page 90: Menu Map
5025-2xx, 4xx Menu map This menu map identifies menus available to customers. The diagram shows the menus on the operator panel and items available under each menu. Some menu items or values are displayed only if a specific option or feature is installed on your printer. Other menu items may only be effective for a particular printer language. -
Page 91: Diagnostic Aids
5025-2xx, 4xx 3. Diagnostic aids Accessing service menus There are different test menus that can be accessed during POR to identify problems with the printer. Diagnostics Menu 1. Turn the printer off. The Diagnostics menu group contains the settings and operations used while manufacturing and 2. -
Page 92: Diagnostics Menu (Diag Menu)
5025-2xx, 4xx Diagnostics Menu (Diag Menu) Note: Tray 2 refers to the 550-sheet tray located in the 650-sheet Duo Drawer. Diagnostics Menu structure When the Diagnostics menu is entered, each Diagnostics main menu item displays on the operator panel. When a diagnostic test is selected from the main menu, a sub menu displays and each individual test displays in the order shown. - Page 93 5025-2xx, 4xx Diagnostics Menu (continued) Base Sensor Test Front Door “Base Sensor Test” on page 3-16. Fuser exit Sensr Standard Bin C-TMC Sensor M-TMC Sensor Y-TMC Sensor K-TMC Sensor Input MISC TESTS Motor Detect “Motor Detect” on page 3-17. DEVICE TESTS Flash Test (if flash memory is “Flash Test”...
-
Page 94: Registration
5025-2xx, 4xx Diagnostics Menu (continued) Event Log Display Log “Display Log” on page 3-22. Print Log “Print Log” on page 3-22. Clear Log “Clear Log” on page 3-23. Exit Diags This selection exits the Diagnostics Menu. The printer performs a POR, and returns to normal mode. -
Page 95: Skew
See “Alignment” on page 3-7 for instructions on setting printhead alignment. This must be performed before color skew adjustment is attempted. The following illustration shows proper alignment versus skewed alignment. Lexmark C544 Quick Test Printer Information Margin Settings Page Count... - Page 96 5025-2xx, 4xx • General printer information, including current page count, installed memory, serial number, and code level. To print the Quick Test page: Note: Print the Quick Test Page on letter or A4 paper. Select Registration from Diag Menu, and press Select ( Select Quick Test Page, and press Select ( The message Printing…...
-
Page 97: Alignment
5025-2xx, 4xx Alignment Aligns each of the color planes to the black plane. Print the Quick Test under each color, Cyan, Yellow, and Magenta, and adjust the Top Margin, Left Margin, Right Margin, Skew, and Bow. Prints the Print Alignment Pages and requires that the best line in each set of lines must be selected. To get started: Select Alignment Menu from the Diag Menu, and press Select ( Select a color (Cyan, Yellow, or Magenta), and press Select (... - Page 98 5025-2xx, 4xx Select Top Margin, and press Select ( Select the best choice for fine or coarse adjustment in Step 1 (first page), and add it to the current value for the Top Margin. to enter the sum of the numbers, and press Select ( Submitting changes…...
- Page 99 5025-2xx, 4xx Select the Skew value in the same way, enter the value, press Select ( ), and print the Quick Test to see if the observed values and the current values are the same. On the second page of the latest Quick Test you printed, proceed to Step 2; adjust the left, right, and bow settings.
-
Page 100: Print Tests
5025-2xx, 4xx Print Tests Input source tests The purpose of the diagnostic Print Tests is to verify that the printer can print on media from each of the installed input options. The contents of the Print Test Page vary depending on the media installed in the selected input source. -
Page 101: Print Quality Test Pages (Prt Qual
5025-2xx, 4xx Print quality test pages (Prt Qual Pgs) The print quality test consists of five pages. Pages one and two contain a mixture of graphics and text. The remainder of the pages contain only graphics. The test prints on the media in tray 1. This test may be printed from either the Configuration Menu or the Diagnostics Menu. -
Page 102: Button Test
5025-2xx, 4xx Button Test This test verifies the operator panel button function. To run the Button Test: Select Hardware Tests from Diag Menu, and press Select ( Select Button Test, and press Select ( Press count: 0 appears. Press each operator panel button, and watch to see if the count of button presses increases by one for each press. -
Page 103: Duplex Tests
5025-2xx, 4xx Duplex Tests Quick Test (duplex) This test prints a duplex version of the Quick Test that can be used to verify the correct placement of the top margin on the back side of a duplex page. Note: Before you set the duplex top margin, be sure to set the registration. See “Registration”... -
Page 104: Top Margin (Duplex)
5025-2xx, 4xx Top Margin (duplex) This setting controls the offset between the first scan line on the front of the duplex page and the first scan line on the back of the page. Therefore, be sure to set the top margin in REGISTRATION before setting the duplex top margin. -
Page 105: Input Tray Tests
5025-2xx, 4xx Input Tray Tests Feed Tests Any installed input tray can be tested. The pages fed through the printer are blank. To run the Feed Test: Select INPUT TRAY TESTS from Diag Menu, and press Select ( Select Feed Tests, and press Select ( Select the tray to be tested. -
Page 106: Base Sensor Test
5025-2xx, 4xx Base Sensor Test These tests allow you to verify the correct functioning of the front door, input, and output sensors. Select Base Sensor Test from Diag Menu, and press Select ( Select the sensor you want to test, and press Select ( The following tests are available: Sensor Value... -
Page 107: Miscellaneous Tests
5025-2xx, 4xx Miscellaneous tests Motor Detect This test initiates an automatic motor detection process that should be performed whenever the controller board is replaced. To run Motor Detect: Remove the imaging unit and the waste toner bottle. See “Imaging unit (IU) removal” on page 4-45. -
Page 108: Printer Setup
5025-2xx, 4xx Printer Setup Defaults US/Non-US defaults changes whether the printer uses the US factory defaults or the non-US factory defaults. The settings affected include paper size, envelope size, PCL symbol set, code pages, and units of measure. Warning: Changing this setting resets the printer to factory defaults, and data may be lost. It cannot be undone. To change the Defaults: Select Printer Setup from Diag Menu, and press Select ( Select Defaults, and press Select (... -
Page 109: Configuration Id
5025-2xx, 4xx Configuration ID The two configuration IDs are used to communicate information about certain areas of the printer that cannot be determined using hardware sensors. The configuration IDs are originally set at the factory when the printer is manufactured. However, the servicer may need to reset Configuration ID 1 or Configuration ID 2 whenever the system board is replaced. -
Page 110: Reset Fuser Cnt
5025-2xx, 4xx Reset Fuser Cnt Resets the fuser count value to zero. The Event Log records each time that a user executes the Reset Fuser Count operation. See “Event Log” on page 3-25 for more information. This setting appears only if the Maintenance Warning and Intervention function is enabled in the printer Configuration ID. -
Page 111: Tps Setup
5025-2xx, 4xx TPS Setup Right or Left TPS The value of the toner density sensor (also called toner patch sensor or TPS) is set at manufacturing. If a sensor is replaced, enter the 32-digit hexadecimal toner density value (TPS) value from the bar code next to the sensor. To enter the value: Select TPS Setup from Diag Menu, and press Select ( Select Right or Left, and press Select (... -
Page 112: Reports
5025-2xx, 4xx Reports Menu Settings Page To print the Menu Settings Page: Select Reports from Diag Menu, and press Select ( Select Menu Settings Page, and press Select ( Event Log Display Log The event log provides a history of printer errors. It contains the most recent errors that have occurred on the printer. -
Page 113: Clear Log
5025-2xx, 4xx The printed event log can be faxed to your next level of support for verification or diagnosis. To print the event log: Select Event Log from Diag Menu, and press Select ( Select Print Log, and press Select ( Press Back ( ) to return to Event Log. -
Page 114: Configuration Menu (Config Menu)
5025-2xx, 4xx Configuration menu (Config Menu) Available tests The tests display on the operator panel in the order shown for all models. Configuration menu Prt Quality Pgs “Prt Quality Pgs” on page 3-24. Color Trapping “Color Trapping” on page 3-24. Reports “Color Trapping”... -
Page 115: Reports
5025-2xx, 4xx Reports Menu Settings Page Print the menu settings pages to list the customer settings and to verify printer options are installed correctly. It is helpful to print the customer settings before you restore factory defaults or make major changes. To print the menu settings: Select Reports from the Config Menu, and press Select ( Select Menu Setting Page, and press Select (... -
Page 116: Factory Defaults
5025-2xx, 4xx Factory Defaults Sets the majority of printer values back to their factory default settings. Warning: This selection cannot be reversed, so this operation should be used only as a last resort to fix any printer problem. When factory default settings are restored: •... -
Page 117: Auto Color Adj
5025-2xx, 4xx Auto Color Adj Sets the suggested number of pages which the printer should print between consecutive calibrations. Selections are Off and the values between 100 and 1000 in increments of 50. The default is 500 pages. If the printer exceeds the set value while printing a job, it completes the current job and any other jobs received while printing the current job before it initiates a calibration. -
Page 118: Updating Printer Firmware
5025-2xx, 4xx Updating printer firmware Warning: Before performing a firmware update on the printer, contact your next level support to confirm, or obtain the correct code. The wrong code, or wrong level of code could lead to a malfunction or render the device inoperable. -
Page 119: Using The Host Computer To Update The Firmware Over Usb
5025-2xx, 4xx Click Open. Various status and progress messages will appear. The printer will reboot. The HTTP session will terminate. Repeat steps 2 through 7 for any other files. Using the host computer to update the firmware over USB Note: This procedure uses the program, USB Flash. USButil is a command line USB flash utility that can also be used to update firmware from a host computer via USB. - Page 120 5025-2xx, 4xx Select the printer from the list of printers installed on the computer. Lexmark C54x series Press Start. Repeat these steps for every file you are updating on the printer. 3-30 Service Manual...
-
Page 121: Paper Jams
The following hints can help you avoid jams: • Use only recommended paper or specialty media. For more information, see the Card Stock & Label Guide available on the Lexmark Web site at www.lexmark.com/publications. • Do not load too much paper. Make sure the stack height does not exceed the indicated maximum height. -
Page 122: Understanding Jam Numbers And Locations
5025-2xx, 4xx Understanding jam numbers and locations When a jam occurs, a message indicating the jam location appears. The following illustration and table list the paper jams that can occur and the location of each jam. Open doors and covers, and remove trays to access jam locations. -
Page 123: 200 Paper Jams
5025-2xx, 4xx 200 paper jams Remove the standard 250-sheet tray (tray 1). Remove the jam. Note: Make sure all paper fragments are removed. Insert the tray. Press Select ( 201 paper jam Grasp the front door at the side handholds, and then pull it toward you to open it. Remove the jammed paper. -
Page 124: Paper Jam
5025-2xx, 4xx 202 paper jam Grasp the front door at the side handholds, and then pull it toward you to open it. Grasp the green lever, and pull the fuser cover toward you. Hold the fuser cover down, and then remove the jammed paper. The fuser cover closes when released. -
Page 125: 230 Paper Jam
5025-2xx, 4xx 230 paper jam Grasp the front door at the side handholds, and pull it toward you to open it. Remove the jam. Close the front door. Press Select ( ) to continue printing. 235 paper jam Load the tray with the correct paper size (supported for duplex). Insert the tray. -
Page 126: 243 Paper Jam In The 550-Sheet Drawer
5025-2xx, 4xx 243 paper jam in the 550-sheet drawer Remove the 550-sheet tray (tray 3). Remove the jam. Note: Make sure all paper fragments are removed. Check the tray adjustments for the size of paper used. Check the pick tires for foreign material or wear. Replace if necessary. See “Pick tires removal”... -
Page 127: Theory Of Operation
5025-2xx, 4xx Theory of operation Print engine theory Electrophotographic process (EP process) The method that all laser and LED printers use to print is called the electrophotographic process. These machines use differences in charge to manipulate and move toner from the toner cartridge to the printed page. Even though the basic EP process is the same for every laser and LED printer, the specifics for each printer are different. -
Page 128: Step 1: Charge
5025-2xx, 4xx Step 1: Charge During the charge step, voltage is sent from the high-voltage power supply to the charge roll inside each of the four photoconductors. The charge roll is part of the photoconductor unit. The charge rolls (A) put a uniform negative charge over the entire surface of the photoconductor to prepare it for the laser beam. -
Page 129: Step 2: Expose
5025-2xx, 4xx Step 2: Expose During the expose step, the laser fires a focused beam of light at the surface of each photoconductor (B) and writes an invisible image called a latent image or electrostatic image for each color. The laser beam actually discharges the surface only where the beam hits the photoconductor. This creates a difference in charge potential between the exposed area and the rest of the photoconductor surface. -
Page 130: Step 3: Develop
5025-2xx, 4xx Step 3: Develop Once the laser exposes the photoconductor, the high-voltage power supply sends charge to the developer roll (C). For each color, the toner cartridge engages the photoconductor so it applies toner to the surface. Because of the charge difference between the toner on the developer roll and the electrostatic image created by the laser, the toner will cling to the PC. -
Page 131: Step 4A: First Transfer
5025-2xx, 4xx Step 4a: First transfer When the latent images are developed on each photoconductor, the high-voltage power supply sends voltage to the first transfer rolls located in the ITU (D). The charge difference between the developed toner image on the photoconductor surface and the first transfer roll causes the images to transfer to the surface of the ITU belt for each color. -
Page 132: Step 4B: Second Transfer
5025-2xx, 4xx Step 4b: Second transfer Once the four planes of color are transferred to the transfer belt from the photoconductors, the image is carried towards the transfer roll (E). The transfer roll is also part of the ITU. Based on the speed of the transfer belt, the proper time to send the signal to pick the media from an input source is determined. -
Page 133: Step 5: Fuse
5025-2xx, 4xx Step 5: Fuse Once the image has been fully transferred to the media, the transfer roll helps move the paper into the fuser area. The fuser (F) applies heat and pressure to the page to melt the tiny toner particles and bond them permanently to the media. -
Page 134: Step 6: Clean/Erase
5025-2xx, 4xx Step 6: Clean/erase There are two main cleaning processes that take place during the EP process. One process cleans the transfer belt and the other cleans the photoconductors. Transfer unit clean Once the toner image on the transfer belt has been transferred to the page, the transfer belt rotates around and is cleaned by the cleaning blade (G). - Page 135 5025-2xx, 4xx Photoconductor clean/erase After each plane of color has been transferred to the transfer belt from the photoconductors, a cleaning blade (H) scrapes the left over toner from the surface of each photoconductor. This is the clean/erase process. Now the photoconductor surface is prepared to begin the EP cycle once again. This cleaning/erasing cycle happens after each plane of color is transferred to the transfer belt.
-
Page 136: Paper Path, Transport Components
5025-2xx, 4xx Paper path, transport components In order for an image to be printed, the media has to be moved from an input source (such as a tray) into the printer and eventually exit into the output bin. The most important component in this process is this media itself. Old, damaged or out-of-specification media can and will cause feed and transport problems. -
Page 137: Transport Components
5025-2xx, 4xx Transport components In summary, the media is fed from the tray into the printer by a feed roll and carried to the transfer roll (ITU). The pick rollers time the media to enter the EP process at just the right moment. The pick rollers push the media to the ITU where the image is transferred to the page. -
Page 138: Duplex Process
5025-2xx, 4xx Duplex process The duplex paper path is a secondary paper path in the front cover and the 250-sheet paper tray to print on the second side of a sheet of paper. After the first side of the media is printed and the trailing edge of the paper clears the fuser exit sensor, the fuser motor reverses. -
Page 139: Color Theory
5025-2xx, 4xx Color theory What is RGB color? Red, green, and blue light can be added together in various amounts to produce a large range of colors observed in nature. For example, red and green can be combined to create yellow. Televisions and computer monitors create colors in this manner. - Page 140 5025-2xx, 4xx My color transparencies seem dark when they are projected. Is there anything I can do to improve the color? This problem most commonly occurs when projecting transparencies with reflective overhead projectors. To obtain the highest projected color quality, transmissive overhead projectors are recommended. If a reflective projector must be used, then adjusting the Toner Darkness setting to 1, 2, or 3 will lighten the transparency.
- Page 141 5025-2xx, 4xx How can I match a particular color (such as a corporate logo)? From the printer Quality menu, nine types of Color Samples sets are available. These are also available from the Color Samples page of the Embedded Web Server. Selecting any sample set generates a multiple-page printout consisting of hundreds of colored boxes.
- Page 142 5025-2xx, 4xx 3-52 Service Manual...
-
Page 143: Repair Information
5025-2xx, 4xx 4. Repair information Warning: Read the following before handling electronic parts. Handling ESD-sensitive parts Many electronic products use parts that are known to be sensitive to electrostatic discharge (ESD). To prevent damage to ESD-sensitive parts, use the following instructions in addition to all the usual precautions, such as turning off power before removing logic boards: •... -
Page 144: Removal Procedures
5025-2xx, 4xx Removal procedures CAUTION Remove the power cord from the electrical outlet before you connect or disconnect any cable or electronic board or assembly for personal safety and to prevent damage to the printer. Disconnect any connections between the printer and PCs/peripherals. Notes: •... - Page 145 5025-2xx, 4xx Disconnect the operator panel cable, the USB port (if installed) cable, and the front door open sensor cables from the controller board (C). Pull the cables through the opening in the rear. Position the printer with the front cover overlapping the front edge of the table. Remove the two restraining straps from the printer by turning the end sideways and lifting out of the connector (D).
- Page 146 5025-2xx, 4xx Lower the front cover to align the flats on the hinges, and remove the front cover. Note: Not all models have all three cables shown. See the chart below. Service Manual...
- Page 147 When installing the front cover on the following models, note the differences relating to the USB port cable: Models Contents of front cover FRU Order front cover P/N Lexmark C540n • Operator panel cable (E) 40X5420 (5025-210) • Front door switch cable (F) Note: The USB port cable (G) is not included.
-
Page 148: Left Cover Assembly Removal
5025-2xx, 4xx Left cover assembly removal “Left cover assembly” on page 7-3 for the part number. Remove the media tray. Position the printer with the left side hanging over the edge of the table. On the rear, remove the metal screw (A), the short plastic screw (B), and the longer plastic screw (C). Remove the screw (D) on the bottom of the cover. - Page 149 5025-2xx, 4xx Unlatch the front bottom corner tab (E), and lower the front while disengaging from the top cover. Installation note: When replacing the left cover, flex the cover slightly to engage the tab (E) near the power switch. Repair information...
-
Page 150: Operator Panel Bezel And Name Plate Removal
5025-2xx, 4xx Operator panel bezel and name plate removal “Operator panel bezel and name plates, including:” on page 7-3 for the part number. Remove the operator panel logo plate. See “Operator panel logo plate” on page 4-9. Lift the bottom edge of the bezel (A), and remove the bezel. Lift the name plate (B). -
Page 151: Operator Panel Logo Plate
5025-2xx, 4xx Operator panel logo plate See “operator panel bezel and name plates on page 7-3 for the part number. This is part of the operator panel bezel and name plate FRU. Open the front cover. With a flat-bladed screwdriver, unlatch the two latches (A) on the inside cover. Remove the logo plate (B). -
Page 152: Operator Panel Removal
5025-2xx, 4xx Operator panel removal “Operator panel and display assembly” on page 7-3 for the part number. Warning: Replace one of the following components, and perform a POR before replacing a second component. Never replace both of the components without performing a POR after installing each one, or the printer may be rendered inoperable: •... -
Page 153: Rear Shield Removal
5025-2xx, 4xx Detach the operator panel cable (C) from the panel. Rear shield removal The rear shield is not a field replaceable unit (FRU). Remove the six screws (A). Remove the rear shield. 4-11 Repair information... -
Page 154: Right Cover Assembly Removal
5025-2xx, 4xx Right cover assembly removal “Right cover assembly” on page 7-3 for the part number. Open the toner supply door. Open the front cover. Release the latches (A), and lift off the cover. 4-12 Service Manual... -
Page 155: Top Cover Assembly Removal
5025-2xx, 4xx Top cover assembly removal “Top cover assembly” on page 7-3 for the part number. Remove the right cover assembly. See “Right cover assembly removal” on page 4-12. Remove the waste toner bottle. See “Waste toner bottle removal” on page 4-77. - Page 156 5025-2xx, 4xx Remove the machine screws (C), and remove the ground cable from the cover. Lift and slide the paper stop to expose the screw (D), and remove the screw. 4-14 Service Manual...
- Page 157 5025-2xx, 4xx Remove the two top screws (E) near the front. Remove the remaining four screws (F). Remove the fuser screw (G). 4-15 Repair information...
- Page 158 5025-2xx, 4xx Disconnect the left fuser spring (H) from the fuser. Disconnect the right fuser spring (J) from the fuser. Disengage the bin-full/narrow media sensor cable (K) from the retainer. Gently rotate the fuser away from the top cover, and let it rest. Note: If fuser needs to be propped up, use something that will not move or shift.
- Page 159 5025-2xx, 4xx Push in on the cover above the locating pins (L) while lifting to disengage the cover. Carefully lift the cover while keeping it horizontal. Note: Guide the fan connector through the hole. 4-17 Repair information...
-
Page 160: Bin-Full/Narrow Media Sensor Removal
5025-2xx, 4xx Bin-full/narrow media sensor removal See “Photo sensor” on page 7-7 for the part number. Open the front cover. Remove the cable from the retainer. Note: Be sure to note the routing for re-installation. Disconnect the cable from the bin-full/narrow media sensor. If there is a sensor retaining plate (A) on the side the latches connect, remove the old adhesive plate. -
Page 161: Bin-Full/Narrow Media Sensor Flag And Exit Deflector Removal
5025-2xx, 4xx Installation note: Clean the contact surface where you removed the sensor retaining plate, or where you need to install the new one. Guide the latches that hold the sensor in the bracket into place. Squeeze the latches together until they latch to the metal frame. Remove the backing from the new plate, and place the plate on the surface between the sensor mounting legs. -
Page 162: Controller Board Removal
5025-2xx, 4xx Controller board removal Controller board—C544n, C544dn, C544dw, Controller board—C540n, C543dn, or “Controller board—C546dn only” on page 7-7 for the part number. CAUTION After disconnecting the high-voltage power cable from the controller board, always check that the HVPS connection was not loosened. Make this check anytime you are working near the HVPS cable. -
Page 163: Developer Unit Removal
5025-2xx, 4xx Installation notes: Warning: When replacing the controller board, verify the cable from the high-voltage power supply is seated properly. The cable may have come loose from the HVPS. Print a few pages to verify the installation. If the pages are blank, confirm that the high-voltage power supply cable is properly seated. -
Page 164: Duplex Reference Edge Removal
5025-2xx, 4xx Duplex reference edge removal “Duplex reference edge” on page 7-5 for the part number. Open the front door. Remove the four short screws (A) in front, and the four longer screws (B) in the back of the duplex aligner. Lift the duplex aligner on the right side, and disengage the gears (C) on the left. - Page 165 5025-2xx, 4xx Remove the four screws (D) from the duplex reference guide, and remove the guide. Installation notes: Align the duplex reference guide so the tabs (A) are inserted into the slots, and the top of the reference guide fits under the door ribs (B). Replace the four screws in the duplex reference guide.
- Page 166 5025-2xx, 4xx Be sure the shaft and bearing have not shifted out of the guide. If so, make sure that the bearing on the left is aligned with the slot (C) facing down (towards the front door). Note: Improperly aligned bearings or seated shafts may cause vibration and noise in the front door. Align the duplex aligner guide so the gears (D) mesh on the left.
-
Page 167: Duplex Sensor Removal
5025-2xx, 4xx Duplex sensor removal See “photo sensors” on page 7-7 for the part number. Remove the waste toner bottle. See “Waste toner bottle removal” on page 4-77. Remove the two screws (A) from the cable cover. Pull corner of cable cover (B) away from the right side to access the sensor posts (C). 4-25 Repair information... - Page 168 5025-2xx, 4xx If there is a plate on the side the latches of the sensor connected, remove the old adhesive plate (D). Unlatch the sensor by pushing on the latches. Remove the sensor, and disconnect the cable (E) from the duplex sensor. Note: Close the front cover, and slightly lift the front of the printer to get better access.
-
Page 169: Exit Deflector And Bin-Full/Narrow Media Sensor Flag Removal
5025-2xx, 4xx Exit deflector and bin-full/narrow media sensor flag removal “Exit deflector and bin-full/narrow media sensor flag” on page 7-5 for the part number. The exit deflector and bin-full/narrow media sensor flag are in the same FRU and should be replaced together. Open the front cover. - Page 170 5025-2xx, 4xx With one hand, gently pull the exit deflector towards the rear, and with the other hand, press to unsnap the tabs (C). 4-28 Service Manual...
-
Page 171: Fuser Assembly Removal
5025-2xx, 4xx Fuser assembly removal See “Fuser assembly” on page 7-5 for the part number. Remove the right cover assembly. See “Right cover assembly removal” on page 4-12. Remove the left cover. See “Left cover assembly removal” on page 4-6. Disconnect the two-wire fuser cable (A) from the LVPS. - Page 172 Note: This pulley (E) is not used and may not be present on the failed fuser. It does not need to be removed in Lexmark C54x printers. Rotate the top of the fuser toward the front, then slide it to the left to align the fuser side frames with the flat areas of the shaft (F), and lift to remove the fuser.
- Page 173 5025-2xx, 4xx Installation notes: • Make sure the springs are resting on the frame so they can be positioned once the new fuser is in place. They can be difficult to reach if they hang down. • Be careful not to bump into the fuser exit sensor on the left side. •...
-
Page 174: Fuser Drive Motor Assembly Removal
5025-2xx, 4xx Fuser drive motor assembly removal “Fuser drive motor assembly” on page 7-5 for the part number. Open the front cover. Remove the right cover assembly. See “Right cover assembly removal” on page 4-12. Disconnect the cable (A) from the fuser drive motor assembly. Note: If you remove the toroid (B) from the cable, be sure to return the toroid to the cable when you re- install. -
Page 175: Fuser Exit Sensor Removal
5025-2xx, 4xx Fuser exit sensor removal “Fuser exit sensor” on page 7-7 for the part number. Open the front cover. Remove the right cover assembly. See “Right cover assembly removal” on page 4-12. Remove the left cover. See “Left cover assembly removal” on page 4-6. - Page 176 5025-2xx, 4xx Disconnect the bin full/narrow medial sensor cable, and remove the cable from the fuser frame. See “Bin- full/narrow media sensor removal” on page 4-18. Note: Observe the cable routing. Unhook the springs (D) from both sides of the fuser. Rotate the fuser toward the front of the printer until the screw (E) can be accessed, and removed.
-
Page 177: High-Voltage Power Supply (Hvps) Assembly Removal
5025-2xx, 4xx High-voltage power supply (HVPS) assembly removal “High-voltage power supply” on page 7-7 for the part number. Before you begin, determine which removal instruction you need to follow: Remove the left cover. Is there a leaf spring (A) biasing the HVPS upward? •... -
Page 178: High-Voltage Power Supply (Hvps) With No Spring
5025-2xx, 4xx High-voltage power supply (HVPS) with no spring Note: This removal requires a magnetized, long-shank Phillips screwdriver at least 8 in. or 200 mm long. Remove the top cover assembly. See “Top cover assembly removal” on page 4-13. Remove the rear shield. See “Rear shield removal”... - Page 179 5025-2xx, 4xx Remove the screw (B). The screw is accessible from the top of the printer, and requires a long-shank, magnetized Phillips screwdriver. It is the only screw without a flanged head, and is about 8 inches below the top of the printer. Remove the screw (C) securing the HVPS.
-
Page 180: High-Voltage Power Supply (Hvps) With Spring
5025-2xx, 4xx High-voltage power supply (HVPS) with spring Remove the rear shield. See “Top cover assembly removal” on page 4-13. Remove the cable cover (A). Disconnect the high-voltage power supply (HVPS) cable at the HVPS and at the controller board. 4-38 Service Manual... - Page 181 5025-2xx, 4xx Remove the screw (C) securing the HVPS. Press down on the spring mount, and carefully slide the HVPS out. Release the pressure on the spring mount when the LVPS slides out about 25mm. Installation notes: CAUTION After disconnecting the high-voltage power cable from the controller board, always check that the HVPS connection was not loosened.
-
Page 182: Image Transfer Unit (Itu) Removal
5025-2xx, 4xx Image transfer unit (ITU) removal “Image transfer unit (ITU) assembly” on page 7-5 for the part number. Write down the number of the new ITU before installing it. You will need the 16-digit numeric value from the barcode after the installation, and it is easier to see at this point. Remove the right cover assembly. - Page 183 5025-2xx, 4xx Removal of ITU without the spring clamp kit Pull the gear (A) straight out to unsnap it, and then discard it. A new gear is included in the spring clamp kit and must be used with the new spring clamp. Remove the rubber pad (C).
- Page 184 5025-2xx, 4xx Continuing the removal (with or without the spring clamp kit) Disconnect the two springs (A, B) from the side frames, leaving the right one (A) attached to the ITU or ITU spring clamp. Rotate the left spring (B), and the cam away from the ITU so the spring is held out of the ITU path. 4-42 Service Manual...
- Page 185 5025-2xx, 4xx Rotate the release lever (C) in a counterclockwise direction with a springhook or needlenose pliers to decouple the ITU while pulling the ITU toward the front. Hold the release lever as you pull out the ITU for the first four inches (100 mm), but a quick, firm pull should overcome the latch at this point.
- Page 186 5025-2xx, 4xx • Rotate the spring clamp so it hooks over the new ITU (E). Note: Position the spring on the right side of the gear shaft. • When you have replaced the ITU, be sure to enter the 16-digit numeric value from the barcode on the new ITU into the printer.
-
Page 187: Imaging Unit (Iu) Removal
5025-2xx, 4xx Imaging unit (IU) removal The imaging unit is customer replaceable unit and is not a FRU. Note: The imaging unit contains: • Photoconductor unit • Developer units To remove only the photoconductor, remove the entire imaging unit, remove the developer units, place the original developer units in the new photoconductor, and re-install the imaging unit. - Page 188 5025-2xx, 4xx Pull the two latches until the imaging unit meets resistance. Press and hold the handles (B) on the right and left sides, and pull the imaging unit straight out. Note: Do not wrap your fingers around the imaging unit. Avoid touching the bottom. 4-46 Service Manual...
-
Page 189: Low-Voltage Power Supply (Lvps) Assembly Removal
5025-2xx, 4xx Low-voltage power supply (LVPS) assembly removal “Low-voltage power supply (universal power supply)” on page 7-7 for the part number. Remove the left cover. See “Left cover assembly removal” on page 4-6. Disconnect the three cables (A) from the LVPS. Remove the seven screws (B). - Page 190 5025-2xx, 4xx Remove the LVPS. Warning: If you receive a new low-voltage power supply with a voltage selector switch (C), be sure to set the switch to the correct setting for your voltage requirements before installing the low-voltage power supply. The switch can be set for either 115 V or 230 V. Failure to do so could result in damage to the power supply.
-
Page 191: Lower Frame Removal, Right And Left
5025-2xx, 4xx Lower frame removal, right and left “Lower left frame and lower right frame with cable cover” on page 7-5 for the part number. The right and left lower frames are in the same FRU. Left lower frame Remove the media tray, and remove the screw (A) in front. Open the front cover. - Page 192 5025-2xx, 4xx Remove the two top screws (B) near the front holding the top cover to the LVPS shield. Remove the two screws (C). 4-50 Service Manual...
- Page 193 5025-2xx, 4xx Disconnect the fuser exit sensor cable (D). Lift the front left corner of the top cover, and pull the LVPS cage (E) out. There are two posts at the bottom of the cage on the left side that need to be disengaged. Note: Be careful with the fuser exit sensor which remains with the cage.
- Page 194 5025-2xx, 4xx Remove the tray 2 connector (F) by pinching the tabs together and pushing the connector into the printer. At the rear of the printer, remove the two screws (G) from the AC receptacle, and the ground screw (H). Remove the two screws (J) holding the plastic shield.
- Page 195 5025-2xx, 4xx Remove the three screws (K) securing the left lower frame. Remove the screw (L) above the frame. 4-53 Repair information...
- Page 196 5025-2xx, 4xx Swing the left lower frame away from the printer, and remove. 4-54 Service Manual...
-
Page 197: Right Lower Frame
5025-2xx, 4xx Right lower frame Note: Remove the duplex sensor, the tray present sensor, the spring, spring holder, and the wireless antenna plate which are not part of the right and left lower frames. The cable cover is part of the FRU. Note: To properly reinstall the duplex sensor and the tray present sensor, also order two photo sensors, see page 7-7, and replace the sensor retaining plates. - Page 198 5025-2xx, 4xx For wireless models—Remove the screw (C) and leave the plate and antenna attached to the wireless card. Remove the duplex sensor. See “Duplex sensor removal” on page 4-25. Remove the three screws (D) securing the lower right frame to the printer. Remove the screw (E) closer to the front of the printer 4-56 Service Manual...
- Page 199 5025-2xx, 4xx Next to screw (E), lift the right lower frame pin (F) out of the hole in the printer frame. Swing the rear part away from the printer to access the spring (G), and remove the spring (G) from the right lower frame.
- Page 200 5025-2xx, 4xx Swing the rear of the lower frame away from the printer, and remove the right lower frame. Note: There are parts in the right lower frame that are not included in the frame. The following instructions show how to remove them. Remove the sensor retaining plate (J), and pinch the latches (K) together to remove the tray present sensor.
-
Page 201: Main Drive Gear Assembly Removal
5025-2xx, 4xx Main drive gear assembly removal “Main drive gear assembly, with motors” on page 7-5 for the part number. Remove the left cover. See “Left cover assembly removal” on page 4-6. Remove the LVPS shield. See “Left lower frame” on page 4-49 for instructions on removing the LVPS shield. - Page 202 5025-2xx, 4xx Remove the two screws (E) from the rear. Remove the two screws (F) from below the main drive gear assembly. Remove the two screws (G) on the right of the main drive gear assembly Lift the main drive gear assembly, and remove. 4-60 Service Manual...
-
Page 203: Paper Pick Motor Drive Assembly Removal-Standard Tray
5025-2xx, 4xx Paper pick motor drive assembly removal—standard tray “Paper pick motor drive assembly—standard tray” on page 7-5 for the part number. Remove the toner cartridges, the waste toner bottle, and the imaging unit (IU). See “Waste toner bottle removal” on page 4-77, and see “Imaging unit (IU) removal”... - Page 204 5025-2xx, 4xx Remove the two screws (D) on the bottom. On the right side, loosen the screw (E) with a screwdriver, and hold the ACM in place as you use your fingers to remove the screw. Move the right side of the ACM out to free the shaft from the hole in the frame. Note: Observe the location of the shaft and hole for reinstallation.
- Page 205 5025-2xx, 4xx Installation notes: Place the left side of the ACM in the printer. Make sure the shaft on the left side aligns with the hole in the frame. Install the two springs. Reinstall the three screws holding the ACM to the printer. Turn the printer to the proper upright position.
-
Page 206: Pick Tires Removal
5025-2xx, 4xx Pick tires removal “Pick tires” on page 7-11 for the part number. Note: You will need to have a soft, padded work surface. Warning: Remove only the rubber tires and not the paper pick tire assembly to avoid losing small parts. The paper pick tires for the standard media tray are located in the base printer. -
Page 207: Printhead Removal
5025-2xx, 4xx Printhead removal “Printhead” on page 7-5 for the part number. Remove the top cover. See “Top cover assembly removal” on page 4-13. Disconnect the cables from the controller board. Note: Be very careful disconnecting handling the ribbon cable. Remove the toroid (A) from the ribbon cable. - Page 208 5025-2xx, 4xx Remove the three screws (B). Remove the printhead. Installation note: • When the printhead is replaced, perform the registration (black planes) and alignment (color planes). See “Registration” on page 3-4 “Alignment” on page 3-7. • Be sure to replace the toroid on the cable when you reinstall the printhead, and push the toriod between the connector and the top frame so that the weight is not supported by the cable.
-
Page 209: Toner Cartridge Contacts
5025-2xx, 4xx Toner cartridge contacts “Toner cartridge contacts (Pogo pin)” on page 7-9 for the part number. Remove the right cover assembly. See “Right cover assembly removal” on page 4-12. Remove the waste toner bottle. See “Waste toner bottle removal” on page 4-77. - Page 210 5025-2xx, 4xx Disconnect the cable (E) from the controller board at JSC1. Remove the cable from the retainer on the bottom of the printer. Extract the cable through the frame, and remove the cable with the spring contacts. Note: To remove the cable, be sure to unwrap the toroid. When you re-install, be sure to wrap the toroid five times as shown.
-
Page 211: Toner Density Sensor (Tds) Removal-Left Or Right Sensor
5025-2xx, 4xx Toner density sensor (TDS) removal—left or right sensor “Toner density sensors, left or right (one in package)” on page 7-9 for the part number. Note: The toner density sensor is also called the toner patch sensor (TPS). The toner density sensors are the same, but the left sensor has a thermistor attached which needs to be removed when you install a new TDS on the left side. - Page 212 5025-2xx, 4xx Installation notes • Before beginning the installation of the new left or right toner density sensor, note the 32-digit TPS value printed on the barcode on the new FRU. • After installation, perform the TPS Setup. Enter the factory preset alignment number. Enter the Diagnostics Menu: Turn the printer off.
-
Page 213: Toner Meter Cycle (Tmc) Card Removal
5025-2xx, 4xx Toner meter cycle (TMC) card removal “Toner meter cycle card assembly” on page 7-7 for the part number. Remove the rear shield. See “Top cover assembly removal” on page 4-13. Remove the right cover assembly. See “Right cover assembly removal” on page 4-12. - Page 214 5025-2xx, 4xx Installation notes: • Be sure the cable runs through the retainer. • The toner meter cycle card is a tight fit. Insert the bottom edge inside the frame, and then push down on the top edge to clear the top cover. •...
-
Page 215: Tray Present Sensor Removal
5025-2xx, 4xx Tray present sensor removal See “photo sensors” on page 7-7 for the part number. Remove the media tray. Remove the imaging unit. See “Imaging unit (IU) removal” on page 4-45. Remove the rear screw (A) in the waste toner bottle sensor contact to allow access to the cable cover. Note: The waste toner bottle sensor contact does not need to be unplugged or removed. - Page 216 5025-2xx, 4xx Next to screw (D), lift the right lower frame pin (E) out of the hole in the printer frame. Swing the rear of the lower frame away from the printer to access the tray present sensor latches. Remove and secure the spring (F) from the right lower frame. Note: The spring easily gets lost.
- Page 217 5025-2xx, 4xx Remove the sensor retaining plate (G), and then pinch the latches together to remove the tray present sensor. Installation notes: Clean the contact surface where you removed the sensor retaining plate, or where you need to install the new one.
-
Page 218: Usb Port Connector Removal
5025-2xx, 4xx USB port connector removal “USB port and cable (for portable flash drive)” on page 7-9 for the part number. The FRU includes the USB port connector and cable. Remove the operator panel. See “Operator panel logo plate” on page 4-9. -
Page 219: Waste Toner Bottle Removal
5025-2xx, 4xx Remove the USB port cable from the cable channel on the right side. Waste toner bottle removal The waste toner bottle is not a FRU. Open the front cover. Lift the toner cover by sliding the latch to the left. Remove the right cover assembly. -
Page 220: Waste Toner Bottle Contact Block Removal
5025-2xx, 4xx Waste toner bottle contact block removal See the on “Waste toner bottle contact block” on page 7-9 for the part number. Open the front cover. Remove the right cover assembly. See “Right cover assembly removal” on page 4-12. Remove the waste toner bottle. -
Page 221: Wireless Network Antenna Removal
5025-2xx, 4xx Wireless network antenna removal “Antenna for wireless card—C544dw only” on page 7-7 for the part number. Remove the rear shield. See “Top cover assembly removal” on page 4-13. Lift to disconnect the wireless card (A) from the controller board. Carefully disconnect the antenna cable (B) from the wireless card at the card. - Page 222 5025-2xx, 4xx Gently squeeze the fastener (E) with needlenose pliers. Slide the antenna cable and cable through the hole in the bracket. If the bushing is damaged, remove it by pressing the tabs on each side. Note: Take note of the orientation of the bushing. When reinstalling, place the cover upright, bend the antenna as it would be positioned, and make sure the antenna can move about 30°...
-
Page 223: Wireless Network Card
5025-2xx, 4xx Wireless network card “Wireless network card assembly—C544dw only” on page 7-7 for the part number. Remove the rear shield. See “Top cover assembly removal” on page 4-13. Lift to remove the wireless card (A) from the controller board. Carefully disconnect the antenna cable (B) from the wireless card at the card. - Page 224 5025-2xx, 4xx 4-82 Service Manual...
-
Page 225: Connector Locations
5025-2xx, 4xx 5. Connector locations Locations Connector locations... - Page 226 5025-2xx, 4xx Note the paper path shown in red. Exit rolls/duplex entry Operator panel Toner cartridges Output bin Y, C, M, K Bin-full/narrow Printhead media sensor Controller board Front cover /duplex Developers Y, C, M, K Fuser Fuser exit sensor PC unit (part of imaging unit)
-
Page 227: Connectors
5025-2xx, 4xx Connectors Connector locations... -
Page 228: Controller Board Diagram
5025-2xx, 4xx Controller board diagram JLVPS1 JOPT1 JFAN1 JCARTB1 JSP1 JMOT1 JTPS2 JTHM1 JHVPS1 JBIN1 JPH1 JFUSES1 JCVR1 JMIRR1 JINT1 JTRAY1 JOPP1 JTPS1 JSC1 JCTM1 JWIN1 JUSBH1 JWT1 JUSBW1 JNET1 JUSB1 Service Manual... - Page 229 5025-2xx, 4xx Controller board connectors Note: SW indicates voltage is switched on during a print cycle, otherwise voltages are taken with printer at Ready state (door closed) and cables plugged in. Connector Pin no. Signal JBIN1 V_BF Bin-full/narrow media sensor and S_BIN_FB, +3.3 V dc fuser exit sensor Ground...
- Page 230 5025-2xx, 4xx Controller board connectors (continued) Note: SW indicates voltage is switched on during a print cycle, otherwise voltages are taken with printer at Ready state (door closed) and cables plugged in. Connector Pin no. Signal JFAN1 FAN_FG, +3.3 V dc System fan Ground V_FAN_P3...
- Page 231 5025-2xx, 4xx Controller board connectors (continued) Note: SW indicates voltage is switched on during a print cycle, otherwise voltages are taken with printer at Ready state (door closed) and cables plugged in. Connector Pin no. Signal JLVPS1 +5 V dc Low-voltage power supply Ground +5 V dc...
- Page 232 5025-2xx, 4xx Controller board connectors (continued) Note: SW indicates voltage is switched on during a print cycle, otherwise voltages are taken with printer at Ready state (door closed) and cables plugged in. Connector Pin no. Signal JOPT1 TXD_PP Optional—Tray(s) Ground Ground RXD_PP +24 V dc...
- Page 233 5025-2xx, 4xx Controller board connectors (continued) Note: SW indicates voltage is switched on during a print cycle, otherwise voltages are taken with printer at Ready state (door closed) and cables plugged in. Connector Pin no. Signal JPH1 D_VDO_2+ Printhead flat cable connector D_VDO_2–...
- Page 234 5025-2xx, 4xx Controller board connectors (continued) Note: SW indicates voltage is switched on during a print cycle, otherwise voltages are taken with printer at Ready state (door closed) and cables plugged in. Connector Pin no. Signal JSP1 ANODE (no wire) Smart pick drive (paper pick motor M1_OUT1, +24 V dc (0 V dc with door open) drive assembly)
- Page 235 5025-2xx, 4xx Controller board connectors (continued) Note: SW indicates voltage is switched on during a print cycle, otherwise voltages are taken with printer at Ready state (door closed) and cables plugged in. Connector Pin no. Signal JUSBW1 Ground USB wireless connector USB_HST_VP USB_HST_VM Ground...
-
Page 236: High-Voltage Power Supply (Hvps) Diagram
5025-2xx, 4xx High-voltage power supply (HVPS) diagram 5-12 Service Manual... -
Page 237: Low-Voltage Power Supply (Lvps) Diagram
5025-2xx, 4xx Low-voltage power supply (LVPS) diagram 5-13 Connector locations... -
Page 238: Toner Meter Cycle (Tmc) Card
5025-2xx, 4xx Toner meter cycle (TMC) card Wireless network card 5-14 Service Manual... -
Page 239: Preventive Maintenance
Damaged, missing, or altered covers, especially in the area of the top cover and the power supply cover • Possible safety exposure from any non-Lexmark attachments Lubrication specifications Lubricate only when parts are replaced or as needed, not on a scheduled basis. Use of lubricants other than those specified can cause premature failure. - Page 240 5025-2xx, 4xx Service Manual...
-
Page 241: Parts Catalog
PP: (Parts Packet) in the parts description column indicates the part is contained in a parts packet. • Model information used in the parts catalog: Machine type/ Model name Description model Lexmark C540n 5025-210 Ethernet network Lexmark C543dn 5025-230 Ethernet network, duplex Lexmark C544n... -
Page 242: Assembly 1: Covers
5025-2xx, 4xx Assembly 1: Covers Service Manual... - Page 243 40X5168 Pick tires 40X5430 Front cover assembly (including duplex and USB port cable)—C543dn, C544dn, C544n, C546dtn 40X5420 Front cover assembly (excluding duplex and USB port cable)—C540n 40X5431 Operator panel and display assembly 40X5436 Operator panel (DBCS) and display assembly 40X5432 Operator panel bezel and name plates, including: •...
-
Page 244: Assembly 2: Frames
5025-2xx, 4xx Assembly 2: Frames Service Manual... - Page 245 5025-2xx, 4xx Assembly 2: Frames Asm- Part Units/ Units/ Description Index number mach 2—1 40X5411 Printhead 40X5415 Fuser drive motor assembly 40X5422 Lower left frame and lower right frame with cable cover 40X5424 Screw packet, miscellaneous screws • TAPTITE M3 L6 panhead (4) •...
-
Page 246: Assembly 3: Electronics
5025-2xx, 4xx Assembly 3: Electronics Service Manual... - Page 247 Units/ Units/ Description Index number mach 3—1 40X1525 Controller board—C544n, C544dn, C544dw 40X1526 Controller board—C540n, C543dn 40X2268 Controller board—C546dn only 40X5319 Antenna for wireless card—C544dw only 40X5036 Wireless network card assembly—C544dw only 40X5404 Toner meter cycle card assembly 40X5405 High-voltage power supply...
-
Page 248: Assembly 4: Cables
5025-2xx, 4xx Assembly 4: Cables Service Manual... - Page 249 5025-2xx, 4xx Assembly 4: Cables Asm- Part Units/ Units/ Description Index number mach 4—1 40X5429 ITU paper path thermistor 40X5414 Toner density sensors, left or right (one in package) 40X7046 Waste toner bottle contact block 40X5421 Toner cartridge contacts (Pogo pin) 40X5423 Cable packet, used for: Fuser exit/narrow media to controller board...
-
Page 250: Assembly 5: Media Drawers And Trays
5025-2xx, 4xx Assembly 5: Media drawers and trays 7-10 Service Manual... - Page 251 Optional 650-sheet Duo Drawer (complete)—C546dtn only (includes 100-sheet MPF) 40X5168 Pick tires 40X5435 650-sheet Duo Drawer tray assembly—C544n, C544dn, C544dw, C540n, C543dn (includes 100-sheet MPF tray assembly using three wear strips) Note: Use only with P/N 40X5434 drawer assembly (see illustration and table below).
-
Page 252: Assembly 6: Options And Miscellaneous
5025-2xx, 4xx Assembly 6: Options and miscellaneous Asm- Part Units/ Units/ Description Index number opt. 6—NS 40X2254 115 V Maintenance kit (fuser, ITU, duplex reference edge) 40X2255 230 V Maintenance kit (fuser, ITU, duplex reference edge) 40X2261 100 V Maintenance kit (fuser, ITU, duplex reference edge) 40X5937 128MB DDR DRAM DIMM card assembly 40X5938... -
Page 253: Index
5025-2xx, 4xx Index 3-49 Numerics color theory 3-24 Color Trapping 2-11 3x–9x user messages – 3-19 configuration ID 2-13 2-17 1xx service errors – configuration menu 2xx paper jam accessing 3-32 locations 3-27 Auto Color Adj 2-11 2-12 messages – 3-24 available tests 250-sheet media tray... - Page 254 5025-2xx, 4xx 3-16 3-12 K TMC Sensor DRAM Test 3-16 M TMC Sensor duplex 3-16 4-22 duplex reference edge removal 3-16 2-25 4-25 duplex sensor 3-16 3-14 Standard Bin Left Margin 3-16 Y TMC Sensor models Device Tests parts catalog 3-17 3-13 Flash Test...
- Page 255 5025-2xx, 4xx parts catalog 4-40 removal operating modes 2-51 service check operator panel imaging unit (IU) 2-55 buttons 4-45 description 2-55 overview parts catalog parts catalog 4-45 removal 4-10 removal 3-10 input source tests 2-33 service check 2-34 display blank, 5 beeps 2-33 one or more buttons fail low-voltage power supply (LVPS)
- Page 256 5025-2xx, 4xx 2-43 4-64 half-color page pick tires, 250-sheet media tray 2-44 4-65 horizontal banding printhead 2-44 4-55 horizontal line right lower frame 2-45 4-67 insufficient fusing toner cartridge contacts 2-39 4-69 menu settings page toner density sensor (TDS), left and right 2-45 4-71 missing image at edge...
- Page 257 5025-2xx, 4xx serial number toner cartridge contacts 3-18 viewing parts catalog 4-67 service checks removals 2-22 90x.xx error toner density sensors (TDS) 2-22 925.01—fan error parts catalog 2-23 4-69 950.xx EPROM mismatch failure removal 2-23 3-21 bin-full/narrow media sensor TPS Setup 2-24 dead printer toner meter cycle (TMC) card...
- Page 258 5025-2xx, 4xx Service Manual...
-
Page 259: Part Number Index
250-sheet tray assembly - - - - - - - - - - - - - - - - - - - - - - - - - - - - - - - - - - - - - - - - - - - - - - - - - - - - - - - - - 40X5420 Front cover assembly (excluding duplex and USB port cable)—C540n - - - - - - - - - - - - - - - - - - - - - - - - - Part number index... - Page 260 Optional 650-sheet Duo Drawer (complete)—C544n, C544dn, C544dw, C540n, C543dn - - - - - - - - - - 7-11 40X5435 650-sheet Duo Drawer tray only —C544n, C544dn, C544dw, C540n, C543dn - - - - - - - - - - - - - - - - - 7-11 40X5436...
- Page 261 Print defects guide Page 1 of 1 Match a set of repeating defects on a print job to the marks on one of the vertical lines. The line that best matches the defects on the print job indicates which particular part may be causing the defect. Replace the For example, the distance between these two Replace the...
Need help?
Do you have a question about the C540n and is the answer not in the manual?
Questions and answers