Table of Contents
Advertisement
Quick Links
Advertisement
Table of Contents

Related Manuals for Lantronix Device Server UDS 10


Summary of Contents for Lantronix Device Server UDS 10
-
Page 1: User Guide
UDS-10 User Guide Revision D 07/15/02 Part Number 900-207... -
Page 2: Copyright And Trademark
Copyright and Trademark © 2000, Lantronix. All rights reserved. No part of the contents of this book may be transmitted or reproduced in any form or by any means without the written permission of Lantronix. Printed in the United States of America. -
Page 3: Disclaimer And Revisions
Changes or modifications to this device not explicitly approved by Lantronix will void the user's authority to operate this device. -
Page 4: Declaration Of Conformity
Declaration of Conformity (according to ISO/IEC Guide 22 and BS 7514) Manufacturer’s Name & Address: Lantronix, 15353 Barranca Parkway, Irvine, CA 92618 USA Declares that the following product: Product Name Model: UDS-10 Universal Device Server Conforms to the following standards or other normative documents:... -
Page 5: Warranty
60 DAYS after the date of shipment. The customer will ship defective media to Lantronix. Lantronix will ship the replacement media to the customer. In no event will Lantronix be responsible to the user in contract, in tort (including negligence), strict liability or otherwise for any special, indirect, incidental or consequential... -
Page 6: Sales Offices
Sales Offices The Americas 15353 Barranca Parkway Irvine, CA 92618, USA Phone: (949) 450-7227 Fax: (949) 450-7231 sales@lantronix.com France 2 Rue Hélène Boucher 78280 Guyancourt France Tel: +33 1 39 30 41 74 Fax: +33 1 39 30 41 73 europesud@lantronix.com... -
Page 7: Table Of Contents
Table of Contents 1. Introduction ...1-1 1.1 UDS-10 ... 1-2 1.2 UDS-10B... 1-3 1.3 UDS-10-IAP Device Server ... 1-4 1.3.1 Industrial Automation Protocols ... 1-5 1.4 Network Protocols... 1-6 1.4.1 Packing Algorithm ... 1-6 1.4.2 IP Address ... 1-6 1.4.3 Port Number ... 1-6 1.5 Serial Interface ... - Page 8 Contents 2.4.4 Add the Unit to the Manage List ... 2-8 2.4.5 Opening a Configuration Window... 2-10 2.5 ARP and Telnet... 2-11 2.6 Serial Port Login... 2-12 3. Configuring the Unit... 3-1 3.1 Configuring via Web Browser... 3-1 3.2 Using DeviceInstaller ... 3-2 3.3 Web Manager Page...
- Page 9 3.8.2 SNMP Community Name ... 3-25 3.8.3 Disable Telnet Setup ... 3-26 3.8.4 Disable TFTP Firmware Upgrade ... 3-26 3.8.5 Disable Port 77FE (Hex) ... 3-26 3.8.6 Disable Web Server... 3-26 3.8.7 Enable Enhanced Password... 3-26 3.9 Factory Defaults ... 3-26 3.10 Exit Configuration Mode ...
- Page 10 Contents 8.3.2 Interface Mode... 8-9 8.3.3 Baud Rate ... 8-10 8.3.4 Flow Control... 8-10 8.3.5 Connect Mode... 8-11 8.3.6 Disconnect Mode ... 8-12 8.3.7 Flush Mode (Buffer Flushing) JKE Check the modifications to 3.6.98-13 8.3.8 Pack Control ... 8-13 8.4 IP Addresses ... 8-14 8.4.1 Network Portion...
- Page 11 Figure 9 - Devices in a Group ... 2-9 Figure 10 - Device Management Window ... 2-10 Figure 11 - Lantronix Web-Manager ... 3-4 Figure 12 - Server Properties Configuration on the Web Browser ... 3-6 Figure 13 - Setup Mode Window ... 3-11 Figure 14 - Device Installer...
- Page 12 Contents List of Tables Table 1 - Ethernet Interface Signals... 1-8 Table 2 - UDS-10 LED Functions ... 1-10 Table 3 - Technical Specs... 1-13 Table 4 - Standard IP Network Netmasks... 3-13 Table 5 - Netmask Examples ... 3-13 Table 6 - Interface Mode Options...
- Page 13 Contents Table 38 - Disconnect Mode Options... 9-5 Table 39 - Flush Mode Options... 9-7 Table 40 - Interface Mode Options ... 9-13 Table 41 - Pack Control Options... 9-14 UDS-10 User Guide...
-
Page 15: Introduction
Introduction 1. Introduction This manual describes the family of Universal Device Servers (UDS), including the UDS-10 Device Server and the UDS-10-IAP Device Server with Industrial Automation Protocols. The UDS-10B Embedded Device Server is shown here for reference only. It is part of the UDS-10 family but is described in the Embedded Integration Kit (EIK) User Manual. -
Page 16: Uds-10
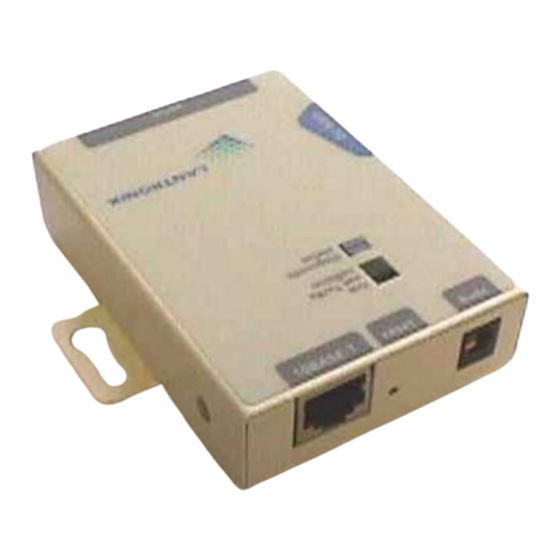
Introduction 1.1 UDS-10 The UDS-10 Device Server connects serial devices to Ethernet networks using the IP protocol family (TCP for connection-oriented stream applications and UDP for datagram applications). A few of the different types of serial devices supported are listed below: Time/Attendance Clocks and Terminals ATM Machines CNC Controllers... -
Page 17: Uds-10B
1.2 UDS-10B Note: This section is for the UDS-10B only. The UDS-10B is the embedded version of the UDS-10, and is designed to be easily and quickly integrated into products. The UDS-10B operates the same as the UDS-10, except the UDS-10B has no external metal case. -
Page 18: Uds-10-Iap Device Server
1.3 UDS-10-IAP Device Server Note: This section is for the UDS-10-IAP only. The Lantronix Industrial Automation Platform (IAP) family of Device Servers allows a single network and protocol to connect multiple serial devices from many vendors. IAP provides the automation industry with a network-enabling solution using TCP/IP and standard Ethernet networks that is vendor-independent. -
Page 19: Industrial Automation Protocols
CD or our web site. Protocol firmware files are also contained on the CD and new versions are available from the Lantronix web site. You can set up the unit using the serial port, or remotely over Ethernet using Telnet or a web browser. -
Page 20: Network Protocols
Introduction 1.4 Network Protocols Note: UDS-10 refers to UDS-10, UDS-10-IAP and UDS-10B except where noted. The UDS-10 uses TCP/IP protocols for network communication. The supported standards are: ARP, UDP, TCP, ICMP, Telnet, TFTP, DHCP, AutoIP, and SNMP. For transparent connections, TCP/IP (binary stream) or Telnet protocols are used. Firmware upgrades can be made with the TFTP protocol. -
Page 21: Serial Interface
1.5 Serial Interface UDS-10 has a female DCE DB-25 serial port that supports RS232 and RS485/422 serial standards (firmware selectable) up to 115.2 Kbps. LEDs DB-25 Serial Port Note 1: The Device Server can alternately be powered up via the serial port using one of these pins. -
Page 22: Ethernet Cable
Introduction 1.7 Ethernet Cable The next drawing shows a typical RJ-45 connector. The color is not standard but very typical of an Ethernet Patch cable. Pin 1 is located at the top of the connector (Orange + White). The view is from the end of the connector. Orange + White Orange Green + White... -
Page 23: Serial Interface Connection
1.8 Serial Interface Connection The UDS-10 can be connected to a serial or Ethernet device for setup and configuration. The serial device can be RS-232 or RS-485/422. The following diagram shows a typical interface cable for the RS-232 Serial interface. The UDS-M-SBC is an optional male DB-25 to RS-485 screw block connector. -
Page 24: Leds
Introduction 1.9 LEDs The device contains the following LEDs: link net Tx/Rx collision diagnostic status Table 2 - UDS-10 LED Functions Meaning L (Green) Lights solid green to indicate network port is connected to the network. Net Tx/Rx (Yellow) Blinks yellow to indicate network packets are transmitting and receiving. -
Page 25: Dimensions
DeviceInstaller is a powerful software utility for configuring device servers from a network connection. For more information, see Using DeviceInstaller on page 3-2. Lantronix DeviceComm Manager is a Windows based COM port redirector software utility. Its function is to redirect customer application data destined for a local serial (COM) port to the PC’s network port. -
Page 26: Power Requirements
Introduction 1.13 Power Requirements The UDS-10 is shipped with a 12VDC, 1A power supply, but any DC power supply between 9VDC and 30VDC can be used. You can order the UDS-10 with a 110VAC (UDS-10-01) or 230VAC (UDS-10-02) power supply. Note: The input voltage for all UDS-10 products has been changed from 6-9VDC to 9- 30VDC. -
Page 27: Technical Specifications
1.15 Technical Specifications Table 3 - Technical Specs Category Description CPU, Memory AMD 188ES CPU, 25MHz clock, 128kByte RAM Flash, EPROM 512kByte Flash PROM Installable Serial Standard Tunnel (UDS-10, and UDS-10-IAP), Modbus (UDS-10- Protocols IAP), DF1 (UDS-10-IAP) Serial Interface Female DB-25 connector (DCE pinout) Baud Rate selectable from 300 to 115kBaud Software selectable RS-232C or RS-422/485 Reset... -
Page 29: Getting Started
This section describes all the procedures for configuring your unit. For a short version, see the Quick Start Guide. Go to the Lantronix web site for the latest firmware and release notes. UDS-10 comes with Standard Tunnel Protocol and the UDS-10-IAP comes with the IAP Standard Tunnel Protocol. -
Page 30: Port Number
Getting Started 2.1.3 Port Number Every TCP connection and every UDP datagram is defined by a destination IP address and a port number. For example, a Telnet application commonly uses port number 23. A port number is similar to an extension on a PBX system. The unit 's serial channel (port) can be associated with a specific TCP/UDP port number. -
Page 31: Methods Of Assigning The Ip Address
2.3 Methods of Assigning the IP Address The unit's IP address must be configured before a network connection is available. You have the following options for assigning an IP to your unit: Method Description DHCP A DHCP server automatically assigns the IP address and network settings. -
Page 32: Dhcp
Getting Started 2.3.1 DHCP The unit ships with a default IP address of 0.0.0.0, which automatically enables DHCP. Provided a DHCP server exists on the network, it will assign the unit an IP address, gateway address, and subnet mask when the unit boots up. The DR1 has acquired an IP address if the red LED stops flashing and the green Status LED is on continuously. -
Page 33: Deviceinstaller
AutoIP can be disabled by setting the unit’s IP address to 0.0.1.0. This setting enables DHCP but disables AutoIP. 2.4 DeviceInstaller You can manually assign the IP address using DeviceInstaller software, which is found on the product CD. If you want to use a serial connection instead of an Ethernet connection to configure the device, go to Serial Port Login on page 2-12. -
Page 34: Assign Ip Address And Network Class
Getting Started 2.4.2 Assign IP Address and Network Class Click the Start button on the Task Bar and select Programs \ Device Installer \ Device Installer. The Device Installer window displays. Figure 5 - DeviceInstaller Window 1. -
Page 35: Test The Ip Address
3. In the Enter IP Address to assign field, enter the unit’s IP address in XXX.XXX.XXX.XXX format. 4. In the PC Network Class section, select the class (subnet mask). (Most users select Class 5. Click the Set IP Address button. (IP is assigned, pinged, and tested) 6. -
Page 36: Add The Unit To The Manage List
Getting Started 2.4.4 Add the Unit to the Manage List Now add the unit to the list of similar Lantronix devices on the network so that you can manage and configure it. 1. Click the Search the network for devices icon. -
Page 37: Figure 9 - Devices In A Group
6. Click the Back button to return to the DeviceInstaller window. The DeviceInstaller window now lists all of the devices in the group, including the unit you are setting up. The hardware address and firmware release number for the unit display. Figure 9 - Devices in a Group Now you can manage (configure) the unit so that it works with the serial device on the network. -
Page 38: Opening A Configuration Window
Telnet session. To configure the unit via a Web browser, click the Web Configuration icon The Lantronix Web-Manager window displays in your browser. For Web Configuration, see Web Manager Page on page 3-4. To configure the unit via a Telnet session, click the Telnet to Device icon The Setup Mode window displays. -
Page 39: Arp And Telnet
2.5 ARP and Telnet The unit’s IP address must be configured before a network connection is available. You are able to ARP an address into a CoBox/UDS device even if there is already an address in the unit. If the unit has no IP address, you can use Address Resolution Protocol (ARP) method from UNIX and Windows-based systems to assign a temporary IP address. -
Page 40: Serial Port Login
Getting Started 2.6 Serial Port Login If you want to initially configure the unit through a serial connection, follow these steps: 1. Connect a console terminal or PC running a terminal emulation program to your unit's serial port. The default serial port settings are 9600 baud, 8 bits, no parity, 1 stop bit, no flow control. -
Page 41: Configuring The Unit
Your device may have different configuration options. 3.1 Configuring via Web Browser Open your JAVA enabled web browser and enter the IP address. The Lantronix Web Manager page will display. Go to Web Manager Page for a summary of the menu selections. -
Page 42: Using Deviceinstaller
Configure 3.2 Using DeviceInstaller DeviceInstaller is a powerful software utility for configuring device servers from a network connection. This section uses the utility to demonstrate the various methods of configuring a device. The Device Management window is a common page for gaining access to different menus. - Page 43 6. For Telnet configuration, click the Telnet to Device icon. A small Telnet to Device window appears, showing the IP Address and the Port address. The main Lantronix Universal Device Server window opens. Go to Using a Telnet Connection on page 3-10 for a summary of the menu selections.
-
Page 44: Web Manager Page
You can start a web browser for configuration by opening your JAVA enabled web browser and entering the IP address or by clicking the Web Configuration button on the Device Management window. The Lantronix Web Manager page will display. Figure 11 - Lantronix Web-Manager Web Manager 3.0 has the following buttons:... -
Page 45: Unit Configuration
Configure 3.3.1 Unit Configuration Click the Unit Configuration button to display the following dialog box. This page contains the Server Configuration and the Port Configuration settings. These are static settings read from the device. Note: The following screen shots represent the web page shown when the device is loaded with cbxw300.cob firmware. -
Page 46: Server Properties
Configure 3.3.2 Server Properties You can change the server properties by editing any of the fields. Lingering over one of the fields will display operator messages. Changing the IP address will require you to enter the new IP address in the browser to reload the page. Figure 12 - Server Properties Configuration on the Web Browser Telnet Password In the Telnet Password field, enter a password to prevent unauthorized access to the Setup... -
Page 47: Port Properties
Configure 3.3.3 Port Properties Serial Protocol: RS232, RS422/485 4-wire, RS485 2-wire Speed: 1200, 2400, 4800, 9600, 19200, 38400, 57600, 115200 Character Size: 8, 7 Parity: None, Even, Odd Stop Bit: 1,2 Flow Control: None, XON/XOFF, XON/XOFF Pass Characters to Host, CTS/RTS (Hardware) UDP Datagram Mode: Enable, Disable UDP Datagram Type: (User selectable) - Page 48 Configure On Active Connection: Enable, Disable On Passive Connection: Enable, Disable At Time of Disconnect: Enable, Disable Packing Algorithm: Enable, Disable Idle Time: Force transmit 12 ms, Force transmit 52 ms, Force Transmit 250 ms, Force Transmit 5000 ms Trailing Characters: None, One, Two Send Immediate After Sendchars: Enable, Disable Send Define2-Byte Sequence: Enable, Disable Send Character 01: (User Selectable)
-
Page 49: Technical Support
Several buttons provide direct links to Technical Support functions. You can use the Tech Support button to link directly to the Lantronix Tech Support web page, the FTP-Site button will link you to the web page for downloading new firmware, manuals, and other files. The Contact Us button will link you to the Contact Information page. -
Page 50: Configuring Via The Setup Mode Window
9999 Note: Be sure to include a space between the IP address and 9999. 2. Click OK. 3. The Lantronix Universal Device Server window displays. *** Lantronix Universal Device Server *** Serial Number 7218033 MAC address 00:20:4A:72:46:71 Software version 04.5 (011025) Press Enter to go into Setup Mode 4. -
Page 51: Figure 13 - Setup Mode Window
*** basic parameters Hardware: Ethernet Autodetect IP addr – 0.0.0.0/DHCP/BOOTP/AutoIP, no gateway set DHCP device name : not set ***************** Security ***************** SNMP is SNMP Community Name: Telnet Setup is TFPT Download is Port 77Feh is Web Server is Enhanced password is disabled ***************** Channel 1 ***************** Baudrate 9600, I/F Mode 4C, Flow 00 Port 10001... -
Page 52: Using The Serial Port
Configure 3.4.2 Using the Serial Port If you want to initially configure the unit through a serial connection, follow these steps: 8. Connect a console terminal or PC running a terminal emulation program to your unit's serial port. The default serial port settings are 9600 baud, 8 bits, no parity, 1 stop bit, no flow control. -
Page 53: Netmask: Number Of Bits For Host Part
3.5.3 Netmask: Number of Bits for Host Part A netmask defines the number of bits taken from the IP address that are assigned for the host section. Note: Class A: 24 bits; Class B: 16 bits; Class C: 8 bits. The unit prompts for the number of host bits to be entered, then calculates the netmask, which is displayed in standard decimal-dot notation when the saved parameters are displayed (for example, 255.255.255.0). -
Page 54: Change Telnet Configuration Password
Configure 3.5.4 Change Telnet configuration password Setting the Telnet configuration password prevents unauthorized access of the setup menu via a Telnet connection to port 9999 or via Web pages. The password is limited to 4 characters. An enhanced password setting of 16 characters is available under Security Settings for Telnet access only. -
Page 55: I/F (Interface) Mode
3.6 Channel 1 Configuration (Serial Port Parameters) Using this option, define how the serial port will respond to network and serial communications. Baudrate (9600) I/F Mode (4C) Flow (00) Port No (10001) ConnectMode (C0) Remote IP Address : (000).(000).(000).(000) Remote Port (00000) DisConnMode (00) FlushMode (00) -
Page 56: Table 7 - Common Interface Mode Settings
Configure The following table demonstrates how to build some common Interface Mode settings: Table 7 - Common Interface Mode Settings Common I/F Mode Setting RS-232C, 8-bit, No Parity, 1 stop bit RS-232C, 7-bit, Even Parity, 1 stop bit RS-485 2-Wire, 8-bit, No Parity, 1 stop bit RS-422, 8-bit, Odd Parity, 1 stop bit (1) The UDS-10 requires you to choose the correct setting in the IF mode. -
Page 57: Flow
3.6.3 Flow Flow control sets the local handshake method for stopping serial input/output. Table 8 - Flow Control Options Flow Control Option No flow control XON/XOFF flow control Hardware handshake with RTS/CTS lines XON/XOFF pass characters to host 3.6.4 Port Number The setting represents the source port number in TCP connections, and is the number used to identify the channel for remote initiating connections. -
Page 58: Connect Mode
Configure 3.6.5 Connect Mode Connect Mode defines how the unit makes a connection, and how it reacts to incoming connections over the network. Enter Connect Mode options in hexadecimal notation. Note: See Table 35 - Binary to Hexadecimal Conversion Table. Table 9 - Connect Mode Options Connect Mode Option Incoming Connection... -
Page 59: Table 10 - Manual Connection Address Example
Table 10 - Manual Connection Address Example Command String Result if remote IP is 129.1.2.3 and remote port is 1234 C121.2.4.5/1 Complete override; connection is started with host 121.2.4.5, port 1 Connect to 129.1.2.5, port 1234 C28.10/12 Connect to 129.1.28.10, port 12 Autostart (Automatic Connection): If autostart is enabled, the unit automatically connects to the remote IP address and remote port specified. -
Page 60: Table 11 - Modem Mode Commands
Configure Table 11 - Modem Mode Commands Modem Mode Function Command ATDTx.x.x.x,pppp or Makes a connection to an IP address (x.x.x.x) and a remote port ATDTx.x.x.x/pppp number (pppp). Makes a connection to an IP address (x.x.x.x) and the remote port ATDTx.x.x.x number defined within the unit. -
Page 61: Remote Ip Address
3.6.6 Remote IP Address This is the destination IP address used with an outgoing connection. 3.6.7 Remote Port The remote TCP port number must be set for the unit to make outgoing connections. This parameter defines the port number on the target host to which a connection is attempted. Note: To connect an ASCII terminal to a host using the unit for login purposes, use the remote port number 23 (Internet standard port number for Telnet services). -
Page 62: Flush Mode (Buffer Flushing)
Configure 3.6.9 Flush Mode (Buffer Flushing) Using this parameter, you can control line handling and network buffers with connection startup and disconnect. You can also select between two different packing algorithms. Note: See Table 35 - Binary to Hexadecimal Conversion Table. Table 13 - Flush Mode Options Function Input Buffer (Serial to Network) -
Page 63: Pack Control
3.6.10 Pack Control Two firmware-selectable packing algorithms define how and when packets are sent to the network. The standard algorithm is optimized for applications in which the unit is used in a local environment, allowing for very small delays for single characters while keeping the packet count low. -
Page 64: Disconntime (Inactivity Timeout)
Configure Send Characters: If 2-Byte Send Character Sequence is enabled, the unit interprets the sendchars as a 2-byte sequence; if not set, they are interpreted independently. If Send Immediately After Characters is not set, any characters already in the serial buffer are included in the transmission after a "transmit"... -
Page 65: Expert Settings
3.7 Expert Settings Note: You can change these settings via Telnet or serial connections only, not on the Web- Manager. Note: The Expert Settings option does not appear with UDS-10-IAP. These parameters should only be changed if you are an expert and definitely know the consequences the changes might have. -
Page 66: Disable Telnet Setup
Port 77FE is a setting that allows DeviceInstaller, Web Pages, and custom programs to configure the unit remotely. You may wish to disable this capability for security purposes. For more information about remote configuration, see the Lantronix Embedded Integration Kit user guide on the Lantronix Web site www.lantronix.com. -
Page 67: Exit Configuration Mode
Configure 3.10 Exit Configuration Mode Select 8 to exit the configuration mode without saving any changes or rebooting. Select 9 to save all changes and reboot the device. All values are stored in nonvolatile memory. 3.11 Get Configuration The device configuration information is stored in flash memory and can be read and saved in a configuration file (filename.cfg). -
Page 68: Set Configuration
Configure 3.12 Set Configuration Device configuration information can be saved in a file and later used to set the configuration of one or several devices. To set the configuration of a device from a saved file, click the Set Configuration button on the Device Management window. The following dialog appears. The Device IP Address is shown in the first field. -
Page 69: Updating Protocol (Firmware)
Web interface (*.COB) via TFTP or DeviceInstaller. The firmware files are located on the software CD in the firmware folder. Here is a list of typical names for those files. Check the Lantronix web site for the latest versions and release notes. -
Page 70: Via Deviceinstaller
After downloading the firmware to your computer, or locating the file on your software CD, you can use DeviceInstaller to install it. 1. Download the updated firmware files from www.lantronix.com or ftp.lantronix.com and store them in a subfolder on your computer. -
Page 71: Figure 15 - Search Network Window
3. Click the Search the network for devices icon displays. Figure 15 - Search Network Window 4. Click the Start Search button. A list of all active units on the local network displays. 5. Click the Save button. A confirmation message displays. 6. -
Page 72: Via Tftp
10. In the Source FW File field, locate the firmware file from the software CD or the file you downloaded from the Lantronix web site. 11. Click the Update FW File button. Upgrade status process messages display in the lower part of the window. -
Page 73: Via Another Unit
4. In the Destination File field, enter the current internal operational code or WEB5 for the internal Web interface. (For UDS-10-IAP, AQ = Standard Tunnel, AM = Modbus, AD = DF1. For UDS-10, 3Q = Standard Tunnel) 5. In the Remote Host field, enter the IP address of the unit being upgraded. 6. -
Page 74: Via The Serial Port
HEX format. There is a DOS application, R2H.EXE that can be used to convert the ROM file to HEX format. The R2H.EXE application is available at ftp://ftp.lantronix.com/pub. Put R2H.EXE and the *.ROM file into the same directory on a PC then open a DOS Window... -
Page 75: Devicecomm Manager
Using simple on-screen menus, users can map up to 255 COM ports directly to IP addresses assigned to Lantronix Device Servers. Once COM ports are mapped, any networked PC with DeviceComm Manager software installed can access devices on the network via Lantronix’... -
Page 76: Installing Devicecomm Manager
5.1 Installing DeviceComm Manager The DeviceComm Manager software is included on the product CD or it can be downloaded from the Lantronix web site. 5.1.1 Install DeviceComm Manager 1. Insert the product CD into your CD-ROM drive. The CD will automatically start and display the main window. -
Page 77: Setup
5.1.2 Setup 1. Open Control Panel. 2. Double click on the “DeviceComm Manager” Icon Status Meaning DISABLED Unused port on your system Port being used by other hardware / software on your system IDLE An IP address and port number have been associated with the COM port CONNECTED An active TCP/IP connection exists between the COM port and the device server 3. - Page 78 Firmware 6. Enter the Port number of the target device server in the “Port:” section. Click OK when done. ****Please Note:**** Because this is a raw mode redirector: a. On UDS and CoBox products, you cannot use ports 14000 through 14009. b.
-
Page 79: Troubleshooting
6.1 Technical Support This chapter discusses how you can diagnose and fix errors quickly without having to contact a dealer or Lantronix. It helps to connect a terminal to the serial port while diagnosing an error to view summary messages that may be displayed. When troubleshooting, always ensure that the physical connections (power cable, network cable, and serial cable) are secure. - Page 80 Troubleshooting When you report a problem, please provide the following information: Your name, and your company name, address, and phone number Lantronix model number Lantronix serial number Software version (on the first screen shown when you Telnet to port 9999)
-
Page 81: Table 16 - Problems And Error Messages
Table 16 - Problems and Error Messages Problem/Message Reason When you issue the ARP –S Your currently logged-in user command in Windows, “The does not have the correct rights ARP entry addition failed: 5" to use this command on this PC. message displays. - Page 82 Change power supplies. Consult the LEDs section in the Introduction chapter or the Quick Start for the LED flashing sequence patterns. Call Lantronix Technical Support if the blinking pattern indicates a critical error. The serial settings for the serial device and the...
- Page 83 Problem/Message Reason The UDS/CoBox appears to be If you are sure that the serial port set up correctly, but you are not setting is correct, then you may communicating with your device not be connecting to the correct attached to the UDS/CoBox socket of the UDS/CoBox.
-
Page 85: Monitor Mode
7. Monitor Mode 7.1 Monitor Mode Monitor Mode is a command-line interface used for diagnostic purposes (see Table 17 - Monitor Mode Commands). There are two ways to enter Monitor Mode: locally via the serial port or remotely via the network. 7.1.1 Entering Monitor Mode Via the Serial Port To enter Monitor Mode locally: 1. -
Page 86: Table 17 - Monitor Mode Commands
Monitor Mode Table 17 - Monitor Mode Commands Command Command Name Download SF x.x.x.x Send Firmware VS x.x.x.x Version GC x.x.x.x Get Configuration SC x.x.x.x Send Configuration PI x.x.x.x Ping ARP Table TCP Connection Table Network Connection Reset Send/Set IP xxx.xxx.xxx.xxx: Address yyy.yyy.yyy.yyy... -
Page 87: Network Configuration Using Udp
8. Network Configuration using UDP 8.1 UDP Datagrams The Device Server can also be configured or queried over the network using UDP datagrams. The Device Server has a UDP listener set for port 30718 (77FE Hex). Responses from the Device Server are returned to the source port of the UDP packet. The first three bytes of the UDP data block should be set to zero. - Page 88 Byte Command Parameters be set to the string IP-SETUP (Hex 49 50 2D 53 45 54 55 50). Next 2 bytes have to be set to 00. Next 2 bytes must contain the serial number. Next 4 bytes have to be the new IP address.
-
Page 89: Configuring Multiple Devices
8.2 Configuring Multiple Devices When configuring a number of Device Servers identically, it is useful to create a template setup record. The setup record can then be sent to the “target” Device Servers from a “master” Device Server via “cut and paste” or UDP (see Network Configuration using UDP on page 8-1). -
Page 90: Sending A Setup Record
To request the setup record of a properly configured Device Server via another Device Server on the network: 5. Make sure that both units are plugged onto the network properly. 6. Enter Monitor Mode (with network support enabled) on the unit that is not properly configured. -
Page 91: The Intel Hex Format
To send a setup record via Monitor Mode: 1. Configure a “master” Device Server with the desired parameters and place it on the network. 2. Place another Device Server (the “target”) on the network. 3. Enter Monitor Mode (with network support enabled) on the master Device Server (see Monitor Mode on page 7-1) 4. -
Page 92: Calculating The Checksum
To get and set the node configuration, 120 bytes should be exchanged at once in 32-Byte records. The IP address in the record (bytes 0 to 3) will be ignored (unless the UDP FD command is being used). 8.2.4 Calculating the Checksum As mentioned in Table 20 - Block Types above, the last two characters of an Intel Hex setup record represent a checksum of the data in the line. -
Page 93: Setup Records
8.3 Setup Records A setup record consists of 120 bytes. They are transmitted at once from and to the node. Unused bytes should be initialized as 00. Table 21 - Setup Record Construction defines the structure of a setup record: Table 21 - Setup Record Construction Byte(s) Function 00-03... -
Page 94: Channel Parameters
8.3.1 Channel Parameters Use the following table to select setup record parameters for Channels 1: Table 22 - Channel Parameters Byte(s) Function (Channel 1) Interface Mode (see Line Speed Bits 7-5: Reserved Bits 4-0: Baud Rate (see Flow Control (see Reserved 20-21 Own TCP port low-byte, high-byte (Intel) -
Page 95: Interface Mode
8.3.2 Interface Mode The Interface (I/F) Mode is a bit-coded byte entered in hexadecimal notation. Use the following table to select Interface Mode settings: Table 23 - Interface Mode Options I/F Mode Option RS-232C RS-422/485 RS-485 2-wire 7 Bit 8 Bit No Parity Even Parity Odd Parity... -
Page 96: Baud Rate
8.3.3 Baud Rate The Device Server and attached serial device must agree on a speed or baud rate to use for the serial connection. Use the following table to select Baud Rate settings: Table 25 - Baud Rate Settings Speed (bps) 38400 19200... -
Page 97: Connect Mode
8.3.5 Connect Mode Connect Mode defines how the Device Server makes a connection, and how it reacts to incoming connections over the network. Use the following table to select Connect Mode options: Table 27 - Connect Mode Options Connect Mode Option Incoming Connection Never accept incoming Accept incoming with DTR... -
Page 98: Disconnect Mode
8.3.6 Disconnect Mode In Disconnect Mode, DTR drop either drops the connection or is ignored. Use the following table to select Disconnect Mode Options: Table 28 - Disconnect Mode Options Disconnect Mode Option Disconnect with DTR drop Ignore DTR Telnet mode and terminal type setup Channel (port) password Hard disconnect... -
Page 99: Pack Control
8.3.7 Flush Mode (Buffer Flushing) Using this parameter, you can control line handling and network buffers with connection startup and disconnect. You can also select between two different packing algorithms. Use the following table to select Flush Mode options: Table 29 - Flush Mode Options Function Input Buffer (Serial to Network) Clear with a connection that is initiated from the... -
Page 100: Ip Addresses
8.4 IP Addresses Each TCP/IP node on a network host has a unique IP address. This address provides the information needed to forward packets on the local network and across multiple networks if necessary. IP addresses are specified as x.x.x.x, where each x is a number from 1 to 254; for example, 192.0.1.99. -
Page 101: Host Portion
A router is required between all networks and all sub-networks. Generally, hosts can send packets directly only to hosts on their own sub-network. All packets destined for other subnets are sent to a router on the local network. 8.4.3 Host Portion The host portion of the IP address is a unique number assigned to identify the host. -
Page 102: Private Ip Networks And The Internet
Table 34 - Netmask Examples Netmask Host Bits 255.255.255.252 255.255.255.248 255.255.255.240 255.255.255.224 255.255.255.192 255.255.255.128 255.255.255.0 255.255.254.0 255.255.252.0 255.255.248.0 255.128.0.0 255.0.0.0 8.4.6 Private IP Networks and the Internet If your network is not and will not be connected to the Internet, you may use any IP address. If your network is connected or will be connected to the Internet, or if you intend to operate the Device Server on an intranet, you should use one of the reserved sub-networks. -
Page 103: Binary To Hex Conversion
9. Binary to Hex Conversion Many of the Device Server’s configuration procedures require you to assemble a series of options (represented as bits) into a complete command (represented as a byte). The resulting binary value must be converted to a hexadecimal representation. Hexadecimal digits have values ranging from 0 to F, which are represented as 0-9, A (for 10), B (for 11), etc. -
Page 104: Connect Mode Options
Binary to Hex 9.1 Connect Mode Options Note: Character response codes are C=conn, D=disconn, N=unreachable Table 36 - Connect Mode Options Accept Serial Incoming Response Connections Upon Connection Never None (quiet) Never None (quiet) Never None (quiet) Never None (quiet) Never None (quiet) Never... - Page 105 Accept Serial Incoming Response Connections Upon Connection Unconditionally Character Unconditionally Character Unconditionally Character Unconditionally Character Unconditionally Character Unconditionally Character Never None (quiet) Never None (quiet) Never None (quiet) Never None (quiet) Never None (quiet) Never None (quiet) Never None (quiet) Never Character Never...
-
Page 106: Table 37 - Connect Mode Options For Modem Emulation
Binary to Hex Accept Serial Incoming Response Connections Upon Connection Unconditionally Character Unconditionally Character Unconditionally Character Unconditionally Character Unconditionally Character Unconditionally Character The following connect mode options are for when you use modem emulation: Table 37 - Connect Mode Options for Modem Emulation Accept Incoming Response Connections... -
Page 107: Disconnect Mode Options
9.2 Disconnect Mode Options Table 38 - Disconnect Mode Options Disconnect Telnet Mode and with DTR Terminal Type Drop Setup (Note) Enable Enable Enable Enable Enable Enable Enable Enable Enable Enable Enable Enable Enable Enable Enable Enable Enable Enable Enable Enable Enable Enable... - Page 108 Binary to Hex Disconnect Telnet Mode and with DTR Terminal Type Drop Setup (Note) Enable Enable Enable Enable Enable Enable Enable Enable Enable Enable Enable Enable Enable Enable Enable Enable Enable Enable Enable Enable Enable Enable Enable Enable Enable Enable Enable Enable Enable...
-
Page 109: Flush Mode (Buffer Flushing) Options
9.3 Flush Mode (Buffer Flushing) Options Table 39 - Flush Mode Options Serial to Network Network to Serial Clear input buffer upon: Clear output buffer upon: None Active connection Passive connection Active connection Passive connection Disconnect Active connection Disconnect Passive connection Disconnect Active connection Passive connection... - Page 110 Binary to Hex Serial to Network Network to Serial Clear input buffer upon: Clear output buffer upon: Active connection Active connection Passive connection Active connection Active connection Active connection Passive connection Disconnect Active connection Active connection Active connection Disconnect Passive connection Active connection Disconnect Active connection...
- Page 111 Serial to Network Network to Serial Clear input buffer upon: Clear output buffer upon: Disconnect Active connection Passive connection Active connection Active connection Disconnect Passive connection Passive connection Active connection Disconnect Passive connection Active connection Active connection Passive connection Passive connection Disconnect Active connection Passive connection...
- Page 112 Binary to Hex Serial to Network Network to Serial Clear input buffer upon: Clear output buffer upon: Active connection Disconnect Disconnect Passive connection Disconnect Disconnect Active connection Disconnect Passive connection Disconnect Active connection Disconnect Active connection Active connection Disconnect Passive connection Active connection Disconnect Active connection...
- Page 113 Serial to Network Network to Serial Clear input buffer upon: Clear output buffer upon: Active connection Passive connection Passive connection Disconnect Disconnect Passive connection Disconnect Active connection Passive connection Disconnect Disconnect Passive connection Passive connection Disconnect Disconnect Active connection Passive connection Passive connection Disconnect Disconnect...
- Page 114 Binary to Hex Serial to Network Network to Serial Clear input buffer upon: Clear output buffer upon: Passive connection Active connection Disconnect Passive connection Disconnect Active connection Active connection Passive connection Passive connection Disconnect Disconnect Active connection Passive connection Disconnect Active connection Active connection Passive connection...
-
Page 115: Interface Mode Options
9.4 Interface Mode Options Table 40 - Interface Mode Options Interface Bits Parity RS-232C RS-232C RS-232C Even RS-232C Even RS-232C RS-232C RS-232C RS-232C RS-232C Even RS-232C Even RS-232C RS-232C RS-422/485 RS-422/485 RS-422/485 Even RS-422/485 Even RS-422/485 RS-422/485 RS-422/485 RS-422/485 RS-422/485 Even RS-422/485 Even... -
Page 116: Pack Control Options
Binary to Hex 9.5 Pack Control Options Table 41 - Pack Control Options Sendcharacter Trailing Defined by a: Characters 1-Byte Sequence 1-Byte Sequence 1-Byte Sequence 1-Byte Sequence 1-Byte Sequence 1-Byte Sequence 1-Byte Sequence 1-Byte Sequence 1-Byte Sequence 1-Byte Sequence 1-Byte Sequence 1-Byte Sequence 2-Byte Sequence 2-Byte Sequence... - Page 117 Sendcharacter Trailing Defined by a: Characters 2-Byte Sequence 2-Byte Sequence 2-Byte Sequence 2-Byte Sequence 2-Byte Sequence 2-Byte Sequence 2-Byte Sequence 2-Byte Sequence 2-Byte Sequence 2-Byte Sequence UDS-10 User Guide Idle Time Send Force Immediately Transmit: after Sendcharacter 250ms 5sec 12ms 52ms 250ms 5sec...
-
Page 119: Ip Addresses
Binary to Hex 10. IP Addresses An IP address is a 32-bit value, divided into four octets of eight bits each. The standard representation is four decimal numbers (in the range of 0..255) divided by dots. 192.2.1.123 This is called decimal-dot notation. The IP address is divided in two parts: network and host. -
Page 120: Network Address
Binary to Hex 10.4 Network Address The host address with all host bits set to 0 is used to address the network as a whole (in routing entries, for example). 10.5 Broadcast Address The address with the host part bits set to 1 is the broadcast address, meaning for every station. Network and broadcast addresses must not be used as a host address (for example, 192.168.0.0 identifies the entire network and 192.168.0.255 identifies the broadcast address). -
Page 121: Private Ip Networks And The Internet
10.7 Private IP Networks and the Internet If your network is not connected to the Internet, and there are no plans to make such a connection, you may use any IP address you wish. If your network is not connected to the Internet and you have plans to connect, or you are connected to the Internet and want to operate your UDS-10s on an intranet, use one of the subnetworks below. -
Page 123: Glossary Of Terms
Glossary of Terms 11. Glossary of Terms Address space A linear array of locations that a thread can access. Simple processors have only one, and these processors are referred to as `linear' addressing. AutoIP AutoIP is an alternative to DHCP that allows hosts to automatically obtain an IP address in smaller networks that may not have a DHCP server. - Page 124 Glossary of Terms Baseband LAN: A LAN that uses a single carrier frequency over a single channel. Ethernet, Token Ring and Arcnet LANs use baseband transmission. Baud: Unit of signal frequency in signals per second. Not synonymous with bits per second since signals can represent more than one bit.
- Page 125 Glossary of Terms Broadband: A data transmission technique allowing multiple high-speed signals to share the bandwidth of a single cable via frequency division multiplexing. Broadband Network: A network that uses multiple carrier frequencies to transmit multiplexed signals on a single cable. Several networks may coexist on a single cable without interfering with one another.
-
Page 126: Data Link
Glossary of Terms Communication Server: A dedicated, standalone system that manages communications activities for other computers. Cut-through: Technique for examining incoming packets whereby an Ethernet switch looks only at the first few bytes of a packet before forwarding or filtering it. This process is faster than looking at the whole packet, but it also allows some bad packets to be forwarded. -
Page 127: Domain Name
Glossary of Terms Dialback: A security feature that ensures people do not log into modems that they shouldn't have access to. When a connection is requested, the system checks the user name for validity, then "dials back" the number associated with that user name. Distributed Processing: A system in which each computer or node in the network performs its own processing and manages some of its data while the network facilitates communications between the nodes. -
Page 128: Hardware Address
Glossary of Terms Filtering: Process whereby an Ethernet switch or bridge reads the contents of a packet and then finds that the packet does not need to be forwarded, drops it. a filtering rate is the rate at which a device can receive packets and drop them without any loss of incoming packets or delay in processing. -
Page 129: Host Table
Glossary of Terms Heartbeat: Ethernet defined SQE signal quality test function. Hertz (Hz): A frequency unit equal to one cycle per second. Host: Generally a node on a network that can be used interactively, i.e., logged into, like a computer. Host Table: A list of TCP/IP hosts on the network along with their IP addresses. - Page 130 Glossary of Terms IPX: Internetwork Packet eXchange, a NetWare protocol similar to IP (Internet Protocol). ISDN: (Integrated Services Digital Network): All digital service provided by telephone companies. Provides 144K bps over a single phone line (divided in two 64K bps "B" channels and one 16K bps "D" channel).
- Page 131 Glossary of Terms Layer: In networks, layers refer to software protocol levels comprising the architecture, with each layer performing functions for the layers above it. Line Speed: Expressed in bps, the maximum rate at which data can reliably be transmitted over a line using given hardware.
-
Page 132: Multilink Ppp
Glossary of Terms Modem: A modulator-demodulator device for changing transmission signals from digital to analog for transmission over phone lines. Used in pairs, one is required at each end of the line. MOP: Maintenance Operations Protocol, a DEC protocol used for remote communications between hosts and servers. -
Page 133: Network Management
Glossary of Terms NetBIOS/NetBEUI: Microsoft's networking protocols for it's LAN Manager and Windows NT products. Network: An interconnected system of computers that can communicate with each other and share files, data and resources. Network Address: Every node on a network has one or more addresses associated with it, including at least one fixed hardware address such as "ae-34-2c-1d-69-f1"... -
Page 134: Print Server
Glossary of Terms PAP: (Password Authentication Protocol) Authentication scheme for PPP links. A password can be specified for both devices on a remote link. Failure to authenticate will result in a dropped connection prior to start of data transmission. Physical Address: An address identifying a single node. -
Page 135: Remote Control
Glossary of Terms Protocol: Any standard method of communicating over a network. Remote Access: Access to network resources not located on the same physical Ethernet. (Physical Ethernet here refers to an entire site network topology.) Remote Control: Form of remote access where a device dialing in assumes control of another network node - all keystrokes on the remote are translated into keystrokes on the network node. -
Page 136: Spanning Tree
MAC layer addresses to filter, routers are able to read data such as IP addresses and route accordingly. RTEL: Lantronix' "reverse Telnet" software allows hosts using TCP/IP to establish a session with a device attached to a terminal server port. Server: A computer that provides resources to be shared on the network, such as files (file server) or terminals (terminal server). - Page 137 Glossary of Terms Store and Forward: Technique for examining incoming packets on an Ethernet switch or bridge whereby the whole packet is read before forwarding or filtering takes place. Store and forward is a slightly slower process than cut-through, but it does ensure that all bad or misaligned packets are eliminated from the network by the switching device.
-
Page 138: Token Ring
Glossary of Terms Terminal Server: A concentrator that facilitates communication between hosts and terminals. Terminator: Used on both ends of a standard Ethernet or Thinwire Ethernet segment, this special connector provides the 50 ohm termination resistance needed for the cable. TFTP: Trivial File Transfer Protocol. - Page 139 Glossary of Terms Twisted-Pair Cable: Inexpensive, multiple-conductor cable comprised of one or more pairs of 18 to 24 gauge copper strands. The strands are twisted to improve protection against electromagnetic and radio frequency interference. The cable, which may be either shielded or unshielded, is used in low-speed communications, as telephone cable.
Need help?
Do you have a question about the Device Server UDS 10 and is the answer not in the manual?
Questions and answers