
Related Manuals for Amica AWB510LP


Summary of Contents for Amica AWB510LP
-
Page 1: Instruction Manual
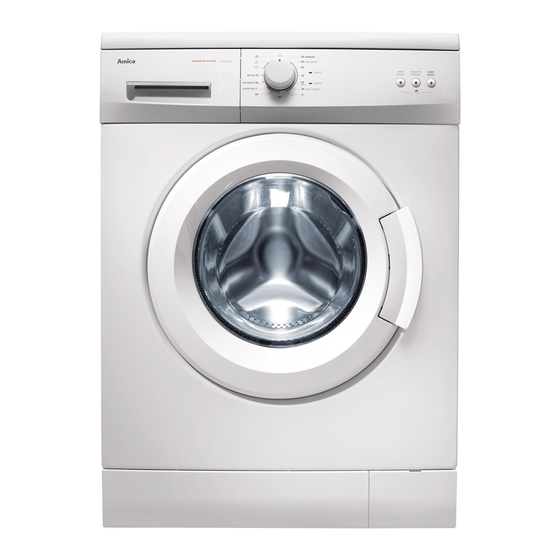
AWB510LP INSTRUCTION MANUAL WASHING MACHINE Please read this User Manual carefully before using the appliance! IO 00590/1 (10.2013) -
Page 2: Table Of Contents
CONTENTS Basic Information........................3 Notes on Safety......................4 Installing the Washing Machine....................6 Understanding the symbols on clothes labels..............8 Description of control panel..................9 Using the appliance....................11 Table of programmes..................12 Troubleshooting........................14 Maintenance and Cleaning..................15 Practical tips on washing.....................16 Specification......................19 Service and Warranty....................19 Product Fiche......................20 In accordance with European Directive 2002/96/EC and Polish legislation regarding used electrical and electronic goods, this appliance is marked with the symbol of the crossed-out waste container. -
Page 3: Basic Information
BASIC INFORMATION Dear customer, From today, washing will be easier than ever before. The Amica washing machine combines exceptional ease of use with excellent effectiveness. Once you have read the instructions, operating the washing machine will not be a problem. -
Page 4: Notes On Safety
NOTES ON SAFETY Detergents Use only those detergents and additives which are designed for au- tomatic washing machines, especially when using the COTTON 90°C programme. Do not use any agents containing solvents, as these may damage certain parts of the machine, or cause them to emit poisonous gases. There may also be a risk of ignition and explosion. - Page 5 NOTES ON SAFETY Checking stability Once the washing machine is in position and levelled, it must be checked to ensure it is standing in a stable position on all four legs. In order to check this, press down each corner of the appliance in turn to see if it moves. The safe, long-term and reliable operation of the washing machine depends on it being correctly positioned and level.
-
Page 6: Installing The Washing Machine
INSTALLING THE MACHINE I. Remove the protection used for transporting the appliance (keep the locking bolts for future use, e.g. when moving house). Unscrew the 4 locking bolts with a spanner. Stop up the holes with the stoppers Remove the rubber and plastic transport enclosed in the accessories bag. - Page 7 INSTALLING THE MACHINE III. Connecting the water supply Use the new hoses sup- plied with the machine. Do not re-use old hoses. A water supply hose with seals is inside the drum of the machine. Water pressure min. 0,03 MPa (0,3 bar), max.1 MPa (10 bar). Supply the machine with cold water after connecting, make sure the hose is not twisted after connecting the hose and the valve, check they are sealed tight...
-
Page 8: Understanding The Symbols On Clothes Labels
UNDERSTANDING THE SYMBOLS ON CLOTHES LABELS I. Washing boiling normal normal DO NOT temp 60 temp 40 wash! temp. 90 delicate handwash II. Chemical cleaning petrol DO NOT solvents except TRI only dry clean! III. Spin dryer DO NOT normal high dry! IV. -
Page 9: Description Of Control Panel
DESCRIPTION OF CONTROL PANEL 1. Programme selector knob 2. End Indicator 3. Ready Indicator 4. Pre-wash Indicator 5. No spin Indicator 6. Start/Pauza Indicator 7. Pre-wash button 8. No spin button 9. Start/Pauza button 1. Programme selector knob Choose the appropriate wash programme as required, depending on how dirty the clothes are, and type and amount of laundry loaded, which ensures better results and more effecti- ve washing. - Page 10 DESCRIPTION OF CONTROL PANEL 7. Pre-wash button Activation of function is indicated by an indicator lighting up next to the function name. Note: The Pre-wash function is not available for all programmes (see Table of wash pro- grammes). The Pre-wash function extends the wash cycle by approximately 15-20 minutes. The laun- dry is prewashed before the main wash cycle begins (cold wash for the programs: Cottons 90°C, Cottons 60°C intensive wash, Cottons 60°C, Cottons 40°C;...
-
Page 11: Using The Appliance
USING THE APPLIANCE I. Programme selection 1. Set the programme selector knob to the desired programme (see the table further on), Ready indicator will light. 2. Activate available additional functions to modify the programme to your individual needs. 3. Press the [Start/ Pause] button. II. -
Page 12: Table Of Programmes
TABLE OF PROGRAMMES Programme name Max. Max. spin Max. Additional functions available temp. speed [rpm] load °C [kg] Pre-wash No spin Cotton 90 90° 1000 Option Option Intensive wash 60 60° 1000 Option Option Cotton 60° 1000 Option Option Cotton 40°... - Page 13 TABLE OF PROGRAMMES Detergent drawer Time Ener- Water Num- Type of laundry [h:min] con- ber of con- sump- rinses sump- tion (l) tion Pre- Basic Fabric (kWh) wash wash softener Heavily soiled clothing, or an moderately so- 2:35 1,96 iled cotton and linen for children that requires boiling.
-
Page 14: Troubleshooting
TROUBLESHOOTING The fault indicator lights The washing machine indicates error codes to help locate minor operating faults and iden- tify their cause. An error is indicated by LEDs on the control panel [Ready/ Start/Pause]. The appliance interrupts operation upon encountering an error. Error Code - The status Reason Solution... -
Page 15: Maintenance And Cleaning
MAINTENANCE AND CLEANING Never clean the product’s casing or plastic parts using solvents or strong, abrasive cleaning agents (e.g. washing powders or creams)! Only use delicate liquid cleaning agents and soft cloths. Do not use sponges. I. Cleaning the pump filter Clean the pump filter every 20 washes or so. -
Page 16: Practical Tips On Washing
PRACTICAL ADVICE REGARDING WASHING I. Cleaning and It is recommended to use powder or liquid general purpose purifying agents detergents for all temperatures in a range as per the deter- gent Producer’s recommendations indicated on the product packaging. Detergents Pour the detergent into the drawer compartment marked Pour the pre-wash detergent into the drawer compartment marked Liquid detergents... - Page 17 PRACTICAL ADVICE REGARDING WASHING V. Water hardness Hard water causes sediment to form. Information about water hardness is available from your nearest water works. It is advised that water softeners are used for every wash. Power cuts or unplugging the machine does not cancel the set- VI.
- Page 18 PRACTICAL ADVICE REGARDING WASHING The washing machine is equipped with an interlock which prevents IX. Door the door from being opened during washing. Once a washing cycle interlock is complete, the door interlock is automatically released. In order to open the door during the wash program, press PAUSE button and wait about 2 minutes to unlock the door.
-
Page 19: Specification
SPECIFICATION -Type AWB510LP -Rated voltage 230V / ~50Hz. -Rated power 2100 W -Current protection 10 A -Drum capacity max 5 kg -Water pressure min 0,03 MPa (0,3 bar) max 1 MPa (10 bar) -Dimensions/Height/Breadth/ Depth 845 / 597 / 497 [mm]... -
Page 20: Product Fiche
(EU) No. 1015/2010 of 10 November 2010 on the implementation of the Directive of the European Parliament and of the Council No. 2009/125/EC on the Eco design requirements for the household washing machines). Amica Wronki S.A. Supplier’s name or trade mark...
Need help?
Do you have a question about the AWB510LP and is the answer not in the manual?
Questions and answers