Table of Contents
Advertisement
Advertisement
Table of Contents
Troubleshooting

Related Manuals for Pinnacle Systems miroVIDEO DC30 Series

Summary of Contents for Pinnacle Systems miroVIDEO DC30 Series
-
Page 1: Mirovideo Dc30 Series
DC30 Series ’ UIDE... - Page 2 All other brand or product names are trademarks or registered trademarks of their respective holders. This manual is printed on chlorine-free paper using environmentally safe ink. Pinnacle Systems Inc. has written this manual to the best of its knowledge, but does not guarantee that the programs/systems will fulfill the desires of the user.
-
Page 3: Table Of Contents
Contents OVERVIEW miroVIDEO DC30 series? ................ 1 HAT IS THE miroVIDEO DC30 series ? ............3 HAT DOES THE OFFER BEFORE YOU BEGIN ....................5 YSTEM REQUIREMENTS ......................8 ACKAGE CONTENTS ................... 9 XISTING IDEO CAPTURE BOARD ..................9 EFRAGMENTING THE HARD DISK QUICK START ..................... -
Page 4: Troubleshooting
........................126 ARDWARE ........................128 OFTWARE ........................129 IGITIZING ......................130 IDEO EDITING miroVIDEO DC30 series 4.2 / 4.2LE ........131 DOBE REMIERE miroVIDEO DC30 series ..........135 AND COMPUTER ANIMATION JPEG ......................... 135 ISSUES TROUBLESHOOTING miroVIDEO DC30 series User´s Guide... - Page 5 IDEO TECHNICAL DATA ........................151 ENERAL ......................... 152 ONNECTORS APPENDIX A: HARDWARE CONFIGURATIONS miroVIDEO DC30 series ............154 IGITIZING WITH THE miroVIDEO DC30 series......156 IGITIZING AND RECORDING WITH THE miroVIDEO DC30 series ....158 IGITIZING WITH THE AND A SOUND BOARD...
- Page 6 About the User’s Guide This manual explains how to install and use the hardware and software of your miroVIDEO DC30 series product. It also contains many tips and tricks to make optimal use of it. In the margins are subheadings to help you quickly find your way through this Subheadings manual.
-
Page 7: Overview
Pinnacle capture application and Windows 95/98. The miroVIDEO DC30 series is a system of hardware and software, for IBM compatible PCs with a PCI bus, used to digitize, compress, process, and play back video sequences in Motion-JPEG format. The sound is digitized, as well. -
Page 8: System Components
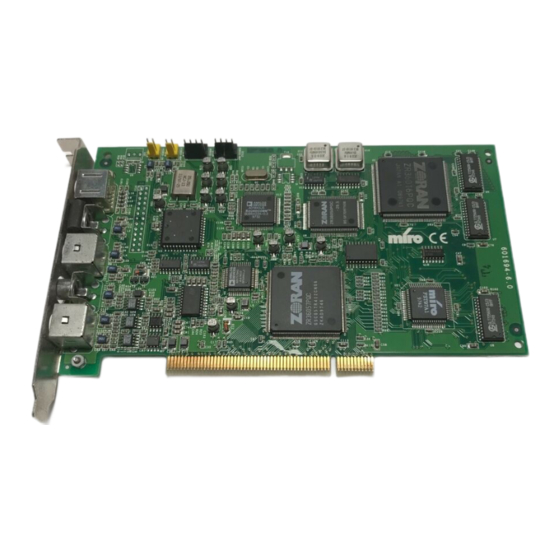
Hardware The miroVIDEO DC30 series hardware is a state-of-the-art PCI video digitizer. The miroVIDEO DC30 series includes a JPEG processor to compress video as well as a video encoder and an audio codec to digitize and decode audio signals. For capturing and playing back the PCI bus mastering mode is used. -
Page 9: What Does The Mirovideo Dc30 Series Offer
DC30 series HAT DOES THE OFFER The miroVIDEO DC30 series system stands out for its quality (Hi8), compression capabilities, performance, and digital video editing capabilities. Combined with a suitable graphics board, the miroVIDEO DC30 series offers digital real-time overlay. Please also see our website (http://www.pinnaclesys.com) for hardware compatibility. - Page 10 Motion-JPEG format. • Optimized bus interface The miroVIDEO DC30 series supports the PCI bus mastering mode and is therefore capable of transferring the uncompressed video data for the video overlay to suitable PCI graphics boards simultaneously to the compressed audio and video data.
-
Page 11: Before You Begin
Before you begin This chapter tells you which computer system components are required for the operation of the miroVIDEO DC30 series, which devices you can connect to the board, and what is included in the miroVIDEO DC30 series package contents. - Page 12 Under Windows 95 / 98 you will find a defragmentation utility under Start, Programs, Accessories, System Tools, Disk Defragmenter. If you use miroVIDEO DC30 series under Windows NT, use a tool you can obtain from your computer store to defragment your hard disk.
- Page 13 Sound board If you use the miroVIDEO DC30 series board under Windows NT, an additional sound board has to be installed in your system. Software Windows 95 (OSR2), Windows 98 or Windows NT 4.0 (SP3 or higher). Support for Windows 2000 is planned.
-
Page 14: Package Contents
Computer components are sensitive to electrostatic charge. Do not take the miroVIDEO DC30 series board out of its antistatic package until you install it. Depending on the delivery scope, the package contents may vary from the contents listed in this manual. -
Page 15: Existing Video Capture Board
You find the Windows 95 / Windows 98 defragmentation utility under Start > Programs > Accessories > System Tools > Disk Defragmenter. If you use miroVIDEO DC30 series under Windows NT, use a utility, which you can obtain from your computer store, to defragment your hard disk. -
Page 16: Quick Start
Detailed configuration options are listed in the appendix, beginning on page I. UICK INSTALLATION Proceed as follows to install the miroVIDEO DC30 series hardware and software: Install Adobe Premiere. ; Place the Adobe Premiere-CD-ROM in your CD-ROM drive. -
Page 17: Video Recording -Quick Start
—Q IDEO RECORDING UICK START Start miroVIDEO Capture. Start miroVIDEO Capture from the miroVIDEO DC30 series program group, or directly from the Desktop if you have selected this option during the installation. Specify the user type. Select the Standard user type. -
Page 18: Playback With Media Player -Quick Start
Proceed as follows to play the edited video sequence on a television or to record it on videotape: Start media playback. Start MediaPlayer from the miroVIDEO DC30 series program group. Select the video output. Use the DC30 series Control to select the video output (Window, S-VHS, Composite video) and define the output standard if required. -
Page 19: Installing Adobe Premiere
The following chapter describes the procedure to install Adobe Premiere You must install Adobe Premiere before installing the miroVIDEO DC30 series board in your computer, because the miroVIDEO DC30 series presets must be copied to the appropriate Adobe Premiere folder during the installation of the miroVIDEO DC30 series software, and software installation starts immediately after the hardware installation. - Page 20 If you ever need to reinstall Adobe Premiere, please remember to run the DC30 series installation again, selecting at a minimum the Presets and Plug-ins. DC30 series will not work correctly if these components are missing. miroVIDEO DC30 Series User´s Guide...
-
Page 21: Installing The Hardware
Installing the Hardware The following chapter explains how to install the miroVIDEO DC30 series into your computer. If you have already installed a video capture board in your computer, you must un-install and remove this board before installing the miroVIDEO DC30 series board. - Page 22 Tighten the screws and reassemble the computer’s casing. Reconnect the cables. The miroVIDEO DC30 series hardware installation is completed. Connect the video/audio devices as described in the next chapter, and install and configure the software as described in the “Installing the software” chapter (see page 20).
-
Page 23: Connecting The Video And Audio Devices
Video and Audio Devices The following section shows you how to connect your video and audio devices (which have to be powered off) to the miroVIDEO DC30 series board. To do so, you need suitable cables. For detailed sample configurations, refer to the Appendix A beginning on page 154. -
Page 24: Connecting Video Devices
Composite video output S-Video output Inputs The miroVIDEO DC30 series has one composite input and one S-Video input, enabling parallel connections of two video sources. The software switches between the video inputs. The composite input is an RCA female connector, the S-Video input is a 4-pin Mini DIN female connector. -
Page 25: Connecting Audio Devices
Out connectors of your adapter. • Connect the Breakout Box cable ends to the corresponding sockets on the miroVIDEO DC30 series board. • Place the Breakout Box in a convenient location. Connect your external video and audio source devices to the panel. -
Page 26: Installing The Software For Windows 95/98
Installing the Software for Windows 95/98 Once you have installed the miroVIDEO DC30 series into your computer, you can install the miroVIDEO DC30 series drivers and software. The installation steps for the Windows 95 (OSR2), Windows 98 and Windows NT are slightly different. -
Page 27: Installing The Drivers For Windows 95
NSTALLING THE DRIVERS FOR INDOWS At this point, the miroVIDEO DC30plus board should already be installed in your computer. To install the drivers for Windows 95, proceed as follows: 1. Switch on computer. Switch on your computer. Windows 95 is started automatically. If your computer is configured in such a way, that Windows 95 is not started automatically, please start Windows 95 now. - Page 28 Switch to your CD-ROM drive and go into the \SETUP directory. Click 7. Click Next. Click on the Next button. 8. Click OK and Browse... again. When your system requests you to insert the CD-ROM again, click on OK and once again on Browse..miroVIDEO DC30 Series User´s Guide...
- Page 29 Proceed with the “Installing the software for Windows 95 / Windows 98” section on page 26. Be sure you have the latest driver! 1. Go to the Pinnacle Systems Website at www.pinnaclesys.com and click on Support. Click on the links to navigate to the...
- Page 30 3. Double-click on the driver updater icon on your desktop to launch the installation program. miroVIDEO DC30 Series User´s Guide...
-
Page 31: Installing The Drivers For Windows 98
NSTALLING THE DRIVERS FOR INDOWS 1. Switch on computer. Switch on your computer. Windows 98 is started automatically. If your computer is configured in such a way, that Windows 98 is not started automatically, start Windows 98 now. After Windows 98 starts, the new hardware is found, and the Add New Hardware Wizard dialog box appears. -
Page 32: Installing The Software For Windows 95 / Windows 98
Œ Custom: Lets you select the components and allows to adjust the settings individually. Choose this option only if several versions of Premiere are installed on your computer or your system hard disk is very slow. miroVIDEO DC30 Series User´s Guide... - Page 33 NTSC. The intro movies help you switch on the VCR just in time when recording video. − Extended presets for Adobe Premiere 4.2 Presets for Adobe Premiere which have been developed especially for the miroVIDEO DC30 series board and the PAL and NTSC standard. Installing the Software for Windows 95/98...
- Page 34 Hardware Test (Windows 95 / 98 Only) After the restart, the miroVIDEO DC30 series Hardware Test program starts. The hardware test program is used to test your miroVIDEO DC30 series hardware and to analyze your computer system. Click on the More>> button to expand the dialog box window to include the Extended Settings area.
- Page 35 DC30 series board in a different slot and test it there. This section displays notes regarding the current hardware of miroVIDEO DC30 Notes series. If the miroVIDEO DC30 series is not working properly, install the video board in a different slot. Installing the Software for Windows 95/98...
- Page 36 Expert If you are installing the miroVIDEO DC30 series for the first time, the hard disk transfer test program will automatically start once the hardware test has been successfully completed. miroVIDEO EXPERT determines your hard disk’s performance capabilities. If you have linked more than one hard disk to your system, test them all and use the hard disk with the fastest data rate for video work.
- Page 37 The hard disk test first examines the speed with which data can be written to, or read from, the hard disk. After this, the test determines the optimum frame format with its corresponding compression factor . Using the PCI storage link data together with your hard drive’s write speed, the program calculates the data rate at which an M-JPEG video sequence with sound can be recorded with no image loss (dropped frames).
- Page 38 Starting the miroVIDEO DC30 series hardware test at a later time There are two methods of starting the miroVIDEO DC30 series hardware test at a later time, to select another language version, receive information about the driver version, or to test the hardware): 1.
-
Page 39: Installing The Software For Windows Nt
Installing the Software for Windows NT 4.0 Once you have installed the miroVIDEO DC30 series into your computer, you can install the miroVIDEO DC30 series drivers and software. The installation steps for the Windows 95 (OSR2), Windows 98 and Windows NT are slightly different. -
Page 40: The Installation Program
Œ Custom: Lets you select the components and allows to adjust the settings individually. Choose this option only if several versions of Premiere are installed on your computer or your system hard disk is very slow. miroVIDEO DC30 Series User´s Guide... - Page 41 − System Software Drivers for Windows NT. − miroVIDEO DC30 series utilities The capture application miroVIDEO Capture for capturing clips, tools, helps and ReadMe file. − Adobe Premiere AddOns Including miroINSTANT Video. miroINSTANT Video allows to save valuable computing time when creating projects with Adobe Premiere.
- Page 42 − Extended presets for Adobe Premiere 4.2 Presets for Adobe Premiere which have been developed especially for the miroVIDEO DC30 series board and the PAL and NTSC standard. − Documentation The User’s guide is also available in PDF format and can be opened with the Acrobat Reader.
-
Page 43: Quick Start Guide For Dc30 Pro
Quick Start Guide for DC30 Pro The following chapter is designed to verify correct operation of your miroVIDEO DC30 Pro installation. Before beginning, be sure you have installed Premiere, the DC30 board, the Breakout Box, the drivers and software. UDIO OOPTHROUGH 1. - Page 44 3. Click on the Record tab. Start your VCR or video source. 4. Do you hear audio from your TV monitor speakers? YES Go on to the Video Loopthrough Test. NO Go to the Breakout Box setup section and check your connections. miroVIDEO DC30 Series User´s Guide...
-
Page 45: Video Loopthrough Test
IDEO OOPTHROUGH 1. Open miro VIDEO Capture. Go to Start > Programs > DC30 Series > miro VIDEO Capture. NEW PROJECT BUTTON 2. Start a new project. Press the New Project Button on the Projects tab. 3. Click on the Settings tab. Check the settings for correct input selection and audio level. - Page 46 4. Click on the Record tab. Start your VCR or video source. 5. Do you see video on your TV monitor? YES Go on to the Video Capture Test. NO Go back to the Breakout Box setup section and check your connections. miroVIDEO DC30 Series User´s Guide...
-
Page 47: Video Capture Test
IDEO APTURE 1. Open miro VIDEO Capture. Go to Start > Programs > DC30 Series > miro VIDEO Capture. NEW PROJECT BUTTON 2. Start a new project. Press the New Project Button on the Projects tab. 3. Click on the Settings tab. Check the settings for correct input selection and audio level. - Page 48 7. Click on the Record Button. 8. Are dropped frames are reported on the Record tab (below the Preview window)? YES Go on to Step 9. NO This test is done. Go on to the Video Edit Test. miroVIDEO DC30 Series User´s Guide...
- Page 49 DATA RATE SLIDER 9. Click on the Settings tab. 10. Move the slider left to reduce the data rate. 11. Repeat the Video Capture Test (Steps 1 thru 7). 12. Are dropped frames are reported on the Record tab? YES Go on to Step 13. NO This test is done.
-
Page 50: Video Edit Test
2. From the pulldown menu, select Project > Settings > General. In the New Project Settings dialog box, click the Load button. 3. Choose the NTSC DC30 640x480 4MB setting and click the OK button. miroVIDEO DC30 Series User´s Guide... - Page 51 The frame size in Project Settings must match the frame size (Resolution) in the miroVIDEO Project tab. 4. Click the OK button on the New Project Settings dialog box. 5. From the pulldown menu, select File > Import > File to import a clip. 6.
-
Page 52: Video Output Test
2. From the pulldown menu, select Project > Settings > General. In the New Project Settings dialog box, click the Load button. 3. Choose the NTSC DC30 640x480 4MB setting and click the OK button. miroVIDEO DC30 Series User´s Guide... - Page 53 The frame size in Project Settings must match the frame size (Resolution) in the miroVIDEO Project tab. 4. Click the OK button on the New Project Settings dialog box. 5. From the pulldown menu, select File > Import > File to import a clip. 6.
-
Page 54: Using The Dc30 Board Under Windows 95 / Windows 98
This chapter provides an introduction into working with the miroVIDEO DC30 series. You can find additional information about working with the miroVIDEO DC30 series in the “Tips & tricks” section (page 126). Important: If you use Windows NT, skip this chapter and see “Using the DC30 Board Under Windows NT”... -
Page 55: The Dc30 Series Control
Œ PAL M (Brazil) Œ PAL N (Argentina) Œ NTSC 4.43 MHz. With miroVIDEO DC30 series no standard conversion is possible. That is clips digitized and edited PAL video only be output in PAL format. The same applies to NTSC. - Page 56 This gives advantages when working with certain applications, for example, when scrubbing with Premiere 4.2. More The More >> button enlarges the DC30 series Control by the Overlay Settings and AVI Cache Settings sections. miroVIDEO DC30 Series User´s Guide...
- Page 57 This indicates that the video is played back simultaneously at the outputs of the miroVIDEO DC30 series, but here, of course, without logo. The setting of the overlay resolution as well as the logo setting only refer to the Overlay Surface function.
- Page 58 Limiting the image quality and the amount of data only refers to the playback in the window: the high quality of miroVIDEO DC30 series during video editing and playback will not be affected. Low resolution If the described image interference still occur when the option Medium resolution has been chosen, try the option Low resolution.
-
Page 59: Live Overlay
For displaying in overlay mode several MBs of image data must be transmitted per second to your graphics board by miroVIDEO DC30 series via the PCI bus. This is no problem for state-of-the-art PCs and graphics boards. If your system does not offer the necessary performance, image interference might occur in the video window. - Page 60 If the selection of High resolution causes the image interference, described above, choose the option Medium resolution. Via this option the video is transferred from the miroVIDEO DC30 series to the graphics board with a reduced quality and a reduced amount of data. This reduces the strain on the bus, so that image interference should be avoided.
-
Page 61: S Ound Settings
DC30 series board. Internal Lets you adjust the input level and the balance for the device you connected to the internal miroVIDEO DC30 series audio input (such as the audio cable of a CD-ROM drive or a sound board). External Lets you adjust the input level and the balance of the connected device (a VCR, for example) with the miroVIDEO DC30 series board. - Page 62 ΠAudio Loopthrough If you activate the check box Audio loopthrough, the audio signal that is present at the audio input of the miroVIDEO DC30 series will also be looped through to the audio output of the miroVIDEO DC30 series.
- Page 63 Internal Lets you adjust the input level and the balance for the device you connected to the internal miroVIDEO DC30 series audio input (such as the audio cable of a CD-ROM drive or a sound board). External Lets you adjust the input level and the balance of the connected device (a VCR, for example) with the miroVIDEO DC30 series board.
- Page 64 Advanced Controls from the Options menu. Œ Mic. Boost On The Mic. Boost On button lets you enable an additional amplification of 20 dB for the external input, if you want to connect a microphone. miroVIDEO DC30 Series User´s Guide...
-
Page 65: R Ecording Video
ECORDING VIDEO Video capture: source settings Depending on the application you use for capturing video, there are several ways to access the DC30 series Video Input settings dialog box. Adobe Under Premiere 5.1 select the File menu and the commands Capture and Movie Premiere 5.1 Capture. - Page 66 If your player is also your recording device, connected to the video input as well as to the video output of the miroVIDEO DC30 series, deactivate the Video loopthrough check box in order to avoid video feedback.
- Page 67 The Defaults button restores all default settings. The default settings have the value 0. Video capture: format settings Depending on the application you use for capturing video, there are several ways to access the DC30 series video format settings dialog box. Adobe Under Premiere 5.1 select the File menu and the commands Capture and Movie Premiere 5.1...
- Page 68 When clicking Cropping >> the Cropping field is added to the window. Here you can view the compression factor (with reference to the data rate). If you change the image settings, the compression factor changes automatically. miroVIDEO DC30 Series User´s Guide...
- Page 69 Quality adjustments Here, you determine the amount of data of the compressed video and thus the quality. The entries for compression, data rate, frame size, and capture time depend on each other. Compression The slider Compression helps you to determine the compression factor. This factor reduces the amount of data of the digitized video sequence compared to the uncompressed data during capture.
- Page 70 CAUTION: there is only one board and only one driver. In other words, any settings you specify in a program that accesses the miroVIDEO DC30 series, will automatically apply to all other programs that operate with the miroVIDEO DC30 series and the associated driver.
-
Page 71: Using The Dc30 Board Under Windows Nt
Control while a movie is running. This change only takes effect after you restart the playback procedure. Select the Start menu, the miroVIDEO DC30 series program group and the DC30 series Control command to start the control application. Make the desired settings: Video format Select the desired video standard. -
Page 72: Video Output
Overlay Determine if you want to view an overlay during recording and playback or not. The miroVIDEO DC30 series board supports the PCI overlay using the Overlay Surface. When using Primary Overlay, clipping is not possible. When you move another window over the overlay window, the overlapping section will remain in the overlay window. -
Page 73: Audio Output
This is caused by overloading of the PCI-Bus. In this case, activate the check box PCI bus adaptation. If this option is activated, the miroVIDEO DC30 series board uses a different operating mode for data transmission on the PCI bus, which may eliminate picture interference under some circumstances. -
Page 74: Mirovideo Capture
Capture will organize the clips into separate folders for you. If you use Windows NT, you must use miroVIDEO Capture in order to capture video with a miroVIDEO DC30 series product, as other capture applications are not supported. miroVIDEO C... -
Page 75: Projects -Standard
• Select Advanced if you are experienced in video editing and if the concepts “data rate”, “compression” and “cropping” are not new to you. —S ROJECTS TANDARD A project consists of a compilation of video clips which have the same settings (video quality, video standard, resolution). - Page 76 CD-ROM (2x) the lowest quality. Frames/Sec The video standard you selected determines the frames per second: Œ PAL / PAL N / SECAM: 25 frames/sec Œ NTSC / NTSC 4.43 / PAL M: 29,97 frames/sec. miroVIDEO DC30 Series User´s Guide...
-
Page 77: Projects -Advanced
Resolution The quality setting determines the resolution: PAL / PAL N / Secam NTSC / NTSC 4.43 / PAL M Quality Format Format S-VHS, Hi8 720 x 540 608 x 456 720 x 540 608 x 456 CD-ROM (16x) 384 x 288 320 x 240 CD-ROM (2x) 384 x 288... - Page 78 This will help you avoid problems when editing the clips later. You have two possibilities to select new settings: Œ Delete the project and create a new project with the desired settings. Œ Delete all files in the Clips tabs and make the desired settings. miroVIDEO DC30 Series User´s Guide...
- Page 79 Video Under Video you can select the settings for your captured video clips: Video standard Here you can select the video standard: PAL, NTSC, SECAM, NTSC 4.43 (NTSC video signal, PAL color carrier), PAL M (Brazil) or PAL N (Argentina). Depending on the installed Windows version, one video standard has been pre- selected.
- Page 80 704 x 576 (PAL / PAL N /SECAM) or 704 x 480 (NTSC / NTSC 4.43 / PAL M) resolution. • Select Square if you want to use the 4:3 pixel format. • Select ITU-R.601 if your video device supports this studio standard. miroVIDEO DC30 Series User´s Guide...
- Page 81 If you selected the ITU-R.601 pixel ratio, the captured video clip looks a bit squashed on the computer display. Please keep this in mind when editing the clip with a video editing program. When the clip is played back on a TV or recorded with a VCR, the original image proportions will be restored.
-
Page 82: Settings -Standard
Click the Video input button repeatedly to specify whether an S-Video device, a composite device, or an internal video source is connected to your video capture board. The button icon changes to reflect the selected option. miroVIDEO DC30 Series User´s Guide... -
Page 83: Data Rate
Video output Click the Video output button repeatedly to specify whether an S-Video device or a composite device is connected to your video capture board. The button icon changes to reflect the selected option. Data rate This tab displays the quality of the final video clip you selected under Project. It also displays the data rate (KB) and the compression factor. -
Page 84: Settings -Advanced
Click the Video input button repeatedly to specify whether an S-Video device, a composite device, or an internal video source is connected to your video capture board. The button icon changes to reflect the selected option. miroVIDEO DC30 Series User´s Guide... - Page 85 Video output Click the Video output button repeatedly to specify whether an S-Video device or a composite device is connected to your video capture board. The button icon changes to reflect the selected option. Image settings Here you can select the Brightness, the Contrast, the Saturation, the Sharpness and the Hue (the latter for NTSC only).
- Page 86 Measures the speed of the specified hard disk. Œ Update Determines the free hard disk space and changes all resulting data accordingly. Œ Do not use for capturing Excludes the selected directory as capturing directory. miroVIDEO DC30 Series User´s Guide...
-
Page 87: Record -Standard
—S ECORD TANDARD The Record tab lets you record and playback video clips. The current settings are displayed in the top right corner. Recording clips • Click the Start recording ( ) button to start recording: The Start recording button then changes to a Stop recording ( ) button. -
Page 88: Record -Advanced
The frame is copied into the Windows Clipboard and can be pasted into any picture editing application. —A ECORD DVANCED The Record tab lets you record and playback video clips. The current settings are displayed in the top right corner. miroVIDEO DC30 Series User´s Guide... - Page 89 Recording video clips • If you want to limit the recording duration, enable the Capture time check box and specify the desired duration. If the resulting clip size exceeds the hard disk capacity, the duration will be reduced automatically to the maximum recording time available.
-
Page 90: Batch Capture -Advanced (Windows 95/98 And Productivity Pack Only )
Rewinds to the beginning of the tape. Fast forwards to the end of the tape. Winds the tape to its beginning displaying the clip. If the VCR is in pause mode, you can step backward by single frames. miroVIDEO DC30 Series User´s Guide... - Page 91 Winds the tape to its end displaying the clip. If the VCR is in pause mode, you can step forward by single frames. The Jog Shuttle Use the Jog Shuttle slider to search the video tape in both directions at four velocities.
- Page 92 − Select all Selects all clips you want to be captured. The symbol appears in front of the clip names. miroVIDEO DC30 Series User´s Guide...
-
Page 93: Clips
− Deselect all Deselects all clips. The symbol disappears. − Select all unrecorded Selects all clips which have not been recorded so far: the symbol appears in front of the clip names. − Select all recorded Selects all recorded clips: the symbol appears in front of the clip names. −... - Page 94 Mark as playlist Creates a list from selected video clips you want to play back. Add to playlist Adds the currently selected files to a list. Remove from playlist Removes all selected files from a list. miroVIDEO DC30 Series User´s Guide...
- Page 95 Select all Selects all files in the list. Deselect all Deselects the files. Select invalid Deletes all files from the list which have been removed or which are empty. Rename Renames the selected file. Delete Deletes the selected files from the hard disk. miroVIDEO Capture...
-
Page 96: What Is Miroinstant Video 5
This results in a maximum project duration of less than 7 minutes when working at a data rate of 5 MB/sec, for example. Using miroINSTANT Video 5, the maximum project duration is 3 hours. This makes long format work on a PC possible. miroVIDEO DC30 Series User´s Guide... -
Page 97: System Requirements
In order to use miroINSTANT Video 5, you must have installed three things in your PC: ΠA Pinnacle video editing board that supports INSTANT Video 5, like the miroVIDEO DC30 series. ΠAdobe Premiere 5.1. ΠDriver software for the video editing board that supports and includes INSTANT Video 5. -
Page 98: How Does It Work
However, it may be hidden by Premiere’s floating tool palettes. Move the palettes to see and access the INSTANT Video 5 window. The window indicates by it’s existence that miroINSTANT Video 5 is active. miroVIDEO DC30 Series User´s Guide... - Page 99 “Modes of Operation / Audio Output” (page 96) of this Guide. Film strip Below the Pinnacle Systems logo there is a horizontal film strip. This acts as an indicator for the INSTANT Video 5-playability of the whole project. If all images in the strip are black, then the whole project from the beginning to the end of the timeline can currently be played by miroINSTANT Video 5.
- Page 100 By default, audio scrubbing is switched on. This means, if your project contains scrubbing audio, you will hear the audio playback when playing clips or the whole project, as well as when scrubbing within the project. See the Premiere 5.1 manual for details on scrubbing and playing. miroVIDEO DC30 Series User´s Guide...
-
Page 101: Modes Of Operation
This is the standard Premiere 5.1 behavior, but it results in a slight performance loss when scrubbing sections of audio that have not previously been rendered (see the Premiere 5.1 manual for details on audio rendering and how to see which parts have been rendered). - Page 102 Premiere. The audio is output through the standard audio device in all other cases, when you: Œ Do scrubbing, if the audio scrubbing is not switched off in the miroINSTANT Video 5 menu. miroVIDEO DC30 Series User´s Guide...
- Page 103 ΠPlayback in the program monitor, and some parts of the audio in the work area have not yet been rendered by Premiere. ΠPlay a clip in the source monitor or clip window that has an incompatible format. Rendering previews You have read that the miroINSTANT Video 5 behavior depends on whether the audio and video effects have been rendered.
-
Page 104: Limitations
ΠRequired audio settings 44.1 kHz 16 bit stereo. ΠSupported video and compression formats See miroVIDEO DC30 series presets. When using Windows 9x, miroVIDEO DC30 can act as default audio device and handle all audio output. ΠOperating system Windows 95 OSR 2.1 or Windows 98 recommended. -
Page 105: Changes From Previous Versions
HANGES FROM REVIOUS ERSIONS miroINSTANT Video 5 for Premiere 5.1 differs substantially from the previous miroINSTANT Video 2.0 for Premiere 4.2 and 4.2LE. The new version does not work with any version of Adobe Premiere before 5.1. There is no longer an item in the Premiere menu to call miroINSTANT Video 5, nor a special miroINSTANT Video play window. -
Page 106: Titledeko
Introduction TitleDeko is a plug-in program for Adobe Premiere 5.1 or higher. This plug-in is designed to work with your miroVIDEO DC30 series board. As an integrated title editor program, TitleDeko allows you to create professional quality titles and graphics quickly and easily. Titles can contain words, shapes, background colors, and photos or graphics imported from other programs. -
Page 107: Installing Title Deko
NSTALLING ITLE To install TitleDeko, proceed as follows: 1. Switch on the computer. If you have not done so already, switch on the computer. 2. Insert CD-ROM. If have not done so already, insert the TitleDeko installation CD in your CD-ROM drive. -
Page 108: The Title Deko User Interface
“video safe area” always visible in the final movie. Preset Styles A Preset Styles window shows the style presets that can be applied to text and other objects. You can modify the Preset Styles and create new ones. miroVIDEO DC30 Series User´s Guide... - Page 109 Status Line A Status Line provides information about the tool in use, text cursor coordinates, movement setting (Coarse or Fine), and so forth. Tool Functions At the top and left of TitleDeko are Toolbars that offer fast access to frequently used TitleDeko functions.
- Page 110 Depending on the object handle selected, these controls have different functions. Move the cursor over the object. The cursor shows the active function. Text Kerning/Leading Spreads text lines vertically (leading), or adds/removes space between individual letters and words horizontally (kerning). miroVIDEO DC30 Series User´s Guide...
- Page 111 Add Rectangle, Ellipse Click to add these shapes. Insert Picture Click to insert an image from your hard disk or other media. Pictures are treated like other objects in that you can move, scale and size them. You cannot, however, skew or rotate a picture. Replace Background Allows you to make adjustments to the color, opacity and other details of the background.
-
Page 112: Selecting Text And Objects
To select a single word or object • Double-click the word or object. Or, use the arrow keys to move the cursor to the beginning or end of the word, then hold Shift and press the right or left arrow. miroVIDEO DC30 Series User´s Guide... -
Page 113: Formatting Text And Objects
• A selection border with handles appears around the word or object. To select a random section of text spanning more than one line • Drag across, then down or up the text, or diagonally. • Or, position the cursor at the beginning or end of the desired selection area, and press arrow keys while holding the Shift key. - Page 114 The Justify button provides the same Bottom, Middle, Top functions as does the Justify menu, and also has Left, Center, Right controls for each. Click the Justify button to display a grid that resembles a tic-tac-toe grid. To use the grid, miroVIDEO DC30 Series User´s Guide...
-
Page 115: Tools And Selection Handles
select the text or object, and click the button that indicates how you want the text justified, or where you want the object positioned. Keypad The numeric keypad also emulates the functions of the grid, and thus offers a quick way to position or justify text and other objects, which is particularly useful if you have many repetitions to do. - Page 116 Leading is the amount of space between lines of text. To change the leading, click the Kerning/Leading button, select the text, and use the cursor to drag one of the handles above or below the text block. miroVIDEO DC30 Series User´s Guide...
-
Page 117: Transforming Text And Objects
Layers Layers allow you to put one object in front of another. To move a layer forward or backward, select the object. From the Layer menu, choose one of the menu commands such as Layer > Send Back One Layer, or press its command key equivalent (<Ctrl>... -
Page 118: Using And Modifying Looks And Styles
Applying Looks to Text and Objects To select and change looks, click the Looks button. The Looks browser graphically displays the looks you can pick. Just double- click the look you want. miroVIDEO DC30 Series User´s Guide... - Page 119 Editing Looks To create your own custom effect, change the detail attributes of the current look. You cannot save your changes in the Looks browser. However, you can save them as part of a style. Details Each look detail (face, edge or shadow) has its own set of attributes such as color, size and blur, which you change to create a custom look.
- Page 120 You can replace any of the 24 Preset Styles with a style of your own. Create text or an object with the attributes you want for your new style. right-click on the Preset Style you wish to replace. Select Deposit Current Style Here. miroVIDEO DC30 Series User´s Guide...
-
Page 121: The Background
ACKGROUND Backgrounds fill the screen behind all the text and objects. Titles can have a transparent background, in which case the text and objects appear directly on top of the video. They can alternatively have a solid or gradient color background. - Page 122 To select color and opacity for a solid or gradient background, click on the corresponding Color button. The Color Picker appears. Except for opacity, the choices in this screen are self-explanatory and conform to Windows Color Picker standards. miroVIDEO DC30 Series User´s Guide...
-
Page 123: Let
Opacity The following illustrations show that, as you adjust the Opacity slider down from 100%, the background becomes increasingly transparent. ’ AKE A ITLE Example 1 creates a basic title and inserts it into the Timeline in Adobe Premiere. Examples 2, 3,and 4 build on this basic title to show more advanced TitleDeko features. - Page 124 3. Select the text. Press <Ctrl> + <A> to select the text. A selection box, with handles on its sides, now surrounds the text. miroVIDEO DC30 Series User´s Guide...
- Page 125 4. Apply a Preset Style to the text. A sampling of styles is displayed in the window to the right of the Preview Area. (If the Style window is not visible, select View > Preset Styles.) Scroll down to number 5 and click it. 5.
- Page 126 To center the text, click the Horizontal Justify button to display its pop-up choices. Click the center button. 8. Check your progress. Your title is centered, and appears as follows: 9. Save the title. Click the Save button to save the Still. miroVIDEO DC30 Series User´s Guide...
- Page 127 10. Return to Adobe Premiere. Press <F12> to accept the title and return to Adobe Premiere. Trim the title. You return to Adobe Premiere from TitleDeko. Adobe Premiere places the title in the Project window. From here, drag the title to the Timeline and place it on Video 2, or the top video channel.
- Page 128 (except on the handles) so the cursor is a Move symbol that looks like a cross. Experiment with moving the text. 3. Rotate the text. Click the Rotate/Skew button. Rotate the text. miroVIDEO DC30 Series User´s Guide...
- Page 129 4. Apply a combination of formatting techniques. In the following illustration, Style 4 was applied to the text. The selection was rotated, made bold, and resized. The Rotate/Skew tool was used to skew the text, by grabbing the upper right handle with the Skew cursor. 5.
- Page 130 Clip Speed window. Click OK. Selecting Roll or Crawl allows you to use more text than will fit in the video safe area. Select File > Scrollable to roll or crawl additional text. miroVIDEO DC30 Series User´s Guide...
- Page 131 Example 4: Creating a Scrollable Crawl In this example, you launch TitleDeko and create a scrollable crawl. This will allow the title to crawl horizontally from the left of the screen, toward the right. You also trim the title from the Main Menu Bar of Adobe Premiere. 1.
-
Page 132: Tips & Tricks
To counteract this problem, use the Video Settings dialog box to reduce the sharpness. ARDWARE To use the miroVIDEO DC30 series effectively, your hardware must be optimally prepared and configured. Hard disk Since recording video sequences with S-VHS quality produces approximately 2,500 to 3,000 KB/sec of compressed data, your hard disk must be large and fast enough to handle the data rate. - Page 133 However, UW SCSI hard disks are faster and therefore more suitable for digital video at very high data rates. The more RAM you have, the better miroVIDEO DC30 series works. To run Adobe Premiere 5.1, you need at least 32 MB. 64 MB are recommended.
-
Page 134: Software
Newest drivers If you have also installed a graphics board in your computer together with the miroVIDEO DC30 series, always use the newest driver. If necessary, ask your dealer or obtain the drivers directly from your reseller. Color depth adjustment... -
Page 135: Digitizing
When media playback is running, no other video capture or video editing program will run because media playback keeps the miroVIDEO DC30 series AVI driver open at all times. Opening media playback is enough to open the driver! -
Page 136: Video Editing
You may have to change some colors or perform a smoothing on the images to get good looking results. Important: Always preview your work on a TV set if you plan to do a tape production, as the PC screen display is not the same. miroVIDEO DC30 Series User´s Guide... -
Page 137: Mirovideo Dc30 Series And Adobe Premiere
Whichever resolution you use to digitize a video sequence, the standard size setting used by Adobe Premiere Preview is 320 x 240. Use one of the miroVIDEO DC30 series defaults that was copied to your hard disk during installation. If you installed Adobe Premiere after the miroVIDEO DC30 series, you can go back later and install the project default files (presets). - Page 138 4. Specify the correct number of frames per second (PAL = 25; NTSC = 30). 5. If necessary, define the number of frames after which you want to save a keyframe (not available with MJPG). 6. Specify that you do NOT want to use Optimize still frame. miroVIDEO DC30 Series User´s Guide...
- Page 139 Working with multiple video windows When working with Adobe Premiere, please remember that only one program can access the miroVIDEO DC30 series hardware and software at any given time. If you have several video windows open, the movie will only play back in the currently active window.
- Page 140 Adobe’s website for registered customers. Generally use one of the miroVIDEO DC30 series defaults that was copied to your hard disk during installation. If you installed Adobe Premiere after the miroVIDEO DC30 series, you can go back later and install the project default files (preset).
-
Page 141: Mirovideo Dc30 Series And Computer Animation
JPEG ISSUES If you capture or create video with your miroVIDEO DC30 series board at a too low data rate, you may see image degradations like these: • A checkerboard pattern appears at sharp color transitions and edges (light –... -
Page 142: Troubleshooting
If this message does not appear during startup, install the miroVIDEO DC30 series in a different PCI slot. If this still does not solve the problem, either the miroVIDEO DC30 series is defective or the video board is having problems with your system’s motherboard. - Page 143 DC30 series area. You must change the graphics board mapping manually. If the miroVIDEO DC30 series memory area is located directly after one of the graphics board’s memory areas, you must use the device manager to move the graphics board memory resources to a different area. For example, the current...
-
Page 144: Operation
This problem is not caused by the miroVIDEO DC30 series, but is the result of the manner in which the hard disk operates and interacts with other system components. -
Page 145: Problems Playing Back And Editing Videos
Capture application (miroVIDEO DC30 series program group, or desktop) to capture AVI files. When recording video sequences, capture them directly to the hard disk and not to your computer’s virtual memory. Inadequate image quality. Compression is set too high or the data rate is set to low. -
Page 146: Vid Cap
To do this, instead of connecting the audio cable to the audio inputs of the miroVIDEO DC30 series, connect them directly to your television set (or to an unused input of an amplifier). If you do not hear any... - Page 147 DC30 series. 5. Now make sure that the miroVIDEO DC30 series is selected as the audio recording device in Windows. To do this, start the audio mixer by double clicking on the loudspeaker icon in the taskbar.
- Page 148 DC30 series is too loud. In this case, reduce the initial volume of the source, if possible. If this is not possible, you can insert an audio mixing board between the source and the miroVIDEO DC30 series and reduce the volume in this way.
- Page 149 DC30 series is selected as preferred device in the Control Panel (Start menu, Preferences, Multimedia; Audio tab). 4. Use the one of the included miroVIDEO DC30 series project settings for Premiere without modification. Always use the 44.1 kHz 16-bit stereo format for audio recording and playback.
-
Page 150: Adobe Premiere
The miroVIDEO DC30 series project presets are not displayed when starting Premiere. Start the installation program and install the presets. 1. Place the miroVIDEO DC30 series CD-ROM in your CD-ROM drive. If the installation program is not started automatically, select the Run… command from the Start menu. -
Page 151: Windows
If this message does not appear during startup, install the miroVIDEO DC30 series in a different PCI slot. If this still does not solve the problem, either the miroVIDEO DC30 series is defective or the video board is having problems with your system’s motherboard. -
Page 152: Windows Nt
The miroVIDEO DC30 series driver outputs the following error messages in case of malfunctions: DC30 series device not found - 0x0001. No miroVIDEO DC30 series board has been installed in your computer or the hardware is defective. Install the miroVIDEO DC30 series. - Page 153 If this does not solve the problem, another I22-based board is installed in your computer. Insert the miroVIDEO DC30 series board in a PCI slot which is located in front of the other hardware.
- Page 154 If this does not solve the problem, another I22-based board is installed in your computer. Insert the miroVIDEO DC30 series board in a PCI slot which is located in front of the other hardware.
-
Page 155: Miroinstant Video
Video only supports M-JPEG coded clips. Please use the make/make movie. There are clips in the project that are not in the miroVIDEO DC30 series Motion JPEG format. Bitmaps, stills, animations, etc. fall into this category. Open the project. Find all clips in the project that are not in the miroVIDEO DC30 series Motion JPEG format. - Page 156 Select the multitrack button from the toolbar of the Construction Window. All selected video clips can then be moved without Premiere forgetting where the effects have been inserted. The Edit menu item and the Select all command let you move the whole project. miroVIDEO DC30 Series User´s Guide...
-
Page 157: Technical Data
Technical Data ENERAL Board 32-bit PCI board with bus-mastering JPEG Processor ZORAN ZR36050 Power supply Standby: 4 Watt Operation: 7 Watt System Pentium or compatible PC with at least 200 MHz (300 MHz or more requirements recommended) with a free PCI slot At least 32 MB memory (64 MB recommended). -
Page 158: Connectors
You can select the inputs, using the software. The video is output on both outputs in parallel. Audio inputs/audio outputs Y adapter The Y adapter has an 8-pin Mini DIN-connector and four RCA jacks. Audio Out Audio Out Audio In 8-pin Mini DIN Audio In miroVIDEO DC30 Series User´s Guide... - Page 159 Connector data Audio Sampling rate: Max. 44,1 kHz inputs/outputs Resolution: 16 bit linear per channel Frequency range: 20 Hz to 20 kHz ± 3dB Signal-to-noise ratio: >82dB Audio input Impedance: 20 kOhm (Slot shield) Input amplification: For microphone sensitivity + 20dB (adjustable via software, for dynamic microphones) For Line sensitivity 0 dB (adjustable...
-
Page 160: Appendix A: Hardware Configurations
Appendix A: Hardware Configurations Depending on the operating mode, the miroVIDEO DC30 series can be used in different configurations. The following pages explain the different connections. Make sure you always connect the inputs/outputs of the same type: Only connect an S-Video output to a S-Video input or a composite output to a composite input. - Page 161 The miroVIDEO DC30 series digitizes and compresses the input signal (video and audio) and saves the signal to the hard disk. The miroVIDEO DC30 series routes the output signal (video and audio) to the TV monitor or video monitor. When recording video, the video is displayed on the TV monitor.
-
Page 162: Igitizing And Recording With The
Monitor Connections The miroVIDEO DC30 series video input and the miroVIDEO DC30 series output connect to the same VCR or camcorder. The second VCR output connects to a TV monitor. If your video source has an S-Video output, use this connector instead of the composite output because higher quality will be provided. - Page 163 During editing the graphics board outputs a preview which the computer monitor and the TV monitor display. The miroVIDEO DC30 series outputs the final video to the VCR which then records the video in VHS quality. The VCR outputs the recorded video sequence to the TV monitor.
-
Page 164: Digitizing With The Mirovideo Dc30 Series And A Sound Board
Connect the internal miroVIDEO DC30 series audio output (ST12) (see. miroVIDEO DC30 series board layout on page 17) to the audio input of the sound board using a suitable cable. The audio input may be located at a different place on the sound board than outlined in the diagram (see diagram on the previous page). -
Page 165: Digitizing And Recording With The Mirovideo Dc30 Series
The miroVIDEO DC30 series digitizes and compresses the input signal and saves the signal to the hard disk. The miroVIDEO DC30 series routes the output signal to the TV or video monitor. When recording video, the video is displayed on the TV monitor and the sound is output to the speakers connected to the sound board. - Page 166 Connect the internal miroVIDEO DC30 series audio output (ST12) (see. miroVIDEO DC30 series board layout on page 17) to the audio input of the sound board using a suitable cable. The audio input may be located at a different place on the sound board than outlined in the diagram.
-
Page 167: Appendix B: Glossary
Appendix B: Glossary Multimedia terminology contains computer and video terminology. The most important terms are defined in the following. Cross references are marked with . Aliasing An inaccurate display of an image due to the limitations of the output device. Typically, aliasing appears in the form of jagged edges along curves and angled shapes. - Page 168 The measurement of the speed at which information passes between storage rate mediums, (ex. CD ROM or Hard Disk), and the display device, (ex. Monitor or MCI device). Depending on the devices used, some transfer rates may offer better performance than others. miroVIDEO DC30 Series User´s Guide...
- Page 169 The way an image is internally described and represented by a computer. The Data type data type of an image controls the amount of information that the image can retain and therefore its displayed appearance. Ulead programs read and write the following types: Black &...
- Page 170 Mark In / Mark In video editing, the mark in and mark out times refer to the starting and ending time codes that identify the portions of clips to be included in the project. miroVIDEO DC30 Series User´s Guide...
- Page 171 A mask isolates a portion or portions of an image for editing. By using a mask, Mask you can protect parts of an image from unwanted changes. A special kind of mask allows you to use grayscale values to control how much protection is applied to an area.
- Page 172 System commonly used for home VCRs to record and play back images and sound using a ½” tape. VH systems use composite signals consisting of brightness and color information. VISCA A protocol used by several devices for controlling external video sources from computers. miroVIDEO DC30 Series User´s Guide...
- Page 173 Video system using a 8 mm tape. Video-8 Video 8 recorders generate composite signals. Video decoder Converts analog signals into digital information. Video encoder Converts digital information into analog signals. Video for Video for Windows is a Microsoft Windows system extension which records, Windows stores and to plays back video sequences from hard disk ( digital video).
-
Page 174: Appendix C: Support Questionnaire
Motherboard: ___________________ chip set: _________________ Processor: Manufacturer: ________________ Type:_____________ _____ MHz Dual CPU 2. At which clock rate does your computer operate? _____ MHz At which clock rate does the I/O bus operate? _____ MHz miroVIDEO DC30 Series User´s Guide... - Page 175 3. How much memory are installed in your computer? _____ MB RAM 4. Which Microsoft Windows version do you use? Windows 95 Version: _________ Windows 98 Version: _________ Windows NT Version: _________ Service Pack: ___________ Windows 2000 Version: _________ Computer peripheral 1.
- Page 176 5. Which video editing software do you use? 1. Manufacturer: ___________________ , version:_________________ 2. Manufacturer: ___________________ , version:_________________ 6. Which audio device do you use? miroVIDEO DC30 series Other sound board Manufacturer and type: __________________________________ miroVIDEO DC30 Series User´s Guide...
- Page 177 In addition to the questionnaire, please fax us a printout of your computer configuration (the printout of the device manager, if you use Windows 95 / Windows 98). Thank you very much for your cooperation and for answering the questions! Kind regards, Your Pinnacle Systems team Appendix C: Support Questionnaire...
-
Page 178: Appendix D: Fcc Compliance Statement
(1) this device may not cause harmful interference, and (2) this device must accept any interference received, including interference that may cause undesired operation. miro Computer Products AG miroVIDEO DC30 series Tested To Comply With FCC Standards FOR HOME OR OFFICE USE miroVIDEO DC30 Series User´s Guide... -
Page 179: Declaration Of Conformity
1992 (ICE 801-2,-4 / ENV50140 / ENV 50141) Dieser Erklärung liegt zugrunde: Prüfbericht(e) des EMV-Prüflabors This certification is based on: Test report(s) generated by EMI-test laboratory Aussteller Pinnacle Systems GmbH / Holder of certificate Carl-Miele-Str. 4 D - 38112 Braunschweig Braunschweig, 16. Februar, 1999 Braunschweig, February 16 , 1999 ... -
Page 180: Index
Contrast 79 Bitmap 161 Control line 162 Black and white 161 Control point 162 Blur 113 Coordinates 103 Bold 103, 107, 108 Copy 103 Brightness 79 Crawl 103, 117, 125 Bring Forward One Layer 105 miroVIDEO DC30 Series User´s Guide... - Page 181 Create 118, 124, 125 Frame 163 Frame content Cropping 130, 131, 134, 162 Cursor 103, 104, 105, 106, 107, highly detailed 126 low level of detail 126 109, 110, 111, 112, 122 Cut 103 Frame rate 163 Frame size 131, 134, 163 Full 73 Full justification 109 Data quantity 126...
- Page 182 DC30 Control 49 Point size 108 miroVIDEO Expert 30 Position object 109 miroVIDEO EXPERT 30 Power supply 151 miroVIDEO EXPERT 2, 127, Preset 131, 134 Preset Styles 102, 107, 108, 114, miroVIDEO-Expert 77, 80 119, 124, 125 miroVIDEO DC30 Series User´s Guide...
- Page 183 Presets 2, 20, 33, 144 Preview 131 Saturation 79 Preview Area 100, 102, 119, Save 103, 120 124, 125 Save button 123, 124, 125 Prime colors 165 Scale 105 Processor 151 Scaling 111, 166 Project 68, 69, 71, 100, 101, Screen saver 129 118, 124, 125 Scrollable 117, 124, 125...
- Page 184 Width 111 Characteristics 103 Window 114 Windows 98 25 Underline 103, 108 Undo 104 Y adapter 7, 152 Undo/Redo 104 Y/C 167 User interface 100, 102 Y-Adapter 19, 155, 157, 158 User type 68 YUV 167 miroVIDEO DC30 Series User´s Guide...
Need help?
Do you have a question about the miroVIDEO DC30 Series and is the answer not in the manual?
Questions and answers