Carrier Air Conditioner Owner's Manual
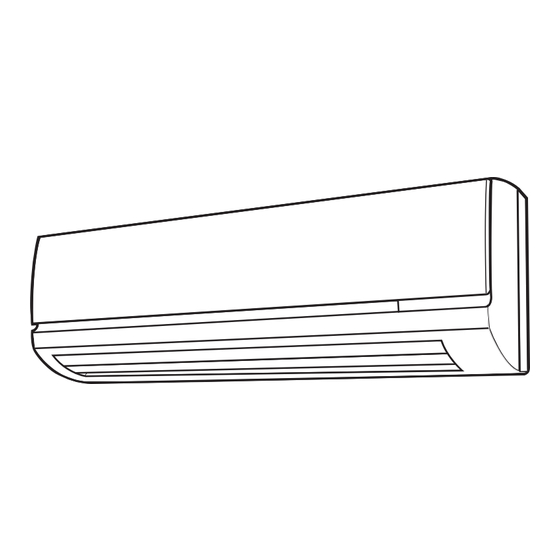
High-wall fan coil unit
Hide thumbs
Also See for Air Conditioner:
- Operation and service manual (96 pages) ,
- Owner's manual (23 pages)
Table of Contents
Advertisement
GENERAL. . . . . . . . . . . . . . . . . . . . . . . . . . . . . . . . . . . . . . .2,3
OPERATING MODES . . . . . . . . . . . . . . . . . . . . . . . . . . . . 2
REMOTE CONTROL. . . . . . . . . . . . . . . . . . . . . . . . . . . . . 2
OPERATION . . . . . . . . . . . . . . . . . . . . . . . . . . . . . . . . . . . 3-9
REMOTE CONTROL OPERATION . . . . . . . . . . . . . . . . 3
INDOOR UNIT DISPLAY . . . . . . . . . . . . . . . . . . . . . . . . . 5
EMERGENCY OPERATION . . . . . . . . . . . . . . . . . . . . . . 5
PRESSING THE ON/OFF BUTTON. . . . . . . . . . . . . . . . 5
SELECTING AN OPERATING MODE. . . . . . . . . . . . . . . 6
SETTING THE TEMPERATURE SET POINT . . . . . . . 6
OF LOUVER POSITION. . . . . . . . . . . . . . . . . . . . . . . . 6
SELECTING THE FAN SPEED . . . . . . . . . . . . . . . . . . . . 7
USING THE TURBO SETTING . . . . . . . . . . . . . . . . . . . 7
USING THE ECONOMICAL SETTING . . . . . . . . . . . . 7
SETTING THE ON TIMER. . . . . . . . . . . . . . . . . . . . . . . . 7
SETTING THE OFF TIMER. . . . . . . . . . . . . . . . . . . . . . . 8
SETTING THE DAILY TIMER . . . . . . . . . . . . . . . . . . . . 8
SETTING THE SLEEP TIMER . . . . . . . . . . . . . . . . . . . . 8
USING THE IONIZER FUNCTION . . . . . . . . . . . . . . . . 9
REMOTE CONTROL ADDRESS SELECTION . . . . . 9
Manufacturer reserves the right to discontinue, or change at any time, specifications or designs without notice and without incurring obligations.
Catalog No. 02-38H40Q01-OM
Book 1
4
Tab
3e 2f
OWNER'S MANUAL
High-Wall Fan Coil Unit
CONTENTS
Page
Printed in U.S.A.
RESETTING THE REMOTE CONTROL . . . . . . . . . . . 9
OPERATING CONDITIONS . . . . . . . . . . . . . . . . . . . . . . 9
TIME DELAY . . . . . . . . . . . . . . . . . . . . . . . . . . . . . . . . . . . 9
MINIMUM OPERATION TIME . . . . . . . . . . . . . . . . . . . 9
HEATING FEATURES. . . . . . . . . . . . . . . . . . . . . . . . . . . . 9
DEFROST OPERATION . . . . . . . . . . . . . . . . . . . . . . . . . . 9
AUTO RECOVERY . . . . . . . . . . . . . . . . . . . . . . . . . . . . . . 9
MODE. . . . . . . . . . . . . . . . . . . . . . . . . . . . . . . . . . . . . . . . 9
TROUBLESHOOTING . . . . . . . . . . . . . . . . . . . . . . . . . .9-11
PERIODIC MAINTENANCE . . . . . . . . . . . . . . . . . . . . . . 9
CLEANING THE COIL . . . . . . . . . . . . . . . . . . . . . . . . . . . 9
AIR FILTERS. . . . . . . . . . . . . . . . . . . . . . . . . . . . . . . . . . . 10
IONIZER . . . . . . . . . . . . . . . . . . . . . . . . . . . . . . . . . . . . . . . 10
INDOOR UNIT FRONT PANEL . . . . . . . . . . . . . . . . . . 10
SYSTEM OPERATION CHECK LIST . . . . . . . . . . . . . 10
ENERGY SAVING RECOMMENDATIONS. . . . . . . . 10
TROUBLESHOOTING . . . . . . . . . . . . . . . . . . . . . . . . . . . 10
Form OM38/40-6
Pg 1
Page
406
2-06
Replaces: New
Advertisement
Table of Contents
Troubleshooting

Related Manuals for Carrier Air Conditioner


Summary of Contents for Carrier Air Conditioner
-
Page 1: Table Of Contents
OWNER’S MANUAL High-Wall Fan Coil Unit CONTENTS Page Page RESETTING THE REMOTE CONTROL ... 9 GENERAL........2,3 OPERATING CONDITIONS . -
Page 2: General
AUTO — In Auto mode, the system will automatically cool or GENERAL heat the room according to the user selected set point. The high wall fan coil unit provides quiet, maximum If the room temperature is 2° F lower than the set point, the comfort. -
Page 3: Operation
Batteries should only be changed after turning the unit off. The average battery life during normal use is approximately one year. If the air conditioner does not Handle the controller with care and avoid getting the con- operate normally after replacing the batteries, refit the batteries troller wet. -
Page 4: Remote Control Display Icons
SETTING THE TIME ON THE REMOTE CONTROL FAN SPEED — To select the Fan mode and change the Fan (Current Time Adjusting C and Reset Buttons) — Press cur- Speed, follow the steps below: rent time adjusting button C to adjust the current time. Press 1. -
Page 5: Indoor Unit Display
“Cool” or “Heat” mode. Table 1 — Louver Positions When the Pressing the On/Off Button — air conditioner is not in operation, the remote SYMBOL ON DESCRIPTION control readout will display the time of day only. REMOTE CONTROL Louver position will be set automatically. -
Page 6: Selecting An Operating Mode
Fig. 7 — Unit Display and Switch Panel 2. The display will show the channel setting (CH). Use the Selecting an Operating Mode — button to select the unit operating mode. 3. Press the mode button once to go to the Temperature (tu) screen. -
Page 7: Selecting The Fan Speed
LEFT AND RIGHT CONTROL — To adjust the direction of For quiet, Using the Economical Setting — the discharge air to the left or right, adjust the vertical guide energy saving operation in Cooling, Heating and Auto vane with the handle after opening the louver. See Fig. 9. modes, press the Economical Setting button E. -
Page 8: Setting The Off Timer
5. Fan speed: For everyday operation to start at 5:30 P.M. and stop at 10:30 P.M. complete the following steps: Choose the fan speed, using . When the selection has 1. Set the ON timer for 5:30 P.M. been completed, press button for confirmation. -
Page 9: Using The Ionizer Function
If unit operation is started after the power Time Delay — is turned off, there will be a 3-minute time delay until the compressor turns on. When heating operation starts, hot air delivery may be delayed due to a warm-up period. In normal operation, Minimum Operation Time —... -
Page 10: Air Filters
Remove and clean the air filters once a Air Filters — Preparing for a Long Shutdown Period — month. Clean the filters and reposition them in the unit. Operate the unit in Fan only mode for 12 hours to dry all internal parts. NOTE: If air filters show signs of excessive wear or are torn, they must be replaced. - Page 11 Table 3 — Troubleshooting PROBLEM POSSIBLE CAUSE SOLUTION • The circuit breaker has tripped or a fuse has • Reset the circuit breaker or replace the fuse with the blown. specified replacement fuse. • Power failure. • Restart operation when the power is restored. Unit/System Does Not Work •...
- Page 12 Copyright 2006 Carrier Corporation Manufacturer reserves the right to discontinue, or change at any time, specifications or designs without notice and without incurring obligations. Book 1 Catalog No. 02-38H40Q01-OM Printed in U.S.A. Form OM38/40-6 Pg 12 2-06 Replaces: New 3e 2f...
Need help?
Do you have a question about the Air Conditioner and is the answer not in the manual?
Questions and answers