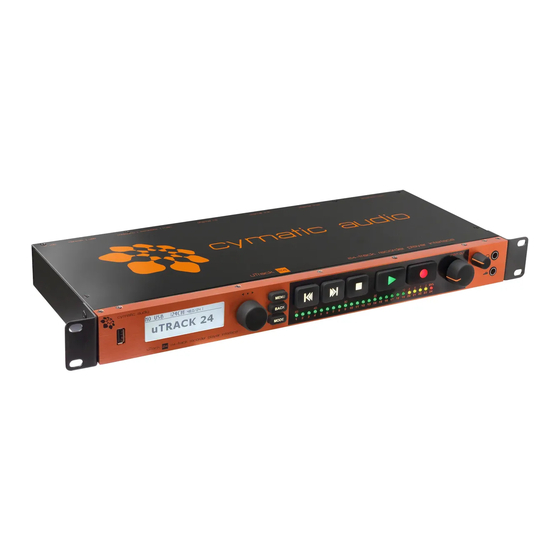
cymatic audio uTrack 24 User Manual
24-track recorder player interface cymatic audio utrack 24
Hide thumbs
Also See for uTrack 24:
- User manual (58 pages) ,
- Product manual (21 pages) ,
- Quick start manual (8 pages)
Table of Contents
Advertisement
Advertisement
Table of Contents

Related Manuals for cymatic audio uTrack 24


Summary of Contents for cymatic audio uTrack 24
- Page 1 Firmware Version 2469 USER‘S MANUAL Firmware Build 2469 April 2015...
-
Page 2: Table Of Contents
UTRACK 24 FRONT PANEL ....................8 UTRACK 24 REAR PANEL ....................1 0 USING THE UTRACK 24 WITH A MIXER TO RECORD A LIVE CONCERT ....1 2 USING THE UTRACK 24 WITH A RECORDING SPLIT/OUTBOARD MIC PREAMPS ...1 3 GETTING STARTED WITH RECORDING AND PLAYBACK ...........1 4 13.1. - Page 3 WDM and ASIO driver installation ........................3 3 23.1.3. uTrack 24 / Control Panel for PC ........................3 3 23.2. Using the uTrack 24 as an Audio Interface with an OS X ............... 4 0 23.2.1. Minimum System Requirements ........................4 0 23.2.2.
-
Page 4: Safety Precautions
Also make sure to disconnect all connection cables and the power cord before moving the uTrack 24. 1.5. Alterations Never open the case of the uTrack 24 or attempt to modify the product in any way since this can result in damage to the unit. 1.6. Volume Do not use the uTrack 24 at a loud volume for a long time since this can cause hearing impairment. -
Page 5: Usage Precautions
2.2. Cleaning Use a soft, dry cloth to clean the Live Recorder uTrack 24. If necessary, slightly moisten the cloth. Do not use abrasive cleanser, wax, or solvents (such as paint thinner or cleaning alcohol), since these may dull the finish or damage the surface. Please keep this manual in a convenient place for future reference. -
Page 6: Introduction
Never before has such a powerful combination of features been available at such an affordable price, and in such a compact footprint. The uTrack 24 records to and plays back from standard, off-the-shelf USB drives, while offering a large complement of professional features. -
Page 7: What's In The Box
• The uTrack 24 also works with the free downloadable playlist editor software which allows you to create custom playlist that can be played back on the uTrack 24. Download the Playlist Editor and its user’s manual at www.cymaticaudio.com/downloads •... -
Page 8: Utrack 24 Front Panel
13 14 1. USB Port This port allows connection of a standard, off-the-shelf USB drive. The uTrack 24 records and plays back up to 24 tracks of audio to/from the connected USB drive. The uTrack supports USB drives from sizes ranging from 2GB to 16TB. - Page 9 13 14 10. RECORD Button Press the RECORD button to begin a new recording. The uTrack 24 is always ready to start a new recording as soon as the RECORD button is pressed. Note: when the uTrack 24 is neither playing back nor in playlist-mode, it will automatically switch to “pre-recording”...
-
Page 10: Utrack 24 Rear Panel
5. Word Clock Input The uTrack 24 can be “slaved” to an external word clock signal by connecting it to the BNC word clock input. This allows the uTrack 24 to be properly integrated into a larger complement of digital audio equipment, where the clock signals of all connected equipment need to be synchronized. - Page 11 This connector outputs a standard digital word clock signal, running at the sample rate that the uTrack 24 is currently set to. The word clock output is useful when you want to use the uTrack 24 as a “clock master” and wish to slave other digital equipment to its internal clock signal.
-
Page 12: Using The Utrack 24 With A Mixer To Record A Live Concert
24 Outputs Stereo Headphones The uTrack 24 is the perfect tool for capturing 24 individual tracks of a live concert, which can then be imported into your DAW software of choice. The physical connections work as follows: • Connect 24 balanced, direct outs of an analog mixer to the analog inputs of the uTrack 24 •... -
Page 13: Using The Utrack 24 With A Recording Split/Outboard Mic Preamps
Préamplifiers Monitors In some instances, you may wish to use the uTrack 24 in a higher end remote recording setup, with a dedicated recording split of the stage snake (as opposed to the mixer’s direct outputs). In this case, the connections would work as follows: •... -
Page 14: Getting Started With Recording And Playback
A USB hard drive is a traditional “moving parts” hard drive that records its data on spinning platters. This is the recommended type of USB drive to use with the uTrack 24, as its data read/ write speeds are the most reliable and consistent You are free to use two different types of USB hard drives with the uTrack 24: USER‘S MANUAL... -
Page 15: Usb Flash Drive
Common sizes include 120 Gigabytes through 1 Terabyte. It is NOT recommended to use the uTrack 24 with either of the above two types of USB flash drives; the nature of these drives results in them offering unreliable read/write speeds. Although they can offer very fast AVERAGE data read/write speeds, they are subject to occasional pauses in data writing. -
Page 16: Starting A Recording
Note that the Pre-Recording feature can be toggled on/off in the uTrack 24’s Recording menu. 13.5. 24-Channel Input Metering The front panel of the uTrack 24 contains 24 separate LEDs; each one serves as an individual 3-segment input level meter for the corresponding record channel. -
Page 17: Gapless Recording
The uTrack 24 has the ability to automatically playback a playlist upon powering up. This feature can be very useful when the uTrack 24 is used in installed sound setups, where a certain playlist should always be playing when the device is on. -
Page 18: Looping Playback Between In And Out Points
On the uTrack 24, in the “Playback Settings” menu, enable the “AutoPlay” feature (it is disabled by default). Once the autoplay the feature is enabled on the uTrack 24, on startup it will look for an autoplay. play file in the playlist folder within the multitrack folder and if not found, looks into the playlist folder within the stereo/music folder. -
Page 19: Utrack 24 File Formats
Both applications, the WavTool and the Playlist Editor, perform these functions as they copy the uTrack 24’s recordings from the external USB drive to your computer. As a result, you are left with 24 separate, standard mono wav files, each one running the length of your entire take. - Page 20 DAW Audio to uTrack 24 Copy (with automatic conversion) to Export individual audio Plug and Play USB drive external USB drive, using the tracks from DAW on uTrack 24 WavTool or Playlist Editor For more information please refer to the respective user manuals of the WavTool and the Playlist Editor, downloadable at www.cymaticaudio.com...
-
Page 21: Utrack 24 File Playback Modes
This is a different playback mode, intended for playback of stereo program material you may wish to use for walk-in music, break music, walk-out music, etc. The uTrack 24 goes into stereo mode any time you load an audio file that resides anywhere OUTSIDE the MultiTrack folder on the attached USB drive. -
Page 22: Settings Bar
SETTINGS BAR The uTrack 24 contains a “settings bar” at the top of the screen that is always present on all recording and playback screens. It shows important settings, at a glance, of the key aspects of your recording. Playback Recording 1. - Page 23 Playback 5. Markers Displays how many markers have been recorded to the current take’s multi-track broadcast wave file. 7. Playback Mode Displays current playback mode (please refer to chapter PLAY Page for an explanation of the Playback Mode Symbols). Recording 8.
-
Page 24: Record Page
4. Droputs Display (If Applicable) Displays the number of dropouts in a recording, if any have occurred. The uTrack 24 is designed to record up to 24 tracks of audio with any standard USB hard drive, and do so without any glitches or dropouts. - Page 25 To bring up the monitor mixer and adjust the parameters for each channel: • Press the front panel rotary encoder. The display will switch to the “MIX” screen as shown below • Once in the “MIX” screen, press the rotary encoder to move between the various parameters.
-
Page 26: Loading Audio Files For Playback
The BROWSER screen will show a folder named “MultiTrack” that contains all of the multitrack audio files that can be selected for playback on the uTrack 24. Rotate the encoder to highlight the MultiTrack folder then press it to select. You will then see a list of all of the different MultiTrack takes that have been saved to the Multitrack folder. -
Page 27: Play Page
PLAY PAGE The play screen is shown any time the uTrack 24 is currently playing back a multitrack audio take, as well as when the transport is currently stopped. It displays various parameters related to the playing back of audio from an attached USB drive. -
Page 28: Playlist Screen
PLAYLIST SCREEN The playlist screen is shown any time the uTrack 24 is currently playing back a “playlist” of audio takes: a pre-configured list of takes that automatically play one after the other. Playlists can be configured using free Playlist Editor software available for download at www.cymaticaudio.com... -
Page 29: Utrack 24 System Menus
Internal: The uTrack 24 will run off its own internal sample clock; you are free to select from four different sample rates to run the internal clock at. When running from the internal clock, the settings bar will display “Int”... -
Page 30: Footswitch Menu
NOTE: When playing back a previously recorded take, it will always play back at the sample rate it was recorded at. If the uTrack 24 is currently set to a different sample rate, the unit will automatically revert back to the sample rate set in the menu, after the take has completed playback. -
Page 31: Playback Menu
Note: When using sample rates of 88.2 kHz or 96 kHz, the uTrack 24 is limited to recording of 8 tracks maximum. When selecting one of these sample rates, the following message will temporarily appear: Bit Depth: Selects the bit depth of the recording. Choices include: 16-bit and 24-bit. -
Page 32: Utilities Menu
The Utilities menu contains assorted global settings and functions, as follows: Date/Time: Allows you to set your local date and time. The uTrack 24 will then use this to set a time-stamp metadata field in the recorded take. This metadata can be useful in a variety of ways, when later importing the wave files into your preferred DAW software. -
Page 33: Using The Utrack 24 As A Computer Audio Interface
The uTrack 24 driver installation program will automatically install the uTrack 24 / Control panel on your PC. You can launch it by clicking on the uTrack 24 icon that will be present in the Windows task bar, or by locating the program’s entry in the Windows start menu. - Page 34 1. USB connection indicator 2. Input level meters 3. Faders 4. Monitor panning 5. Mute 6. Solo 7. Channel link 8. Control room output level 9. Display device settings USER‘S MANUAL USING THE UTRACK 24 AS A COMPUTER AUDIO INTERFACE...
- Page 35 The default name is “uTrack 24” but it can be modified to the name of your choosing. Sample Rate: Click on this field to select what sample rate you wish to operate the uTrack 24 at when using it as an audio interface. Choices include: •...
- Page 36 The control panel’s buffers screen allows adjustment of the ASIO buffers used by your ASIO compatible DAW software. USB Streaming Mode: Adjust this value to set the basic mode of operation of the uTrack 24 drivers. ASIO Buffer Depth: Adjust this setting to configure the size of the ASIO buffer, measured in samples.
- Page 37 DAW. Click on the checkbox labeled ‘Include device name in ASIO display name’ if you wish for the channel names to be prepended with the device name. USER‘S MANUAL USING THE UTRACK 24 AS A COMPUTER AUDIO INTERFACE...
- Page 38 DAW. Click on the checkbox labeled ‘Include device name in ASIO display name’ if you wish for the channel output names to be prepended with the device name. USER‘S MANUAL USING THE UTRACK 24 AS A COMPUTER AUDIO INTERFACE...
- Page 39 Settings View: About Tab Revision: Displays the revision number of the control panel itself. uTrack 24: Displays the connection-status for the uTrack 24, indicating if the device is connected and recognized by the computer. Serial Number: Displays the specific serial number of the connected uTrack 24 unit.
-
Page 40: Using The Utrack 24 As An Audio Interface With An Os
The device will now be selecteable in the “Audio MIDI Setup” application, which can be found in the Applications/Utilities folder. Note that no custom uTrack 24 mixer control panel is available for the Mac, as there is when using the uTrack 24 with Windows. The internal mixer of the uTack 24 is not available when connected to a Mac, so all monitoring must be done through the DAW software. -
Page 41: Using The Utrack 24 As An Audio Interface With An Apple® Ipad
23.4. Control Room Features The uTrack 24 contains a “main out” audio output path, that is very useful when using it as a computer audio interface; it allows for monitoring your DAW mix over speakers and headphones,... -
Page 42: Firmware Update Using A Network Connection (Pc & Mac)
24.2. Firmware update using a Network Connection (PC & Mac) If your uTrack 24 is connected to a network using a standard network cable connected to the RJ45 network connector on the uTrack 24 rear panel and the network router of your home or business network, you can perform the update through the network using any Internet Browser (e.g. - Page 43 SELECT FILE button or click the SELECT FILE button and select the file with the file browser that opens. 7. Click the green “UPLOAD FIRMWARE” button that appears. The update process starts and you will see the following screen: USER‘S MANUAL UPDATING THE FIRMWARE OF YOUR UTRACK 24...
- Page 44 8. After the update has successfully finished, your browser will show the following: 9. Click the green “REBOOT” button. The connected uTrack 24 will reboot which concludes the update process. The screen will show the version number of the updated firmware.
-
Page 45: Legal Disclaimer
Technical specifications and appearance are subject to change without notice and accuracy is not guaranteed. Cymatic Audio accepts no liability for any loss which may be suffered by any person who relies either wholly or in part upon any description, photograph or statement contained herein. - Page 46 Cymatic Technologies B.V. P.O. Box 208 6590 AE Gennep The Netherlands www.cymaticaudio.com Support: For Europe: support-EMEA@ cymaticaudio.com Rest of the world: support@cymaticaudio.com USER‘S MANUAL © copyright 2015 Cymatic Audio B.V. Firmware Build 2469 April 2015...
Need help?
Do you have a question about the uTrack 24 and is the answer not in the manual?
Questions and answers