Motorola D1001 User Manual
Digital cordless phone
Hide thumbs
Also See for D1001:
- User manual (45 pages) ,
- User manual (26 pages) ,
- User manual (50 pages)

Related Manuals for Motorola D1001


Summary of Contents for Motorola D1001
- Page 1 Motorola D1000 Series For D1001, D1002, D1003 and D1004 Digital Cordless Phone Warning Use only rechargeable batteries.
- Page 2 Welcome... to your new Motorola D1000 Digital Cordless Phone! • All handsets fully cordless for locating anywhere within range. You must subscribe to your network provider’s Caller Display or Call Waiting service for these features to work. A quarterly fee may be •...
-
Page 3: Table Of Contents
Getting started........................5 Dial from the calls list ....................13 Save a number from the calls list to the phonebook .............14 Location..........................5 Delete a calls list entry ....................14 Setting up ..........................5 Delete entire calls list ....................14 Connecting up the base ......................5 Redial ...........................14 Connecting the handset and charger (Multi-pack only)............ - Page 4 Help............................20 10. General information......................21 Important safety instructions....................21 Installation Guidelines......................21 Battery Safety Instructions....................21 Cleaning..........................21 Environmental........................21 Product disposal instructions ....................22 Consumer Products and Accessories Warranty ..............22 R&TTE ..........................23 Connecting to a switchboard ....................23 Inserting a pause ........................23 Recall............................23 11. Wall mounting ........................24...
-
Page 5: Getting Started
1. Getting started Connecting up the base WARNING Do not place your D1000 in the bathroom or other humid areas. Location You need to place your D1000 base within 2 metres of the mains power socket and telephone socket so that the cables will reach. Make sure it is at least 1 metre away from other electrical appliances to avoid interference. -
Page 6: Setting Up Your D1000
Setting up your D1000 3. Place the handset on the charger to charge for at least 24 hours. When the handset is fully charged the icon will indicate that it is fully charged. Welcome screen 4. When the handset is fully charged after 24 hours, plug the telephone line cord from the large WELCOME is displayed. -
Page 7: Getting To Know Your Phone
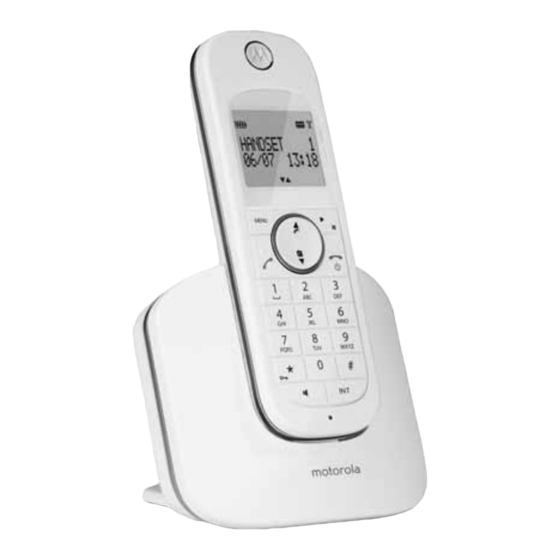
2. Getting to know your phone Redial / Scroll right / Clear / Mute Open the redial list. Scroll to the right. Delete characters on screen when entering names and numbers. Overview of your handset Mute / unmute the microphone during a call. Go back to previous menu level – BACK displayed on screen. -
Page 8: Handset Display
Handset display ! " displayed Press to scroll through the options in a menu, to open the phonebook or calls list when in standby. Back ! displayed Press to go back to the previous menu option, to cancel an action or to delete a character. Overview of the base Display icons On when the line is in use. -
Page 9: Menu Map
Menu map PHONEBOOK CLOCK/ALARM PERSONAL SET ADVANCED SET NEW ENTRY DATE & TIME HANDSET TONE RECALL TIME LIST ENTRY SET ALARM RING VOLUME DIAL MODE <NAME> ALARM TONE RING MELODY CALL BARRING EDIT ENTRY GROUP MELODY EASY CALL DELETE ENTRY KEY TONE REGISTRATION DELETE ALL... -
Page 10: Using The Phone
3. Using the phone If Auto Pick up mode (see page 16) is on, simply lift up the handset from its base to answer the call. The default setting is On. Calls NOTE Make a call An incoming call has priority over other events. Whenever there is an incoming call, other <... -
Page 11: Call Another Handset
4. Phonebook Call another handset 1. Press • If you have two handsets, the other handset is called automatically. The D1000 handset phonebook can store up to 100 names and numbers. • If more than two handsets are registered to the base, their numbers are displayed, e.g. 2345*. NOTE Enter the number of the handset you want to call or press to ring all handsets. -
Page 12: Character Map
> To enter a space press 3. Press to cancel the phonebook display. > 4. Press again to end the call. Press to delete a character or press and hold to delete all characters. Edit an entry Character map 1. Press Use the keypad to enter names and characters. -
Page 13: Dial From The Calls List
5. Caller display and Calls list Dial a one touch number 1. Press and hold a number key If you have subscribed to Caller Line Identification (CLI), and provided the identity of the caller is The number is displayed and dialled. >... -
Page 14: Save A Number From The Calls List To The Phonebook
Save a number from the calls list to the phonebook 6. Press to select GROUP, GROUP and press to confirm. 1. Press . The most recent call is displayed. > 2. Scroll to the number you want. 7. Press to return to standby. 3. -
Page 15: Clock & Alarm
6. Clock & Alarm 7. Personal settings Handset tones If you subscribe to your network’s Caller Identification service, the time on your D1000 may be set automatically each time you receive a call, depending on your network provider. WARNING You can also set or adjust the time using the Clock & Alarm menu. When the phone is ringing, avoid holding the earpiece too close to your ear as it may damage your hearing. -
Page 16: Handset Name
Room Monitor on/off 4. Press to confirm. > 5. Press to return to standby. Leave one handset in a room and use another handset to hear sounds in that room. First ring 1. Press , scroll PERSONAL SET and press Your D1000 will automatically detect the Caller identification (Subscription dependent). -
Page 17: Advanced Settings
8. Advanced settings Set a number to be barred 1. Press , scroll ADVANCED SET and press This setting is useful to access certain network and PABX/switchboard services. 2. Scroll CALL BARRING. Press 3. Enter the master PIN (default setting 0000) and press Recall time 4. -
Page 18: Registration
Registration Up to 5 handsets can be registered to one base station. Additional handsets must be registered The 4-digit master PIN is used when registering or unregistering a handset and when changing to the base before you can use them. some settings on your D1000. -
Page 19: Auto Prefix
Auto prefix ECO mode You can set the D1000 to detect a dialling number and replace it with another number. The To reduce the level of power emissions, you can select low power or ECO mode. When the ECO number to be detected can be up to 5 digits long. It can be replaced with a number up to 10 digits. mode is set to ON, the base transmission power will be reduced. -
Page 20: Help
9. Help Interference Noise interference on your radio or television Charging Your base or charger may be too close. Move it as far away as possible. icon is not scrolling when the handset is placed on the base • Bad battery contact – move the handset slightly •... -
Page 21: 10. General Information
10. General information 6. Adjust only those controls that are covered by the operating instructions. Improper adjustment of other controls may result in damage and will often require extensive work to restore the product to normal operation. IMPORTANT 7. Clean this product with a soft, damp cloth. Do not use chemicals or cleaning agents to clean This equipment is not designed for making emergency telephone calls when the power fails. -
Page 22: Product Disposal Instructions
SUNCORP TECHNOLOGIES LTD or its authorized distributor at its option and within a or (d) other acts which are not the fault of Motorola or SUNCORP TECHNOLOGIES LTD., are commercially reasonable time, will at no charge repair or replace any Products or Accessories that excluded from coverage. -
Page 23: R&Tte
11. Wall mounting How to Obtain Warranty Service or Other Information? To obtain service or information, please call: +852 2185 1305. IMPORTANT Email: INFO@USTEL.COM.HK Before you wall-mount your D1000, check that you are not drilling into any hidden wiring or pipes. You will receive instructions on how to ship the Products or Accessories at your expense, to Before you drill, make sure the power and telephone line cables will reach the sockets. -
Page 24: Wall Mounting
2. Insert the wall plugs if necessary, then insert the screws leaving about 5mm protruding from the wall on which to hang the phone. 3. Pull the base/charger out of the stand and slot the holes on the back of the base over the screw heads and gently pull the base/charger down to make sure it is securely in place. - Page 25 Wall mounting...
- Page 26 Manufactured, distributed or sold by Suncorp Technologies Ltd. official licensee for this product. MOTOROLA and the Stylized M Logo, and other Motorola trademarks and trade dress are owned by Motorola, Inc. and are used under license from Motorola, Inc. MOTOROLA and the Stylized M Logo are registered in the US Patent &...