Table of Contents
Advertisement
Advertisement
Table of Contents

Related Manuals for Grace GRACE EASY


Summary of Contents for Grace GRACE EASY
- Page 1 GRACE EASY Manual English GRACE EASY Manual Page | 67...
-
Page 2: Table Of Contents
1. Your GRACE EASY ......................72 1.1. About this operating manual ................... 73 1.2. Scope of supply ......................73 1.3. Description of equipment on the GRACE EASY ............74 1.4. Anti-manipulation-plate ..................75 1.5. Use of the vehicle as intended ................75 2. - Page 3 5.13. Replacing the bake disks ..................114 6. Transport ........................ 115 7. Cleaning and maintenance ..................116 8. Troubleshooting ...................... 118 9. Wear parts ......................120 9.1. Tyres ........................120 9.2. Handlebar grips ...................... 121 GRACE EASY Manual Page | 69...
- Page 4 12.4. Braking system ....................... 125 12.5. Weights ........................125 12.6. Add-on parts ......................125 12.7. Frame sizes ......................126 12.8. Tightening torques ....................126 13. Warranty ........................ 128 14. EC Declaration of Conformity .................. 129 Page | 70 GRACE EASY Manual...
-
Page 5: Explanations Of Symbols
This sign has useful information about how to handle your product. Note! This symbol points out that damage is possible on the vehicle. Read the original operating manual! This symbol refers to important information in the original operating instructions of the component manufacturers. GRACE EASY Manual Page | 71... -
Page 6: Your Grace Easy
1. Your GRACE EASY The GRACE EASY is a member of the class of electric power-assisted motorcycles, also known as EPAC's. The motor only provides assistance when you apply force to the pedals. The force applied by the rider is measured in terms of speed, pedalling frequency, and torque through which the motorised assistance is adjusted. -
Page 7: About This Operating Manual
1.1. About this operating manual This operating manual is solely for the GRACE EASY range in the Pedelec- and S-Pedelec variants and frame sizes M and L. Follow the instructions and warnings for your own safety. Failing to do so may damage the bike and/or lead to personal injury. -
Page 8: Description Of Equipment On The Grace Easy
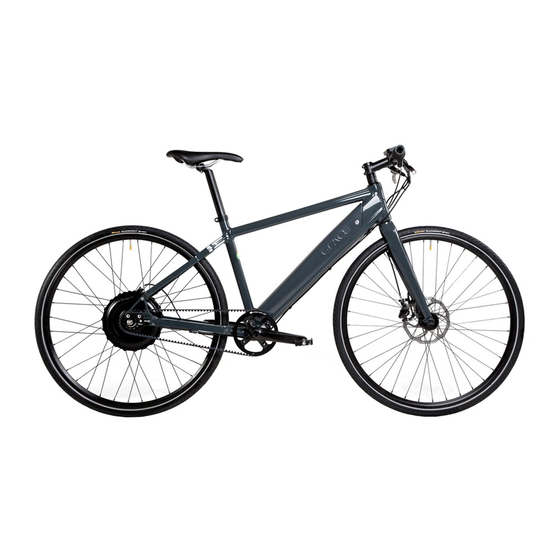
1.3. Description of equipment on the GRACE EASY 1. Saddle 2. Battery 3. Battery lock 4. Stem 5. Twist shifter 6. Headlight 7. Front wheel 8. Fork/spring fork* 9. Hydraulic disc brake 10. Crank and pedal 11. Double kick stand 12. -
Page 9: Anti-Manipulation-Plate
The tyres must not leave the ground. The GRACE EASY is not designed for riding over obstacles such as high curbs. It is also not designed for transporting more than one person. The active and passive lighting equipment required under technical safety regulations in Germany are not in compliance with the StVZO. - Page 10 Before joining the main roads, first practice on your new GRACE EASY in an area with little traffic. You may be legally required to wear a helmet for Pedelecs depending on which country you are using your GRACE EASY.
-
Page 11: First Time Use
If the battery is not correctly fitted in the guide rails, it is not possible to press in the lock cylinder. If this is the case, re-insert the battery. The lock cylinder can also be pressed in even if the key is not inserted into the lock. GRACE EASY Manual Page | 77... -
Page 12: Charging The Battery
Do not use the charger in damp rooms or if the ambient temperature falls outside of the permissible operating temperature of -10°C (14°F) to 40°C (104°F). Only use the battery for the GRACE EASY. Do not submerge the battery under water. ... - Page 13 - the power supply will detect it automatically. The battery is fitted to the down tube of your GRACE EASY. You can charge the battery while it is fitted to the bike or remove it from the mounting before doing so.
- Page 14 The battery loses capacity. The typical life expectancy of a Lithium-ion battery is currently 2 to 3 years, regardless of whether the battery is in use or not. Page | 80 GRACE EASY Manual...
-
Page 15: Adjusting The Saddle
The battery goes into protection mode when the GRACE EASY is not used for two months at a time or when the battery charge was used up and was not re-charged in the week that followed. The battery is inactive in protection mode. The only way to re-activate the battery is through a full charging cycle. -
Page 16: Adjusting The Saddle Position And -Angle
If you place the balls of your feet on the pedal while it is in its lowest position, you knee should be bent slightly and your kneecap should be in a vertical line to the pedal axis. Page | 82 GRACE EASY Manual... -
Page 17: Adjusting The Position Of The Brake Lever
This increases the braking distance. Risk of accident! 2.7. Assembling the side reflectors (S-Pedelec only) The self-adhering side reflectors are fixed to the down tube of the frame on the side. GRACE EASY Manual Page | 83... -
Page 18: Rear-View Mirror (S-Pedelec Only)
2.9. Insurance plate (S-Pedelec only) The insurance plate is fixed to the number plate holder beneath the saddle with two screws (M4x10) and two self-sealing nuts. Page | 84 GRACE EASY Manual... -
Page 19: Mounting Instruction Pedal Reflectors For Schindelhauer-Pedals
Have the following tools avaiable: • Cross screwdriver PH2 • wrench 7 mm mouth width Work steps Take the reflector housing and plug the M4 screw into the existing long holes. Then push on this the mounting wedge. GRACE EASY Manual Page | 85... - Page 20 If you hold still while tightening the screw and turn with the wrench, the housing slips less. Click the reflector to the reflector housing. Repeat the process with two pedals and on both sides of the pedal. Page | 86 GRACE EASY Manual...
-
Page 21: Before Each Ride
When wanting to use a different model of tyre than the Continental EcoContact on your GRACE EASY, also make sure that it has reflective strips on the sides of the tyres as well. Alternatively, in Germany, you can attach two spoke reflectors per wheel as per the German Traffic Registration Regulations (StVZO). -
Page 22: Checking The Drive Belt
When this idle motion is overcome with a small amount of handforce the brake will apply, the pressure point is reached. If the brake is properly adjusted and vented, applying a greater handforce will result in a higher braking performance while moving the brake lever a shorter distance. Page | 88 GRACE EASY Manual... -
Page 23: Checking The Suspension Forks (Optional Accessory)
Brake pads and discs wear due to friction. The more often you ride in a hilly environment or through rain or dirt, the higher the wear. The braking system on the GRACE EASY has a fully-automatic pad synchronisation system. This system balances the wear on the brake pads so that the pressure point of the brake is always constant. -
Page 24: Function Description
Only operate the display unit when the traffic situation permits it. While you are operating the display unit during the ride you are distracted from what is going on around you. Risk of accident. Page | 90 GRACE EASY Manual... - Page 25 Display: Drive- (A) / generator level (G) Display: Bike mode Display: Battery charge status On-board computer: Trip mileage, overall mileage, ride time, average speed, motor temperature, and clock - button: Set the clock, scroll through/reset display GRACE EASY Manual Page | 91...
-
Page 26: Switch The Drive System On/Off
4.5. Choose an assistance level The GRACE EASY only provides assistance when you apply force to the pedals. Once you stop applying force, the electric motor switches off. The pedal power assistance will also switch off if you exceed the maximum assisted speed. -
Page 27: Select The Generator Level
The size of the braking force applied to the rear wheel depends on the speed and cannot be proportioned. Exception: The rear wheel does not brake when the battery is fully charged. GRACE EASY Manual Page | 93... -
Page 28: Change Display
Check the charge status of the battery While the system is switched on, the battery symbol in the charge indicator shows the remaining life of the battery. When all batteries are visible the battery is 100 % charged. Page | 94 GRACE EASY Manual... -
Page 29: Set The Time
The lighting system meets the requirements of the StVZO. This registration is issued by the Federal Motor Transport Authority and can be seen by a registration number with a shaft line, the upper case K and a number. GRACE EASY Manual Page | 95... - Page 30 10 m of 5 m (16.4 ft) is only half as high as when it was emitted. On the GRACE EASY this is 40 cm (1.3 ft). Park the bike on an even surface. Undo the screw underneath the headlight with a fork socket SW 10 (0.39 in) and tilt it accordingly.
-
Page 31: Belt Drive
4.11. Belt drive The GRACE EASY is fitted with an innovative drive belt reinforced with carbon fibre. When installed properly, the Gates carbon drive is almost completely maintenance-free - it requires no lubrication or re-tightening. The carbon fibres in the belt can absorb high tensile forces but are sensitive to bending loads, notching, shear forces, and blows. -
Page 32: Gear Change
4.12. Gear change A gearbox with 3 gears is fitted into the drive on the GRACE EASY. You switch gears using the shifter on the handlebars. You can see the gear you are currently in (in red) from the gear indicator on the shifter. -
Page 33: Tyres And Wheels
GRACE EASY without wear as a result of the energy recuperation process. Note that GRACE EASY does not have a back-pedal brake. If you are not familiar with the braking force of hydraulic disk brakes, first make some test brakes on stable ground away from main roads. -
Page 34: Side-/Double-Kick Stand
4.16. Side-/double-kick stand Depending on the model variant, the GRACE EASY has a double kick- or side stand. Lift up the rear wheel of your GRACE EASY from the floor a little before extending/retracting the double-kick stand. -
Page 35: Luggage Rack (Optional Accessory)
The right-hand fork has a knob which can be used to adjust the speed with which the fork springs down. When riding over an obstacle, the suspension fork should spring down quickly, however it should also not oscillate more than once. GRACE EASY Manual Page | 101... - Page 36 You can find a list of international dealers at www.sram.com. Faults in the fork legs or dropouts can cause the rider to lose control of the bike and suffer serious and/or life-threatening injuries. Page | 102 GRACE EASY Manual...
-
Page 37: Maintenance
Removing/installing the front wheel The hydraulic disc brakes must not be operated while the wheel is disassembled. The brake pistons come together completely. Immediately after removing the wheel, place the yellow transportation safety between the brake pads. GRACE EASY Manual Page | 103... -
Page 38: Removing/Installing The Rear Wheel
The brake pistons come together completely. Immediately after removing the wheel, place the yellow transportation safety between the brake pads. Please follow the instructions on working with the drive belt in the chapter "Belt drive" Page | 104 GRACE EASY Manual... - Page 39 Firmly tighten the two axle nuts in sequence and alternately with a open end spanner SW15 (0,59 in) fest (see torque table). Connect the plug connections on the power cable, data cable and shift cable and when necessary re- adjust the gears. GRACE EASY Manual Page | 105...
-
Page 40: Adjusting The Gears
If the tension on the drive belt is too high, this may cause damage to the bearings and seals in the wheel hub. This also increases the wear and frictional losses in the entire drive. Page | 106 GRACE EASY Manual... - Page 41 The belt should only touch the side stop (flanged wheel) on the rear timing pulley slightly or have a maximum gap of around 1 mm (0.04 in). The optimal situation is a constant distance of 0.5 mm (0.02 in). GRACE EASY Manual Page | 107...
- Page 42 Align the rear wheel so that the belt travels in the correct line. Always make sure the belt tension is correct. We recommend you have a specialist workshop inspect the tension of the drive belt. Page | 108 GRACE EASY Manual...
-
Page 43: Adjusting The Belt Guide
Remove any excess oil the following day with a cloth. 5.8. Switching gears (EASY 1x10) Please consult the attached manual from the manufacturer, SRAM for information on the gearshift adjustment. GRACE EASY Manual Page | 109... -
Page 44: Assembling The Pedals
The right pedal has a right-hand thread, the left pedal a left-hand thread to the pedal axle for assembly onto the cranks. The right pedal is screwed in a clockwise direction and the left pedal anti-clockwise. Page | 110 GRACE EASY Manual... -
Page 45: Checking The Wear On The Brake Pads
the total thickness of the brake pad including pad carrier, at the thinnest point, is less than 2.5 mm (01 in) thick, the break pads are worn and must be replaced. GRACE EASY Manual Page | 111... -
Page 46: Replacing The Brake Pads
Do not apply heavy force. Apply from different sides where necessary until the slave pistons slide back fully without needing to apply heavy force. Twist the retaining screw on the brake pad out using the Torx T25 spanner. Page | 112 GRACE EASY Manual... - Page 47 If you use the screw more than once it may come undone while riding. This can cause the brakes to fail. Risk of accident! Always replace the retaining screws with new ones immediately after they have come undone. Dispose of the used retaining screws immediately. GRACE EASY Manual Page | 113...
-
Page 48: Checking The Wear On The Brake Disc
Insert the new brake disk with the lettering pointing outwards onto the wheel flange. Note the direction of travel of the brake disk. The arrow on the brake disk must face the direction of travel. First of all, insert the new screws loosely using a Torx T25 spanner. Page | 114 GRACE EASY Manual... -
Page 49: Transport
Transporting the GRACE EASY battery in a passenger aeroplane is not permitted. Transporting the GRACE EASY with its battery installed on a car with a roof or tailgate carrier is not permitted. Remove the battery before transport. The weight of the bike places special requirements on a car roof or tailgate support. -
Page 50: Troubleshooting
In particular, take the following instructions into account when maintaining your GRACE EASY: Use as little water as possible and keep it away from electrical contacts. Clean the vehicle with a soft sponge or soft brush. Clean the battery carrier on the down tube with a damp cloth. - Page 51 Electrical connections can come loose. Check the fit of electrical connections on the handlebars. If the problem is not resolved with these measures, refer to a specialist dealer. GRACE EASY Manual Page | 117...
- Page 52 Brake several times to remove dirt from the brake disks and -pads. The brake calliper is not aligned up with the brake callipers exactly. Have a specialist workshop align up the brake calliper correctly. Page | 118 GRACE EASY Manual...
- Page 53 The gears shift from second to first gear by The shift cable is too slack. Increase the themselves. tension of the shift cable on the shifter. If the problem is not resolved with these measures, refer to a specialist dealer. GRACE EASY Manual Page | 119...
-
Page 54: Wear Parts
The wear parts include: 9.1. Tyres Tyres wear according to how the GRACE EASY is used and can vary considerably from one rider to the next. Heavy braking which causes the wheel to lock up reduces the service life of the tyre considerably. -
Page 55: Handlebar Grips
The brake pads are subject to function-related wear which is heavily dependent on how the GRACE EASY is used. When riding along tracks with heavy drops or when using it for bike sports, it may be necessary to replace the brake pads at shorter intervals. It is therefore essential that you check the wear on your brake pads regularly. -
Page 56: Chain (Easy 1X10)
Due to its function, the chain is susceptible to wear, which is very dependent on care and maintenance and on how the GRACE EASY is used (mileage, dirt, salt and riding in the rain, etc.). The life span of the chain can be prolonged by regular cleaning and lubrication although it is necessary to replace it when the limit is reached. -
Page 57: Frame Paint And Coating
Your GRACE dealer knows your bike very well and has the right tools to maintain your GRACE bike. After a crash or an accident on your GRACE EASY, you must take your bike to a specialist dealer for a thorough inspection. -
Page 58: Technical Data
Input voltage 100 – 240 V Frequency 50 – 60 Hz Permissible operating temperature -10 °C (14 °F) to 40 °C (104 °F) Permissible storage temperature -10 °C (14 °F) to 40 °C (104 °F) Page | 124 GRACE EASY Manual... -
Page 59: Braking System
Ryde Front wheel hub Quanta Pedals Schindelhauer Cranks SR Suntour; sugino (Red Dot) Forks bearing Cane Creek 10 series Headlight Busch & Müller Side stands Ursus Double kick stand Pletscher Suspension fork RockShox (optional) GRACE EASY Manual Page | 125... -
Page 60: Frame Sizes
850 mm 710 mm 490 mm Size M (23.03 in) (33.46 in) (27.95 in) (19.29 in) GRACE EASY 610mm 860 mm 760 mm 540 mm Size L (24.04 in) (33.86 in) (29.92 in) (21.26 in) Page | 126 GRACE EASY Manual... -
Page 61: Tightening Torques
8-10 Nm (5,9 – 7,37 lb.ft) Stand plate on frame 40 Nm (29.5 lb·ft) Stem forks 9 Nm (6.64 lb·ft) Stem handlebars 6 Nm (4.43 lb·ft) Frame opening on right dropout 8 Nm (5.9 lb·ft) GRACE EASY Manual Page | 127... -
Page 62: Warranty
13. Warranty A statutory warranty period of two years has been in effect since 01/01/2002. The warranty period begins when you receive your GRACE EASY from your dealer, who is your contact person for all warranty issues. Please keep the invoice or till receipt in a safe place for the duration of the warranty period. -
Page 63: Ec Declaration Of Conformity
The declaration is not valid anymore if the product is modified without agreement. Attorney of documents: Karl-Heinz Nicolai; Kyselhäuser Straße 23, D-06526 Sangerhausen Sangerhausen, 31.01.2014 (Place, date) (legally binding signature of the issuer) Director Karl-Heinz Nicolai GRACE EASY Manual Page | 129...
Need help?
Do you have a question about the GRACE EASY and is the answer not in the manual?
Questions and answers