Table of Contents
Advertisement
OWNER'S MANUAL
HELLO KITTY CITY SCOOTER
DO NOT RETURN TO STORE!
QUESTIONS OR COMMENTS?
STOP
1-800-288-1560
FOR AGES THIRTEEN AND UP
MAXIMUM WEIGHT: 170 lbs. (77 kgs.)
NOTE: Illustrations in this Manual are for reference purposes only and may not reflect the exact
appearance of the actual product. Specifications are subject to change without notice.
©1976, 2012 Sanrio Co., LTD. Used Under License.
Advertisement
Table of Contents

Related Manuals for Hello Kitty CITY SCOOTER

Summary of Contents for Hello Kitty CITY SCOOTER
- Page 1 OWNER’S MANUAL HELLO KITTY CITY SCOOTER DO NOT RETURN TO STORE! QUESTIONS OR COMMENTS? STOP 1-800-288-1560 FOR AGES THIRTEEN AND UP MAXIMUM WEIGHT: 170 lbs. (77 kgs.) NOTE: Illustrations in this Manual are for reference purposes only and may not reflect the exact appearance of the actual product.
-
Page 2: Table Of Contents
TABLE OF CONTENTS A Introduction, Safety and Warnings B Before You Begin Assembly C City Scooter Parts D Assembly E Before You Ride and Routine Safety Checks F Detailed Maintenance and Repair G Troubleshooting Guide H Warranty THIS VEHICLE MUST BE ASSEMBLED BY AN ADULT. PLEASE READ THE MANUAL... -
Page 3: A Introduction, Safety And Warnings
INTRODUCTION, SAFETY, AND WARNINGS ABOUT THIS MANUAL: This Manual was written to help you get the most performance, comfort, enjoyment and safety when riding your new electric scooter. It is important for you to understand your new electric scooter. By reading this manual before you or your child go out on your first ride, you will know how to get the most from your new electric scooter. - Page 4 Always wear appropriate clothing and shoes, including long sleeved shirts and long pants and lace-up or similar shoes with rubber soles. Never ride barefoot or in sandals and make sure that shoelaces or other fasteners are tied and kept away from the wheels and drive system of the scooter.
- Page 5 • Children must be supervised by an adult to be safe. • Always be alert and ride your scooter defensively. Watch out for obstacles that could catch one of the scooter’s wheels or force you to turn suddenly and/or lose control. Be careful to avoid pedestrians, persons using other wheeled products (including roller or in-line skates, skateboards, scooters, bikes, etc.), children or animals who may enter your path.
- Page 6 • Before each cycle of operation, the operator shall perform the pre-operation checks specified in this manual or by the manufacturer, including: • That all guards and pads originally supplied by the manufacturer are in proper place and in serviceable condition; • That the area that the unit is to be operated in is safe and suitable for safe operation;...
-
Page 7: B Before You Begin Assembly
USING THE CHARGER The charger should be examined regularly for damage to the cord, plug, enclosure and other parts. In the event such damage has occurred, the scooter should not be charged until the charger has been repaired by qualified personnel or replaced. Use only the supplied, recommended charger. - Page 8 Charger Charger Plug Charger Port Required Tools 6mm Allen Key (included) Bicycle style tire pump for Schrader valve tires with pressure gauge (not included) 8mm and 10mm wrenches (included) Phillips screwdriver 15mm wrench (not included) (not included) If you experience a problem with this product, or are missing a part, please call us at 1-800-288-1560, rather than return this product to the store.
-
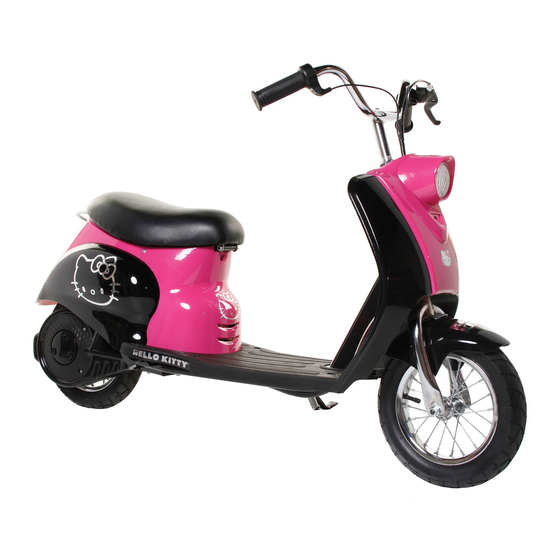
Page 9: C City Scooter Parts
CITY SCOOTER PARTS 1. Handlebar Grip 8. Front Wheel Complete 18. Kickstand (Right/Left) 9. Front Fork 19. Motor (24V 250W) 2. Single Speed Twist 10. Front Fork Fairing 20. Rear Brake Grip Throttle 11. ON/OFF Switch 21. Chain 3. Handlebar 12. -
Page 10: D Assembly
ASSEMBLY WARNING Children can be harmed by small parts, sharp edges and sharp points in the vehicle’s unassembled state, or by electrical items. WARNING In the unassembled state, this package contains small parts. Adult assembly is required, children should not handle parts, or help in assembly of the vehicle. - Page 11 Attaching the Front Fender to the Front Fork 1. Use a Phillips screwdriver to attach and tighten the front fender with the two screws and mounting bracket onto the front fork as shown. Attaching the Front Wheel Tools required: Two (2) 15mm wrenches (not included).
-
Page 12: Charging The Battery
If you exceed the recommended PSI, release the excess pressure immediately. Charging the Battery Your City Scooter may not have a fully charged battery. Therefore the battery must be charged prior to use. Initial charge time: 18 hours, and never charge the battery longer than 30 hours. - Page 13 Charger port 1. Turn power OFF before 2. Plug the charger into a charging. Plug the charger wall outlet. If the lights on into the charger port on charger do not light up, the scooter. check the power to the Note: Be sure to properly outlet.
-
Page 14: E Before You Ride And Routine Safety Checks
BEFORE YOU RIDE AND ROUTINE SAFETY CHECKS Before you ride always check for the following: Safety Gear Always wear proper protective gear such as: • Approved safety helmet. (Helmet may be legally required by local law or regulation in your area.) • Elbow pads, knees pads and wrist guards • Long sleeved shirt, long pants • Gloves... -
Page 15: Tire Inflation
Pre-Ride Checklist Loose Parts There should not be any unusual rattles or sounds from loose parts or broken components. If you are not sure, ask an experienced mechanic to check or call customer service. Brake Check the brake for proper function. When you squeeze the lever, the brake should provide positive braking action. -
Page 16: F Detailed Maintenance And Repair
DETAILED MAINTENANCE AND REPAIR (Turn power “OFF” before conducting any maintenance procedures) Testing the Brakes To use the brake, squeeze the lever to increase the pressure on the brake. The brake lever is fitted with a cable adjuster to compensate for cable stretch and/or to fine-tune the lever movement to brake engagement. - Page 17 WARNING The brake could be capable of skidding the tire and causing the rider to loose control and fall or be thrown from the scooter if not applied correctly. Practice using the brake in an unobstructed, open area to become familiar with its function and until you can make smooth, controlled stops.
- Page 18 3. With a 10mm wrench, loosen the brake cable anchor and disconnect the cable. Note: Get all the anchor hardware out of the brake arm hole and keep them together to avoid losing. 4. Use two 15mm wrenches, to loosen the axle locknuts.
- Page 19 6. Slide the chain onto the chain wheel as shown. Then slide the rear wheel axle into the slots on the rear end of the frame. (Replace with a new chain, new rear brake or a new rear wheel at this time.) 7.
- Page 20 9. Re-attach the chain guard. Test ride and readjust as needed. Chain Tensioner Replacement: Note: Use a Phillips screwdriver to remove the 4 bolts from the chain guard. 1. Lift the chain tensioner arm up. 2. Use the Phillips screwdriver to loosen (counter-clockwise) the bolt on the chain tensioner.
-
Page 21: Replacement Parts
BATTERY CARE AND DISPOSAL Do not store the battery in temperatures above 75° F (23.5° C) or below 32° F(0°C). THIS SCOOTER CONTAINS SEALED LEAD ACID BATTERIES WHICH MUST BE RECYCLED IN ACCORDANCE TO YOUR LOCAL AND STATE LAWS. PLEASE CAREFULLY READ AND UNDERSTAND THE FOLLOWING DISPOSAL INSTRUCTIONS: Disposal: This product contains sealed lead acid batteries which must be disposed... -
Page 22: G Troubleshooting Guide
City Scooter by exceeding the 170 lb maximum weight capacity or by towing anything behind the City Scooter. Do not drive up hills or run into fixed objects, which can cause the wheels to stop spinning while power is still being supplied to the motor. - Page 23 Problem Possible Cause Solution Scooter runs sluggishly Riding conditions are too Use only on solid, flat, clean and dry surfaces severe such as pavement or level ground. Tires are not properly The tires are inflated when shipped but they inflated in variably will lose some pressure between the point of manufacturing and your purchase.
-
Page 24: H Warranty
WARRANTY Limited Warranty Subject to the following limitations, all electric scooters manufactured for Dynacraft are warranted to the original purchaser to be free of defects in materials and workmanship for a period of 90 days from the date of purchase. No other express or implied warranty is given. - Page 25 SB 1918/Cal. Veh. Code, §§ 406, 407.5 (CALIFORNIA) DISCLOSURE YOUR INSURANCE POLICIES MAY NOT PROVIDE COVERAGE FOR ACCIDENTS INVOLVING THE USE OF THIS SCOOTER/ ELECTRIC VEHICLE. TO DETERMINE IF ANY COVERAGE IS PROVIDED, YOU SHOULD CONTACT YOUR INSURANCE COMPANY OR INSURANCE AGENT.
- Page 26 Cal. Veh. Code, § 407.5 (CALIFORNIA) DISCLOSURE (IF APPLICABLE) YOU MAY NOT MODIFY OR ALTER THE EXHAUST SYSTEM OF THIS SCOOTER TO CAUSE IT TO AMPLIFY OR CREATE EXCESSIVE NOISE PER VEHICLE CODE SECTION 21226, OR TO FAIL TO MEET APPLICABLE EMISSION REQUIREMENTS PER VEHICLE CODE 27156.
-
Page 27: Customer Service
Dynacraft Customer Service 1.800.288-1560 7AM TO 4PM PACIFIC TIME Please have the following information available when you call: Model Number: (sample: 8595-95) Production Date: (sample: 2003.10.10) Serial Number: (sample: 03TD5899988) Having this information is required and helps us handle your call more effectively. DO NOT return this item to the store.
Need help?
Do you have a question about the CITY SCOOTER and is the answer not in the manual?
Questions and answers