
Subscribe to Our Youtube Channel
Related Manuals for Nivona CafeRomatica 720


Summary of Contents for Nivona CafeRomatica 720
- Page 1 720/725 CafeRomatica & 740 Fully automatic coffee centre Operating Instructions and Useful Tips A passion for coffee. Downloaded from CoffeeMachineManual.com Manuals...
- Page 2 Operating Instructions and Useful Tips Dear Customer, Congratulations and many thanks for choosing a high-quality NIVONA product. To get the most out of your NIVONA machine, please read this manual carefully before use. Please start by reading the safety notes.
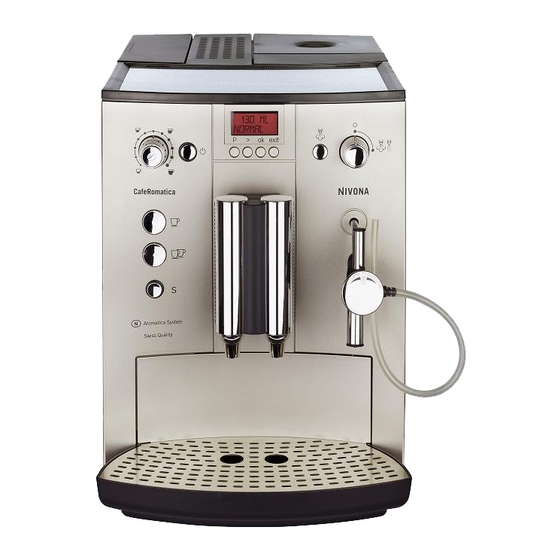
- Page 3 Equipment Text display screen Steam / hot water Service button ‘S’ with control keys valve control knob Height-adjustable coffee spout Removable water Document compart- reservoir ment (on rear) Drip grill Cupwarming / Mains supply switch Cup-warming function holding plate (on rear) (On / Off switch, Water quantity NICR 740 only)
- Page 4 Equipment Control knob Air inlet valve Air inlet pipe Inlet valve Steam / hot water jet Liquid inlet hose Downloaded from CoffeeMachineManual.com Manuals...
-
Page 5: Table Of Contents
Contents 1. Safety instructions 2. Set up 2.1 Preparing the machine 2.2 Getting started 2.3 Grinder settings 2.4 Cup-warming function 3. Making coffee 3.1 Selecting coffee strength 3.2 Selecting water quantity 3.3 Making one cup 3.4 Making two cups 3.5 Using pre-ground coffee 3.6 Drawing hot water 3.7 Drawing steam 3.8 Frothing up milk... - Page 6 1. Safety instructions • This machine may only be used • Always unplug the machine dur- for the intended purpose (domest- ing extended periods of absence. ic use) and is not for commercial • Do not leave the machine ap plication (more than 3000 switched on unnecessarily.
-
Page 7: Safety Instructions
CE – This machine conforms to it was purchased – or to NIVONA the following EC guidelines: central customer services. • 73/23/EWG dated 19/02/1973 Caution: Electrical appliances “Low Voltage Directive”, includ-... -
Page 8: Set Up
2. Set up 2.1 Preparing the machine 2.2 Getting started Carefully remove the machine and Remove the plug from the all parts from the packaging. power cord compartment (fig. 1/V) and plug the machine in. Note: If you need to return your Switch the mains supply on machine for servicing, it can be (fig. -
Page 9: Grinder Settings
... 2. Set up ton (fig. 1/F), “FILL UP PIPE-SYS” Remember: and “TURN VALVE” appear alter- · a light roast requires a finer grind nately in the display. · a dark roast requires a coarser Open the steam / hot water con- grind trol valve (fig. -
Page 10: Making Coffee
3. Making coffee Note: The machine is preset for You can change this setting by immediate use. However, we re - pressing the button (fig. 1/E and 6) commend that first you adjust the repeatedly until the desired coffee most important settings to suit your strength appears in the display personal preferences. -
Page 11: Making One Cup
... 3. Making coffee 3.3 Making one cup of coffee Turn the water quantity control knob (fig. 1/D and 6) to one of the Place your (pre-heated) cup following positions: under the coffee spout (fig. 1/J or · ‘100ml’ for a small (espresso) cup. 5). -
Page 12: Using Pre-Ground Coffee
... 3. Making coffee Note: pressed after ground coffee is · The brewing operation can be added, the machine will automati- stopped at any point by pressing cally be rinsed out via the coffee the 1-cup (fig. 1/G) or 2-cup spout (fig. -
Page 13: Drawing Steam
... 3. Making coffee 3.7 Drawing steam · Caution: Risk of scalding! The steam which comes out is Then press the steam warm-up very hot. Only touch the black button (fig. 1/P and 7). plastic parts of the jet. As soon as the system is ready, ·... - Page 14 ... 3. Making coffee For cappuccino: now turn the Now draw steam (as described ‘spumatore’ control knob (fig. 11a) in points 3.7 and 3.8) until only to the left so that it points to clean water / steam comes out. ‘cappuccino’.
- Page 15 4. Programming functions The function keys under the text filter setting to “FILTER YES” so display screen are used to pro- that the machine knows that the gram functions (fig. 1/A and 4): filter has been inserted. The de - fault setting is “FILTER NO”.
-
Page 16: Programming Functions
... 4. Programming functions Wait until no more water comes placed anyway after no longer than out of the jet for a short time and two months (see chapter 5.2 turn the control knob (fig. 1/Q “Washing filter manually”). and 7) back to the left to close. (Caution: If water continues to Operating without a filter: come out of the jet after a short... -
Page 17: Water Hardness
... 4. Programming functions 4.2 Water hardness Note: If none of the dots turn red on the test strip, please set level 1. Depending on the water hardness in your region, or if you have not Press the program key ‘P’ to inserted a filter (see chapter 4.1), enter programming mode. - Page 18 ... 4. Programming functions Press the ‘ok’ key to confirm. You can return to programming The display reads: “PROGRAM mode “PROGRAM TIMES” by TEMP.”. pressing the ‘exit’ key. You can now either continue in You can now either continue in programming mode to change programming mode to change other function settings or press...
-
Page 19: Language
... 4. Programming functions Press ‘ok’ to confirm. Now the Press the ‘ok’ key to confirm. arrow < flashes behind the minute Press the > key until the desired display. number of hours (1 – 12 hours are Press the > key until the desired possible) appears. -
Page 20: Statistics
... 4. Programming functions Confirm your selection by press - Press the program key ‘P’ to ing ‘ok’. The display reads enter programming mode. “PROGRAM LANGUAGE”. Press the > key until “PROGRAM You can now either continue in STATIST.” appears. programming mode to change Press the ‘ok’... -
Page 21: Changing A Filter - Washing A Filter Manually
... 5. Maintenance and Care Empty the water reservoir (fig. ing disk at the top of the filter 1/B and 2) and replace the filter (scale in months). (see point 4.1). Empty the water reservoir (fig. Press the service button (fig. 1/B and 2) and replace the filter. - Page 22 ... 5. Maintenance and Care 5.3 Cleaning program Tip: Place a sufficiently large con- tainer (about 0.5 l) under the cof- When the machine needs to be fee spout (fig. 1/J and 5). cleaned, “PLEASE CLEAN” ap - pears in the display and the Put a cleaning tablet into the service button (fig.
- Page 23 ... 5. Maintenance and Care Press the > key until “PRGRAM Tip: Only press the service button CLEANING” appears. when you wish to start the des - Press the ‘ok’ key. The display caling program. Please strictly ob - reads “MANUAL CLEANING” serve the order of the following Press the ‘ok’...
- Page 24 ... 5. Maintenance and Care Replace the water reservoir in Open the steam / hot water valve the machine. The display reads (fig. 1/Q and 7) by turning the “TURN VALVE”. control knob to the right. The system is rinsed out in Tip: Place a fairly large container intervals once more through the...
- Page 25 ... 5. Maintenance and Care Manual descaling Empty the drip tray (fig. 1/W) and the used coffee tray (fig. 1/U) If required, the descaling program only when instructed to do so by can also be started even if no the display. From time to time indication has been displayed by use soapy water to clean.
- Page 26 ... 5. Maintenance and Care Unlock the brewing unit by Replace and lock the brewing pressing the red switch and turn - unit with equal care by pressing the ing the handle to the left until it red lever switch and turning the blocks (see fig.
-
Page 27: System Messages
... 6. System messages Message Meaning What to do EMPTY TRAYS Drip tray (fig. 1/W) Empty drip and / or and / or used coffee used coffee tray tray (fig. 1/U) are full TRAYS MISSING Drip tray (fig. 1/W) Position water and and used coffee tray used coffee trays (fig. -
Page 28: Troubleshooting
7. Troubleshooting Fault Meaning What to do No hot water / Jet (fig. 1/T) is Clean jet thoroughly steam comes out blocked of jet Too little milk foam Unsuitable milk Use cold milk or foam too liquid Jet is blocked Take jet apart and clean Coffee only comes... - Page 29 ... 7. Troubleshooting Fault Meaning What to do “ERROR 1” Circular light around Let the machine appears in display On / Off button warm up at room (fig. 1/F) flashes temperature for one Machine is too cold to two hours “ERROR 2”...
-
Page 30: Further Instructions
Instead Customer service submit it to the “collection point for the disposal and recycling of NIVONA products are designed to electric and electronic appliances” meet the highest quality standards. provided by your local council. However, if questions do arise while... - Page 31 - pliance and improve its durability. scaling programme. The The CLARIS filter cartridge, if NIVONA descaler is de - changed regularly, ensures that signed especially for our machines you will have to descale your and will reliably remove limescale NIVONA machine less often.
- Page 32 Notices Downloaded from CoffeeMachineManual.com Manuals...
- Page 33 Notices Downloaded from CoffeeMachineManual.com Manuals...
- Page 34 Nivona Apparate GmbH Fritz-Haber-Straße 10 D-90449 Nürnberg www.nivona.com © 2008 by NIVONA Downloaded from CoffeeMachineManual.com Manuals...
Need help?
Do you have a question about the CafeRomatica 720 and is the answer not in the manual?
Questions and answers