Table of Contents
Advertisement
Advertisement
Table of Contents

Related Manuals for Hasselblad CFV 50c


Summary of Contents for Hasselblad CFV 50c
- Page 1 CFV 50c USER MANUAL...
- Page 2 CFV 50c Welcome to Hasselblad...
-
Page 3: Table Of Contents
Image Orientation This manual describes how to work with the Aspec t ratio Navigating the Menu Hasselblad CFV 50c digital back only. Please re- Show preview fer to previously published manuals for details Over view of Menu concerning older or discontinued Hasselblad... -
Page 4: Introduction
Replacements are expensive so treat the glass surface We hope you enjoy working with the CFV 50c. The results will with at least as much care as you would a lens. The sensor it- prove you made the right choice. -
Page 5: Computer System Requirements
When you are connected to a computer, the following applies: • The CFV 50c will take power via the FireWire cable if it is available (not all computers can supply power, notably PC lap- tops). This will help conserve the battery power. -
Page 6: Before You Start
Leave protective covers on as much as possible and avoid touching glass surfaces and inserting fingers into the camera body. Hasselblad cameras have a robust construction and are capable of withstanding fairly rough treatment but neverthe- less are precision instruments and will serve you longer if treated with respect from the beginning. -
Page 7: Work F Low
(typically by way of Phocus) to obtain complete development. If processed in Phocus, 3FR files become Hasselblad 3F files – denoted by each file now bearing the suffix “.fff”. If processed by other RAW processors, the 3FR files are not converted to 3F but can be exported directly to TIFF, PSD etc according to requirements. -
Page 8: Phocus
Phocus combines with Hasselblad Natural Color Solution result is exactly what you would expect from Hasselblad – sim- (HNCS) and digital lens corrections to provide ultimate image ply stunning image quality. -
Page 9: Getting Started
CFV 50c GETTING STARTED Photo: Bryn Griffiths © / Hasselblad Masters... -
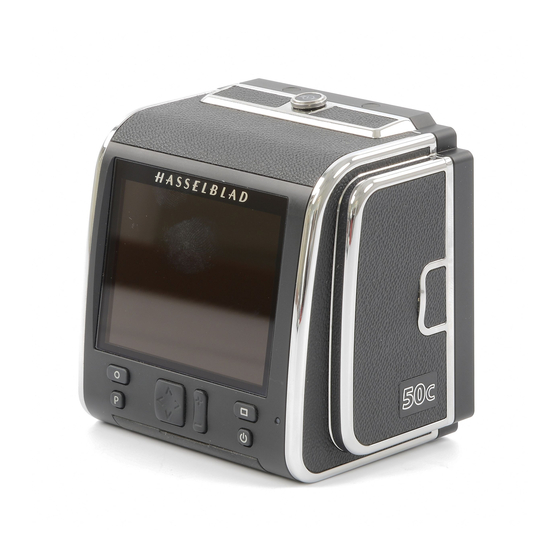
Page 10: Buttons, Parts & Components
The sensor is positioned behind a permanently mounted IR filter. Always be very careful not to touch or scratch the surface of the filter when it is ex- posed. Replace the protective cover whenever the CFV 50c is not mounted on a camera. -
Page 11: Bat Ter Y
When both attaching and removing the protective cover as well as attaching and removing the CFV 50c to the camera, slide the locking button A. Avoid trying to just ‘snap’ the CFV 50c or protective cover into place without using the button. -
Page 12: Inserting A Cf Card
Ensure you format all previously unused cards in the CFV 50c before use for optimum performance. Do not remove a CF card from the CFV 50c if the ‘ready’ light is orange. All files on the card may become corrupted (and consequently lost) if you... -
Page 13: Navigating The Menu
CFV 50c NAVIGATING THE MENU Photo: Bryn Griffiths © / Hasselblad Masters... -
Page 14: Over View Of Menu
CFV 50c BASIC OVERVIEW OF MENU & SCREENS The menu is structured in a manner similar to very many digitally controlled personal devices and should be familiar to most. Once the menu is accessed, navigation, selection and confirmation are made by the various buttons beneath the display. -
Page 15: White Balance
Sets options regarding P Button, show preview, mark overexposure, etc. Camera Accesses the individual settings requirements for the various Hasselblad V system models as well as for view camera / large format use. Service Accesses save log data, default settings, firm- ware update, tethered power and firewire speed. -
Page 16: Menu
OVERVIEW OF NAVIGATING MENU AND SETTINGS. Navigating the menu and accessing the settings on the CFV 50c are achieved by pressing the appropriate buttons surrounding the display. Note that some of the buttons are modal and so have dual functions which is indicated by the designation that ap- pears closest to that particular button when navigating. -
Page 17: Initial Settings
CFV 50c INITIAL SETTINGS Photo: Paul Gisbrecht © / Hasselblad Masters... -
Page 18: Iso Set Ting
4. Save the chosen selection by pressing EXIT (MENU button). ISO can also be set on the CFV 50c when tethered, via Phocus. WHITE BALANCE SETTING – PRESETS: MENU > WHITE BALANCE There are six ‘White Balance’... -
Page 19: Exposure Time
When changing large differences in ton). exposure time it is more practical to use the Flash Sync cable method. Exposure time can also be set on the CFV 50c when tethered, See Camera Connectivity in this via Phocus. manual. ... -
Page 20: File Storage
CFV 50c FILE STORAGE Photo: Martin Schubert © / Hasselblad Masters... -
Page 21: Storage
CFV 50c STORAGE Storage includes three entries: Create new folder, Delete and Format. ‘CURRENT’ FOLDER SELECTION You can re-direct new captures to a selected folder for storage instead of the latest folder created. 1. Enter Browse mode 2. Zoom out (use the... -
Page 22: Format
CFV 50c FORMAT The camera is only able to read and write to storage media that have been formatted correctly. New cards sometimes have no formatting, or you might want to convert a card that is currently using a format that the camera cannot read. In either case, you must reformat the CF card. -
Page 23: Settings
CFV 50c SETTINGS Photo: Bryn Griffiths © / Hasselblad Masters... -
Page 24: Language
MENU > SETTINGS > USER INTERFACE > DATE & TIME The CFV 50c has an internal clock that keeps track of the date and time. This informa- tion is used to mark each shot with the date and time at which it was taken. It is also used to label folders with the date on which each folder was created. -
Page 25: Display
CFV 50c DISPLAY MENU > SETTINGS > USER INTERFACE > DISPLAY This setting controls the level of Contrast and Brightness (both on a scale of 1-10) on the display. Usually, you should leave this set to the default level of 5; however in some viewing environments and/or with some types of images you may wish to increase or decrease this value. -
Page 26: • Power Off
CFV 50c • Power Off: MENU > SETTINGS > CUSTOM OPTIONS > POWER OFF Sets the amount of elapsed time before the back turns itself off completely requiring a re- start. OPTIONS: 30 min, 60 min, Never • Mark overexposure MENU >... -
Page 27: Camera
CFV 50c • Animation 5. Press the ZOOM button to MENU > SETTINGS > CUSTOM OPTIONS > ANIMATION select. Animation selects the behaviour of previews on the display when browsing and zooming. 6. Save the chosen selection EXIT by pressing (MENU 1. -
Page 28: About
The About box displays which firmware version is present so you can see if you have the latest (which can be downloaded from the Hasselblad website). The serial number is also dis- played in case Hasselblad Support need to know it for any eventual problem solving. 1. Press MENU. -
Page 29: Previews, Browsing & Live View
CFV 50c PREVIEWS, BROWSING & LIVE VIEW Photo: Dmitry Ageev © / Hasselblad Masters... -
Page 30: Preview Modes
CFV 50c PREVIEW MODES Two additional screens also available, accessible from the Use the Display button to cycle through the available pre- Histogram preview by pressing the up and down arrows on view modes which are: the navigation button. -
Page 31: Browsing
CFV 50c HISTOGRAM TYPES There are three types of histogram representation available: Histogram and Full details, Combined histogram and Histogram mode. Histogram and Full details Combined Histogram Histogram mode In Histogram and Full details mode, In Combined Histogram mode, the... -
Page 32: Zooming In And Out
CFV 50c ZOOMING IN AND OUT There are four views in Browse mode. Zoom in by using the Zoom in ( ) / out ( ) button. Zoomed View is reached by zooming in from the Standard View. When zoomed in, you can select the area of interest by using the navigation button. -
Page 33: Live View
CFV 50c LIVE VIEW Live View This feature is useful for accurate focusing, composition, checking depth of field etc. It is activated by the P button. Firstly, program either the P button to ‘Live View’. Tip: for a short-cut to program the P Button, press ‘MENU’... -
Page 34: Change Language
CFV 50c CAMERA CONNECTIVITY Photo: Bara Prasilova © / Hasselblad Masters... - Page 35 CFV 50c Connectivity diagram This diagram illustrates the situation regarding V system cameras and the connection requirements according to model. All cables illustrated here are supplied. 500 C/CM 501 C/CM 503 CX/CXi/CW Battery Adapter (3054668) SWC/SWC/M required for portable use.
- Page 36 • Use a Battery Adapter (optional accessory 3054668) to provide the necesssary extension beyond the motor housing of the EL models for battery attachment. It is attached to the CFV 50c in the same man- All Hasselblad EL models...
-
Page 37: Flash Sync
For use with lenses/cameras with no shutter. Intended primarily for use in a studio environment where complete darkness can be achieved and exposures made accordingly, for ‘light painting’ etc. In this mode the CFV 50c uses the exposure time (as well as other required stages in a capture sequence) set in the Capture Sequence dialog. - Page 38 Battery Adapter at certain extreme settings. The adapter unit consists of two connected battery mounting plates. It is attached to the CFV 50c in the same manner as a battery allowing the extra mounting plate to be accessible for A Hasselblad ELD attaching the battery itself.
-
Page 39: Flash/Strobe
CFV 50c FLASH / STROBE Photo: Joseph Goh © / Hasselblad Masters... - Page 40 CFV 50c STUDIO FLASH/STROBE tethered Flash / strobe connection for CFV 50c digital backs. Standard flash / Please note the different ways of connecting the various camera strobe sync cable body / CFV 50c / flash /computer combinations. In particular, notice the importance of the correct connections...
- Page 41 Move the film speed selector on the camera so that is becomes approximately 12⁄3 f/stop higher than the ISO setting on the CFV 50c. Therefore, for example, when the CFV 50c is set at 50 ISO, the ‘film speed setting’ on the camera should read 160 ISO, and so on.
-
Page 42: Appendix
CFV 50c APPENDIX Photo: Hengki Koentjoro © / Hasselblad Masters... -
Page 43: Cleaning
If you see dark or colored spots or lines in your images, then you may need to clean the outer surface of the CFV 50c’s infrared (IR) filter. In most cases, the careful use of compressed air will be adequate though if you use canned com-... - Page 44 MENU > SETTINGS > USER INTERFACE > LANGUAGE If the CFV 50c has been set to a language you don’t understand (on a rented back, for example), you can navigate to your preferred language by following the actions and appearance in the illustrations here.
-
Page 45: Technical Specif Ications
F/FE lenses. The ArcBody is not compatible. SWC/M and newer can be used but has limitations on image quality due to lens design not being suitable for digital capture. All other cameras with Hasselblad V interface. -
Page 46: Equipment Care & Service
• Take particular care when working with strobe / studio flash units problems particularly in regard to the CFV 50c. Try to ensure the environ- to prevent damage to equipment and personal injury. ment or conditions are as dry as possible when storing. - Page 47 CF Cards On/Of f button Cleaning P Button Computer system requirements Phocus Custom Options Power of f Date & time Powering the CFV 50c Delete Preview Display Qualit y Equipment care & ser vice Ser vice E xposure time Sound...
-
Page 48: Cfv 50C
Victor Hasselblad AB assumes no responsibility or liability for loss or damage incurred during or as a result of using Hasselblad soft- ware or products. Hasselblad, Phocus, Phocus Mobile and Phocus Quick are trade- marks of Victor Hasselblad AB. - Page 49 CFV 50c www.hasselblad.com...
Need help?
Do you have a question about the CFV 50c and is the answer not in the manual?
Questions and answers