Table of Contents
Advertisement
Advertisement
Table of Contents

Related Manuals for Elnapress 320


Summary of Contents for Elnapress 320
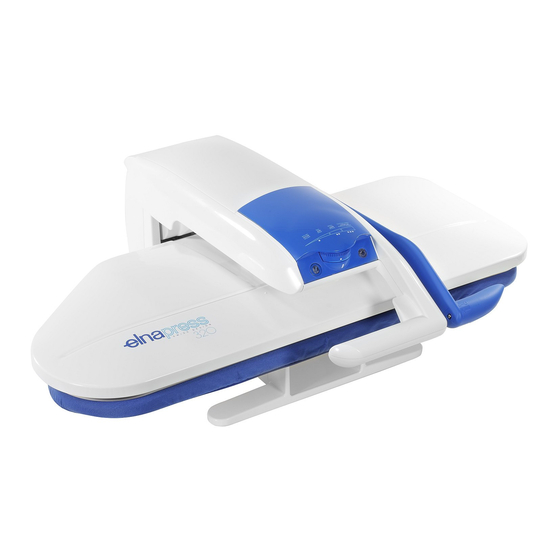
- Page 1 Instruction manual for the Elnapress 320 ironing press...
-
Page 3: Table Of Contents
Opening and closing the press p. 8 Shirt p. 19 T-shirt p. 21 Power supply p. 8 Touching up Turning the Elnapress on p. 9 Pleated skirt p. 22 and setting the temperature. Jacket p. 22 Safety features p. 9... -
Page 4: Important Safety Instructions
• Never immerse the appliance in water or any other liquid. • Do not use the Elnapress if it has fallen or been damaged. Do not try to disassemble or repair it yourself. Take it to a qualified person to be checked or repaired. Improper repair or re-assembly might cause one of the above-mentioned risks and will render the guarantee null and void. - Page 5 Elnapress and its accessories. Safety Before using your Elnapress for the first time, please be sure to read all the " IMPORTANT SAFETY INSTRUCTIONS ". In addition, according to recommendations made by standards and safety organi- sations, unplug your Elnapress from the electric power supply when left unattended, during maintenance and when accessories are being replaced.
-
Page 7: Main Parts
Main parts 1. Movable heating shoe 6. ON/OFF switch 2. Padded ironing board 7. Temperature control dial 3. Fixed handle 8. Thermostat light (To open and close the press) 9. Spray bottle 4. Movable handle (To apply ironing pressure) 10. Electronic security with safety buzzer 5. -
Page 8: Opening And Closing The Press
(Operating the press into the socket. this way keeps your hand from accidentally touching Note : The Elnapress has a grounded plug and must the heating shoe while pressing.) be connected to a grounded wall socket only. See With your right hand, lower the movable handle and IMPORTANT SAFETY INSTRUCTIONS. -
Page 9: Turning The Elnapress On And Setting The Temperature
LED will illuminate to indicate that the Elnapress is in the process of heating. If the Elnapress is left on, in its open position and Turn the temperature control dial to the desired unused for more than 15 minutes, the power supply setting. -
Page 10: Spray Bottle
Spray bottle The spray bottle allows items to be dampened before and during pressing. The spray bottle disperses a mist of water over the surface to be pressed. When the heating shoe is lowered, the mist is converted into steam, which penetrates the fibres of the material. -
Page 11: Pressing Hints
To create steam with the spray bottle, place your dry pressing cloth on the item and pump the spray bottle Buttons, Zippers, Pins to dampen. Close the Elnapress for a few seconds The padded surface allows ordinary buttons to sink and then open to allow excess steam to escape. -
Page 12: Preparing Your Laundry
If the press is closed for more than 10 seconds, the electronic safety buzzer sound and the power supply is automatically switched off. When the Elnapress is opened again, the power supply is automatically switched back on. -
Page 13: Storing Your Elnapress
While the press is still hot, open and close several times to dry the board cover. Note : Do not close or lock the Elnapress before it has cooled down completely. The heating shoe should be cleaned as needed, and the padding foam and board cover should be regu- larly replaced. -
Page 14: Maintenance
Maintenance Padding foam and Board Cover After cleaning the heating shoe, with a lint-free cloth Padding foam flattens after prolonged use, and your apply a thin protective coating (optional accessory) pressing results will be unsatisfactory. to the warm surface. Leave the press open for about 20 minutes, set at the maximum temperature. -
Page 15: Technical Specifications
Technical specifications Accessories for separate purchase Electrical input 1000 watts / 230V 1000 watts / 120V (For 1) Vapojet system USA and CANADA only) 2) Cleaning stick 700 watts / 100V (For 3) Protective cover JAPAN only) 4) Padding foam 5) Protective liquid (for aluminium heating shoe Voltages 100V, 120V (For JAPAN,... -
Page 16: Basic Ironing Doilies
For all ironing, use your vaporiser as necessary. For cotton items it is generally helpful to give your vaporiser a few squirts each time before lowering the heating shoe. Do not use the vaporiser for applications and special fabrics. Basic ironing Doilies You can press multiple items at one time because of the large surface of the heating shoe and ironing board. - Page 17 Move the tablecloth forward towards you. Press. Continue moving forward until the entire item is pressed. To store, fold it, place it on the ironing board and close the press. Apply mini-pressure. If necessary, refold the tablecloth to press any areas that were hanging off the sides of the ironing board.
-
Page 18: Trouser
Trouser Waistband : ironing board Place the top of the trousers on the press and spray with the vapo- riser. Use the ironing cushion or the board to press the waistband. Waistband : cushion Place the waistband around the board. Arrange the pleats. Press. Use mini pressure if only lightly wrinkled. -
Page 19: Shirt
Crotch Area : ironing board Place the inside of the crotch area on the board, facing up. Align with the slanted left side of the board. Press. Legs : ironing board Place top of one trouser leg half way on the ironing board. Press front crease. - Page 20 Cuffs : ironing board Place the cuffs and plackets around the edges of the ironing board. Arrange any pleats. Press. Sleeves : ironing board Place the garment to the left side of the press with the collar towards you. Place the first sleeve on the ironing board with the curve of the garment fitted to the curve of the board (the second sleeve will lay in front of the press off the board).
-
Page 21: T-Shirt
T-shirts are generally pressed flat on the ironing board. Depending on the shape, begin with the sleeves. The Elnapress won’t push the stretchy fabric along like a hand iron creating unwanted wrinkles. For a T-shirt with plasticized decorations or rhinestones, place it with the decorated side face down on the board before pressing or turn it inside out before pressing. -
Page 22: Touching Up
Note : You may wish to use mini pressure allowing the heat to smooth out areas that are only lightly wrinkled. Use the cushion to iron parts that may be difficult to reach like shoulders. The Elnapress will not leave shiny marks on the fabric. - Page 23 Children’s clothing : flounces on little girls’ dresses or tiny tops with or without gathers Ties : Place the tie lengthwise on the board and apply mini-pres- sure. Ribbons, straps : There are two ways to proceed. Place them horizontally on the board and press or close the press and pull the ribbon or strap through it.
-
Page 24: Elnapress Accessory Cushion
Elnapress accessory Cushion Tops without a full front opening : Lay garment flat on the ironing board. Insert cushion under the front opening. Press. Use the cushion to iron delicate yokes or other difficult to reach areas. Note : Items such as this may only need mini pressure. -
Page 25: Special Techniques
Note : Be sure to apply mini pressure to delicate knits or hand knits. Use the ironing cushion to press areas without creases. Embroidery Press the embroidered part first by placing it face down. Apply full pressure. The Elnapress will not flatten embroidery. -
Page 26: Elastic
Elastic Elasticized waist or yoke : Place the waist or yoke around the board and stretch so that the fabric lays flat. Lower the heating shoe before releasing the elastic. Fitted Sheets : Place the corner around the curved end of the ironing board. Using your right hand, pull on the sheet to stretch flat. -
Page 27: Applications & Embellishments
Applications & Embellishments Fusible patches Measure the patch area and cut the patch larger than the area measured. Place the patch on the garment. See the manufacturer’s directions for fusing time. Interfacing Cut the interfacing without seam allowances and trim away any corners. - Page 28 elnapress.com...
Need help?
Do you have a question about the 320 and is the answer not in the manual?
Questions and answers