Advertisement
OWNER'S
MANUAL
product and hope it will provide many hours of quality exercise to make you feel
better, look better and enjoy life to its fullest.
long duration exercise product. This is great for the office or the home and for use
during activities where an individual would sit for long periods of time.
+
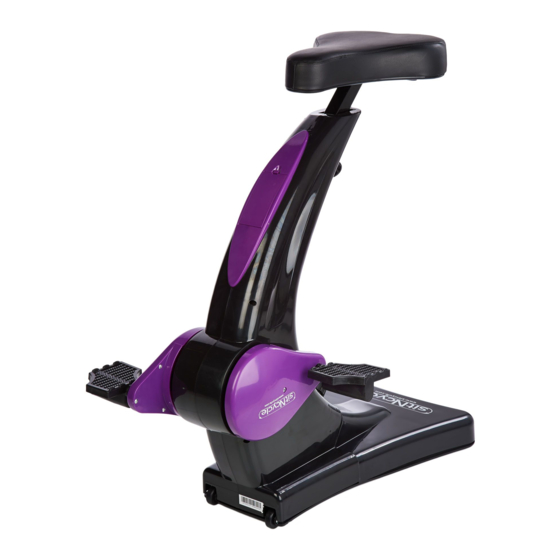
Thank you for choosing the
The sitNcycle is not a typical exercise bike; it is designed to be a low resistance
CAUTION: WEIGHT ON THIS PRODUCT SHOULD NOT EXCEED 136KG / 300LBS
The Product May Vary Slightly From the
sitNcycle
. We take great pride in producing this quality
Picture Shown Above
MADE IN CHINA
Advertisement
Table of Contents

Summary of Contents for SitNcycle SitNcycle
- Page 1 The sitNcycle is not a typical exercise bike; it is designed to be a low resistance long duration exercise product. This is great for the office or the home and for use during activities where an individual would sit for long periods of time.
- Page 2 Serious bodily injury can also occur if all instructions are not followed. Follow your Doctor's recommendations in developing your own personal fitness program. You must NOT use the sitNcycle without your doctor’s consent if you: a. Are pregnant b. Have had a recent operation or surgery c.
- Page 3 “A SSEMBLY ARTS” Unpack the box in a clear area. Follow the List of Assembly Parts below to check and make sure all of the assembly parts are present and in good condition. Do not dispose of the packing material until the trial period has expired. The tools needed for assembly have been included.
- Page 4 “H ARDWARE DENTIFICATION HART” Unpack the box in a clear area. Review the Hardware Kit List below. This chart is provided to help identify the hardware used in the assembly process. Place the washers, the ends of the bolts, or screws on the circles to check for the correct diameter.
- Page 5 UPPER materials. 2. Place the upper Styrofoam packaging Fig1-B upside down on the floor. Then remove the sitNcycle main frame and place it on to the Styrofoam as pictured on the left in Fig 1-A. Bolt holes facing outward 3. Attach the base frame #13 to the main frame #8.
- Page 6 “A SSEMBLY NSTRUCTIONS” – TEP2 Base Cover Top and Bottom Covers #34 x 4 1. Attach the base frame top cover (12) to the base frame (13). 2. Ensure that the base frame top cover overlaps the main frame cover so that the seam between the covers is tight and there are no gaps.
-
Page 7: Step3 - Foot Pads
“A SSEMBLY NSTRUCTIONS” – TEP3 Foot Pads #15 x 4 1. Once the base frame bottom cover is attached, screw the 4 foot pads (15) in to the base fame as pictured on the left. 2. Verify that all of the bolts and fasteners are completely tightened from the previous steps, before moving forward. - Page 8 “A SSEMBLY NSTRUCTIONS” – TEP5 Pedals NOTE: THE PEDALS ARE STAMPED, L AND R ON THE PEDAL THREADED SHAFT. The left and right pedals are not interchangeable. You must only assemble the right pedal to the right side crank arm and the left pedal to the left side crank arm.
-
Page 9: Step6 - Seat Assembly
“A SSEMBLY NSTRUCTIONS” – TEP6 Seat Assembly #3 x 5 1. For ease of assembly, turn the seat upside down and place it on the floor or any flat surface. 2. Line up the holes in the seat post with the threaded holes on the seat. - Page 10 “S DJUSTMENT” Warning: Do not use the sitNcycle without verifying that the seat is locked in place. Before moving or using the bike, pull upward on the seat to verify it cannot be removed 2. Pull back the seat 1. Turn the seat adjustment...
-
Page 11: Adjusting The Resistance
2. To increase the resistance, turn the dial clockwise. 3. To decrease the resistance, turn the dial counter-clockwise. sitNcycle USAGE Resistance It is recommended that the resistance level is selected prior to using the machine. Start by setting the resistance to the easiest level before trying a more challenging resistance level. -
Page 12: Muscle Chart
ORKOUT ECOMMENDATIONS” Prior to each workout, perform a few warm-up exercises in order to prevent excessive straining of your muscles and to reduce the risk of injury. After each workout, perform some cool-down exercises as well in order to gradually relax your muscles. MUSCLE CHART Targeted muscle groups: The exercise routine that is performed on this product will develop primarily lower body muscle groups. -
Page 13: Stretching Routine
STRETCHING ROUTINE Warm up and cool down: A successful exercise program consists of a warm-up, aerobic exercise, and a cool-down. Do the entire program at least two and preferably three times a week, resting for a day between workouts. After several months, you can increase your workouts to four or five times per week. -
Page 14: Exploded Diagram
Exploded Diagram ”... - Page 15 “P IST” Item Name Q'TY SNC2JY-1 Seat SNC2JY-2 Seat Post SNC2JY-3 M5x15mm Allen head bolts SNC2JY-4 Seat Tube Sleeve SNC2JY-5 Handle SNC2JY-6 Front Decorative Cover SNC2JY-7 Seat Adjustment Knob SNC2JY-8 Main Frame SNC2JY-9 Resistance Adjustment Knob SNC2JY-10 Resistance Adjustment Knob Cable Box SNC2JY-11 Crank Pulley SNC2JY-12...
- Page 16 Period of Coverage: The Warranty on this product runs from the date of original purchase using the following schedule: Model Name Plastics, Upholstery and Wear and Tear Parts Frame and Mechanical Parts sitNcycle 90 days 1 year SCN Products LLC reserves the right to inspect damaged parts for misuse. Your Original Receipt is proof of purchase and should be kept with the product manual.
- Page 17 Customer Service 1-855-663-5643...
Need help?
Do you have a question about the SitNcycle and is the answer not in the manual?
Questions and answers
The box that show speed and miles doesn’t work how can get this to work. Put in new battery