Table of Contents
Advertisement
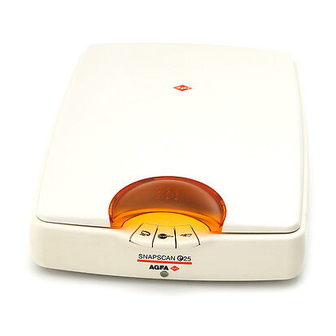
SnapScan™ e25
Owner's Guide
!
Preface
This chapter gives you information about SnapScan and about
!
Chapter 1: Preparing the Scanner
"Preparing the Scanner" explains how to prepare your SnapScan for installation.
!
Chapter 2: Installing the Scanner for PC
This chapter shows you how to set up your SnapScan for your PC.
!
Chapter 3: Configuring Buttons on Your PC
This chapter shows you how to configure your SnapScan Buttons on your PC.
!
Chapter 4: Installing the Scanner for Macintosh
This chapter shows you how to set up your SnapScan for your Macintosh computer.
!
Chapter 5: Configuring Buttons on Your Macintosh Computer
This chapter shows you how to configure your SnapScan Buttons on your Macintosh
computer.
!
Chapter 6: Making Your First Scan
Here you find instructions on how to place reflective originals on the glass plate of your
scanner.
!
Appendix A: Troubleshooting
"Troubleshooting" can be helpful when you come across problems.
!
Appendix B: Technical Information
This appendix provides specifications for your SnapScan.
!
Appendix C: Regulation Compliance
This appendix gives you information about safety regulations and electromagnetic
compatibility.
How to Use This Online
ab
Guide.
Advertisement
Table of Contents

Related Manuals for AGFA SnapScan e25


Summary of Contents for AGFA SnapScan e25
- Page 1 SnapScan™ e25 Owner’s Guide Preface This chapter gives you information about SnapScan and about How to Use This Online Guide. Chapter 1: Preparing the Scanner “Preparing the Scanner” explains how to prepare your SnapScan for installation. Chapter 2: Installing the Scanner for PC This chapter shows you how to set up your SnapScan for your PC.
- Page 2 Trademarks AGFA and the Agfa rhombus are trademarks of Agfa-Gevaert AG ScanWise and SnapScan are trademarks of Agfa-Gevaert N.V. Acrobat is a trademark of Adobe Systems Incorporated which may be registered in certain jurisdictions. Apple, Macintosh, PowerPC and Mac OS are trademarks of Apple Computer Inc., registered in the U.S.
-
Page 3: Table Of Contents
Contents Preface ............................... 5 About SnapScan ......................... 6 Environmental Requirements...................... 6 Precautions ..........................7 Cleaning Your Scanner ....................... 7 How to Use This Online Guide....................8 How to Print This Guide ......................8 Chapter 1: Preparing the Scanner....................9 Unpacking the Scanner......................10 Taking a Closer Look ........................ - Page 4 Safety Regulations ........................50 UL Safety Statement....................50 TÜV: Wichtige Sicherheitshinweise................50 Electromagnetic Compatibility....................51 Federal Communications Commission Radio Frequency Interference Statement..51 Industry Canada Class A and B Label Requirements ..........51 Declaration of Conformity: SnapScan e25 ................52 Contents...
-
Page 5: Preface
Preface About SnapScan Environmental Requirements Precautions Cleaning Your Scanner How to Use This Online Guide How to Print This Guide Preface... -
Page 6: About Snapscan
About SnapScan In this Owner’s Guide, the name SnapScan is used for the SnapScan e25 (unless specified otherwise). The SnapScan is a one pass flatbed color scanner with a resolution of 600 X 1200 ppi equipped with a cold cathode lamp. It is based on CCD (Charge-Coupled Device) scanning technology. With the SnapScan, you can scan line-art, gray-scale and color reflective originals up to A4 format. -
Page 7: Precautions
Precautions For your own safety and that of your equipment, respect conscientiously the Environmental Requirements and always take the following precautions: " Check frequently whether there is no overheating of the AC adapter. " If you do not use your scanner for some time, pull the AC adapter cable out of the power supply socket. -
Page 8: How To Use This Online Guide
How to Use This Online Guide To … Click … jump to another location within or outside the blue text document jump to a topic in the document click the corresponding bookmark jump to the first or the last page retrace your steps in the document jump to the previous or to the next page zoom in and zoom out (control-click) on the... -
Page 9: Chapter 1: Preparing The Scanner
Chapter 1: Preparing the Scanner This chapter helps you to prepare your SnapScan for installation. Unpacking the Scanner Taking a Closer Look Changing the Handle Unlocking the Scanner Chapter 1: Preparing the Scanner... -
Page 10: Unpacking The Scanner
Unpacking the Scanner Open the packing box and carefully unpack all the items. Check each item to make sure that everything listed on the Packing List (printed on the box) is present. Check if there is no visible defect. If something is missing, contact your dealer. Remove the plastic wrapping and the packing materials from the scanner. -
Page 11: Changing The Handle
The following figure illustrates the location of the different parts at the rear of your scanner. Power connector USB Port (labeled with the USB icon ) to make a connection to your computer Changing the Handle It is possible to customize your SnapScan by changing its handle. Rotate the handle counterclockwise to remove it. -
Page 12: Unlocking The Scanner
Unlocking the Scanner Before you start using the scanner, you first have to unlock it. Place the scanner on a horizontal, flat surface and pull it carefully towards you until you can see the locking screw at the bottom. Rotate the locking screw in the direction of Your scanner is unlocked. -
Page 13: Chapter 2: Installing The Scanner For Pc
Chapter 2: Installing the Scanner for PC This chapter shows you how to set up your SnapScan for your PC. Minimum System Requirements Installing the Scanner Software Connecting the Scanner to Your PC Installing Additional Software Chapter 2: Installing the Scanner for PC... -
Page 14: Minimum System Requirements
Minimum System Requirements " A USB port " A Pentium® processor " A 14 inch color monitor " A video card that can display a minimum of 16 bit high color " 32 MB of RAM (64 MB of RAM is recommended) "... -
Page 15: Installing The Scanner Software
Note: During installation the Register ScanWise window appears. You can choose to register now or later. " Register now: If you choose to register now, the Agfa webpage opens. Here you can register online. " Register later: If you choose to register later, you can register afterwards via Start/Programs/Agfa ScanWise/Register ScanWise. - Page 16 Agfa assists you online if you have additional questions about technical issues. Automatic e-mail notification: Agfa notifies you immediately when new software and upgrades are available for downloading. Note: For support issues, go to http://support.agfa.com. Note: For the latest information consult the ScanWise Read Me File.
-
Page 17: Connecting The Scanner To Your Pc
Connecting the Scanner to Your PC Caution: For your safety, use the adapter that comes with this product. Do not use any substitute. Misuse of the power adapter can cause serious damage to the product and a safety hazard while using it. -
Page 18: Installing Additional Software
Installing Additional Software If you want to use OCR (Optical Character Recognition) you will have to install Readiris Pro. Insert the CD-ROM and follow the instructions on your screen. To install additional software, insert the Corel Print Office 2000 for Windows CD-ROM and follow the instructions on your screen. -
Page 19: Chapter 3: Configuring Buttons On Your Pc
Chapter 3: Configuring Buttons on Your PC Selecting a Different ScanWise Configuration Modifying an Existing Configuration Creating a New Configuration Modifying the ScanWise Settings Chapter 3: Configuring Buttons on Your PC... -
Page 20: Selecting A Different Scanwise Configuration
In this example we will change the settings of the e-mail button into a configuration that will send the scanned image to a file. Open the Agfa ScanWise software. Select Configure Buttons from the Tools menu. The Configure Buttons window appears. -
Page 21: Modifying An Existing Configuration
In this example we will change the settings of the e-mail button into a configuration that will send the scanned image to a file instead of to your mail recipient. Open the Agfa ScanWise software. Select Configure Buttons from the Tools menu. - Page 22 Click Organize. The Organize Actions window appears. The Organize Actions window displays all predefined and user defined configurations. Note: Remove will be enabled when a user defined action is selected. The default actions cannot be removed. Chapter 3: Configuring Buttons on Your PC...
- Page 23 Select Scan Image to File (autoselect). Click Edit to modify the selected configuration. The Settings For window appears. a. All predefined settings are available via the different drop-down menus. b. The resolution depends on the choice of destination. c. The output dimensions can be managed via the Dimension drop-down list. Note: There are several options to edit the existing configuration.
-
Page 24: Creating A New Configuration
SnapScan. The following example will show you how this is done. In this example we will create a new configuration and assign it to the e-mail button. Open the Agfa ScanWise software. Select Configure Buttons from the Tools menu. The Configure Buttons window appears. - Page 25 Click Organize. The Organize Actions window appears. The Organize Actions window displays all predefined and user defined configurations. Note: Remove will be enabled when a user defined action is selected. The default actions cannot be removed. Chapter 3: Configuring Buttons on Your PC...
- Page 26 Click New in the Organize Actions window. The Settings For window appears. a. All predefined settings are available via the different drop-down menus. b. The resolution depends on the choice of destination. c. The output dimensions can be managed via the Dimension drop-down list. Note: There are several options to create a new configuration.
-
Page 27: Modifying The Scanwise Settings
Click Close. You return to the Configure Buttons window. 10 Select the name you have given to your configuration from the drop-down list next to the e-mail button. 11 Click OK. The e-mail button is configured with your personal settings. Modifying the ScanWise Settings There are several options to edit an existing configuration or to create a new one. - Page 28 " Dimension: If you want a specified output range, click the Dimension drop-down list. A list of additional options will appear. Select the dimension (width or height) you want to specify. Enter the desired range and select the correct unit from the drop-down list. The Keep original size selection will keep the original size of the image.
-
Page 29: Chapter 4: Installing The Scanner For Macintosh
Chapter 4: Installing the Scanner for Macintosh This chapter shows you how to set up your SnapScan for your Macintosh. Minimum System Requirements Installing the Image Editing Software Installing the Scanner Software Connecting the Scanner to the Macintosh Computer Installing Additional Software Chapter 4: Installing the Scanner for Macintosh... -
Page 30: Minimum System Requirements
Minimum System Requirements A USB port A PowerPC ® processor A 14 inch color monitor with thousands of colors for an accurate display of color images 32 MB of RAM A CD-ROM drive Mac ® OS 8 or higher Installing the Image Editing Software Disable the virus protection software. -
Page 31: Installing The Scanner Software
" Note: After installation the Register ScanWise window appears. Register now: If you choose to register now, the Agfa webpage opens. Here you can register online. Register later: If you choose to register later, you can register afterwards by double- clicking the ‘Product Registration’... - Page 32 Personalized one-to-one technical support: Agfa assists you online if you have additional questions about technical issues. Automatic e-mail notification: Agfa notifies you immediately when new software and upgrades are available for downloading. " Note: For support issues, go to http://support.agfa.com.
-
Page 33: Connecting The Scanner To The Macintosh Computer
Connecting the Scanner to the Macintosh Computer Caution: For your safety, use the adapter that comes with this product. Do not use any substitute. Misuse of the power adapter can cause serious damage to the product and a safety hazard while using it. -
Page 34: Chapter 5: Configuring Buttons On Your Macintosh Computer
Chapter 5: Configuring Buttons on Your Macintosh Computer Selecting a Different ScanWise Configuration Modifying an Existing Configuration Creating a New Configuration Modifying the ScanWise Settings Chapter 5: Configuring Buttons on Your Macintosh Computer... -
Page 35: Selecting A Different Scanwise Configuration
In this example we will change the settings of the e-mail button into a configuration that will send the scanned image to a file. Open the Agfa ScanWise software. Select Configure Buttons from the Tools menu. The Configure Buttons window appears. -
Page 36: Modifying An Existing Configuration
In this example we will change the settings of the e-mail button into a configuration that will send the scanned image to a file instead of to your mail recipient. Open the Agfa ScanWise software. Select Configure Buttons from the Tools menu. - Page 37 Click Organize. The Organize Actions window appears. The Organize Actions window displays all predefined and user defined configurations. Note: Remove will be enabled when a user defined action is selected. The default actions cannot be removed. Select Scan Image to File (autoselect). Click Edit to modify the selected configuration.
-
Page 38: Creating A New Configuration
Note: There are several options to edit the existing configuration. For more information see Modifying the ScanWise Settings. Click Save As. The Save Action Configuration window appears. Enter the name of your configuration. Click OK. You return to the Settings For window. Click OK. - Page 39 In this example we will create a new configuration and assign it to the e-mail button. Open the Agfa ScanWise software. Select Configure Buttons from the Tools menu. The Configure Buttons window appears. a. Print button b. ScanWise button c. E-mail button Click Organize.
- Page 40 Click New in the Organize Actions window. The Settings For window appears. a. All predefined settings are available via the different drop-down menus. b. The resolution depends on the choice of destination. c. The output dimensions can be managed via the Dimension drop-down list. Note: There are several options to create a new configuration.
-
Page 41: Modifying The Scanwise Settings
Click Close. You return to the Configure Buttons Window. 10 Select the name that have given to your configuration from the drop-down list next to the e-mail button. 11 Click OK. The e-mail button is configured with you personal settings. Modifying the ScanWise Settings There are several options to edit the existing configuration or to create a new one. - Page 42 " Dimension: If you want a specified output range, click the Dimension drop-down list. A list of additional options will appear. Select the dimension (width or height) you want to specify. Enter the desired range and select the correct unit from the popup list. The Keep original size selection will keep the original size of the image.
-
Page 43: Chapter 6: Making Your First Scan
Note: The adjustable document cover makes it possible to scan from books and magazines. When you put a thick original on the reflective glass plate, the document cover adapts to the thickness of the original. For PC: In the Start menu, select Programs, Agfa ScanWise to open the ScanWise application. -or- For Macintosh: Go to the Agfa ScanWise folder on your hard disk and double-click Select your scanner (if needed). - Page 44 Follow the steps described in the ScanWise Guide Me mode. For more information consult the ScanWise Application Guide and the Agfa Contacts on your Agfa ScanWise CD-ROM. After installation you can access these documents via the Start menu on your PC or via the ScanWise icon on the desktop of your Macintosh.
-
Page 45: Appendix A: Troubleshooting
If ScanWise is not installed correctly, the following message appears: “The software needed to use the device SnapScan e25 cannot be found”. " Re-install ScanWise. " Check if the Extensions folder contains the file ‘Agfa USB e25’. This driver is necessary for detecting the scanner. Appendix A: Troubleshooting... - Page 46 You cannot scan from within your image editing software (MACINTOSH ONLY) If ScanWise is installed before the image editing software, no plug-ins will be available in the image editing software. " Uninstall and re-install ScanWise. Windows 98 fails to detect the scanner when you connect it for the first time (PC ONLY).
- Page 47 Note: If ScanWise cannot find an e-mail destination, ScanWise will ask you to assign another action to the default e-mail button of your scanner. Your problem is not solved. For support issues, go to http://support.agfa.com or consult the Support file in the documentation folder on the ScanWise CD-ROM. Appendix A: Troubleshooting...
-
Page 48: Appendix B: Technical Information
Appendix B: Technical Information Technical specifications are subject to change without notice. Scanner type: - SnapScan e25 Desktop, flatbed, one pass, 3 buttons of which all are software definable Maximum resolution: - optical: 600 ppi horizontal x 1200 ppi vertical... -
Page 49: Appendix C: Regulation Compliance
Appendix C: Regulation Compliance Safety Regulations UL Safety Statement TÜV: Wichtige Sicherheitshinweise Electromagnetic Compatibility Federal Communications Commission Radio Frequency Interference Statement Industry Canada Class A and B Label Requirements Declaration of Conformity: SnapScan e25 Appendix C: Regulation Compliance... -
Page 50: Safety Regulations
The SnapScan and the AC adapter are suited for indoor use only. Do not use them outdoors. Use the Agfa supplied AC adapter only, otherwise guarantee will be voided. For the reason of safety, besides the personal maintenance mentioned in this operation manual, do not try to remove any mechanical parts or any electronic devices. -
Page 51: Electromagnetic Compatibility
Electromagnetic Compatibility SnapScan is designed to comply with: " Emission EN55022, class B " Immunity IEC 801-2, IEC 801-3, IEC 801-4 " 47 CFR, part 15, subpart B, class B Federal Communications Commission Radio Frequency Interference Statement This equipment has been tested and found to comply with the limits for a Class B digital device, pursuant to Part 15 of the FCC Rules. -
Page 52: Declaration Of Conformity: Snapscan E25
Agfa SnapScan e25 Color image scanner Complies with the requirements of the Low Voltage Directive 73/23/EEC, 93/68/EEC The product SnapScan e25 complies with the following standards: EN 60950: 1992/A1: 1993 Complies with the requirements of the EMC directive 89/336/EEC The product SnapScan e25 complies with the following standards: EN 55022 class B EN 50082 –...
Need help?
Do you have a question about the SnapScan e25 and is the answer not in the manual?
Questions and answers