Table of Contents
Advertisement
Advertisement
Table of Contents

Summary of Contents for Ready Welder 10000
- Page 1 (800) 935-3644...
-
Page 2: Table Of Contents
Wire Spool Installation ....... . . 5 Loading the Ready Welder II ......6 Welding Aluminum . -
Page 3: Warranty Information
When welding is to be suspended for any sustained period of time, such as during lunch or overnight, the READY WELDER II should be disconnected from its arc current power source when not in use. Never immerse MIG guns, electrode holders, TIG torches,... - Page 4 SAFETY (continued) BE AWARE, ARC RAYS, HOT SLAG AND SPARKS CAN AND DO CAUSE INJURIES TO EYES AND SKIN The welding and/or cutting processes produce extreme localized heat and strong ultraviolet rays. Never attempt to weld and/or cut without proper welding equipment, including, but not limited to, a welding helmet with the proper lens, which complies with federal guide lines.
-
Page 5: Frequently Asked Questions
Optima Batteries offers, or at least a group 31 marine deep cycle battery as a power source for the Ready Welder II. A fully charged pair of these batteries will normally yield a minimum duration of about 45 min- utes when welding 1/2”... -
Page 6: Important Operating Tips
IMPORTANT OPERATING TIPS In order to obtain the best possible performance and service life from your new RW-II, we recommend that you read and practice the following operating tips: 1. SAFETY · Never open the RW-II if it is connected to a live power source! Opening the case halves while the gun is powered will likely cause severe damage to the circuit board and other parts inside the RW-II. -
Page 7: Thin Metal Welding
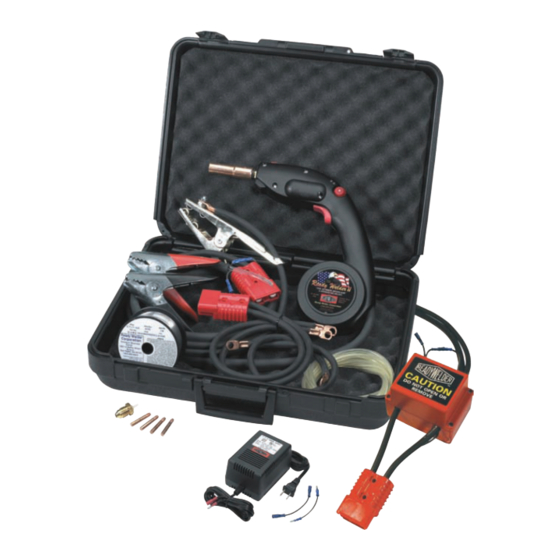
WIRE SPOOL INSTALLATION The Ready Welder system is shipped virtually ready-to-use as its name implies. The only preparation required is to load the RW-II welding gun with a wire spool. -
Page 8: Loading The Ready Welder Ii
LOADING THE READY WELDER II Lift top half of case from spool end first to allow the Remove the T-Bolt handle (turn counter clockwise). retainer clip securing the case halves at the tip end to disengage. Remove nozzle and insulator, then remove gas diffuser and tip;... -
Page 9: Welding Aluminum
RW-II spool gun. As with all installations of weld wire, and especially aluminum, be sure that the Ready Welder is NOT connected to any welding power source (batteries or DC welding machines). Once the aluminum wire is installed, install the gas diffuser and contact tip, and then trim any excess wire flush to the nozzle. -
Page 10: Operation
RW-II will adjust to a spray transfer process. Deep cycle marine batteries have a longer discharge/recharge life over standard batteries. However, welding performance will be the same with either type of battery. Model 10000/10000-CS Connect two 12 volt batteries in series by connecting the positive terminal of battery #1 to the negitive terminal of battery #2. -
Page 11: Connecting To Dc/Cv Power Source & Engine Drives
The RW-II will be controled by the voltage control on the machine. Model 10000/10000-CS Connect the RW-II positive lug to the positive output stud on the machine, or you can connect to any part of the roller block, if needed. -
Page 12: Connecting To Premier Power Welder & Other Alternator Systems
PREMIER POWER WELDER OR OTHER ALTERNATOR BASED SYSTEMS You can only weld on your own vehicle with the Ready Welder II in reverse polarity (green LED light). Using the RW-II that is powered by the Premier Power Welder or other alternator based system in straight polarity (red LED light) could cause serious damage to your electrical system. -
Page 13: Mig Machine As The Rw-Ii Power Source
MIG drive motor. CONNECTION DIAGRAMS C o n n e c t i n g To B a t t e r i e s Model 10000 Model 10000-CS GAS HOSE... - Page 14 CONNECTION DIAGRAMS (continued) C o n n e c t i n g To B a t t e r i e s ( c o n t i n u e d ) Model 10000ADP Model 10000ADP-CS GAS HOSE Wire From Jacket to Neg Side TO RW-II...
-
Page 15: Diagrams For Connection To Cv Mig Machine
CONNECTION DIAGRAMS (continued) C o n n e c t i n g To A C V M I G M a c h i n e Model 10000 and 10000-CS -OR- GAS HOSE TO RW-II TO GROUND GAS HOSE... -
Page 16: Diagrams For Connection To Cc Stick Welder
CONNECTION DIAGRAMS (continued) C o n n e c t i n g To A C V M I G M a c h i n e ( c o n t i n u e d ) Model 10250 and 10250-CS Small Clamp To Ground -OR- Small Clamp To Ground... -
Page 17: Routine Maintenance
ROUTINE MAINTENANCE RW-II Prevent:ative Maintenance Recommendations 1. Keep grinding grit from getting into the RW-II gun. Do not lay the RW-II down on dirty or gritty surfaces and set the gun down as far away from grinding activities and grit sources as possible. 2. -
Page 18: Troubleshooting
Check Application Table Wrong Feed Wire or Shielding Gas Used Check Application Table (800) 935-3644, NOTE: Please contact READY WELDER customer service, at (800) 465-9184, with questions regarding any mechanical or technical problems that you may encounter when using your RW-II. -
Page 19: Applications Table
READY WELDER II APPLICATION TABLE Thickness of Tweco Gas Flow Wire Speed Metal Shield Polarity / Material Be- Wire Type/Size #2 Tip Rate Control Set- Type LED Color ing Welded Size ting (Cu.Ft./Hour) 75% Argon / Straight / 24 to 18 GA Solid Steel .023”... -
Page 20: Assembly Diagram
ASSEMBLY DIAGRAM...

Need help?
Do you have a question about the 10000 and is the answer not in the manual?
Questions and answers