
Subscribe to Our Youtube Channel
Related Manuals for Brunswick 850 Impact


Summary of Contents for Brunswick 850 Impact
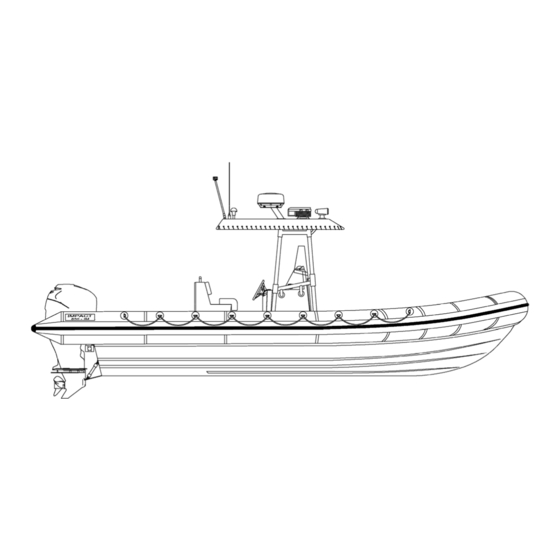
- Page 1 Operation & Maintenance Manual 850 IMPACT ® Rigid Hull Inflatable Boat © 2013 Brunswick Commercial & Government Products. All Rights Reserved. 420 Megan Avenue Edgewater Florida 32132 USA...
- Page 2 Warranty Information When you see a safety information box in this manual, carefully read the message before Read the Brunswick Commercial & Gov- you proceed. Take these safety warnings ernment Products limited commercial war- seriously and be alert to the possibility of ranty statement located on the inside rear property damage, serious injury, or death.
-
Page 3: Safety Section
Safety Section 1 Operator Responsibilities It is expected by Brunswick Commercial & Govern- ment Products (BCGP) that the personnel authorized to operate this boat are experienced boat handlers familiar with high-performance boating. BCGP cannot predict, nor warn against, every possible hazardous situation related to the operation and maintenance of this boat. -
Page 4: Personal Flotation Devices
Section 1 Safety Personal Flotation Devices Personal Flotation Devices (PFDs) are designed to save lives. It is your responsibility to ensure that the boat has a sufficient number of PFDs for your crew. It is your responsibility to ensure that non-swimmers wear PFDs at all times and that everyone wears a PFD during emergencies, special operations, and severe weather. -
Page 5: Exhaust Emissions
Safety Section 1 Exhaust Emissions Gasoline-powered engines produce carbon monoxide when they are running. Carbon monoxide is a color- less and odorless gas. It is extremely toxic. Always be aware of operating conditions that might allow carbon monoxide to collect in occupied spaces on your boat. -
Page 6: Fire Extinguishers
Section 1 Safety Fire Extinguishers Your boat is equipped with at least two 2¾-pound United States Coast Guard approved Type ABC fire extinguishers. Each extinguisher is UL Rated 1-A:10- BC. This UL rating certifies that these extinguishers can be used to fight Class A, B, and C fires. These classes include fires involving wood, cloth, gasoline, oil, grease, and live electrical equipment. -
Page 7: Severe Weather
Safety Section 1 Severe Weather Take these general safety precautions if you must operate your boat in severe weather conditions: • Review the condition and operation of all safety and communication gear • Have everyone wear personal floatation devices • Use your ignition shutoff clip and lanyard •... -
Page 8: Boat Load Capacities
Section 1 Safety Boat Load Capacities The United States Coast Guard requires boats less than 20 feet (6 m) to display a capacity plate that indi- cates the maximum number of people and the maxi- mum weight that the boat can support under normal operating conditions. -
Page 9: Diving Operations
Safety Section 1 Swamping Swamping (flooding the interior of the boat) can occur for a number of reasons, including severe weather conditions, improper operation, and improper load- ing. Consider the following: • Know the safe loading limits for this boat under normal conditions. -
Page 10: Operator Notes
Operator Notes... -
Page 11: Proposition 65 Information
Safety Section 1 Proposition 65 Information The following information is included in this manual as recommended by California’s Safe Drinking Water and Toxic Enforcement Act of 1986, amended through Proposition 65. ! WARNING A wide variety of components used on this boat contains or emits chemicals known to the State of California to cause cancer, birth defects, and other reproductive harm. - Page 12 Section 1 Safety Deck Occupancy Chart 1-10...
- Page 13 Safety Section 1 Working Decks: Do not allow passengers on these decks while the boat is underway. These decks can only be used when you are at the dock, mooring, or anchoring. Accommodation Decks: You can allow passengers to move around these decks while the boat is under- way.
- Page 14 Section 1 Safety Warning Label Chart 1-12...
- Page 15 Safety Section 1 1 1017078 Do Not Stand 2 0995704 Fuel Fill 3 1016443 Do Not Drill (Fuel Tank) 4 1017136 Hi-performance Boat 5 1950698 Rotating Propellers 6 1016518 Steering Effort 7 1016534 Fuel Level Readings 8 1811368 Carbon Monoxide 9 2084383 Collar Maintenance 0 1817722...
- Page 16 Operator Notes 1-14...
-
Page 17: Pre-Operation Check List
Boat Operation Section 2 Pre-operation Checklist Review all the items on this checklist each time you prepare for a mission. Resolve any issues before you begin your mission. ❑ Drain plug installed in hull ❑ Drain plug installed in engine bracket ❑... -
Page 18: Boat Operation
Section 2 Boat Operation Ignition Shutoff Switch Your boat is equipped with one ignition shutoff switch. The ignition shutoff switch is located on the control console face. The ignition shutoff switch is designed to shut off both engines if you move away from the helm station by accident, either by falling down or by being ejected from the helm seat. - Page 19 Boat Operation Section 2 Understand this important information about your ignition shutoff switch: • It is your responsibility to decide when to attach the switch lanyard, but we strongly recommend that you use the shutoff switch anytime you are operating the boat. •...
- Page 20 Section 2 Boat Operation Main Engine Key Switch Your boat is equipped with two main engine key switches. The key switches are located on the control console face. The key switches control the starting, running, and stopping of the outboard engines. The key switches also control the operation of certain engine accessory systems.
- Page 21 Boat Operation Section 2 To START the port outboard engine, the control port lever must be in the NEUTRAL position. The ignition shutoff switch clip and lanyard must be attached to the shutoff switch. Turn the port main engine key switch to the ON position and then to the START position.
-
Page 22: Battery Parallel Switch
Section 2 Boat Operation Battery Parallel Switch Your boat is equipped with an emergency battery par- allel switch. The switch is located on the control con- sole face. You can use the emergency battery parallel switch to connect the two engine starting batteries in parallel if one engine will not start due to low battery voltage. -
Page 23: Starting Procedure
Boat Operation Section 2 Starting Procedure Use the following checklist each time you start the out- board engines. Additional detailed information about these systems is covered in the engine operator’s manual. ! DANGER Never start or operate the engines when people are in the water near your boat. -
Page 24: Shift And Throttle Control
Section 2 Boat Operation Shift and Throttle Control Boat direction, boat speed, and close-quarter maneu- vering are controlled by the dual-lever control. The dual-lever control includes gear selection, engine speed, and engine trim angle functions. Additional detailed information about your dual-lever control is covered in the engine operator’s manual. - Page 25 Boat Operation Section 2 Speed Control • Move the shift lever forward from the FORWARD gear detent to increase engine speed in forward gear. • Move shift lever backward from REVERSE gear detent to increase speed in reverse gear. Engine Trim ! WARNING Certain combinations of engine trim angle, boat operating angle, and boat speed can reduce...
- Page 26 Section 2 Boat Operation You must determine the correct engine trim adjust- ments through experimentation or experience, based on your mission loads and operating conditions. • Adjusting engine trim angles can affect ride com- fort and boat performance. 4° “bow up” is an average setting for boat operating angle.
-
Page 27: Engine Gauges
Boat Operation Section 2 Engine Gauges Your boat might be equipped with a number of dash- mounted gauges that display the condition of various engine systems. The gauges power up when the engine ignition switch is turned to the ON position. The engine gauges are illuminated for nighttime oper- ation. - Page 28 Section 2 Boat Operation Hour Meter The hour meter records cumulative hours of engine operation. The hour meter powers up when the engine ignition switch is turned to the ON position. Always turn the engine ignition switch to the OFF posi- tion when the engine is secured from service.
- Page 29 Boat Operation Section 2 Water Pressure Gauge The water pressure gauge displays the pressure in the engine’s cooling system. The gauge’s unit of measure is pounds per square inch (PSI). The water pressure gauge is a good indicator of cool- ing system condition.
-
Page 30: Boat Operation
Section 2 Boat Operation Trim Gauge The trim gauge measures the engine’s angle position relative to the boat’s transom. The first 15° of move- ment is the engine’s trim range. The additional engine movement is referred to as the tilt range. Engine movement through the tilt range does not reg- ister on the trim gauge. -
Page 31: Smartcraft Vessel View ® System
Boat Operation Section 2 ® SmartCraft Vessel View System Your boat might be equipped with Mercury Marine’s SmartCraft Vessel View boat and engine information system. The Vessel View color LCD display is mounted on the control console, directly above the steering wheel. - Page 32 Section 2 Boat Operation Propellers Your outboard engines are equipped with propellers of a tested size and design to provide best engine and boat performance. Refer to the engine operator’s manual for detailed information about propeller designs and the correct propeller selection method.
- Page 33 Boat Operation Section 2 Reducing propeller pitch and diameter will increase acceleration and load carrying capability, with a slight decrease in top speed. It will also increase the engine’s full-throttle RPM at a rate of about 150 RPM per inch of pitch change. Increasing propeller pitch...
- Page 34 Section 2 Boat Operation Maneuvering Maneuvering this boat requires experience and a high level of skill. Always operate any boat within the limits of your experience. If you do not have this experience, ask someone to instruct you or gain experience through experimentation under controlled conditions. If you do not have this experience, do not operate this boat under high-risk conditions, such as: •...
- Page 35 Boat Operation Section 2 At idle speed, you can control boat direction and position by engine gear selection alone. With both outboard engines facing straight ahead: • You can rotate the boat to port by shifting the starboard engine into FORWARD and the port engine into REVERSE.
-
Page 36: Load Distribution
Section 2 Boat Operation Load Distribution Placement and concentration of non-permanent loads in a boat can affect boat performance and crew safety. Refer to Boat Load Capacities in Section 1 of this manual for additional information. ! WARNING Improper operation, excessive loading, improper load distribution, and mismatching... -
Page 37: Boat Trim Tabs
Boat Operation Section 2 Boat Trim Tabs ® Your boat is equipped with Lenco electro-mechanical trim tabs. The trim tab control switches and LED indi- cator lights are located on the control console face. Using the boat trim tabs properly requires experience and skill. - Page 38 Section 2 Boat Operation Operation The trim tab switch panel is labeled and wired to make tab operation simple. When operating the trim switches, think of how you want the bow of the boat to move to properly trim the boat. To lower the port side of the bow, push the left switch forward.
-
Page 39: Stopping Procedure
Boat Operation Section 2 Stopping Procedure Use the following checklist at the end of each mission to verify that the appropriate boat systems are config- ured for a short period of non-use at the dock. If you are not going to use the boat for a long period of time, refer to Off-Season Storage in Section 6. - Page 40 Section 2 Boat Operation Trailering If Boston Whaler supplied the trailer for your boat, it is designed specifically for your boat and it is commer- cial-grade. The trailer construction is heavy-duty and it exceeds the capacity requirements for your boat. This trailer might be equipped with additional upgrades to suit your mission.
- Page 41 Boat Operation Section 2 If you supplied the trailer for your boat, you must verify that the trailer’s design is adequate for your boat. Review these guidelines when evaluating a customer- supplied trailer: • The trailer’s net carrying capacity must exceed the weight of the boat in its fully-loaded condition •...
- Page 42 Section 2 Boat Operation Safety Checklist Use the following safety checklist to verify that your boat, trailer, and towing vehicle are in good condition. Use this checklist each time you prepare for a mission. Resolve any issues before beginning your mission. ❑...
- Page 43 Boat Operation Section 2 Towing ! WARNING Tow vehicle GCWR must exceed the combined weights of your tow vehicle, boat, and trailer. Overloading the tow vehicle is unsafe and could cause loss of vehicle control. Towing your boat on a trailer requires experience and skill.
- Page 44 Section 2 Boat Operation Backing Backing a trailer requires experience and skill. Always operate a towing vehicle within the limits of your expe- rience. If you do not have this experience, ask some- one to instruct you or gain experience through experimentation under controlled conditions.
-
Page 45: Lifting And Slinging
Boat Operation Section 2 Lifting and Slinging Safety Warnings ! WARNING Verify that the lifting equipment, spreader bars, slings, and attaching hardware are profession- ally certified to a working load of at least 7,600 pounds (3447 kg) with a safety factor of five. Failure of any lifting component could cause extensive damage to the boat, serious injury, or death. - Page 46 Section 2 Boat Operation Integral Lifting Eyes Your boat might be equipped with integral lifting eyes. These integral lifting eyes are only available as a factory-installed option. Your hull would have a special lamination schedule and aluminum plate inserts to distribute the lifting load. If your boat has integral lifting eyes that were installed by the factory, you may use them as attaching points to lift your boat.
- Page 47 Boat Operation Section 2 Slings You can use a spreader bar and slings to lift your boat. The system must be professionally certified to a work- ing load of at least 7,600 pounds (3447 kg) with a safety factor of five. The slings must be a wide, flat, belted design to distribute the load and protect the boat.
- Page 48 Section 2 Boat Operation Forklift You can use a large marine forklift to move your boat. The forklift must be professionally rated to a working load of at least 7,600 pounds (3447 kg) with a safety factor of five. Adjust the forks to lift the boat evenly. The forks must not contact any thru-hull fittings on the bottom of the boat.
-
Page 49: Safety Warnings
Fuel Systems Section 3 Safety Warnings ! WARNING Inspect your fuel system and fuel tank before each mission. Correct the cause of any gasoline leak immediately. Ventilate the area to eliminate gasoline vapor before energizing any 12 VDC electrical cir- cuits or starting the outboard engines. -
Page 50: Fuel Systems
Section 3 Fuel Systems General Description Read and understand all the fuel-related information and warnings in this section and in your outboard engine operator’s manual. Your boat is equipped with a built-in gasoline fuel sys- tem. The fuel system includes a single, centerline fuel tank. - Page 51 Fuel Systems Section 3 The fuel fill and catch plate assembly is located on the forward step, just to the right of centerline. This assembly has an integral feature that will catch inci- dental amounts of liquid gasoline that might spill dur- ing the fueling process.
- Page 52 Section 3 Fuel Systems Fuel System Diagram...
- Page 53 Fuel Systems Section 3 1 Canister, carbon, vent 2 Vent, fuel tank 3 Fuel fill and catch plate assembly 4 Hose, fuel vent 5 Hose, fuel fill 6 Valve, fuel level vent 7 Valve, flow-control 8 Tank, gasoline, 150 gallons (568 liters) 9 Sender, fuel level 0 Cap, fuel sounding, manual (optional) A Label, manufacturer compliance...
-
Page 54: Contaminated Gasoline
Section 3 Fuel Systems Contaminated Gasoline Water from condensation and sediment from contami- nated gasoline can collect in your fuel tank. Contami- nated gasoline can damage boat fuel system components, corrode fuel tanks, clog fuel filters, and damage your engines’ fuel systems. Your fuel filter inspection and servicing routine is directly related to the quality and quantity of gasoline that you take on-board. -
Page 55: Racor ® Gasoline Filters
Fuel Systems Section 3 ® Racor Gasoline Filters ® Your boat might be equipped with two Racor 320R- RAC-01 gasoline filters. This filter features a water- separating 10-micron filter element, a replaceable spin-on canister, and a clear bowl to help detect water in your fuel. - Page 56 Section 3 Fuel Systems Fuel Gauge and Sending Unit The fuel tank has a sending unit that sends fuel level information to the electric fuel gauge installed in the control console. The fuel level sending unit is an ISSPRO 14-inch unit. The sending unit is fully elec- tronic and compatible with Mercury Marine’s Smart- Craft gauge system.
- Page 57 Fuel Systems Section 3 Fuel Level Sounding Your centerline fuel tank might be equipped with a system that allows you to manually sound the tank to determine fuel on-board. You can use this system as a back-up in case of electrical malfunctions or as a method to confirm the electric fuel gauge reading.
- Page 58 Section 3 Fuel Systems Fuel Stripping Pump Your boat might be equipped with a system that allows you to manually strip gasoline and possibly water from the bottom of the fuel tank. Refer to Contaminated Gasoline in this section for detailed information about the risks related to taking on gasoline that might contain ethanol or might be contaminated.
-
Page 59: Fill And Vent Locations
Fuel Systems Section 3 Fill and Vent Locations The Fuel System Diagram in this section shows loca- tions of the fuel tank, fuel fill, fuel tank vent, fuel level sending unit, fuel withdrawal tubes, fuel shutoff valves, fuel filters, and certain emission system components. The fuel fill and catch plate assembly is located on the forward step, just to the right of centerline. -
Page 60: Bonding System
Section 3 Fuel Systems Bonding System A green #8 awg insulated copper wire forms a com- mon bond among the fuel tank, the fuel fill and catch plate assembly, and the bonding plate on the hull. Maintenance Check the bonding system periodically to assure that the wire and connections are not broken or damaged. -
Page 61: Fueling Procedures
Fuel Systems Section 3 Fueling Procedures Safety Warnings ! DANGER Gasoline vapor is extremely flammable and highly explosive under certain conditions. Always stop the engines and never smoke or allow open flames or sparks within 50 feet (15 meters) of the fueling area when refueling. ! DANGER A discharge of static electricity can ignite gasoline vapor, causing serious injury, death,... - Page 62 Section 3 Fuel Systems Static Electricity A discharge of static electricity can ignite gasoline vapor that has accumulated during the fueling pro- cess. Use extreme caution when fueling your boat under unusual circumstances such as when the boat is suspended in a boatlift. Your boat has important safety features and systems that can be defeated by not following standard fueling practices.
- Page 63 Fuel Systems Section 3 General Guidelines Also follow these important guidelines during fuel- ing operations: ! WARNING This fuel system is not designed to support an automatic “hands free” fuel nozzle. Never use an automatic fuel nozzle to fill this tank and never leave a fueling process unattended.
-
Page 64: Hose Routing
Section 3 Fuel Systems Hose Routing The Fuel System Diagram in this section shows loca- tions of the fuel tank, fuel fill, fuel tank vent, fuel level sending unit, fuel withdrawal tubes, fuel shutoff valves, fuel filters, and certain emission system components. Fill Hose Replacement Removal Loosen the two hose clamps and remove the fill hose... -
Page 65: Vent Hose Replacement
Fuel Systems Section 3 Vent Hose Replacement Removal The fuel tank is vented through a fitting on the fuel fill and catch plate assembly. Loosen the two hose clamps and remove the vent hose from the elbow at the fuel tank. Remove the clamps from the vent hose. -
Page 66: Blended Fuels
Section 3 Fuel Systems Blended Fuels ! WARNING The components in your boat fuel system are designed to work with automotive gasoline containing up to 10% ethanol, by volume. Using automotive gasoline with higher concentrations of ethanol will damage boat fuel system components and might cause fuel leaks. - Page 67 Fuel Systems Section 3 • If E-10 gasoline absorbs enough moisture, it can suffer phase separation. The ethanol and water mixture will fall out of suspension and collect in the lowest parts of the fuel system. The ethanol and water mixture can damage engines, clog fuel filters, and corrode metal fuel system parts.
-
Page 68: Operator Notes
Operator Notes 3-20... -
Page 69: General Description
Boat Systems Section 4 General Description This section contains general theory and functional information about the boat systems. This information is intended to give you an idea about how each boat system is configured and how it should be used. The content of this section is based on the most cur- rent design and assembly information available at the time of publication. - Page 70 Section 4 Boat Systems Console Layout...
- Page 71 Boat Systems Section 4 1 Floodlights, 12 VDC 2 Radio, VHF 3 Panel, switch, floodlights 4 T-top 5 Radio box 6 Compass, magnetic 7 Display, navigation 8 Engine instrumentation 9 Panel, switch, helm station 0 Outlet, accessory, 12 VDC A Helm, steering, manual hydraulic B Control, engine, dual-lever C Horn, signal, 12 VDC D Panel, switch, Lenco trim tabs...
- Page 72 Section 4 Boat Systems Deck Layout...
- Page 73 Boat Systems Section 4 1 Sampson post, bow (optional) 2 Hatch, access, bow storage 3 Plate, fuel fill & catch 4 Non-skid, collar, painted 5 Cover, tank 6 Hatch, access, storage 7 Plate, access, fuel level vent 8 Handle, six places 9 Plate, access, fuel fill hose 0 Storage, batteries, house &...
-
Page 74: Boat Systems
Section 4 Boat Systems Steering System The steering system installed in your boat is a Teleflex Sea Star II hydraulic system. This is a manually oper- ated, closed-loop hydraulic system requiring no electri- cal pumps or motors. The system consists of the following components: •... - Page 75 Boat Systems Section 4 Hydraulic fluid is added to the system through a fill port in the helm pump while air is purged through bleeder tees on the steering cylinders. This manual hydraulic steering system has been filled, purged, and checked for leaks prior to shipment.
- Page 76 Section 4 Boat Systems Going Astern The steering system has less effect while backing up the boat. The stern moves to starboard when the steering wheel is turned clockwise. The stern moves to port when the steering wheel is turned counter-clockwise. The stern can be made to run straight in reverse by determining the proper rudder angle.
- Page 77 Boat Systems Section 4 Steering System Diagram 1 Port engine 6 Hydraulic hoses 2 Starboard engine 7 Steering wheel 3 Steering cylinder 8 Fill port 4 Tiller arm 9 Helm pump 5 Tie bar...
-
Page 78: Navigation Lights
Section 4 Boat Systems Navigation Lights Your boat is equipped with navigation lights for your safety. Regulations state that all boats, regardless of size, must display navigation lights at night. Your navigation lights let people operating other ves- sels know the approximate size of your boat and the direction your boat is traveling. -
Page 79: Bilge Pump
Boat Systems Section 4 Bilge Pump The bilge pump power circuit is wired directly to the battery side of the port engine battery OFF-ON switch. The bilge pump system has an uninterruptible supply of power that is not affected by the position of the port engine battery OFF-ON switch. - Page 80 Section 4 Boat Systems Operation The bilge pump is controlled by a two-position rocker switch located on the helm station switch panel. The AUTO switch position supplies power to the mechani- cal float switch so water is pumped anytime it is detected.
- Page 81 Boat Systems Section 4 Battery Parallel Switch Your boat is equipped with an emergency battery par- allel switch. The switch is located on the control con- sole face. You can use the emergency battery parallel switch to connect the two engine starting batteries in parallel if one engine will not start due to low battery voltage.
-
Page 82: Trim Tabs
Section 4 Boat Systems Trim Tabs ® Your boat is equipped with Lenco electro-mechanical trim tabs. The trim tab system consists of four major components. The switch panel with LED tab indica- tors is located on the control console. The system control box is located inside the control console. - Page 83 Boat Systems Section 4 Trim Tab Control Box The trim tab control box, located inside the control console, operates on power supplied through the accessory fuse block. The trim tab power circuit is protected a 20-amp blade fuse. The trim tab control box senses 12 VDC when the starboard engine igni- tion key switch is in the ON position.
- Page 84 Section 4 Boat Systems Proper Boat Trim All boats “break over” or get on plane at a particular speed. This speed is determined by load distribution, water conditions, and other factors. Trim tabs allow your boat to plane at speeds below the natural planing speed.
- Page 85 Boat Systems Section 4 Trim Tabs and Engines Adjusting the trim tabs in conjunction with the trim function on your outboard engines will give you increased power, speed, and maneuverability. When the boat comes on plane adjust the trim tabs to achieve the desired running attitude of the boat.
- Page 86 Section 4 Boat Systems Compass ! WARNING magnetic compasses subject magnetic interference, which can produce errors called deviation. Compass deviation can contribute to inaccurate course plotting and position fixes, placing your crew, your boat, and others at risk. Deviation Your magnetic compass is located in line with the helm station, below the operator’s line of sight so it can be easily read during normal boat operation.
-
Page 87: Console Interior Dome Light
Boat Systems Section 4 Console Interior Dome Light Your boat is equipped with a 12 VDC control console interior dome light. The dome light is used to light the interior of the control console for inspection or servic- ing. It is accessed through the control console door. The OFF-ON switch for the control console interior dome light is located on the light fixture. -
Page 88: Siren & Strobe Light
Section 4 Boat Systems Siren & Strobe Light ® Your boat might be equipped with a Whelen flush- mount siren and strobe light. The normal mounting location is on the forward side of the console. Use the siren control head to operate the various strobe, radio, siren, and public address features. -
Page 89: Signal Horn
Boat Systems Section 4 Signal Horn Your boat is equipped with a 12 VDC signal horn. The signal horn is mounted on the forward face of the con- trol console. The horn button is on the control con- sole, just to the left of the steering wheel. This signal horn satisfies United States Coast Guard Navigation Rule 36 for signals to attract attention. -
Page 90: Manual Bilge Pump
Section 4 Boat Systems Manual Bilge Pump Your boat might be equipped with a manual bilge pump. You can use the manual bilge pump to aug- ment or temporarily replace the 12 VDC bilge pump. The manual bilge pump is a Whale Water Systems model BP-4410, rated at 28 gpm (106 lpm). -
Page 91: Swimmer's Ladder
Boat Systems Section 4 Swimmer’s Ladder Your boat might be equipped with a boarding block and a provision for a swimmer’s ladder on the port col- lar, mid-ship. Secure the swimmer’s ladder on its stor- age rack when you are not using it. •... -
Page 92: Towing System
Section 4 Boat Systems Towing System Your boat might be equipped with a towing system. Towing another boat requires experience and skill. Always operate any boat within the limits of your expe- rience. If you do not have this experience, ask some- one to instruct you or gain experience through experimentation under controlled conditions. - Page 93 Boat Systems Section 4 • Keep all crew in both boats clear of the tow rig. • Keep your tow line clear of your engines and pro- pellers. • Always avoid shock loading your tow rig and tow- ing system. Never attempt to jerk an excessive load into motion.
-
Page 94: High-Capacity Scuppers
Section 4 Boat Systems High-capacity Scuppers Your boat is equipped with a high-capacity scupper system that includes scupper extension tubes. Your boat is self-bailing under light load conditions when the extension tubes are in the down and free position. Scupper extension tube deployment is controlled by a lanyard and jamb cleat on each side of the transom. -
Page 95: General Description
Electrical Systems Section 5 General Description Your boat is equipped with a 12 volt direct current (12 VDC) electrical system. The 12 VDC electrical system provides power to all DC electrical loads on the boat. The complete 12 VDC electrical system consists of seven main power distribution circuits that are electrically connected on the negative side of the sys- tem. -
Page 96: Electrical Systems
Section 5 Electrical Systems Batteries Safety Warnings ! CAUTION Batteries should always be enclosed in the covered battery boxes provided with your boat. The boxes will contain any spilled acid and will protect the battery terminals from damage or shorting due to contact with metal objects. The battery boxes should always be secured using the heavy-duty straps and aluminum trays provided. - Page 97 Electrical Systems Section 5 Capacities ® Exide marine heavy-duty 12-volt batteries are nor- mally selected for your boat. One Group 24 1000 marine cranking amp (MCA) battery is provided for each engine and one Group 27 115 amp hour, deep cycle battery is normally provided for the boat’s electri- cal accessories.
- Page 98 Section 5 Electrical Systems Remove the batteries from the boat during cold weather or off-season storage. Always protect the batteries from freezing temperatures. You must not allow your batteries to become com- pletely discharged. As a battery discharges, the active material on both positive and negative plates changes to lead sulfate, causing the plates to become similar in chemical composition.
- Page 99 Electrical Systems Section 5 Charging The outboard engine alternators charge the three bat- teries when the engines are running above idle speed. The batteries are charged through a marine-grade bat- tery charge isolator, which allows the outboard engine alternators to charge the starting batteries and the house battery.
-
Page 100: Grounding And Bonding
Section 5 Electrical Systems Grounding and Bonding Definitions The terms grounding and bonding are often incorrectly used interchangeably. They are different systems that can work together to provide solutions to common problems and risks on the water. Bonding is the process of connecting various metal components in the boat to a common electrical con- tact. - Page 101 Electrical Systems Section 5 Bonding Your boat’s bonding system starts with a bronze plate located below the water line at the center of the tran- som. A #8 awg green cable connects the bronze plate to the negative buss system. The fuel tank, fuel fill, control console, engine crash rail, leaning post, and transom cap are also connected to the negative buss system with #8 awg green cables.
-
Page 102: Battery Switches
Section 5 Electrical Systems Battery Switches Battery Parallel Switch Your boat is equipped with an emergency battery par- allel switch. The switch is located on the control con- sole face. You can use the emergency battery parallel switch to connect the two engine starting batteries in parallel if one engine will not start due to low battery voltage. - Page 103 Electrical Systems Section 5 Battery OFF-ON Switches Your boat is normally equipped with three battery OFF-ON switches that allow you to turn battery power on and off to the outboard engines and to each main 12 VDC power distribution circuit in the boat. The switches are located in the control console, just inside the console door.
-
Page 104: Operator Notes
Operator Notes 5-10... -
Page 105: Dc Power Distribution
Electrical Systems Section 5 DC Power Distribution All DC electrical devices and systems in your boat are controlled and protected by seven main 12 VDC power distribution circuits. Starboard Engine Main 12 VDC power circuit 1 of 7 provides power for starting the starboard engine through a battery OFF- ON switch connected to a Group 24 1000 MCA bat- tery. - Page 106 Section 5 Electrical Systems Bilge Pump Main 12 VDC power circuit 3 of 7 provides uninter- ruptible power to the bilge pump switch located on the helm station switch panel. The circuit is directly con- nected to the port engine battery OFF-ON switch. The connection is made on the battery side of the battery OFF-ON switch and is always powered, regardless of switch position.
- Page 107 Electrical Systems Section 5 Helm Station Switch Panel Main 12 VDC power circuit 4 of 7 provides power to the helm station switch panel. The bilge pump switch is located on the helm sta- tion switch panel, but it is not included in this power circuit.
- Page 108 Section 5 Electrical Systems Accessory Fuse Block Main 12 VDC power circuit 5 of 7 provides power to the accessory fuse block located inside the control console. This circuit is protected by one 60-amp, push button breaker. The 60-amp breaker is located inside the control console within seven inches of the house bat- tery OFF-ON switch.
- Page 109 Electrical Systems Section 5 T-top Fuse Block Main 12 VDC power circuit 6 of 7 provides power to the fuse block located inside the T-top radio box. This circuit is protected by one 60-amp, push button breaker. The 60-amp breaker is located inside the control console within seven inches of the house bat- tery OFF-ON switch.
- Page 110 Section 5 Electrical Systems Electronics Distribution Panel Main 12 VDC power circuit 7 of 7 provides power to the electronics distribution panel (optional) located inside the control console. This circuit is protected by one 60-amp, push button breaker. The 60-amp breaker is located inside the control console within seven inches of the house bat- tery OFF-ON switch.
-
Page 111: Dc Circuit Distribution
Electrical Systems Section 5 DC Circuit Distribution Helm Station Switch Panel A typical helm station switch panel includes these functions: • Dimmer for dash lights • Bilge pump • Navigation lights • Cockpit lights • Spares The dimmer switch controls backlighting brightness level on all engine gauges, dash components, and the magnetic compass. - Page 112 Section 5 Electrical Systems The bilge pump is controlled by a two-position rocker switch. The AUTO switch position supplies power to a mechanical float switch so water is pumped anytime it is detected. The rocker switch has a red LED indicator that will be lighted anytime the bilge pump is running.
- Page 113 Electrical Systems Section 5 Accessory Fuse Block The accessory fuse block is a ten-position, blade-fuse design. It is located inside the control console. A typi- cal fuse block could include the following branch cir- cuits: • 12 VDC outlet • Whelen power supply •...
-
Page 114: Wire Color Chart
Section 5 Electrical Systems Wire Color Chart Black Ground Gray Navigation lights Black/brown Ground, pumps Gray/white Anchor light Black/orange Ground, accessories Gray/black Masthead light Black/green Ground, water level sender Gray/red Remote spotlight Black/blue Ground, lighting Gray/green Strobe light Black/gray Ground, navigation lights Gray/blue Flood lights Black/white... -
Page 115: Boat Maintenance
Boat Maintenance Section 6 Specifications Overall boat length 27 ft. 10½ in. 8,5 m Trailered length, engines tilted 34 ft. 7 in. 10,5 m Trailered height, Note 1 127 in. 323 cm Trailered height, Note 2 100 in. 254 cm Beam, maximum, collar inflated 121 in. -
Page 116: Hull Identification Number
Section 6 Boat Maintenance Hull Identification Number The Hull Identification Number (HIN) is located on the starboard outboard side of the transom. This is the most important form of boat identification and it must be included in all correspon- dence related to your boat. The engine and electronics model and serial numbers are also important when obtaining parts or service for these items. -
Page 117: Hull Maintenance
For this reason, many options cannot be added after the boat leaves the factory. If you want to add options or accessories to the boat, you must contact Brunswick Commercial & Govern- ment Products Customer Service Department at 386- 423-2900, for advice. - Page 118 Section 6 Boat Maintenance Waxing ! WARNING Gelcoat surfaces are always slippery when wet. Use extreme caution when walking on wet surfaces to avoid slipping or falling. Never wax portions of the boat that have a non-skid pattern. The interior and exterior fiberglass parts of the hull should be waxed a minimum of twice per year to pro- tect the gelcoat from salt, dirt, and ultraviolet degrada- tion.
-
Page 119: Trim Care
Section 6 Fiberglass repairs should only be done by an experi- enced fiberglass repair facility. If the damage pene- trates the hull, call Brunswick Commercial & Government Products Customer Service Department for the correct repair procedures. The repair must be done following Boston Whaler’s recommendations. - Page 120 Section 6 Boat Maintenance Cutwater & Chafe Plates Your boat might be equipped with an optional stainless steel cutwater. This is a plate that protects the keel against debris while underway and possible damage while beaching. Inspect the cutwater several times a year for loose screws, missing screws, and large gaps along the outside edges.
-
Page 121: Hull Blistering
Boat Maintenance Section 6 Hull Blistering The chemical and physical structure of all fiberglass boats is somewhat porous. Water can permeate through gelcoat and fiberglass during long periods of immersion in water. This process is referred to as hydrolysis. The effect of hydrolysis over time allows water to enter the gelcoat and substrate, forming a blister. - Page 122 Section 6 Boat Maintenance Damage caused by blistering is not covered under your hull warranty. There are a number of important things that you can do to avert hull blistering. They include: Storage Store your boat out of the water when not in use. Store your boat on a trailer, in a boatlift, or on a cradle.
- Page 123 Boat Maintenance Section 6 ! CAUTION Some compound of copper is the active ingredient in most conventional bottom paints. Do not apply any copper-based bottom paints to the engine bracket or the engines. Severe damage resulting from galvanic corrosion will occur.
- Page 124 Section 6 Boat Maintenance Preparation is the key to successful hull painting. If the hull is bare, the gelcoat will have to be de-waxed before sanding can begin. After de-waxing is com- plete, light sanding with 80-grit sandpaper is recom- mended.
-
Page 125: Fuel System
Boat Maintenance Section 6 Fuel System Your boat is equipped with one below-deck aluminum fuel tank that requires little maintenance. You should visually inspect the fuel tank and all associated hoses and fittings for leaks or deterioration before each mis- sion. - Page 126 Section 6 Boat Maintenance Steering System Your boat is equipped with a manual hydraulic steer- ing system. ! WARNING Follow the steering system manufacturer’s maintenance recommendations exactly. Improper maintenance might cause loss of steering, which could cause property damage or serious injury. Be sure to check the operation of the steering system before each mission.
- Page 127 Boat Maintenance Section 6 Every six months, a qualified marine technician should check the following items: • Check fluid level in the helm reservoir. • Check outboard engine tilt tubes for salt deposits or signs of corrosion. Clean and grease as required.
- Page 128 Section 6 Boat Maintenance Batteries Safety Warnings ! CAUTION Batteries should always be enclosed in the covered battery boxes provided with your boat. The boxes will contain any spilled acid and will protect the battery terminals from damage or shorting due to contact with metal objects. The battery boxes should always be secured using the heavy-duty straps and aluminum trays provided.
- Page 129 Boat Maintenance Section 6 Capacities ® Exide marine heavy-duty 12-volt batteries are nor- mally selected for your boat. One Group 24 1000 marine cranking amp (MCA) battery is provided for each engine and one Group 27 115 amp hour, deep cycle battery is normally provided for the boat’s electri- cal accessories.
- Page 130 Section 6 Boat Maintenance Remove the batteries from the boat during cold weather or off-season storage. Always protect the batteries from freezing temperatures. You must not allow your batteries to become com- pletely discharged. As a battery discharges, the active material on both positive and negative plates changes to lead sulfate, causing the plates to become similar in chemical composition.
- Page 131 Boat Maintenance Section 6 Bilge Pump The bilge pump and float switch are sealed units and do not require any periodic maintenance. Check the bilge area weekly to make sure there is no debris or sludge that could foul the float switch or clog the pump.
-
Page 132: Off-Season Storage
Section 6 Boat Maintenance Off-Season Storage All boat and engine systems must be carefully pre- pared for long periods of non-use. This preparation is particularly important in regions where you experience extreme changes in temperature or where the temper- ature is consistently below freezing. Outboards You must protect your outboard engines from freeze damage and from internal corrosion caused by... - Page 133 Boat Maintenance Section 6 Fuel System You must take appropriate steps to protect your boat’s fuel system and engines during periods of non-use. Situations where fuel isn’t being consumed and expo- sure to extreme changes in temperature will cause condensation to accumulate in your fuel system. This moisture can compromise your fuel, your fuel system, and your engines.
- Page 134 Section 6 Boat Maintenance Hull Drainage Remove the main hull drain plug. Open all internal seacocks and drains. Verify that there is no debris plugging any drain, seacock, or limber hole. Store the boat with the bow higher than the stern to promote adequate drainage.
- Page 135 Boat Maintenance Section 6 Raw Water Washdown System Your boat might be equipped with a raw water wash- down system. You must protect the washdown sys- tem from the effects of freezing temperatures. Use the following steps to prepare this system for off- season storage: •...
- Page 136 Operator Notes 6-22...
- Page 137 Collar Maintenance Section 7 General Description A commercial-grade, air or air-over-foam collar system is an integral part of your boat’s design. The collar is approximately 22 inches (56 cm) in diameter and extends from just behind the transom to the bow. This collar system gives you a performance advantage over conventional FRP boats of the same length due to a significant reduction in boat weight.
- Page 138 Section 7 Collar Maintenance...
-
Page 139: Collar Layout
Collar Maintenance Section 7 Collar Layout The collar system is manufactured and tested sepa- rate from the boat and mechanically attached after the hull is complete. The collar consists of seven separate inflation chambers. Each inflation chamber has one inflation valve, one over-pressure valve, and at least one pressure-equalization baffle. - Page 140 Section 7 Collar Maintenance Collar Inflation Manual Air Pump A manual inflation pump is supplied with your boat. The manual inflation pump can be used if another source of air is not available or if you need to make minor adjustments in collar air pressure. Whenever possible, the collar should be inflated and the pressure should be verified when the ambient air temperature is between 65°F and 75°F (18°C and...
- Page 141 Collar Maintenance Section 7 12 VDC Air Pump A 12 VDC inflation pump is supplied with your boat. The 12 VDC inflation pump can be used to inflate the collar system and make routine adjustments in collar air pressure. Whenever possible, the collar should be inflated and the pressure should be verified when the ambient air temperature is between 65°F and 75°F (18°C and 24°C).
-
Page 142: Collar Repair
Section 7 Collar Maintenance Collar Repair Preparation This portion of the manual will guide a service techni- cian through a repair procedure designed to address small tears in the collar fabric. It is expected that the technician has some collar repair experience, has access to an appropriate repair shop, and has the cor- rect tools and supplies as recommended in this sec- tion. - Page 143 Collar Maintenance Section 7 ! CAUTION The repair environment and materials will have a direct effect on the integrity of the repair. Follow these instructions exactly. The collar repair environment must be: • Clean and dust-free • Well ventilated • Explosion-proof •...
- Page 144 Section 7 Collar Maintenance Damage Assessment Small tears in the fabric of less than 1 inch (3 cm) can be closed using an external patch and the Clifton one-part adhesive. Tears in the fabric between 1 and 12 inches (3 and 31 cm) can be closed using an internal and external patch and the Clifton two-part adhesive system.
- Page 145 Collar Maintenance Section 7 Add one-half ounce of Clifton UN1866 catalyst to eight ounces of Clifton UR4980 adhesive in a clean mixing cup. Note: The catalyzed glue has a working life of approx- imately four hours. Condition the repair area and the surface of the patch with methyl ethyl ketone (MEK) just before the first application of glue.
- Page 146 Section 7 Collar Maintenance ! CAUTION Work very carefully. Adhesion between the patch and collar is immediate. Place the glued patch inside the collar. Install it care- fully starting at one end of the tear and working toward the opposite end. DO NOT allow any wrinkles, over- laps, or air bubbles in the patch.
- Page 147 Collar Maintenance Section 7 External Patch Procedure ! WARNING Some of the chemicals used in this repair are hazardous. Read and understand all safety warnings on the chemical containers. To avoid injury, use appropriate personal protective equipment (PPE) at all times during this repair. The repair procedure for the external patch is similar to the procedure for the internal patch.
- Page 148 Section 7 Collar Maintenance Add one-half ounce of Clifton UN1866 catalyst to eight ounces of Clifton UR4980 adhesive in a clean mixing cup. Note: The catalyzed glue has a working life of approx- imately four hours. Condition the repair area and the surface of the patch with methyl ethyl ketone (MEK) just before the first application of glue.
- Page 149 Collar Maintenance Section 7 ! CAUTION Work very carefully. Adhesion between the patch and collar is immediate. Place the glued patch on the collar. Install it carefully starting at one end of the tear and working toward the opposite end. DO NOT allow any wrinkles or air bub- bles under the patch.
- Page 150 Section 7 Collar Maintenance Inflation and Testing ! CAUTION Wait at least 24 hours before you inflate and test the collar. Whenever possible, the collar should be inflated and the pressure should be verified when the ambient air temperature is between 65°F and 75°F (18°C and 24°C).
- Page 151 Collar Maintenance Section 7 Cosmetic Patch Procedure ! WARNING Some of the chemicals used in this repair are hazardous. Read and understand all safety warnings on the chemical containers. To avoid injury, use appropriate personal protective equipment (PPE) at all times during this repair. The repair procedure for the cosmetic patch is similar to the repair procedure for the external patch.
- Page 152 Section 7 Collar Maintenance Collar Removal and Installation General Description This information will guide a service technician through the correct procedures for removing and installing the collars used on BCGP Impact RHIB boats. You should only perform this work procedure if you are removing the collar system to repair extensive dam- age or to replace it.
- Page 153 Collar Maintenance Section 7 • Remove all the inside fasteners and HDPE clamping bars • Save all collar fastening components in a secure area • Assign at least six people to lift the collar system and move it toward the bow •...
- Page 154 Section 7 Collar Maintenance • Starting at the bow, install the inside HDPE clamping bars and fasteners. Fill existing screw holes with black Sikaflex 291 LT • Starting at the bow, install the outside HDPE clamping bars, lashing “D” rings, and fasteners. Fill existing screw holes with black Sikaflex 291 LT •...
- Page 155 Rigid Hull Inflatable Products Limited Commercial Warranty Brunswick Commercial & Government Products (BCGP) warrants that each Impact RIB product manufactured by BCGP will be free from structural defects due to substandard material or workmanship, under conditions of reasonable commercial or government service, as described below: ...
- Page 156 World-class support for World-class boats.
Need help?
Do you have a question about the 850 Impact and is the answer not in the manual?
Questions and answers