Table of Contents
Advertisement
Having fun with the SD1! A guide on how to start playing and having fun right away
Song Play, Midifiles and Karaoke
Up-dating and Resetting the SD1
INDEX
PAGE
3
5
7
13
15
23
28
33
35
40
41
45
Style & Sound
55
56
60
68
69
77
79
80
82
84
90
93
94
97
103
105
110
Demo & Hit
111
113
121
122
137
1
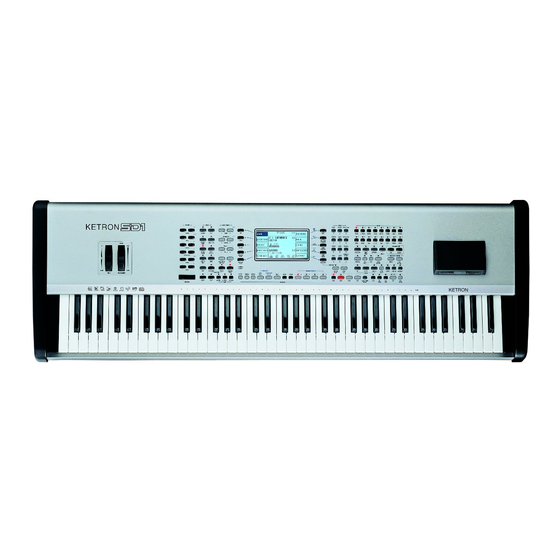
Owner's Manual SD1
Advertisement
Table of Contents

Related Manuals for KETRON SD1


Summary of Contents for KETRON SD1
- Page 1 Ketron SD1: a new wonderful musical adventure is about to begin! Connections Control panel and push button functions Parameter management Having fun with the SD1! A guide on how to start playing and having fun right away Voice and User Voice Programs and One Touch Sound Load...
-
Page 3: Ketron Sd1: A New Wonderful Musical Adventure Is About To Begin
General MIDI files. If you are already familiar with Ketron X1 then you will have no problem in using the SD1. If you are new to the world of Ketron and electronic keyboards then we advise you to read the “Having fun with the SD1!” section. - Page 4 Before we even started to design the SD1 we thought of the sounds and the styles, which had to be the best ever. We are convinced that we...
- Page 5 : Monophonic audio outputs 1/4’ of which Left can work as overall monophonic output for the whole instrument. When the Left and Right outputs are used the SD1 works in stereo. Outputs 3 and 4, again monophonic, can be used for par- ticular instrumental sections of the keyboard so that they can be controlled by a separate mixer or processor with separate effects.
- Page 6 Vibrato or Pitch bend. Thus it is simple to control the different timbre tones. The Aftertouch version installed in the SD1 is the monphonic one, namely the effect produced is valid for all the keys pressed at that time.
-
Page 7: Control Panel And Push Button Functions
They are used to gain access to menus controlling crucial functions. SONG RECORD This enables the sequencer in registration mode and makes it possible to record everything played on the SD1, from the sty- les to calling up the Voices. - Page 8 In the main page the CURSOR + and CURSOR – push buttons are used to Transpose all the SD1 musical sections in steps of one semitone. To reset the transposition, simply press the two push buttons together at the same time.
- Page 9 Voices per family, the user can move onto the next pages either using the PAGE + and PAGE – push buttons or by pressing the push button rel- ative to the family of Voices in use again. When the SD1 reaches the last page of Voices available, the user can return to the first page of Voices by pressing the push button relative to the family of Voices again and not the PAGE + and PAGE - push buttons.
- Page 10 2ND VOICE EDIT When the LED is lit it is used to call up a new timbre to replace that set by Ketron for the second voice using the VOICES push buttons and also from the User Voice group. By pressing 2ND VOICE and 2ND VOICE EDIT at the same time the block of the timbre assigned at the time to the Second Voice is obtained, which will appear with an asterisk in front of the name.
- Page 11 DRUM MIXER For each drum set Ketron has grouped the percussion sounds together in ten categories that can be selected using the F1- F10 function push buttons. When a category is ticked ( ), the percussion instruments related to it will play and vice versa their volume will be muted (Mute function).
- Page 12 With the Arranger stopped it generates a fade in, in other words taking the volume of all the sections from zero to the set volume. When pressed repeatedly it will not generate abrupt volume variations. SD1 Manuale di Istruzioni...
- Page 13 CALLING UP THE MENUS The parameters of the SD1 are grouped in menus that are always called up from the main page of the display and that can be accessed using the EXIT push button (apart from some exceptions which we will see later).
- Page 14 Entering words or letters: When saving some files the SD1 requests the entry of words, which can be done using the notes of the keyboard to which letters and numbers are related. The CURSOR +/- push buttons are used to move within the letters of the name and the VALUE +/- push buttons are used to enter the alphabetic letter.
- Page 15 A guide on how to start playing and having fun right away You will certainly want to know how to use some functions of the SD1 such as how to reproduce Midi files, how to use the Arranger, how to call up Styles and Voices, how to use a MIDI accordion and the Vocalizer with a microphone.
- Page 16 From the main page of the display, enable the SONG PLAY push button Select the Midi file source, either hard or floppy disk using the PAGE +/- push buttons Select the F6 Juke-Box function To display the F9 Chain Select function press the * push button SD1 Owner’s Manual...
- Page 17 EXIT push button The only restriction in creating chains of Midi files lies in the fact that the SD1 cannot use Midi files on hard disk and floppy disk at the same time. You must always work with the files stored on one of the two disks.
- Page 18 Arranger. To check if the Style has been enabled simply look at the name that appears at the top of the central window of the display. The SD1 stores the Styles of each kind of music in groups of ten and the number of the next groups is indicated as Pages. To call up the other groups of Styles that are not currently displayed, simply press the STYLES push button again to which the groups belong or use the PAGE +/- push buttons.
- Page 19 HOW TO LOAD A STYLE FROM DISK Thanks to the built-in hard disk the SD1 facilitates the use of any Styles that are not saved in the memory but are stored as files on the hard disk, either by loading them from folders created by the user or by using a preferential folder with the Master Folder enabled. As default set- ting the SD1 utilises the Styles stored in the memory and called up by enabling the CUSTOM STYLE push button.
- Page 20 HOW TO USE THE MICROPHONE AND THE VOCALIZER The SD1 can work with up to two microphones connected to the dedicated rear inputs. The Micro 1 input, on the contrary to Micro 2, is processed by the Vocalizer, namely the effect with which the voice can be naturally harmonized according to the chords played, to a track of a Midi file or according to the notes played on the keyboard.
- Page 21 Up to this stage you can use the microphone with Reverb voice, the effects of which can be modified as desired. The characteristics of the Vocalizer of the SD1 are such to enable its use in various contexts. First and foremost the SD1 is capable of acknowledging the pitch of the note that you are singing so that it can be harmonized naturally.
- Page 22 SD1 will automatically load all these files, without having to access the DISK functions. Then add the fact that you can build up the Registration at home in comfort and you will realise that the SD1 is really fast and handy when play- ing live! For the time being we will end on how to simply save a Registration.
-
Page 23: Voice And User Voice
PAGE + and PAGE – push buttons or by pressing the push button relative to the Family of Voices in use again. When the SD1 reaches the last page of Voices available, if you press the push button relative to the family of voices again you will return to the group of voices of the first page. - Page 24 Access the programming menu using F7 Edit Voice. Together with the User Voices the SD1 enables the musician to also modify the bank of timbres in General MIDI. To call up a timbre to be modi- fied in GM proceed as follows: Enable the User Voice bank (LED lit).
- Page 25 SD1. The coarse sound of the wave form is processed with an envelope on the amplitude, namely a function that is used to “draw” the trend of the sound volume while a note is played. There are different types of envelope: that used by the SD1 is made up of four segments...
- Page 26 This controls the opening of the filter according to the key dynamics. Value 64 is the standard condition. Lower values obtain a less brilliant sound, even when playing at high velocity. Octave Shift: This shifts the octave of the User Voice by a range within - 2 octaves and +2 octaves. SD1 Owner’s Manual...
- Page 27 SAVING A USER VOICE A modified User Voice must be saved permanently in the memory otherwise the modification will be lost when the SD1 is turned off. The sav- ing procedure appears automatically after even only one parameter has been modified and the user attempts to exit the programming menu using EXIT, or by pressing the SAVE/ENTER push button to enable the saving procedure.
-
Page 28: Programs And One Touch
MIDI pedal. Using the Programs the player can create Harmony effects such as Duet, Trio and Steel. The SD1 provides the musician with 128 Programs that are distributed over sixteen pages of eight Programs each. - Page 29 F3/F8 Effect: This enables the multi-effect and is used to choose which algorithm of the multi-effect will be used for the Voice, using the VALUE +/- push buttons. Owner’s Manual SD1...
- Page 30 Modulation Wheel is set at minimum only the first Voice will be heard; when it is at maximum only the second Voice will be heard. In this way it is possible to obtain a morphing between the two Voices in real time and controlled by the musician. SD1 Owner’s Manual...
- Page 31 Select F2 Program and, on the next page, F2 Single Program. Type in the number of the folder in which the Single Programs to be loaded are stored using the numeric keypad (STYLES push buttons). Select the Program using the VALUE +/- push buttons. Press F2 Load. Owner’s Manual SD1...
- Page 32 ONE TOUCH As default setting the SD1 already contains a list of Voices put in order used to call up the timbres using the One Touch function. It is used to create groups of ten Voices at a time with the preferred timbres to therefore speed up their access. To call up one of these timbres simply press the 1 TOUCH push buttons (LED lit).
-
Page 33: Sound Load
SD1. The SD1 is able to load up to a maximum of eight Wave or MSP files and up to 128 Instruments into the RAM memory. LOADING AN AUDIO FILE Press the SOUND LOAD button to open the Sound Load page. - Page 34 Flash RAM, that makes it possible to keep the samples in memory even while the key- board is switched off and which is used to up-date or locate the timbres. The use of the Flash RAM is reserved to Ketron specialists, due to the fact that replacing one of the samples present on the purchase may jeopardise the correct management of the Style and Voices timbres.
-
Page 35: The Sampler
The sampler The SD1 sampler is used to record new sounds using the Micro 1 audio input and can also handle Wave files created on PC using the floppy disk. The characteristics of the SD1 include the processing of the 16-bit signal with sampling frequency of 44,1 kHz in monphony. One of the special features is the possibility to create a Multi-sample file exploiting up to a maximum of 64 samples arranged over the keyboard and therefore achieving an amazing timbre over the octaves of the keyboard. - Page 36 Confirm that the sample is to be saved using F10 Exec or cancel the procedure using F5 Escape. Upon completion the SD1 returns to the initial page of the sampler to record new sounds or to modify those that already exist.
- Page 37 Together with the VALUE +/- push buttons it is used to select one or a number of files to be loaded. Once the Multi-sample has been loaded, the SD1 automatically opens the MSP Edit page that is identical to the F5 MSP New function.
- Page 38 Together with the VALUE +/- push buttons it is used to select one or a number of files to be loaded. Once the single .WAV files have been loaded the SD1 enters the editing function. From here onwards there are no differences between the edit- ing function of a Multi-sample that already exists and that to be created.
- Page 39 MSP Edit, or you can press SAVE/ENTER. The page called up is used to enter the name of the Multi-sample using the keyboard keys and the CURSOR +/- push buttons. Confirm the procedure using F10 Exec, cancel it using F5 Escape, which will take you to the MSP Edit page. Owner’s Manual SD1...
- Page 40 As usual, pressing both buttons relevant to a Drawbar at the same time put the harmonic to zero. The SD1 also allows you to control a number of particular features relevant to the original organ timbre, to be called up with the function but- tons and the CURSOR +/- buttons and modified with the VALUE +/- buttons.
-
Page 41: Drum Set
Drum Set The rhythm section of the SD1 uses both the Drum Sets and the Live Drums. The Drum Sets are assigned to the Drum 1 track (channel MIDI 10), whereas the Live Drums are assigned to the Drum 2 track (channel MIDI 9) within a style. - Page 42 With regard to the Live Drum Sets you may perceive a number of instruments at a very low volume, although you have deactivated them: this behaviour is a result of the groove processing and is not a defect of the SD1.
- Page 43 HOW TO CREATE OR MODIFY A DRUM SET he SD1 makes it possible to create and program a Drum Set to be stored among the User Drum Sets and to be used in the styles. If you wish to access the editing pages, press the EXIT button to go to the main page and then press F9 Edit Drum.
- Page 44 Calls up the storage page, where to enter the name of the modified Drum Set using the keyboard keys and the CURSOR +/- buttons. Pressing F10 Save once more you confirm the saving procedure, which will overwrite any already existing User Drum Set. The F5 Escape button deletes storage and takes you back to the Edit Drum Set page. SD1 Owner’s Manual...
- Page 45 Editing, modifying and copying accompaniment tracks and sections is achieved with Edit Pattern. For each Style, the SD1 allows you to modify the timbres that are assigned to the tracks, as well as the volumes, the pan value and the amount of the effects sent.
- Page 46 If you play a chord in the following conditions: JUMP activated, HOLD activated and Arranger in Stop, before pressing a FILL, TO END, BREAK or COUNT IN button, the SD1 remembers the chord played. In this way you may create short musical detachments complete with Endings, that are most useful to manage unforeseen situations of interaction with the public during performance.
- Page 47 If the Arranger is Off, KEY STOP restarts it if you play a chord over a longer time than the one fore- seen. If you have selected a FILL or an INTRO, the Arranger is Off and you play a chord over a longer time than the Owner’s Manual SD1...
- Page 48 Style. The Style Setting function allows you to associate to each Style up to ten timbres that can be directly called up with the relevant function buttons. The SD1 has 48 Style Setting memories. Each of them can be associated with any Style.
- Page 49 Lower 1 by +/- three octaves, using the VALUE +/- push buttons. F4 Low 2 Octave: the same as F3 Low 1 Octave but dedicated to the timbre of Lower 2. Owner’s Manual SD1...
- Page 50 Activating this, the Bass timbre remains the one in use, even if you pass on to different Styles. F6 Chord Mode: Pressing repeatedly the F6 function button modifies the chord acknowledgement mode, choosing among the follow- ing four possibilities: SD1 Owner’s Manual...
- Page 51 Mode parameter, select the Style track pressing the CURSOR +/- buttons and modify the parameter pressing F10 Select. To go back to the second page of the Arrange Mode, press F5 Escape. F9 Dyn. Arranger: Owner’s Manual SD1...
- Page 52 Set the transposition with the CURSOR +/- push buttons within a few seconds; otherwise the Lower transposition parameter disap- pears and the CURSOR +/- push buttons take over the function to transpose the complete Style. Repeat the operation for the other Style sections. SD1 Owner’s Manual...
- Page 53 ARRANGE VIEW: FIRST PAGE Further to modifying the volume for the single tracks and the Lower parts, the SD1 allows you to activate the Mute function on a single trace. This setting will remain stored also for the next Styles.
- Page 54 Enter the file name using the keyboard keys and the CURSOR +/- push buttons. Confirm the operation pressing F10 Exec or quit the procedure pressing F5 Escape. The file thus created contains all the Custom Styles and has the extension .STY. SD1 Owner’s Manual...
-
Page 55: Style & Sound
Style & Sound Personalising the Styles with new samples is one of the innovative features of the SD1. You may use up to four audio samples (in .WAV, .INS and .MSP format) for as many accompaniment tracks. Furthermore, for track Drum 2, you may use an audio loop processed by the internal SD1 sam- pler, to be synchronised with the rhythm and the tempo, without important changes to the intonation and the length of the loop. -
Page 56: Ram Styles And Flash Ram
It is no longer possible, as was the case for Ketron X1, to copy and load one or a number of Styles in floppy disk to Flash RAM but they must first be copied on hard disk then must be loaded from there. The Ram Styles constitute the transition from hard disk to RAM. To distinguish a RAM Style in RAM from a Style in Flash RAM, the display shows “DISK”... - Page 57 VALUE +/- push buttons to scroll one file at a time, CURSOR +/- to call up groups of Styles if stored in the Folder and F10 Select to confirm the choice. The symbol “>” is set next to each Style selected. Press the VALUE +/- push buttons together at the same time to select all the Styles in Folder 95 Styles. Owner’s Manual SD1...
- Page 58 LOADING A BLOCK STYLE AND CALLING UP THE RAM STYLES From the main page of the display enable the MASTER FOLDER push button. Press the BLOCK/LIST push button. Press F9 Dir Block to display the Block List files stored in Folder 95 Styles. SD1 Owner’s Manual...
- Page 59 F9 Dir Block and then select that desired using the VALUE +/- and F10 Select push buttons. Once selected, press the SAVE/ENTER push button and the SD1 will create a file called !! INIT 01.PWR placed in the same Folder as the original Block Style. The next time the SD1 is turned on it will automatically load the Block Style desired.
-
Page 60: Pattern Edit
Pattern Edit The SD1 can record new Styles both in real time and also exploiting a MIDI connection to automate and speed-up the process. It is also possi- ble to copy Sections of different Styles and to modify the timbres used in the tracks. - Page 61 Section that already exists, it will be impossible to change the measure value. The Fill In’s always have a fixed duration of one beat. To change the reproduction and registration Tempo simply use the FAST and SLOW push buttons. Below is the explanation of the single parameters that can be called up using the function push buttons. Owner’s Manual SD1...
- Page 62 To simplify the recording phase it is also possible to record a section only in Major leaving it up to the SD1 to extract the various versions of minor and seventh. To do this select “M.m.7th” for Tonality and record the sec- tion with an arrangement in Do major.
- Page 63 If enabled (√), a Crash will be played at the end of every Fill In, Break and Intro. F4 Crash Level: This establishes the Crash volume related to the Autocrash. It is modified using the VALUE +/- push buttons. F5 Escape: This is used to return to the main Edit Pattern menu Owner’s Manual SD1...
- Page 64 To create a completely new Style, press F5 Escape to exit the list which may be displayed when accessing Pattern Edit or press F10 Select. Create a new Style using the F10 Create function from the main menu of Pattern Edit. The SD1 will switch to the page dedicated to entering the name, using the keyboard keys and the CURSOR +/- push buttons.
- Page 65 VALUE +/- push buttons and, having found the Style, press F10 Select. You will automatically return to the main page of Pattern Edit. To return to the initial page without choosing a Style press F5 Escape. Owner’s Manual SD1...
- Page 66 The applications of this new mixed Style are the most musical that there could pos- sibly be: on one hand the fidelity of the timbres of the SD1, on the other the groove of a sampled drummer. The appendix provides some prac- tical examples of this innovation.
- Page 67 To cancel the procedure and to return to the Edit Pattern page press the F5 Escape function push button. Remember, if you were modifying a Style before you started to create a new one, save the Style otherwise all the modifications added will be lost. Owner’s Manual SD1...
-
Page 68: Power On Set Up
Power On Set Up Some of the most important settings programmed for the use of your SD1 can be stored in such a way that they are automatically called up when turning the instrument on, thus avoiding loss of time to re-program them. The parameters are not grouped on the same page, but dis- tributed in a number of menus such as Arrange Mode, Arrange View, MIDI as well as the push buttons on the control panel. - Page 69 Midi file, without having to use software to add the words. This possibility is described in the “Text files” section. To make it easier to find a Midi file, the SD1 automatically numbers the Midi files both in hard disk and floppy, as the Midi files are not called up by their name or by selecting them but by entering the number assigned.
- Page 70 Return to the Song Play page using EXIT and call up the next Midi files of the chain using START. Chains thus created cannot be saved and are lost if you change Folder or disk as the SD1 is no longer capable of finding the references.
- Page 71 BALANCING AND PLAYING THE TIMBRES ASSIGNED TO THE KEYBOARD One of the prerogatives of the SD1 is the availability of timbres to be played on the keyboard while the Midi file is being reproduced. In fact the two parts Lower and Bass as well as Right and Manual Drum remain in use, separated by the split point that can be programmed even while the Midi file is being reproduced.
- Page 72 When set as On, it disables all the tracks of the Midi file with the exception of those for the Drums and Bass. F10 Lyric: The display choice applies to all Midi files. Its default setting is Off. Press the function push button F10 again if the Midi SD1 Owner’s Manual...
- Page 73 Midi file. The SD1 is provided with two different editing methods: the first is based on displaying one track or Part at a time, the second shows the set- ting of the single parameter for all sixteen parts.
- Page 74 General MIDI, but it offers the best pos- sible for creating Midi files on SD1. If the function is enabled (symbol √), the track is cut-out from the reproduction.
- Page 75 F10 Execute. The Midi file thus modified is saved in the same folder from which it was loaded. SAVE SONG SETUP PARAMETERS - Program Change - Transposer ( Global/Song ) - Effects - Pan - Volume - Note Shift - Tempo - Song Balance - Drum Mixer - Right Hand Voice Owner’s Manual SD1...
- Page 76 Midi file will appear. There are three ways of moving along the chain: Leave the Midi files to end normally, the SD1 will load the next one and will reproduce it without having to touch a key.
-
Page 77: Video Out And Karaoke
CHANGING THE BACKGROUND AND TEXT COLOUR The SD1 can select two different colours for the background and for the words: The combinations are Blue/White or White/Black. To change the colour of the background use F1 Background, by pressing the function push button repeatedly. - Page 78 Off: means that only the Midi file words appear on the screen despite the SD1 display. The Mirror Off status may prove useful to read the words on the screen when the words displayed on the SD1 is set on off via Lyric Off, and can only be set with Song Play stopped.
-
Page 79: Recording A Midi File
Everything that is played on the SD1, including the automatic accompaniment and the variations made on the control panel, can be recorded as a Midi file directly on Floppy Disk or Hard Disk. Everything recorded can be later modified using the built-in sequencer of the SD1 or on soft- ware sequencers for PC/Mac. -
Page 80: Kar Midi Files And .Txt Files
.KAR file is a normal Midi file in format 1 and therefore it is to be converted into format 0 for it to be reproduced directly by the sequencer. The SD1 not only reads Midi files with Lyrics in format 0 and 1 can also automatically convert a .KAR Midi file into a new .MID Midi file in format 0 with text meta events. - Page 81 SYNCHRONIZING THE PAGE CHANGE USING A MIDI FILE The SD1 can record the page change of the .TXT file displayed at any stage of a Midi file. By writing a text with empty lines you can reach results very near to Karaoke, obviously with some graphic restrictions. The synchronization procedure is always enabled when reproducing the Midi file and there are no functions or controls to call it up.
-
Page 82: Using The Microphone
Using the microphone The SD1 can use two separate microphones, thanks to its separate inputs, of which one (input Mic 1) with professional pre-amplifier and balanced XLR connection to minimise interference. Input Mic 1 is the only one that can exploit the built-in Vocalizer plus it is provided with a separate audio output to be able to lead the voice and the signal processed to an external mixer. - Page 83 The SD1 resolves this problem with the Dry On Stop function which, in other words enables the effects on the micro- phone signals only when the Arranger or a Midi file are playing. When the Arranger and the Midi file stop, the SD1 disables the effects on the microphones to restore them again as soon as the Arranger or the Midi file start playing again.
- Page 84 XLR connection, and uses, as harmonisation information, the chords played on the keyboard or those on the MIDI In 2 input. The Vocalizer control can also be carried out by a MIDI track of a Midifile played by the SD1 sequencer or by information collected on MIDI In 1. Due to the fact that the Vocalizer includes the control of the elements forming the timbre, further to harmonisation it also consents to significant- ly alter the timbre itself, for example to transform a male timbre into a female one.
- Page 85 The parameters are selected with the CURSOR +/- buttons and the value is entered with the VALUE +/- buttons. To go back to the main page of Vocalizer Edit, press once more the F7 Filter function button. In the following the parameters are described in detail: Owner’s Manual SD1...
- Page 86 Arranger, and not via MIDI and not via the sequencer. “None” completely deac- tivates the SD1 Vocalizer but still transmits the information for the Vocalizer control to the MIDI Out, to be able to control a similar external unit.
- Page 87 In this operating mode the note sung does not influence the harmonisation, which depends only on the chord played. The complete keyboard of the SD1 is enabled to recognise the chord and the single inversions, producing different harmonisation. The algorithms available for Keyboard Harmony are: Harmony Right:The chord is recognised on the keyboard area to the right of the split point, with all its inversions, regardless of the note sung.
- Page 88 Once you have modified any of the Vocal Set parameters, you need to store it in one of the twelve memories available to avoid losing them when you exit Vocalizer Edit or switch the SD1 off. To activate the saving operation, press the SAVE/ENTER push button before exiting Vocalizer Edit.
- Page 89 Press EXIT twice to go back to the main page. AUTOMATIC VOCAL SET LOADING ON SD1 POWER ON Thanks to the Power On Setup function described in the special section, you may load the desired Vocal set on turning the SD1 on. For this purpose, proceed as follows: Access the On Line Effect menu pressing the relevant push button.
- Page 90 The SD1 employs up to three DSP’s to generate the global Reverb and for the Upper parts, the Reverb to assign to the Drum 1 track and the three groups of Chorus, Delay and Distorsor effects that can work both in parallel and in series in Programs and in parallel for the automatic accom- paniment tracks and the Lower parts.
- Page 91 EDITING AN EFFECT The SD1 does not only choose the algorithm to be assigned to the DSPs but it also allows its substantial modification and saving in dedicated memories. To modify an algorithm first it must be selected between Reverb 1, Chorus, Delay and Distorsion, simply by pressing the function push button and choosing the algorithm.
- Page 92 This is the LPF filter to cut out the higher frequencies. PARAMETERS FOR DISTORSOR ALGORITHMS Level: This is the level of the signal. Tone: This is the timbre variation degree. Resonance: This is the accentuation of the frequencies of the distorted timbre. SD1 Owner’s Manual...
-
Page 93: On Line Effects And Rotor Effect Menus
The relative push button on the control panel is used to enable the Rotor effect that simulates the classic cabinet Leslie used of old with the Hammond electro-magnetic organs. The rotation velocity of the speakers, when the ROTOR LED is lit, is controlled by the Modulation Wheel. Owner’s Manual SD1... - Page 94 Registration Thanks to these special memories all the control panel settings and the main parameters that control the SD1 can be called up instantly. Once the Registrations have been programmed they make it very quick to change the Style, the Voice variations, the settings of the effects and above all the automatic call-up of the audio samples associated with a Style and the possible TXT file.
- Page 95 AUTOMATICALLY LOADING THE TEXT FILE AND MIDI FILE WITH THE REGISTRATIONS This function is one of the most powerful and useful functions of the SD1. It is used to avoid lots of procedures to load the file required when playing live. There is no operational difference between a Registration of the Block Registrations and a Single Registration.
- Page 96 When it is enabled (On) it disables the BLOCK REGISTRAT push button, after a few seconds to allow the user to select a Style rather than a Registration using the numeric keypad. F10 Select: Once the parameter has been selected F10 Select is used to modify its enabling status. SD1 Owner’s Manual...
- Page 97 The Utility menus are used to control the physical controllers, the MIDI accordions, the pedal, the dynamics response curve, the audio outputs and a group of parameters that modify the general performance of the SD1. From the main page of the display, press F3 Utility to access the first page indicated as 1/3 at the top right part of the display. To select the other two menu pages use the PAGE +/- push buttons.
- Page 98 F1 Tune: The value indicated in Hertz, that can be modified +/- 100 Cents using the VALUE +/- push buttons, estab- lishes the fine tuning of the whole sound generator of the SD1. By pressing the two VALUE +/- push buttons togeth- er at the same time the standard tuning of 440 Hz is reset.
- Page 99 F5 Footswitch: The SD1 can exploit two types of optional pedals (FS13 with thirteen switches and FS6 with six switches) to control many func- tions, including those already available in the X series. F5 Footswitch: This calls up a page that shows the function assigned to each of the switches. To modify it, use the CUR-...
- Page 100 F1 Left: This establishes whether the intervals of the Arabic scale are operational also on the Arranger and Lower parts or otherwise. If set as No the Arabic scale is not cut-out from the whole Left part. F5 Escape: This returns to the initial page of the Utility menu. SD1 Owner’s Manual...
- Page 101 DSP dedicated to the effects, but not the Reverb. Therefore if Distorsor effect is to be used on a timbre, the aux- iliary output cannot be used at the same time. If four audio outputs are used together at the same time, the SD1 dis- ables all the DSP’s, therefore the timbres are not processed by Reverb or Effects.
- Page 102 Old and then the new one in line called New and then confirm using F10 Confirm. F5 Escape returns to the main page of the display, F6 Flash Ins is used for any Styles up-dates produced by Ketron. F7 Chorus Lck: When set as On, it keeps the chorus of the Voice selected locked even if the Voice is changed and Midi files are played.
-
Page 103: Midi Accordions
CONNECTING A MIDI ACCORDION The MIDI Out Output of the MIDI Accordion is to be connected using a MIDI cable to the MIDI 2 In input (Keyboard) of the SD1 and then enable the Accordion mode on the SD1. - Page 104 THE MIDI PARAMETERS FOR THE ACCORDION When the Accordion is enabled using F10 Active, the SD1 calls up the MIDI Accordion 1 set-up to attribute the MIDI channels to the keyboad sec- tions in MIDI reception. The MIDI Accordion 1 set-up is that most frequently used with most MIDI accordions. The attribution of the MIDI recep- tion channels can be modified in menu F6 MIDI that is accessed from the main page of the display and then using F2 Channel Receive.
- Page 105 This protocol is therefore used to connect a computer with dedicated programs to the SD1, to control other timbre modules or keyboards directly from the SD1 and to connect the SD1 to an Accordion, a Sax or a MIDI guitar. Various books have been written on the MIDI standard and some simple research via Internet or in any specialised library can help you to better under- stand how it works.
- Page 106 General MIDI, but it offers the best pos- sible for creating Midi files on SD1. If the function is enabled (symbol √), the track is cut-out from the reproduction.
- Page 107 THE MIDI PARAMETERS OF THE SD1 SECTIONS From the main page of the display press F6 MIDI to call up the menus dedicated to the SD1 sections. For each single function the single sec- tions involved are displayed together with relative value. To move around between the sections use the CURSOR +/- push buttons and use the VALUE +/- push buttons to modify the value.
- Page 108 F5 Escape: This returns to the initial page of the MIDI menu. F10 MIDI Setup: This calls up the settings already put in order and saved to use the SD1 via MIDI. The MIDI Set-up currently selected is also that where the settings will be saved using the SAVE/ENTER push button.
- Page 109 F6 Computer: This selects the type of computer to which the SD1 is connected. F7 Local On/Off: This is a MIDI condition for which, when set as Off, all the SD1 sections are no longer controlled by the keyboard but only by the MIDI In input.
-
Page 110: Using A Midi Pedal
Using a MIDI pedal The SD1 enables the connection of a MIDI pedal to control the manual bass line and to set the chords. The MIDI reception channel is to be set for the bass part on the same transmission channel as the pedal, by proceeding as follows: Connect the MIDI pedal to MIDI In 2 (Keyboard). -
Page 111: Demo & Hit
Midi file associated with this button, and the previous one is interrupted. ORGANISING THE MIDI FILES IN DEMO & HIT You may delete Midi files or change their location on the Demo & Hit pages. Owner’s Manual SD1... - Page 112 F4 Undo, delete the storage operation without saving the modifications by pressing F5 Escape, save the set- tings on the hard disk by pressing F8 Disk Save, restore the Midi files sorting according to their numeric order pressing F9 Default, or save the modifications in the Flash memory by pressing F10 Save. SD1 Owner’s Manual...
- Page 113 DISK The SD1 is supplied standard with built-in 6 GB Hard Disk and a Disk drive for Floppy Disks of 720 Kb (DD) or 1,4 MB (HD). The SD1 uses the DOS format for the Floppy, therefore the same floppy disk can be used to exchange files from PC or Mac. The direct connection to a PC on the back of the control panel is used to directly control the contents of the Hard Disk via PC, by means of an application developed by Ketron.
- Page 114 If for example you are working in Song Play, when you access Disk you immediately call-up the Midi files folder. The SD1 does not just not end here, as if you should load Midi file, a User Voice bank, an audio file, a TXT file and a Style for a song even with Master Folder enabled we would have to look for the single files and load them one at a time.
- Page 115 It is also preferable to save the files when they are programmed via the Save options to avoid making mis- takes in selecting them. All these files are saved always in the Folder currently selected. The options are the following: Owner’s Manual SD1...
- Page 116 When copying from Floppy to Hard Disk you must first choose the destination Folder. If Master Folder is enabled, the files copied will be dis- tributed in the appropriate Folders pre-arranged by Ketron. If Master Folder is disabled before copying you must first establish which is the destination Folder using the following procedure: Enable the DISK menu using the dedicated push button.
- Page 117 The options are the same as those indicated in F3 Save. F6 Delete: This cancels one or a number of files selected using F10 Select. Before completing the procedure the SD1 displays a warning message with the following options: F5 Escape: This cancels the procedure.
- Page 118 F5 Escape: This cancels the procedure and returns to the Disk menu. F8 Skip: This skips the copying procedure of the current file. F9 Copy All: This copies all the files without re-naming them. F10 Execute: This confirms that the single file is to be copied. F9 Utility: SD1 Owner’s Manual...
- Page 119 Midi file will appear. There are three ways of moving along the chain, namely: Let the Midi files come-in as they end normally and the SD1 will load the next file and reproduce it without touching a key.
- Page 120 Fatal Error appears you must contact a Ketron service centre as the Hard Disk is seriously damaged. If the Hard Disk surface test detects no anomalies the display will return to the Disk Utility menu once the procedure has been com- pleted.
-
Page 121: Up-Dating And Resetting The Sd
Floppy Disk Drive USB. Once the operating system Floppy has thus been created, turn the SD1 off and put it in the Disk Drive. Turn the SD1 on and press the function push button F6 immediately. - Page 122 (for example, by playing on the right- hand side of the keyboard), and different midi playback channels can later be set for each recorded track. SD1 Owner’s Manual...
- Page 123 7 for Volume, 10 for pan-pot, while the second byte normally expresses the amount of control. A number of controls and related codes are given below (see midi implementation in the Instructions Handbook for a more detailed list). Owner’s Manual SD1...
- Page 124 Allows you to switch off all tracks except the one in Solo. After selecting a track, it is put in solo by pressing F10 (SOLO); pressing F10 again will remove the solo. NOTE. Only one track at a time can be in solo. SD1 Owner’s Manual...
- Page 125 EDIT menu by pressing the F5 button. The menu is divided into two pages. For both pages, the midi events with their temporal position are centered on the display. Let us have a detailed look at the fields relating to the events that are centered on the display. Owner’s Manual SD1...
- Page 126 Program = 0 Piano Rock Piano Upright Honky Tonk " " Leslies Jazz Organ " " Bank = 1 (second sound bank) Program = 0 Concert Digipiano House Piano Stage Piano " " Rotor B3 Pop Organ " " SD1 Owner’s Manual...
- Page 127 96 and then a decrescendo from 96 to 20. Let us suppose that the crescendo should go from bar 31 to bar 33; the decrescendo from bar 33 to bar 36. Use the Cursor <> buttons to access the various function fields. Owner’s Manual SD1...
- Page 128 NOTES, only the notes inside the interval will be changed. External: the operation will affect only the events with values falling outside the editable interval given by FROM and TO. If the STATUS is NOTES, all the notes falling inside the interval will be excluded. SD1 Owner’s Manual...
- Page 129 Example. Let us suppose you are editing the notes of a track on the basis of the following characteristics: - They are in the interval going from bar 32 to 64. - They are different from C_2. Owner’s Manual SD1...
- Page 130 Press F9 (DEFRAG) to “format” the memory and free the spaces lost through deletion. FUNCTION: when FUNCTION is selected by pressing the F4 button, new functions of the sequencer become operational such as OPTIONS, MIDI FILTER, MASTER TRACK LOAD/SAVE, DEMIX, MIXDOWN, VELOCITY, TRANSPOSER. SD1 Owner’s Manual...
- Page 131 2nd voice will play if you access by pressing the rela- ted button. If a channel is switched off, it will not be recorded by the sequencer. The MIDI FILTER can be used to filter the events Owner’s Manual SD1...
- Page 132 Position indica la posizione degli eventi (misure, quarti, steps) Event Tempo: performance tempo Signature: musical division ExcMsg: exclusive messages of other producers Solton: Solton exclusive messages Part: name of the musical part Lyrics: lyric events (rows of letters) SD1 Owner’s Manual...
- Page 133 Lower1 (left) Lower2 (left) Bass (left) Chord1 (left) Chord2 (left) Chord3 (left) Groove (left) Drum (left) Chord5 (left) Program voice1 (right) Program voice2 (right) Program voice3 (right) Program voice4 (right) Effect no effect Leslie Distorsor Chorus Delay Owner’s Manual SD1...
- Page 134 Press F10 to confirm the operation, F5 to exit. VIEW: It allows you to choose the type of event to show in the MASTER TRACK menu. Press F6 (VIEW) repeatedly to select the events. ALL: all events are displayed. LYRIC: only lyric events are displayed. SD1 Owner’s Manual...
- Page 135 (Chan. column) will be automatically set for every track. Instead, the tempo and signatures of the midi files, and any lyrics or exclusive messages, will be recorded on the MASTER TRACK. Owner’s Manual SD1...
- Page 136 Delete, Mixdown, Copy/Move. In this way, should any of these operations not give you the desired results, you can always use LOAD to reload your ori- ginal sequence. After saving, press F5 to return to the main menu. SD1 Owner’s Manual...
- Page 137 USING AUDIO FILES IN A MIDI FILE You may assign up to eight .WAV files, with or without loop, to a Midi file. The SD1 will apply a real time Pitch Shift algorithm to avoid excessive timbre modifications within a reasonable tempo and transposition range. The audio files loaded into the RAM are managed as if they were Program Changes within the Midi file.
- Page 138 Make sure that the MASTER FOLDER button is activated and press F1 Load to display the list of audio files stored in the Sound folder (no. 94). Use the VALUE +/- buttons to select the audio file to be loaded and press the F2 Load button. When loading is completed, the SD1 goes back to the initial Sampler page.
- Page 139 In this case the notes set on the track dedicated to the use of the sample define both the point where the sample is to be activated and its pitch. After the Midi file has been imported into the SD1, assign the sample to the track proceeding in the same way as with the audio loop and then save the modified Midi file.
- Page 140 Drum 2, use the Arrange View parameters. Any time you use the Style with a loop that was sampled in Sync, SD1 loads into the RAM memory the relevant audio samples. To avoid too long waiting times, it is recommended to create a Style Block to be loaded on switching on the instrument.
Need help?
Do you have a question about the SD1 and is the answer not in the manual?
Questions and answers