Table of Contents
Advertisement
Advertisement
Table of Contents

Related Manuals for MAXDATA M-book 5000


Summary of Contents for MAXDATA M-book 5000
- Page 1 USER'S MANUAL E N G L I S H December 2010...
-
Page 2: Table Of Contents
CONTENTS BEFORE YOU START ..................... 5 Make sure you have everything ..................5 Familiarize yourself with the computer ................ 6 OPENING THE DISPLAY PANEL ................6 FRONT OVERVIEW ....................7 LEFT SIDE OVERVIEW ....................9 RIGHT SIDE OVERVIEW ..................11 BACK OVERVIEW ..................... -
Page 3: Taking Care Of Your Notebook Pc
TAKING CARE OF YOUR NOTEBOOK PC To prevent possible overheating of the computer's DO NOT press or touch the display panel. processor, make sure you don't block the open- ings provided for ventilation. DO NOT place on uneven or unstable work DO NOT use your notebook computer under surfaces. - Page 4 Avoid sudden changes in temperature or humid- DO NOT expose the computer to rain or ity by keeping it away fromA/C and heating vents. moisture. DO NOT place near fire or other sources of heat. DO NOT tamper with the batteries. Keep them away from children.
-
Page 5: Before You Start
BEFORE YOU START Make sure you have everything When you receive your notebook PC, unpack it carefully, and check to make sure you have all the items listed below. For a pre-configured model you should have the following: • Notebook Computer •... -
Page 6: Familiarize Yourself With The Computer
BEFORE YOU START Familiarize yourself with the computer OPENING THE DISPLAY PANEL To open the display panel, simply lift the lid up. When closing it, be sure not to slam it shut. -
Page 7: Front Overview
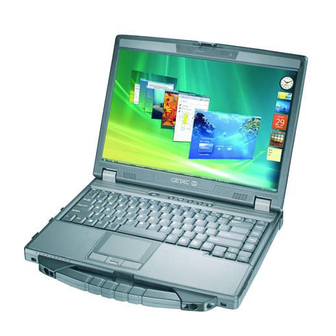
BEFORE YOU START FRONT OVERVIEW The following is an overview of the front of the notebook. Camera Microphone Display Panel Suspend/Power On Button Keyboard TouchPad Pointing Device Memory Card Reader Status Indicator Lights Microphone The built-in microphone allows for the reception and transmission of voice and/or other audio data to any program capable of accepting such input. -
Page 8: Touchpad Pointing Device
BEFORE YOU START Keyboard A full-size keyboard with the numeric keys and the dedicated Windows keys. ® TouchPad Pointing Device The TouchPad pointing device is a mouse-like cursor control with two buttons and a touch sensitive movement pad. Status Indicator Lights The Status indicator lights correspond to specific operating modes. -
Page 9: Left Side Overview
BEFORE YOU START LEFT SIDE OVERVIEW The following is a brief description of the left side of the notebook. External Monitor Port HDMI Port Kensington Lock LAN (RJ-45) Port Slot Power Adapter Port USB Ports Power Adapter Port The power adapter port allows you to plug in the AC adapter to power your notebook and charge the internal Lithium-Ion battery. -
Page 10: Kensington Lock Slot
BEFORE YOU START Kensington Lock Slot The Kensington lock slot allows you to secure your notebook to an immovable object with an optional security cable. -
Page 11: Right Side Overview
BEFORE YOU START RIGHT SIDE OVERVIEW The following is a brief description of the right side of the notebook. Headphone Jack Optical Drive Activity Indicator Optical Drive Eject Button Microphone Jack USB Port Optical Drive Emergency Tray Release Microphone Jack The microphone jack allows you to connect an external mono microphone. -
Page 12: Back Overview
BEFORE YOU START BACK OVERVIEW The following is an overview of the back of the notebook. -
Page 13: Bottom Overview
BEFORE YOU START BOTTOM OVERVIEW The following is an overview of the bottom of the notebook. Lithium-Ion Battery Bay Rating Label Outlets Compartment Compartment Cover Stereo Speakers Cover Lithium-Ion Battery Bay The battery bay contains the internal Lithium-Ion battery. It can be opened for the removal of the battery when stored over a long period of time or for swapping a discharged battery with a charged Lithium-Ion battery. -
Page 14: Getting Started
GETTING STARTED Power Sources Your computer has two types of power source: a Lithium-Ion battery or an AC adapter. CONNECTING THE POWER ADAPTERS The AC adapter provides power for operating your notebook PC and charging the battery. Connecting the AC Adapter 1. -
Page 15: Recharging The Battery
GETTING STARTED RECHARGING THE BATTERY The Lithium-Ion battery is recharged internally using the AC adapter. To recharge the battery, make sure the battery is installed and the computer is connected to the AC. There is no "memory effect" in Lithium-Ion batteries; therefore you do not need to discharge the battery completely before recharging. -
Page 16: Starting Your Notebook
GETTING STARTED Starting Your Notebook POWER ON Suspend/Power On Button The suspend/power on switch is used to turn on your notebook from its off state. Once you have connected your AC adapter or charged the internal Lithium-Ion battery, you can power on your notebook by pressing the suspend/power on button located above the keyboard. -
Page 17: Status Indicators
GETTING STARTED Status Indicators The status indicator lights correspond to specific operating modes. These modes are: Power on/ Suspend status, Battery/AC Adapter status, hard drive activity (HDD) and Wireless LAN activity. Battery Indicator Wireless LAN Activity Indicator Power On / Suspend Status Indicator Hard Disk Drive... - Page 18 GETTING STARTED Hard Disk Drive (HDD) Activity Indicator The Hard Disk Drive (HDD) Activity indicator tells you whether your internal hard drive is being accessed and, if so, how fast. Wireless LAN Activity Indicator The Wireless LAN Activity indicator tells you whether your computer is connected to a wireless network or not.
-
Page 19: Using Function Keys
GETTING STARTED Using Function Keys Your computer has 12 function keys, F1 through F12. The functions assigned to these keys differ for each application. You should refer to your software documentation to find out how these keys are used. The [FN] key provides extended functions for the notebook and is always used in conjunction with another key. -
Page 20: Using The Touchpad
GETTING STARTED Using the TouchPad A TouchPad pointing device comes built into your computer. It is used to control the movement of the pointer to select items on your display panel. The TouchPad consists of a cursor control, a left and right button, and a scroll bar. The cursor control works the same way a mouse does, and moves the cursor around the display. -
Page 21: Memory Module Upgrade
GETTING STARTED Memory Module Upgrade To increase your notebook's memory capacity (up to 8 GB maximum), additional memory mod- ules may be installed. The memory upgrade must be a dual-in-line (DIMM) SDRAM module. Installing a Memory Module The following steps describe how to install a memory upgrade module. We do not recommend that you do this yourself. -
Page 22: Troubleshooting
TROUBLESHOOTING Your notebook PC is sturdy and subject to few problems in the field. However, you may encoun- ter simple setup or operating problems that you can solve on the spot, or problems with periph- eral devices, that you can solve by replacing the device. The information in this section helps you isolate and resolve some of these straightforward problems and identify failures that require service. - Page 23 MEMO Federal Communications Commission (FCC) Statement This device complies with Part 15 of the FCC Rules. Operation is subject to the following two conditions: (1) This device may not cause harmful interference. (2) This device must accept any interference received, including interference that maycause undesired operation.
- Page 24 MEMO...
Need help?
Do you have a question about the M-book 5000 and is the answer not in the manual?
Questions and answers