
Related Manuals for handi quilter Avante QM30239


Summary of Contents for handi quilter Avante QM30239
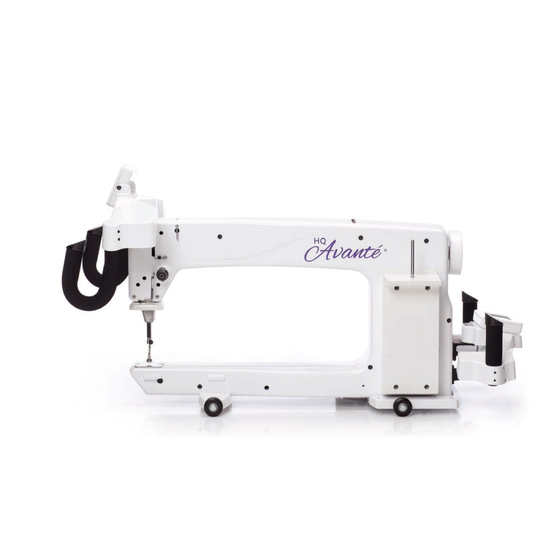
- Page 1 HANDI QUILTER 18-INCH LONGARM Designed by a Quilter, for Quilters. ® USER MANUAL QM30239 • VERSION 3.0...
- Page 2 HandiQuilter.com Page 1...
-
Page 3: Package Contents
Congratulations on your purchase of the HQ Avanté from Handi Quilter! You haven’t just purchased a quilting machine, Remember, if you ever have questions, your local Rep you’ve joined the Handi Quilter family and we can help you. If the Rep is not available, contact Handi welcome you. -
Page 4: Table Of Contents
Installation and Training Checklist ............37 Note: A set of Handi Quilter Getting Started DVDs is included with your HQ Avanté machine. Review the DVDs and... -
Page 5: Safety Section
Disclaimer from outlet pulling from the plug, not the cord. Handi Quilter and its Representatives are in no Never operate the HQ Avanté if the cord is way legally responsible or liable for damage to the damaged or not working correctly. -
Page 6: Components (Front Side View)
HQ Avanté Components Front Side View Figure 1 1. Thread Mast 2. Thread Guide A 3. Three Hole Thread Guide B 4. Thread Guide C 5. Tension Assembly 6. Stirrup Thread Guide E 7. Take-Up Lever 8. Thread Guide F 9. -
Page 7: Components (Back Side, Rear And Front Views)
Back Side View 12. Ruler Foot 13. Needle 14. Needle Bar Thread Guide 15. Needle Bar 16. Presser Bar 17. Handi Feet Mount 18. Needle Plate 19. LED Light Ring 20. Front Handlebar Connector 21. Ruler Base Position Guides 22. Front Wheel Base 23. -
Page 8: Installation (Frames)
Installation (Studio Frame) 1. Place the carriage on the table rails, ensuring that the Carriage Encoder Assembly will be toward the back of the machine (the power cord side of the machine). The back side of the carriage has an encoder assembly attached to the rear cross-piece. -
Page 9: Installation (Handlebars)
IMPORTANT: If you will not be using the machine The lower power connector is for powering other for more than a day, we recommend you turn off attachments developed by Handi Quilter. (Not both switches and unplug the power cord from the yet available) power source. -
Page 10: Inserting Needle
Inserting (or changing) the Needle above the needle bar clamp screw – make sure the needle is touching the top of the stop/sight hole (Figure 7). If it is not, the machine timing will be off and it may be possible for the needle to collide with internal parts causing damage not covered by warranty. -
Page 11: Laser Stylus
Laser Stylus Safety and Use Guidelines The laser stylus projects a straight laser beam visible as a dot on surfaces it hits. The laser dot is used as a guide or stylus, allowing you to stitch the same pattern onto a quilt that is being traced with the laser dot. -
Page 12: Installation (Thread Mast)
Installing the Laser Stylus on it. Remove the nut and washer, replace the nut onto the post and then place the washer under the nut and onto the machine painted surface. The washer protects the painted surface when the nut is tightened. -
Page 13: Threading The Machine
Threading the Machine TAKE UP SPRING TENSION ASSEMBLY FRONT BACK DETAIL 2 Figure 13 1. Place a cone or spool of thread on the spool pin. Pass the thread through the thread-mast eyelet from back to front, continuing to thread guide A. (Figure 13) 2. - Page 14 3. Thread continues through thread guide C, and then down to the tension assembly (see Figure 15). NOTE: It is important that the thread is “flossed” up between the two tension discs. If the thread is not firmly in place between the two tension discs, the thread rests on the outside of the tension discs (without tension) and looping on fabric or thread nests may occur.
-
Page 15: Horizontal Spool Pin
Optional Horizontal Spool Pin Bobbin and Thread Tension Adjustments Figure 16 Figure 17 1. An optional horizontal spool pin is available for metallic and specialty threads wound on a spool (not a cone). 2. The horizontal spool pin mounts on the laser stylus guide post on the top of the machine (see Figure 16). -
Page 16: Easy-Set Tension™ Adjustment
Drawing the Bobbin Thread to the Top of the Quilt 1. After the machine is threaded, locate needle up/needle down button on the left handle. 2. While firmly holding the tail of the needle thread with the left hand, press the needle up/down button with right hand, bringing the needle back to the up position. -
Page 17: Maintenance (Oiling And Lubricating)
Easy-Set Tension™ Adjustment IMPORTANT: Top tension should be adjusted only after the bobbin case foundation tension adjustment is made. Puckering, gathers and thread breakage occur when the top tension is too tight. Loops and thread nests occur on the back when the top thread tension is too loose. -
Page 18: Touch Screen Displays
Using the Touch Screen Displays on the Handlebars Machine and Handlebar Menus The HQ Avanté has touch-screen displays on the front and rear handlebars. Settings may be changed at either of these locations. Main Screen Manual Mode Screen Button Functions: Pressing the “Regulated”... - Page 19 Bobbin Thread Indicator If you use the Low-Bobbin Estimator feature, The Bobbin Thread Indicator box (Figure 26) shows how much bobbin thread remains on the bobbin. The value counts down until it gets to zero, at which time the low-bobbin alarm alerts you that it is time to put Figure 26 in a new bobbin if the alarm is enabled.
- Page 20 Basting Stitches There are four basting stitch settings controlled by the stitches per inch function. After the SPI reaches its lowest stitch setting of 4 stitches per inch, pressing the “-” button will activate the basting settings: • 0.5-inch baste (one stitch every half-inch movement of the machine) •...
- Page 21 Cruise If “Cruise” mode is selected, when you press “Start” on the handles the machine will immediately begin stitching at the percent speed indicated below the “Cruise” button. The “Cruise” speed is the minimum speed the machine will stitch, regardless of how slow you are pushing the machine.
- Page 22 Low Bobbin The HQ Avanté includes a low bobbin capability so you can estimate how soon your bobbin thread will run out. This Low Bobbin Capacity is based on an estimate of how much of a particular thread can fit on a bobbin, in combination with other quilting factors such as tension, stitches per inch, and how much bobbin thread you pull up when beginning and ending...
- Page 23 Timers Timers There are two useful timers. The first (top) timer is a reminder timer. It enables you to set an alarm to go off after a specific period of time, similar to a kitchen timer. Use the “+” and “-” buttons to set the time duration.
- Page 24 Lighting white thread or white chalk on white fabric. The System Message best contrast is achieved when viewed in a dark or dimly lit room. Although Handi Quilter has chosen Light Power Group Do not use All if UV to use UV lights which emit a light wavelength at lights are installed.
-
Page 25: System Information
Lifetime counter cannot be reset and should be used as an indicator to determine when general machine maintenance should be performed by an authorized Handi Quilter Representative. (Figure 44) Press the “Main” button to return to the “Regulated” or “Manual” menu screen or the “Back” button to return to the “More”... - Page 26 Failing Test: qualified Handi Quilter repair technician. No beep or solid beep as you rotate the hand wheel one full revolution. Press the “Main” button to return to the “Regulated”...
- Page 27 Press the “Main” button to return to the “Regulated” or Diagnostics “Manual” menu screen or the “Back” button to return to Motor Speed Sensor Test the “More” menu screen. Remove bobbin case and top thread. Motor Speed Sensor Test Clear all objects from the needle area. The “Speed”...
- Page 28 Calibrate Tension The Tension button enables you to calibrate the tension device. You should only calibrate the tension device under the direction of Handi Quilter technical support. While calibrating the tension, you will be asked to do the following: 1. Remove the tension knob.
-
Page 29: Hq Stitch Regulator Operation
HQ STITCH REGULATOR OPERATION Choose from Two Types of Stitch Regulation: Cruise or Precision In regulation mode the status box at the top left When you press the “Start/Stop” (or “Needle Up/ of the screen should say “Regulated”. If it says Down”)key to stop the machine, the indicator will “Manual”, simply press the “Regulated”... -
Page 30: Getting Started Quilting
Getting Started Quilting Thread Requirements In Stitch Regulator Mode: Set the machine to desired Threads have a tendency to dry rot over a period stitch length. Begin moving the machine to become of time. Be sure to choose high quality threads accustomed to the resistance. -
Page 31: Troubleshooting
Troubleshooting Troubleshooting Stitches are Skipping Corrective Measure The needle is damaged, dull, Replace the needle often, normally once or twice per day for continuous quilting or at least once bent, or installed improperly per quilt. Use HQ Avanté recommended needles. -
Page 32: Troubleshooting
bowed or bent inserted completely together with the push pin engaged so bowing won’t occur. Leaders are stretched/worn If fabric is beginning to stretch or fray, contact Handi Quilter for replacement leaders. Thread Backlash Corrective Measure... - Page 33 Troubleshooting Leaders are stretched/worn If fabric is beginning to stretch or fray, contact Handi Quilter for replacement leaders. Needle Thread Breaks Corrective Measure...
-
Page 34: Warranty Information
HQ QUILTING MACHINE LIMITED WARRANTY Handi Quilter, Inc. (hereinafter HQ) offers a limited warranty on the HQ QUILTING MACHINE (hereinafter “Machine”) to be free of defects in workmanship and materials under normal use upon the terms and conditions hereinafter set forth: (a) 90 day Limited Warranty - During the first 90 days from date of purchase, HQ will repair any manufacturing defect without charge for parts or labor. - Page 35 HQ's entire liability for any defective Product shall in no event exceed the purchase price for the defective Product. This limitation applies even if Handi Quilter cannot or does not repair or replace any defective Product. Warranty Claims...
-
Page 36: Warranty Registration Card
Warranty Registration 11/01/14 Return this registration card within 30 days of purchase or if you prefer, register online at http://www.handiquilter.com/warranty MAIL TO: Handi Quilter, Inc. Warranty Registration 501 N 400 W North Salt Lake, Utah 84054 WARRANTY REGISTRATION CARD The HQ Quilting Machine warranty is 10 years manufacturer’s warranty on casting and machining of the case, 5 years mechanical, and 5 years electronic/electrical. - Page 37 This page was intentionally left blank. Page 36 HQ Avanté User Manual...
-
Page 38: Installation And Training Checklist
Ensure the table is level the Handi Quilter machine you purchased. Additional Show how to wind a bobbin (including how to training by this HQ Retailer or any other HQ Retailer adjust the tensioner and the capacity lever) may result in being charged for additional instruction. - Page 39 This page was intentionally left blank. Page 38 HQ Avanté User Manual...
- Page 40 North Salt Lake, UT 84054 1-877-MY-QUILT (697-8458) • www.HandiQuilter.com HQ Avanté ® is part of the family of innovative quilting products from Handi Quilter ® PRINTED 11 /01 / 2014 © 2014 Handi Quilter, Inc. All rights reserved. Printed in the U.S.A.
Need help?
Do you have a question about the Avante QM30239 and is the answer not in the manual?
Questions and answers