Advertisement
Advertisement

Related Manuals for Treo Fitness E103

Summary of Contents for Treo Fitness E103
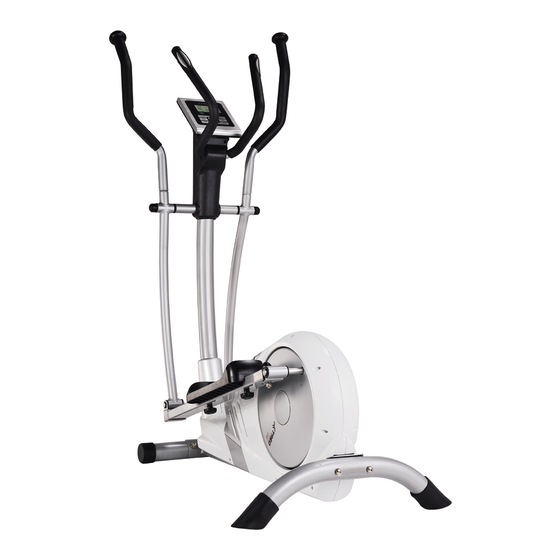
- Page 1 FOR MODEL : E103 ELLIPTICAL OWNER’S MANUAL...
-
Page 2: Table Of Contents
CONGRATULATIONS and THANK YOU for your purchase of this Treo Fitness Elliptical! Whether your goal is to win a race or simply enjoy a fuller, healthier lifestyle, a Treo Fitness Elliptical can help you attain it – adding club-quality performance to your at-home workouts, with the ergonomics and innovative features you need to get stronger, healthier and faster. -
Page 3: Important Precautions
IMPORTANT PRECAUTONS BEFORE YOU BEGIN SAVE THESE INSTRUCTIONS CONGRATULATIONS! on choosing your elliptical. You’ve taken an important step in developing When using an electrical product, basic precautions should always be followed, including the following: and sustaining an exercise program! Your elliptical is a tremendously effective tool for achieving your Read all instructions before using this elliptical. -
Page 4: Elliptical Operation
E103 CONSOLE DISPLAY ELLIPTICAL OPERATION POWER Your elliptical is powered by a power supply. The power must be plugged into the power jack, which is located in the front rear of the machine near the REAR STABILIZER TUBE. HEIGHT TIME... - Page 5 E103 CONSOLE OPERATION PROGRAM PROFILES Manual (P1) The user can start exercise by pressing START/STOP key. The default resistance level is 5. Users may exercise in any desirous of resistance level (Adjusting by UP/DOWN keys during the workout) with a period of time or a number of calories or a certain distance.
- Page 6 E103 LCD WORK OUT GRAPHICS USER SETTING PROGRAM USER SETTING PROGRAM PROGRAM 1 PROGRAM 2 PROGRAM 3 PROGRAM 1 PROGRAM 2 PROGRAM 3 MANUAL STEPS HILL MANUAL STEPS HILL PROGRAM 14 PROGRAM 14 USER 1 USER 1 PROGRAM 4 PROGRAM 5...
- Page 7 USER SETTING PROGRAM BODY FAT TEST PROGRAMS: USER SETTING PROGRAM BODY FAT TEST PROGRAMS PROGRAM 23 PROGRAM 24 PROGRAM 18 PROGRAM 18 BODY FAT (STOP MODE) BODY FAT (START MODE) BODY FAT (START MODE) BODY FAT (STOP MODE) 55% H.R.C. 55% H.R.C.
-
Page 8: Assembly Instructions
ASSEMBLY INSTRUCTIONS STEP 1 Mount the front stabiliser (2) onto the main frame (1) by using 2 x square neck bolts (3), 2 x curved PARTS LIST washers (6), 2 x split washers (7) and 2 x domed nuts (8). STEP 2 Mount the rear stabiliser (19) onto the main frame (1) by using the two allen bolts (14), the 2 x curved washers (6) and 2 x split washers (7). - Page 9 STEP 3 STEP 4 Attach the left and right pedals (21L&21R) to the pedal support tube (11) using the 4 x square neck Slide the handlebar post cover (49) over the handlebar post (10). screw (20), 4 x flat washers (73) and 4 x knobs (77). STEP 5 Fasten the upper computer cable (29) to the motor connector (30).
- Page 10 STEP 8 STEP 9 Pass the shaft axle (71) through the 2 x movable handlebar supports (12), 2 x sea washers (67) and Mount the fixed handlebar (72) to the handlebarpost (10) using 2 x bolts (9), 2 x split washers (7) the handlebar post (10).
- Page 11 STEP 11 STEP 13 Fasten the two handlebar pulse sensor connectors (65) to the matching connectors on the console Attach the front cover (17A) and the back cover (17B) to the handle bar post (10) using 4 x screws (92). (64), then fasten the upper computer cable (29) to the back of the console (64).
-
Page 12: Conditioning Guidelines
CONDITIONING GUIDELINES HEART RATE HANDLEBARS ALWAYS CONSULT YOUR PHYSICIAN BEFORE BEGINNING AN EXERCISE PROGRAM. Place the palm of your hands directly on the grip pulse handlebars. Both hands must grip the bars for HOW OFTEN? (Frequency of Workouts) your heart rate to register. It takes 5 consecutive heart beats (15-20 seconds) for your heart rate to register. - Page 13 THE IMPORTANCE OF A WARM-UP & COOL DOWN STRETCHING T I P S T IP S STRETCH FIRST WARM UP Before using your product, it is best to take a few minutes to do a few gentle stretching exercises. The first 2 to 5 minutes of a workout should be devoted to warming up. The warm-up will limber your Stretching prior to exercise will improve flexibility and reduce chances of exercise related injury.
- Page 14 WEEKLY LOG SHEETS MONTHLY LOG SHEETS WEEK # WEEK LY GOA L D AY DAT E DI STANCE CALORI E S TI M E C O M M E N T S S UNDAY M ONDAY TUE SDAY W ED NESDAY THU RSDAY F RID AY S ATUR DAY...
-
Page 15: Troubleshooting
• Is the outlet of the machine fuctional? Double check that the breaker has not tripped. onto the heart rate handlebars. • The correct adapter is being used. Only use the adapter provided or authorized by Treo Fitness. • Constant movement and vibration due to constantly holding the heart rate grips while exercising. - Page 16 It is also normal for these sounds to change slightly during service calls to a minimum. For this reason, Treo Fitness recommends that the following preventive a workout and over time because of thermal expansion of the parts.
- Page 17 E103 0604’10 © 2010 Treo Fitness Products | Made in China...
Need help?
Do you have a question about the E103 and is the answer not in the manual?
Questions and answers