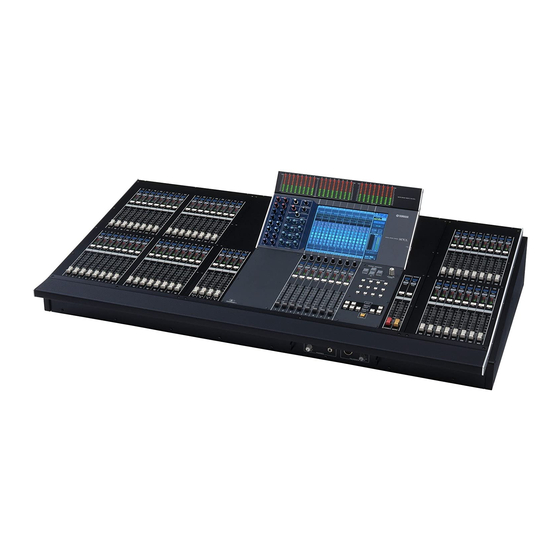
Yamaha M7CL Quick Start Manual
The virtual effects rack. remote ha connection. editor connection guide. using scenes, patching monitor out, accessing outport delays
Hide thumbs
Also See for M7CL:
- Owner's manual (312 pages) ,
- User manual (51 pages) ,
- Quick start manual (24 pages)
Table of Contents
Advertisement
Quick Links
Quick Start Guide
A guide for people using M7CL in the real world.
Part 2
The Virtual Effects Rack. Remote HA Connection. Editor connection guide.
Using Scenes, Patching Monitor out, Accessing Outport Delays.
This is part 2 of a "quick start guide" designed for people
about to use Yamaha M7CL for the first time. It is not a
guide to audio mixing and it assumes the reader has
experience of analog mixers. It does not replace the
manual; we recommend referring to the manual if further
information is required. Most of the features can be
found by intuitive screen pressing but be
sure to practice in non-critical
situations!
282 pages of manual and then
the editor and driver guides.
Mmmmm..... there has got to be a
quicker way...
Advertisement
Table of Contents

Related Manuals for Yamaha M7CL


Summary of Contents for Yamaha M7CL
-
Page 1: Quick Start Guide
282 pages of manual and then the editor and driver guides. about to use Yamaha M7CL for the first time. It is not a Mmmmm..there has got to be a guide to audio mixing and it assumes the reader has quicker way... -
Page 2: Table Of Contents
Connecting Studio Manager / M7CL Editor ........ -
Page 3: Connect Your M7Cl Just As You Would An Analog Desk And Switch On. A Real World Example
EQ to flat, auxes to flat, group routing deselected, insert points switched off, etc. Look at and check upwards of 1000 knobs! Because M7CL can memorize its settings, Yamaha have provided a handy memorized scene (Scene 000) where the console is set to zero ready to start at the touch of a key. -
Page 4: The Virtual Rack; Effects And Graphic Eq
Effects. Mounting units in the virtual rack. M7CL has an on-board virtual rack consisting of eight units. Any of the eight can be filled with 31 band graphic EQ and the last four can be filled with SPX type multi-effect units. Any one unit can be a single 31 band GEQ or 2 x “flex 15”... -
Page 5: Effects. Selecting, Editing And Storing The Effect You Want
M7CL Quick Start Guide Part 2 The virtual rack; effects and graphic EQ: Effects. Selecting, editing and storing the effect you want. From the main rack screen, press the center of the virtual rack mounted effect. This brings up the EFFECT parameter pop-up. -
Page 6: Effects/Graphic Eq. Assigning Effects And Geqs
M7CL Quick Start Guide Part 2 The virtual rack; effects and graphic EQ: Effects/graphic EQ. Assigning effects and GEQs. By default in Scene 000, the effects are prepatched. The sends are MIX 13-16, the returns are STEREO 1-4. However these can be easily repatched if desired. -
Page 7: Graphic Eq. Selecting And Editing The Geqs
M7CL Quick Start Guide Part 2 The virtual rack; effects and graphic EQ: Graphic EQ. Selecting and editing the GEQs. From the main rack screen, press the virtual rack mounted GEQ. This brings up the GEQ pop-up. From the GEQ pop-up, press the tab below the GEQ image with the frequency range you want to edit. -
Page 8: Graphic Eq. Copying, Pasting, Comparing And Storing Geq Settings
M7CL Quick Start Guide Part 2 The virtual rack; effects and graphic EQ: Graphic EQ. Copying, pasting, comparing and storing GEQ settings. At the top of the GEQ pop-up are buttons for COPY, PASTE, COMPARE and LIBRARY. Pressing the [COPY] button stores the displayed GEQ curve into a temporary “copy buffer”. -
Page 9: Connection And Control Of Ad8Hr Remote Head Amp
Yamaha manufactures a remotely controllable mic head amp and AD (analog to digital) converter; the AD8HR. The M7CL comes equipped to remotely control these head amps, but an extra AES Mini YGDAI Card is required to receive the digital audio signals. -
Page 10: Remote Ha Control. Remote Ha Setup 2
Choose the slot and channels that you have connected the AD8HR to. To assign a remote HA to a M7CL channel, first select the input channel’s Centralogic™ overview or single channel screen. From one of these screens, access the PATCH/NAME pop-up. -
Page 11: Connecting Studio Manager / M7Cl Editor
Editor setup; simple PC <-> M7CL via network port 1. M7CL scene memories and libraries can be stored and edited away from the console in a suitably equipped computer running M7CL Editor software. The computer can be linked to M7CL and data transferred between the two via the Ethernet ports and also data synchronization is possible allowing the computer to act as a remote controller for M7CL. -
Page 12: Editor Setup; Simple Pc <-> M7Cl Via Network Port 2
Set the M7CL network settings to the suggested default setting shown here in the NETWORK pop-up. Next, set up the DME-N Network Driver (called DME because it was developed for the YAMAHA DME digital mixing engine series);... -
Page 13: Editor Setup; Simple Pc <-> M7Cl Via Network Port 3
When the M7CL editor screen first appears, click the File menu and go to System Setup. Here you must assign the system ports to the ones you selected in a previous screen; ZONE 1 for both. If M7CL has an Administrator password, enter it here for full access. -
Page 14: Monitor Section. Cue Buttons. Assigning A Monitor Output
M7CL Quick Start Guide Part 2 MONITOR section. CUE buttons. Assigning a monitor output. Cueing a channel will send its audio signal to the CUE bus and meter the channel in the Function Access Area. The audio will be sent to the headphone output under the front panel. Press the [MONITOR] headphone symbol to access options for the monitor setup. -
Page 15: The Back Panel. Connections And Outport Delays
NETWORK; this Ethernet connector is for connecting to a computer running Studio Manager/M7CL Editor. OMNI OUT; there are 16 assignable analog outputs. These can be assigned to any MIX bus, matrix, master, monitor, or direct output. They cannot be insert sends. -
Page 16: Using Scenes
Storing and recalling scenes. M7CL can store 300 scene memories or snapshots. In addition to the 300 numbered memories, there is the default read only Scene 000 and also the ‘current console settings’ which are either the same as a scene or an edited version of a scene. -
Page 17: What Is In A Scene
M7CL Quick Start Guide Part 2 Using scenes: What is in a scene? Included in scene recall Not included in scene recall φ - Head amp (level, +48V, - User defined keys - Name/icon - Preferences - Routing (Input, Output, Insert, Direct, Monitor,... -
Page 18: Recall Safe
M7CL Quick Start Guide Part 2 Using scenes: Recall safe. To prevent a channel or parameter changing at a scene recall, the channel or parameter can be made “safe from recall”. To access the RECALL SAFE MODE pop-up, press the [CH JOB] button, then the [RECALL SAFE] button. -
Page 19: User Defined Keys. Programming User Defined Keys
User defined keys. Programming user defined keys. There are 12 user defined keys on M7CL. These are programmable shortcut keys; they can replace a screen press or cause some other action. They come pre-programmed with some examples but can be user defined from a menu in the SETUP page. -
Page 20: Troubleshooting
M7CL Quick Start Guide Part 2 Troubleshooting. I can’t get +48V to work. ☞ +48V is switched on/off in the HA pop-up, but remember there is also a master switch on the SETUP page. This is not covered by scene recall.