Table of Contents
Advertisement
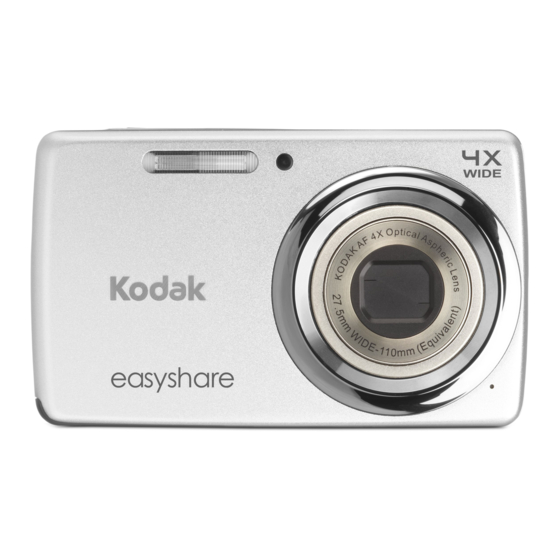
Front View
Record button (for videos)
See the Extended user guide
See How-To videos
www.kodak.com/go/support
Shutter button (for pictures)
Power/Battery Charging light
Power button
Flash
Self-timer/Video light/
AF Assist light
Lens
Microphone
www.kodak.com/go/M532manuals
www.kodak.com/go/M532demos
1
Advertisement
Table of Contents

Related Manuals for Kodak M532


Summary of Contents for Kodak M532
-
Page 1: Front View
Front View Record button (for videos) Shutter button (for pictures) Flash See the Extended user guide See How-To videos www.kodak.com/go/support Power/Battery Charging light Power button Self-timer/Video light/ AF Assist light Lens www.kodak.com/go/M532manuals www.kodak.com/go/M532demos Microphone... -
Page 2: Back View
Delete button Tripod socket SD/SDHC card (optional accessory) See the Extended user guide See How-To videos Zoom button USB port Strap post Review button: Review, edit, or tag pictures Share button SD/SDHC Card slot Battery compartment www.kodak.com/go/M532manuals www.kodak.com/go/M532demos www.kodak.com/go/support... - Page 3 Attach strap, load and charge battery KODAK Li-Ion Rechargeable Digital Camera Battery KLIC-7006 See the Extended user guide www.kodak.com/go/M532manuals www.kodak.com/go/support...
-
Page 4: Charging The Battery
If your package includes this charger: Battery Charging light: • Blinking: charging • Steady On: finished charging Turn off the camera. Connect a KODAK Camera USB Cable, Micro B / 5-Pin and charger. See the Extended user guide See How-To videos Yours may differ. - Page 5 The camera charges when the computer is on and awake. Turn off the computer’s hibernation, sleep, and standby modes. Turn off the camera. Connect a KODAK Camera USB Cable, Micro B / 5-Pin. Battery Charging light: • Blinking: charging • Steady On: finished charging www.kodak.com/go/support...
- Page 6 If pictures/videos are detected in internal memory and a card is inserted, the camera prompts you to move the pictures to the card (and erase those in internal memory). See the Extended user guide Purchase cards Optional accessory www.kodak.com/go/M532manuals www.kodak.com/go/accessories www.kodak.com/go/support...
-
Page 7: Turn On The Camera
Turn on the camera Set the language, date/time, sharing See the Extended user guide See How-To videos www.kodak.com/go/support Language: to change. to accept. Date/Time: At the prompt, press OK. to change current field. for previous/next field. to accept. Sharing Destinations: You can select which sharing sites to display when you share pictures/videos. - Page 8 When the framing marks turn green (or yellow, if faces are detected), press the Shutter button completely down. Press and release the Record button. To stop recording, press and release it again. page 17 www.kodak.com/go/M532manuals www.kodak.com/go/support...
-
Page 9: Understanding The Picture-Taking Icons
Press to zoom in. Press to zoom out. Understanding the picture-taking icons Settings Self-timer/ Burst Most recent picture/video Battery level Flash mode See the Extended user guide See How-To videos www.kodak.com/go/support Number of pictures/video time remaining www.kodak.com/go/M532manuals www.kodak.com/go/M532demos Zoom slider... -
Page 10: Your Camera, The Way You Want It
Your camera, the way you want it Sometimes, you want to see everything available. (Other times, you want everything out of your way!) Press the Display button Clean view and Tools view. Clean view Tools view (Tools vary by camera mode) to change between Tools www.kodak.com/go/support... - Page 11 Press to choose a tool, then press OK. Press to change a tool’s setting, then press OK. NOTE: If you chose press to choose a setting, then press OK. You can choose some settings using www.kodak.com/go/support Most recent picture Tools...
-
Page 12: Review Pictures/Videos
See How-To videos Press the Review button to enter/exit Review. to choose All, Press People, Date, Keywords, or Videos, then press OK. If you chose People, Date, or Keywords, highlight a name, date, or keyword, then press OK. www.kodak.com/go/M532manuals www.kodak.com/go/M532demos www.kodak.com/go/support... - Page 13 • Press OK to play videos. • Press to show/hide tools. • Press to delete pictures/videos. Tags Multi-up Home Back Battery level See the Extended user guide See How-To videos www.kodak.com/go/support Edit Print Slideshow More tools Picture is marked for sharing Picture/video number www.kodak.com/go/M532manuals www.kodak.com/go/M532demos...
-
Page 14: It's Never Been Easier To Share
It’s never been easier to share IMPORTANT: To use the sharing and social networking features, you must install KODAK Software. 1 Press the Share button to share anytime: In Liveview 2 Press and OK to choose social networking sites or email addresses. -
Page 15: Install Software, Transfer Pictures
IMPORTANT: To use the sharing and social networking features, you must install KODAK Software. Make sure the computer is connected to the Internet. When you connect the camera to the computer, the KODAK Camera Setup App automatically runs. Follow the prompts to install the KODAK Share Button App. - Page 16 • transferred pictures to your computer Keep learning! Finish reading this book, so you can take and share your best pictures! Go to www.kodak.com/go/M532support for: • the Extended user guide • how-to videos and tutorials • camera firmware updates • answers to your frequently asked questions •...
-
Page 17: Use The Flash
Do more with your camera Use the flash Flash modes Auto Flash On (Fill) Red-eye Reduction www.kodak.com/go/support Press the Flash button repeatedly until the LCD displays the desired flash mode. Flash button Flash modes are not available in all picture-taking modes. -
Page 18: Use The Self-Timer
A picture is taken after a 10-second delay (so you have time to get into the scene). A picture is taken after a 2-second delay. The first picture is taken after a 10-second delay. A second picture is taken 8 seconds later. www.kodak.com/go/support... - Page 19 Full-frame portraits of people. Sport Action pictures. Landscape Distant scenes. Close-up Close range. Use available light, if possible. www.kodak.com/go/support Do more with your camera 1 Press the Mode button 2 Press Smart Capture: For ■ general picture taking. Film Effects: Apply ■...
- Page 20 Conveying a sense of motion. The settings are: None, 0.5 Exposure Sec., 1.0 Sec., 2.0 Sec., 4.0 Sec., 8.0 sec. Panorama “Stitching” 2 or 3 pictures into 1 panoramic scene. R-L, L-R See the Extended user guide See How-To videos www.kodak.com/go/M532manuals www.kodak.com/go/M532demos www.kodak.com/go/support...
- Page 21 Focus Choose Multi-Zone, Center-Zone, Face Priority. Zone Focus Choose Auto or Infinity. Mode www.kodak.com/go/support Do more with your camera , choose Scene mode, and press to choose a setting, then press OK. White Focus Balance...
-
Page 22: Solve Camera Problems
Turn the camera off, then back on. ■ Make sure the battery is installed correctly and charged ■ Make sure a KODAK Camera USB Cable, Micro B / 5-Pin is connected to the camera and the computer Then turn on the camera. ■... - Page 23 If the LCD breaks, do not touch the glass or liquid. Contact Kodak customer support. ■ The use of an accessory that is not recommended by Kodak may cause fire, electric shock, or injury. For approved accessories, go to www.kodak.com/go/accessories. ■...
- Page 24 Kodak will, at its option, refund the purchase price paid for the product provided the product has been returned to Kodak along with proof of the purchase price paid. Repair, replacement, or refund of the purchase price are the sole remedies under the warranty. If replacement parts are used in making repairs, those parts may be remanufactured, or may contain remanufactured materials.
- Page 25 Unless a specific Kodak warranty is communicated to the purchaser in writing by a Kodak company, no warranty or liability exists beyond any minimum requirements imposed by law, even though defect, damage, or loss may be by negligence or other act.
- Page 26 Appendix Korean Class B ITE Korean Li-Ion Regulatory Eastman Kodak Company Rochester, New York 14650 © Kodak, 2010 Kodak, EasyShare, and Pulse are trademarks of Eastman Kodak Company. 4H7446_en www.kodak.com/go/support...
Need help?
Do you have a question about the M532 and is the answer not in the manual?
Questions and answers