Advertisement
Quick Links
3-862-779-12 (1)
z Getting Started
Installing the Batteries
IC Recorder
1
Push the PUSH button on rear and slide open the battery
compartment lid.
Operating Instructions
PUSH
button
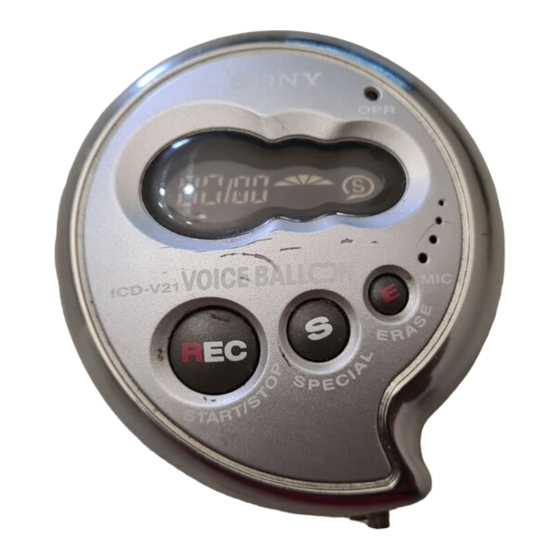
ICD-V21
©1998 by Sony Corporation Printed in Japan
2
Install two CR2032 lithium batteries (supplied) with the positive
(+) side facing out.
For the customers in the U.S.A.
Owner's Record
The model number is located at the bottom and the serial number is
located inside the battery compartment. Record the serial number in
the space provided below. Refer to them whenever you call upon
your Sony dealer regarding this product.
Model No. ICD-V21
3
Close the lid of the battery compartment.
Serial No.___________________________
INFORMATION
This equipment has been tested and found to comply with the limits
for a Class B digital device, pursuant to Part 15 of the FCC Rules.
These limits are designed to provide reasonable protection against
harmful interference in a residential installation. This equipment
generates, uses, and can radiate radio frequency energy and, if not
installed and used in accordance with the instructions, may cause
harmful interference to radio communications.
However, there is no guarantee that interference will not occur in a
Note
particular installation. If this equipment does cause harmful
If the battery compartment lid is accidentally detached, attach it as illustrated.
interference to radio or television reception, which can be
determined by turning the equipment off and on, the user is
encouraged to try to correct the interference by one or more of the
following measures:
– Reorient or relocate the receiving antenna.
– Increase the separation between the equipment and receiver.
– Connect the equipment into an outlet on a circuit different from
that to which the receiver is connected.
– Consult the dealer or an experienced radio/TV technician for
help.
This device complies with Part 15 of the FCC Rules. Operation is
To take out the lithium batteries
subject to the following two conditions: (1) This device may not
cause harmful interference, and (2) this device must accept any
interference received, including interference that may cause
undesired operation.
You are cautioned that any changes or modifications not expressly
approved in this manual could void your authority to operate this
equipment.
If the batteries do not come out, push the side of the battery with a
Welcome!
sharp object.
Thank you for purchasing the Sony IC Recorder.
Replacing the battery
Some features are:
"BATT" appears on the display when the batteries become weak and
• 10 minutes recording time
it flashes when the batteries are exhausted.
• Up to 99 normal messages, one Special Message and up to 20
Replace the batteries with new ones.
messages in the Shuffle Message Box
When replacing, be sure to take out both old batteries first, and then
• Special Message Box to record a message for a special person
insert the new ones.
• Shuffle Message Box for fun
• Flash memory to keep messages recorded even without a battery
Battery life
Sony lithium battery CR2032
approx. 1 month*
* When recording for 2 minutes and playing back for 3 minutes every day
(with VOL control at around 3)
Notes
• The battery life may shorten depending on the operation of the unit.
• The recorded messages will remain even if you replace batteries.
Notes on lithium battery
• Keep the lithium battery out of reach of children. Should the battery be
swallowed, immediately consult a doctor.
• Wipe the battery with a dry cloth to assure good contact.
• Be sure to install the battery in the correct polarity position.
• Do not hold the battery with metallic tweezers, as doing so may cause a
short-circuit.
• Do not break up the battery or throw it into a fire, which might cause it to
explode.
Carefully dispose of the used battery.
CAUTION
Danger of explosion if battery is incorrectly replaced. Replace only
with the same or equivalent type recommended by the equipment
manufacture. Discard used batteries according to manufacturer's
instructions.
Note
When the unit is not be used for a long period of time remove the batteries to
avoid damage from battery leakage and corrosion.
Releasing HOLD
Slide HOLDc to the opposite direction of the arrow.
HOLDc
2
z Basic Operations
1
Recording Messages
You can record up to 99 messages. You can record up to 10 minutes
including Special Message and messages in the Shuffle Message Box.
Since a newly recorded message is automatically added behind the
last recorded message, you can start recording quickly without
searching for the end of the last recording.
Each recorded message has an index number, and a newly recorded
message will have the last index number.
e.g.
Message 1 Message 2 Newly recorded message Blank space
Jog lever
Microphone
REC
1
Press REC and speak into the built-in microphone.
2
Press the jog lever.
"REC" appears while recording.
The selected message is played back.
You do not need to keep pressing REC while recording.
3
Adjust the volume with the VOL control.
After playing back one message, the unit stops at the beginning of
the next message.
When the last message has been played back, the unit stops at the
2
Press REC again to stop recording.
beginning of the last message.
The display shows the current message number and total
number of messages.
Other operations
Current message number
To
Go back to the beginning of Move the jog lever downward once.
the current message
Go back to previous
messages
Total number of messages
When you have recorded up to 99 messages or the maximum
Skip to the next message
recording time, "FULL" appears in the display. If you want to record
Skip to succeeding messages Move the jog lever upward repeatedly.
more messages, first erase some old messages. (Refer to "Erasing
Messages" for details.)
To listen to the current recording
Press REC to stop recording and then press the jog lever.
Search forward during
playback
To review the current recording instantly
Press the jog lever during recording.
Search backward during
playback
Remaining memory indication
As the capacity of the remaining memory decreases, the segments of
the indication will go off one by one.
To stop playback partway through a message (Playback
Pause function)
Press the jog lever.
When you press the jog lever next time, the message will continue
When you record for about two minutes, one segment will go off.
from the point where you stopped previously.
When the remaining memory goes down to about 30 seconds, the
indication will flash, and when the memory is full, all segments go
Playing back a message repeatedly (Repeat Play)
off.
During playback, press and hold the jog lever for more than one
second. "REP" will be displayed and the selected message will be
played back repeatedly until you stop playback by pressing the jog
Playing Back Messages
lever.
Jog lever
VOL
for larger
message
Playing all the messages continuously
number
(Continuous Play)
During stop mode, press and hold the jog lever for more than one
second. Playback starts from the message on the display and
continues playing until the end of the last message. You do not have
to press the jog lever for each message. (During normal mode only;
not available during Shuffle mode)
When the last message has been played back, the unit stops at the
beginning of the last message.
for smaller
message
number
To stop playback
Press the jog lever.
When you press the jog lever next time, normal playback starts from
the point you stopped.
1
Move the jog lever to display the desired message number. (To
change the number rapidly, keep holding the lever.)
Selected message number
Erasing Messages
You can erase the recorded messages one by one or all messages
(excluding Special Message and Shuffle Message Box) at a time.
Note that once a recording has been erased, you cannot retrieve it.
To erase the Special Message and the messages for the Shuffle
Message Box, refer to the corresponding sections.
Total number of message
Jog lever
ERASE
Do this
Erasing messages one by one
Move the jog lever downward
When a message is erased, the remaining messages will advance and
repeatedly. (During stop mode, move
renumbered so that there will be no space between messages.
the jog lever downward and hold it
Before
there to skip the messages
Message 1
Message 2
Message 3 Message 4 Message 5
continuously.)
erasing
Erase Message 3
Move the jog lever upward once.
After
Message 1 Message 2 Message 3
Message 4
erasing
(During stop mode, move the jog lever
Remaining messages are renumbered.
upward and hold it there to skip the
messages continuously.)
1
Press ERASE while playing back the message you want to erase,
Move the jog lever upward and hold it
or press and hold ERASE for more than one second during stop
there, and release it at the message
mode.
number you want to play.
A beep will sound and the message number and "ERS" will
appear one after the other while the first 5 seconds of the
Move the jog lever downward and
message is played back 10 times.
hold it there, and release it at the
message number you want to play.
Message number
to be erased
2
Press ERASE while the message is being played back.
The message is erased and the remaining messages will be
renumbered.
To cancel erasing
Press any button except ERASE before step 2.
To erase other messages
Repeat steps 1 and 2.
Erasing all messages
1
Press ERASE during playback or press and hold ERASE for
more than one second during stop mode.
A beep will sound and the message number and "ERS" will
appear one after the other while the first 5 seconds of the
message is played back 10 times.
2
Move the jog lever downward once while the message is being
played back.
"ALL" and "ERS" will appear one after the other.
3
Press ERASE while "ALL" and "ERS" are displayed.
All messages are erased.
To cancel erasing
Press any button except ERASE before step 3.
Notes
• If you do not press ERASE for more than 10 seconds after step 2, the erase
mode will be cancelled.
• If you move the jog lever upward, the unit returns to step 1 of "Easing
messages one by one". To erase all message, move the jog lever downward
again to display "ALL" and "ERS".
z Advanced Operations
Recording a Special Message
When you record a message in the Special Message Box, you can
find it easily by pressing just one button.
You can record one message in the Special Message Box.
The Special Message is
The Special Message is
recorded.
not recorded.
Jog lever
VOL
ERASE
Microphone
SPECIAL
Recording a message
1
Press SPECIAL.
"REC" appears and "S" flashes.
2
Speak into the built-in microphone.
You do not need to keep pressing SPECIAL while recording.
3
Press SPECIAL again to stop recording
Note
If a message is already recorded in the Special Message Box, "PLAY" appears
and that message will be played back when you press SPECIAL. To record a
new message, erase the old one first as described in "Erasing the Special
Message" (on the back side).
Playing back the message
1
Press SPECIAL.
"PLAY" appears and "S" flashes.
2
Adjust the volume with the VOL control.
To stop playing back partway through the Special Mes-
sage
Press SPECIAL.
When you press SPECIAL again, the message will be played back
from the beginning.
Playing back the Special Message repeatedly
Press and hold SPECIAL until "REP" appears (more than one
second) during playback of the Special Message.
Other operations
To
Do this
Return to the beginning
During playback, move the jog lever
of the message
upward once.
Search forward during
Move the jog lever upward and hold it
playback
there, and release it at the point you
want to play.
Search backward during
Move the jog lever downward and
playback
hold it there, and release it at the point
you want to play.
Continued to the back c
Advertisement

Related Manuals for Sony IC Recorder


Summary of Contents for Sony IC Recorder
- Page 1 All messages are erased. sharp object. Search forward during Move the jog lever upward and hold it Selected message number Thank you for purchasing the Sony IC Recorder. Erasing Messages To cancel erasing playback there, and release it at the point you Replacing the battery want to play.
- Page 2 * This pattern lets you know the procedure is wrong or informs you of some consult your nearest Sony dealer. Design and specifications are subject to change without notice. During playback, press and hold the jog lever for more than one Press REC.
Need help?
Do you have a question about the IC Recorder and is the answer not in the manual?
Questions and answers