Advertisement
Advertisement
Table of Contents

Related Manuals for Boon FLAIR


Summary of Contents for Boon FLAIR
- Page 1 FLAIR + Pedestal Highchair with Pneumatic Lift Instructions...
-
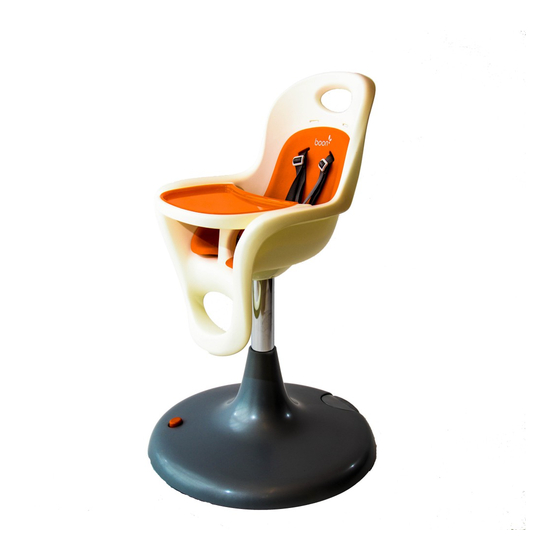
Page 2: Components View
PARTS W CAUTION • Adult assembly required. IMPORTANT! IMPORTANT: Please make sure you have all of the parts • Tool required for assembly: Phillips screwdriver shown on this page before beginning assembly. If you are KEEP FOR missing any parts, please DO NOT return this product to (not included). - Page 3 ASSEMBLY NOTE: DO NOT REMOVE the sticker holding the seat Rotate the tube clockwise while gently pressing down To ensure that tube is secure, first try to rotate tube counter- base cover in place until after support tube has been until the tube drops into place and can no longer rotate.
-
Page 4: Adjusting Seat Height/Using Brake
ADJUSTING THE SEAT HEIGHT & USING THE BRAKE If braking resistance becomes diminished, tip highchair on its side. Using a damp cloth, wipe the raised buttons on To raise seat height, step on To lower seat height, step on height Firmly press brake pedal all the the brake weight so they are clean of dust and debris. -
Page 5: Adjusting Restraint System Straps
ADJUSTING RESTRAINT SYSTEM STRAPS STRAP INSERTION STRAP REMOVAL Squeeze the strap tabs together and push through From the back of the seat, squeeze the strap tabs opening. Repeat for the strap on the other side. together while pulling the strap from the front of the ALWAYS use the same height slots for both sides seat. -
Page 6: Using The Tray/Liner
USING THE TRAY ATTACHING THE TRAY To release locking tabs: 1) slide orange handle to left, Position locking tabs at appropriate slots. Tabs should fit Pull on tray to ensure that it is firmly in place. then 2) pull handle toward front of tray. Place tray on seat into slots in seat arms. -
Page 7: Disassembly
DISASSEMBLY If it should become necessary to disassemble your highchair for transport or storage, please follow these instructions. Tools required: Phillips screwdriver, flat-head screwdriver (not included) Remove the two bolts that attach the seat base Raise tube to highest position by stepping on height Tip the highchair on its side. -
Page 8: Cleaning And Care
CLEANING & CARE Clean with a soft cloth using warm water and mild soap. Disinfectant SEAT wipes can also be used. Clean the seat pad with a soft cloth using warm water and mild soap. SEAT PAD Household disinfectants can also be used. DO NOT place seat pad in dishwasher or washing machine.
Need help?
Do you have a question about the FLAIR and is the answer not in the manual?
Questions and answers
cylinder not holding height.
the pneumatic cylinder is not staying in any position but the lowest
The Boon FLAIR cylinder may not be holding height because the support tube is not properly inserted and secured into the base. The tube should drop into place, not rotate clockwise, and must remain attached to the base even when pulled upward slightly. If not correctly installed, the height adjustment will not function properly.
This answer is automatically generated