
Related Manuals for Kodak EASYSHARE Z1015 IS


Summary of Contents for Kodak EASYSHARE Z1015 IS
-
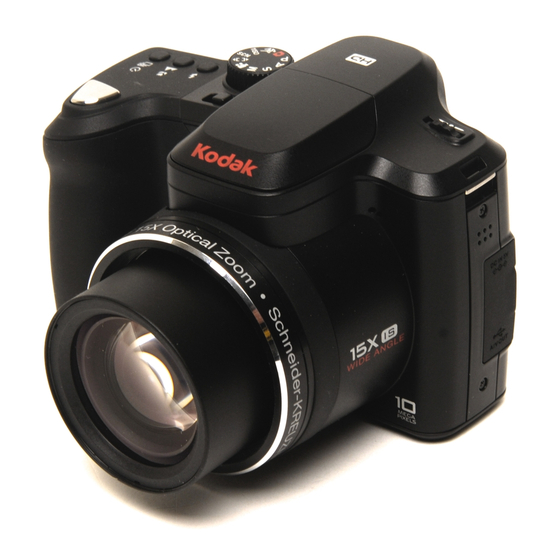
Page 1: Digital Camera
Kodak EasyShare Z1015 IS digital camera Extended user guide www.kodak.com For interactive tutorials, visit www.kodak.com/go/howto For help with your camera, visit www.kodak.com/go/z1015support... - Page 2 Eastman Kodak Company Rochester, NY 14650 © Eastman Kodak Company, 2008 All screen images are simulated. Kodak, EasyShare, and Perfect Touch are trademarks of Eastman Kodak Company. P/N 4F8329_en...
-
Page 3: Front View
■ Drive button (Self-timer, Burst) ■ Focus button (Close-up/Macro, Landscape, Manual) ■ Flash button 6 Mode dial www.kodak.com/go/support Product features 7 Flash 8 Microphone 9 Jog dial (for PASM modes) 10 DC-In (5V), for optional AC adapter 11 USB/AV Out... -
Page 4: Back View
Product features Back view 1 Tripod socket 2 Dock connector 3 LCD 4 EVF/LCD button 5 EVF (Electronic viewfinder) 6 Zoom (Wide Angle/Telephoto) button 12 Battery compartment Optional Info/Review/Delete/Menu buttons Share button OK button 11 Slot for optional SD/SDHC card www.kodak.com/go/support... -
Page 5: Table Of Contents
Deleting pictures/videos ... 18 Using the menu button in Review... 20 Adding sound tags ... 20 Cropping pictures... 21 Using Kodak Perfect Touch technology ... 22 Using the RAW Develop feature ... 22 Editing videos ... 23 Running a slide show ... 25 Viewing pictures/videos in different ways... - Page 6 8 Appendix ...55 Camera specifications ... 55 Storage capacities ... 58 Upgrading your software and firmware... 58 Important safety instructions ... 58 Battery life ... 59 Care and maintenance ... 60 Limited warranty ... 60 Regulatory compliance ... 62 www.kodak.com/go/support...
-
Page 7: Setting Up Your Camera
Setting up your camera Attaching the strap Loading the battery Kodak Li-Ion rechargeable digital camera battery KLIC-8000 (rechargeable) To charge the KLIC-8000 battery, see www.kodak.com/go/support Kodak lithium digital camera battery CRV3 (non-rechargeable) page... - Page 8 Charging light • Blinking: charging • Steady: finished charging (approximately 3.5 hours) Turn OFF the camera. Connect the cable. Note: This charger charges the battery; it does not power the camera. Important: DO NOT plug this cable into a computer. www.kodak.com/go/support...
- Page 9 Kodak EasyShare camera and printer docks Turn off the camera. Kodak USB cable and a USB computer port Turn off the camera. Ensure that the USB cable is connected to a powered USB port and the computer is turned on (not in sleep mode).
-
Page 10: Turning On The Camera
Turning on the camera Setting the language, date/time NOTE: To change the date/time and language in the future, use the Menu button Language: to change OK to accept Date/Time: to change for previous/next field OK to accept www.kodak.com/go/support (see page 37). -
Page 11: Storing Pictures On An Optional Sd Or Sdhc Card
Storing pictures on an optional SD or SDHC card Your camera has internal memory. You can purchase an SD or SDHC card to store more pictures and videos (www.kodak.com/go/z1015accessories). CAUTION: A card can only be inserted one way; forcing it may cause damage. -
Page 12: Taking Pictures/Videos
• EVF (electronic viewfinder) Press the Shutter button halfway to focus and set exposure. When the framing marks turn green, press the Shutter button completely down. NOTE: After you take a picture, the EVF/LCD displays a quickview. Framing marks www.kodak.com/go/support... -
Page 13: Using The Framing Marks To Take Pictures
3 Press the Shutter button completely down and release. To stop recording, press and release the Shutter button again. NOTE: After you take a video, the EVF/LCD displays a quickview. To play/pause the video during the quickview, press OK. www.kodak.com/go/support Taking pictures/videos .) Framing... -
Page 14: Capture Modes
Smart Scene is the default mode. To change it, Faces are detected. The scene is analyzed for other content and for lighting. In Smart Capture, Kodak Perfect Touch technology is applied (for better, brighter pictures). 3:2 (the best choice when making 4 x 6 prints) -
Page 15: Scene Modes
People on a lit stage. Fast shutter speed, high ISO. Flash and sounds are off. (Flash setting can be changed.) Backlight Subjects that are in shadow or “backlit.” Candle light Capturing the ambiance of candle light. Sunset Capturing the deep hues seen at sunset. www.kodak.com/go/support Taking pictures/videos... -
Page 16: Using The 15X Optical Zoom
2 Press Telephoto (T) or Wide (W) to zoom in/out. 3 Take the picture or video. NOTE: To get a focused picture every time, remember: ■ Use the auto focus framing marks, As you zoom in, move away from your subject. ■ www.kodak.com/go/support page... -
Page 17: Using The Flash
(see page 36). Flash-to-subject distance in Smart Scene/Smart Capture mode Wide angle Telephoto www.kodak.com/go/support Press repeatedly to scroll through flash modes. (See flash modes below.) Flash fires When the lighting conditions require it. Never. Every time you take a picture. Use when the subject is in shadow or is “backlit.”... -
Page 18: Using Focus Modes
Again to return to normal Auto Focus ■ 2 Compose the scene. Press the Shutter button halfway, then completely down. to view 2X magnification of the central area of focus. During to adjust focal length. (Framing marks are off www.kodak.com/go/support button:... -
Page 19: Using The Self-Timer
Press the Shutter button completely down. NOTE: The video stops when no storage space remains. Only the 2- and 10-second options are available in video mode. www.kodak.com/go/support 1 Place the camera on a tripod or flat surface. 2 In most Still modes, press the Self-timer/Burst button ■... -
Page 20: Using The Burst Feature
Shutter button, when the pictures are taken, or when there is no more storage space. page 18). Purpose Capture an expected event. Example: A person swinging a golf club. Capture an event when the precise timing is uncertain. Example: A child blowing out birthday candles. www.kodak.com/go/support... -
Page 21: Taking Panoramic Pictures
5 If you are taking only 2 pictures, press OK to stitch them together. After you take 3 pictures, the pictures are automatically stitched together. Take 2 or 3 pictures. Get 1 panoramic picture. www.kodak.com/go/support Taking pictures/videos See page... -
Page 22: Understanding The Picture-Taking Icons
Manual focus Histogram Framing marks Aperture Shutter speed Compression Self-timer/Burst Exposure bracketing Pictures/time remaining Storage location Zoom indicator Auto focus control White balance Exposure metering Focus zone Image stabilizer Date stamp Low battery ISO speed Flash compensation Exposure compensation www.kodak.com/go/support... -
Page 23: Working With Pictures/Videos
NOTE: If you press the W button while at 1X, the view changes from single-picture to multi-up thumbnails. (See page 28.) www.kodak.com/go/support 1 Press the Review button. 2 Press NOTE: Pictures taken at the 3:2 and 16:9 aspect ratios do not fill the LCD. -
Page 24: Playing A Video
1 Press the Review button. 2 Press 3 Press the Delete button. 4 Follow the screen prompts. during playback to adjust the during 4X to page 24.) to find a picture/video. www.kodak.com/go/support during... -
Page 25: Using The Undo Delete Feature
Press the Menu button to exit the menu. ■ CAUTION: Formatting internal memory or an SD or SDHC card deletes all (including protected) pictures/videos. (Formatting internal memory also deletes email addresses.) www.kodak.com/go/support appears with the protected picture/video. Working with pictures/videos... -
Page 26: Using The Menu Button In Review
3 Press to highlight Sound Tag, then press OK. 4 Follow the screen prompts. The sound tag is applied to your picture. Press the Menu button to exit the menu. ■ to find a picture. to highlight the Edit tab. www.kodak.com/go/support... -
Page 27: Playing A Sound Tag
The picture is cropped, the original saved. (Cropped pictures cannot be cropped again.) ■ Press the Menu button to exit the menu. www.kodak.com/go/support Working with pictures/videos to find a picture with the prompt, “Press 1 Press the Review button, then picture. -
Page 28: Using Kodak Perfect Touch Technology
Working with pictures/videos Using Kodak Perfect Touch technology Kodak Perfect Touch technology helps ensure better, brighter pictures. Perfect Touch technology is automatically applied to pictures taken in Smart Scene/Smart Capture mode. (You cannot apply Perfect Touch to videos or pictures to which Perfect Touch technology is already applied.) -
Page 29: Editing Videos
Video Trimming a video You can delete an unwanted portion from the beginning or end of a video. Video Trimmed video www.kodak.com/go/support Working with pictures/videos 1 Press the Review button, then 2 Press the Menu button, then Edit tab. 3 Press to highlight Make Picture, then press 4 Press OK to play the video. - Page 30 ■ To view all bookmarked video frames, press the Zoom wide angle (W) button. To return to normal view, press the telephoto (T) button. www.kodak.com/go/support to find a video. to highlight the to find a video. for 4 seconds...
-
Page 31: Making A Video Action Print
3 Press to highlight Begin Show, then press OK. The slide show begins. ■ To interrupt the Slide Show, press OK. www.kodak.com/go/support Working with pictures/videos 1 Press the Review button, then 2 Press the Menu button, then Edit tab. 3 Press to highlight Action Print. -
Page 32: Changing The Slide Show Display Interval
Each picture is displayed once. To interrupt the slide show, press OK. After the slide show plays, you may save or modify it. to highlight Interval, then press OK. to highlight Loop, then press OK. page 29). to highlight Multimedia Slide Show, then www.kodak.com/go/support... -
Page 33: Displaying Pictures/Videos On A Television
You can display pictures/videos on a television, computer monitor, or any device equipped with a video input. To connect the camera to a television, use an A/V cable (may be sold separately). NOTE: With a direct camera-to-television connection, video playback is limited to VGA and QVGA. www.kodak.com/go/support... -
Page 34: Viewing Pictures/Videos In Different Ways
Search results are kept until you exit Review. ■ Press the Review button to exit Review. ■ For more about tags, see To select multiple pictures/videos, see ■ page page page www.kodak.com/go/support to select a folder. to view them. Press the... -
Page 35: Selecting Multiple Pictures/Videos
3 Press to highlight an option, then press OK. NOTE: Pictures/videos are copied, not moved. To remove pictures/videos from the original location after copying, delete them (see www.kodak.com/go/support 1 Press the Review button, then picture/video. 2 Press OK to select pictures/videos. -
Page 36: Understanding The Review Icons
Email tag Protected Favorite tag Review mode Selected video Scroll arrows Print tag/number of prints Perfect Touch tech. Picture number Image storage location Relative picture position Low battery Video length Video number Image storage location Relative video position Low battery www.kodak.com/go/support... -
Page 37: Doing More With Your Camera
Picture Size (in Smart Scene/Smart Capture mode) Choose a picture resolution. For more about Smart Scene/Smart Capture mode, page www.kodak.com/go/support Capture Options 10.0 MP (4:3) 8.9 MP (3:2) 7.5 MP (16:9) 5.0 MP (4:3) 4.5 MP (3:2) 3.8 MP (16:9) 3.1 MP (4:3) - Page 38 RAW—unprocessed image data in its original state (to which white balance, contrast, etc. have not been applied). You can use the Raw Develop feature to create a JPG copy for printing (see page 22). www.kodak.com/go/support 3.1 MP (4:3) 2.2 MP (3:2) 2.1 MP (16:9) 1.2 MP (4:3)
- Page 39 Faces are given focus priority. The AF Zone and Exposure Metering settings are ignored. Not available in Panorama SCN mode. Always on in Smart Scene/Smart Capture mode. www.kodak.com/go/support Doing more with your camera Capture Options High Color Natural Color Low Color Black &...
- Page 40 Ideal for general picture taking. Center-zone—evaluates the small area centered in the LCD. Ideal when precise focus of a specific area in the picture is needed. Selectable Zone—press focus brackets and choose an auto focus zone. to move the www.kodak.com/go/support...
- Page 41 Assign tag names to pictures/videos. Select tag name(s) before you take pictures or videos. Then, new pictures/ videos are assigned that tag name(s). www.kodak.com/go/support Doing more with your camera Capture + Options +/- 0.3 EV +/- 0.7 EV +/- 1.0 EV...
- Page 42 Pause—Zooming pauses at the optical zoom maximum. To use digital zoom, release then press the Telephoto (T) zoom button. None—Digital zoom is off. On Transfer Theme—applies the same sound effect set to all functions. Individual—choose a sound effect for each function. www.kodak.com/go/support...
- Page 43 Reset Camera Format CAUTION: Formatting deletes all pictures/videos, including those that are protected. About View camera information. www.kodak.com/go/support Doing more with your camera Setup Options High Medium page 4. The format chosen is used for all date/time features. 10 minutes...
-
Page 44: Jog Dial
Flash, are maintained for P, A, S, and M modes—even when you change modes or turn off the camera. Use Reset Camera (see page 37) to reset P, A, S, or M mode to its default setting. www.kodak.com/go/support Press Jog dial to control Exposure compensation (how much light enters the... - Page 45 Smaller f-stop numbers indicate a larger lens opening; good for low-light. Larger f-stop numbers indicate a smaller lens opening; keeps the main subject ■ sharp; good for landscapes and well-lit conditions. www.kodak.com/go/support Doing more with your camera page 38.) Note: A yellow setting indicates possible unsatisfactory results.
-
Page 46: Using Exposure Compensation With Exposure Bracketing
And if the exposure bracketing interval is set to 0.3 steps: (Set the Exposure Bracketing Interval in the Capture + menu.) Bright picture see page Then the exposures taken are: –0.3, 0.0, +0.3 +0.7, +1.0, +1.3 –1.3, –1.0, –0.7 www.kodak.com/go/support... -
Page 47: Sharing Your Pictures
■ Printing tagged pictures When you transfer the tagged pictures to your computer, the Kodak EasyShare software print screen opens. For details, click the Help button in EasyShare software. For more information on printing from your computer, printer dock, PictBridge enabled printer, or card, see NOTE: For the best 4 x 6 in. -
Page 48: Tagging Pictures/Videos For Email
Press the Share button to exit the menu. ■ Third—transfer and email When you transfer these pictures/videos to your computer, EasyShare software prompts you to send them. For details, see Help in EasyShare software. to find a picture/video. to scroll through www.kodak.com/go/support... -
Page 49: Tagging Pictures/Videos With Tags That You Create
To remove the tag, press OK again. View favorites on your camera 1 Press the Review button, then the Menu button. 2 Choose Search, then Favorites. www.kodak.com/go/support Doing more with your camera to scroll through pictures/videos. When the to find a picture. -
Page 50: Transferring And Printing Pictures
4 Follow the on-screen instructions to install the software. NOTE: When prompted, register your camera and software. To register later, see www.kodak.com/go/register. 5 If prompted, restart the computer. If you turned off anti-virus software, turn it back on. See the anti-virus software manual for details. -
Page 51: Transferring Pictures With The Usb Cable
Transferring pictures with the USB cable NOTE: Visit www.kodak.com/go/howto Also available for transferring You can also use Kodak EasyShare docks to transfer your pictures and videos. Visit www.kodak.com/go/z1015accessories. www.kodak.com/go/support Transferring and printing pictures 1 Turn off the camera. 2 Connect the USB cable (U-8). -
Page 52: Printing Pictures
1 Turn off the camera and printer. 2 Connect the appropriate USB cable from the camera to the printer. (See your printer user guide or visit www.kodak.com/go/z1015accessories.) Printing from an EasyShare all-in-one printer 1 Turn on the printer. Turn on the camera. -
Page 53: Printing With A Kodak Easyshare Printer Dock
For details on printing pictures from your computer, click Help in EasyShare software. Printing with a Kodak EasyShare printer dock Dock your camera to the Kodak EasyShare printer dock and print directly—with or without a computer. Purchase this and other accessories at a dealer of Kodak products or visit www.kodak.com/go/z1015accessories. -
Page 54: Troubleshooting
■ In Review mode, Check the image storage location setting you do not see a picture (or the expected picture) on the LCD screen. www.kodak.com/go/z1015support (see page www.kodak.com/go/z1015support (see page 37). www.kodak.com/go/support and select and select (see page... - Page 55 Camera freezes up Turn the camera off, then back on. Make sure the camera is turned off before inserting or removing a card. when a card is inserted or removed. www.kodak.com/go/support (see page (see page 37). (see page (see page 60).
-
Page 56: Camera/Computer Communications
45), or delete pictures (see page (see page 37). (see page (see page 1) or charge rechargeable battery. (see page 44). (see page 44). (see page 44). 18). (see page 45), then format the card (see page 45). (see page 44). www.kodak.com/go/support (see... - Page 57 ■ Format the internal memory Caution: Formatting deletes all pictures and videos, including protected files. (Formatting internal memory also deletes email addresses. To restore them, see the Kodak EasyShare software Help.) ■ Insert a new card (see page page 37).
-
Page 58: Getting Help
If you learn nothing else about your camera, learn how to use on-camera Help. Because the more you know your camera, the more confident you become! Turning on camera Help Press the Menu button, then highlight a menu choice. Press the Info Scroll through a Help topic Menu www.kodak.com/go/support button. -
Page 59: Getting Help On The Web
Get help with the Windows operating system and working with digital pictures Other Get support for other cameras, software, accessories Get information on Kodak EasyShare printer docks Get information on Kodak inkjet products Optimize your printer for truer, more vibrant colors Register your camera www.kodak.com/go/support... -
Page 60: Getting Help On The Telephone
Getting help Getting help on the telephone NOTE: If you have questions concerning this product, you may speak with Kodak customer support. Australia 1800 267 588 Austria 0179 567 357 Belgium 02 713 14 45 Brazil 0800 891 42 13... -
Page 61: Appendix
Appendix Camera specifications For more specifications, visit www.kodak.com/go/z1015support. CCD—1/2.33-type Effective Pixels—3648 x 2736 (10.0 MP) Lens—15X optical zoom lens, 28–420 mm (35 mm equivalent); f/3.5–f/5.4 Image stabilizer—Sensor-shift type Digital zoom—5.0X continuous Combined zoom—75X Shutter speed—1/30–1/1000 sec. in Smart Scene/Smart Capture; 16–1/1000 sec. - Page 62 30 fps (QVGA) Video length—HDV: < 30 mins. VGA/QVGA: < 80 mins. Video output—NTSC or PAL selectable Power—1 Kodak Li-Ion rechargeable digital camera battery KLIC-8000; 1 Kodak lithium digital camera battery CRV3 (non-rechargeable); 5V AC adapter; Kodak EasyShare docks Burst mode—Maximum 3 pictures @ 2.1 fps in Smart Scene/Smart Capture mode;...
- Page 63 Tripod mount—1/4 inch Size—108.5 x 74.2 x 76.6 mm (4.3 x 2.9 x 3.0 in.) @ power off Weight—325 g (11.5 oz) without battery or card www.kodak.com/go/support Other Modes 10.0 MP (4:3): 3648 x 2736 pixels 8.9 MP (3:2): 3648 x 2432 pixels 7.5 MP (16:9): 3648 x 2064 pixels...
-
Page 64: Storage Capacities
If the LCD breaks, do not touch the glass or liquid. Contact Kodak customer support. ■ The use of an accessory that is not recommended by Kodak may cause fire, electric shock, or injury. For approved accessories, visit www.kodak.com/go/accessories. Use only a USB-certified computer equipped with a current-limiting motherboard. -
Page 65: Battery Life
■ Remove the battery when the product is stored for an extended period of time. In the unlikely event that battery fluid leaks inside the product, contact Kodak customer support. In the unlikely event that battery fluid leaks onto your skin, wash immediately with ■... -
Page 66: Care And Maintenance
Do not use cleaning solutions unless designed specifically for camera lenses. Do not allow chemicals, such as suntan lotion, to contact painted surfaces. Service agreements may be available in your country. Contact a dealer of Kodak ■ products for more information. - Page 67 Appendix If Kodak is unable to repair or replace a Product, Kodak will, at its option, refund the purchase price paid for the Product provided the Product has been returned to Kodak along with proof of the purchase price paid. Repair, replacement, or refund of the purchase price are the sole remedies under the warranty.
-
Page 68: Regulatory Compliance
Unless a specific Kodak warranty is communicated to the purchaser in writing by a Kodak company, no warranty or liability exists beyond any minimum requirements imposed by law, even though defect, damage, or loss may be by negligence or other act. -
Page 69: Canadian Doc Statement
This device complies with Industry Canada RSS-210 and FCC Rules. Operation is subject to the following two conditions: (1) this device may not cause harmful interference, and (2) this device must accept any interference received, including interference that may cause undesired operation. www.kodak.com/go/support... -
Page 70: Waste Electrical And Electronic Equipment Labeling
EU: It is the final user's responsibility to discard this equipment into an approved, segregated collection scheme to enable its suitable treatment/disposal and to improve human/environmental protection. For more information, see your retailer, local authority, or www.kodak.com/go/recycle. (Product weight: 325 g.) Korean Class B ITE VCCI Class B ITE China RoHS www.kodak.com/go/support... -
Page 71: Russian Gost-R
Russian GOST-R Eastman Kodak Company Rochester, NY 14650 AIO-40 MPEG-4 Use of this product in any manner that complies with the MPEG-4 visual standard is prohibited, except for use by a consumer engaging in personal and non-commercial activities. www.kodak.com/go/support Appendix... - Page 72 32 continuous AF, 33 copy pictures card to memory, 29 memory to card, 29 to computer, 44 cropping pictures, 21 customer support, 53, 54 date setting, 4 date stamp, 36 DC-in, i deleting pictures/video, 18 protecting pictures, videos, 19 www.kodak.com/go/support...
- Page 73 28 fireworks, 9 firmware, upgrading, 58 flash settings, 11 flower, 9 focus framing marks, 7 zone, 34 www.kodak.com/go/support focus mode infinity, 12 macro, 12 format, card or internal memory, 37 framing grid, 40 grid, framing, 40 guidelines, battery, 59 HDTV...
- Page 74 Index Kodak EasyShare software installing, 44 upgrading, 58 Kodak Perfect Touch technology, 22 Kodak web sites, 53 landscape, 9 LCD, ii brightness, 35 reviewing pictures, 17 reviewing videos, 17 lens, cleaning, 60 loading battery, 1 SD/SDHC card, 5 software, 44...
- Page 75 60, 64 red-eye, flash, 11 regulatory information, 62 repair, 53 reset camera, 37 review button, 17 reviewing pictures/videos after taking, 17 www.kodak.com/go/support deleting, 18 protecting, 19 slide show, 25 running a slide show, 25 scene modes, 9 backlight, 9 beach, 9...
- Page 76 37 sounds, camera, 36 specifications, camera, 55 stage, 9 storage capacity, 58 strap, 1 sunset, 9 support, technical, 53, 54 favorites, 43 for email, 42 for print, 41 set, 35 telephone support, 54 television, slide show, 27 text, 9 www.kodak.com/go/support...
- Page 77 48 camera/computer communications, 50 error messages, 51 turning camera on/off, 4 undelete, 19 upgrading software, firmware, 58 URLs, Kodak web sites, 53 USB cable, 45 video, 8 action print, 25 bookmarks, 24 checking settings, 30 copying, 29 emailing tagged, 42...
Need help?
Do you have a question about the EASYSHARE Z1015 IS and is the answer not in the manual?
Questions and answers