Table of Contents
Advertisement
owner's manual
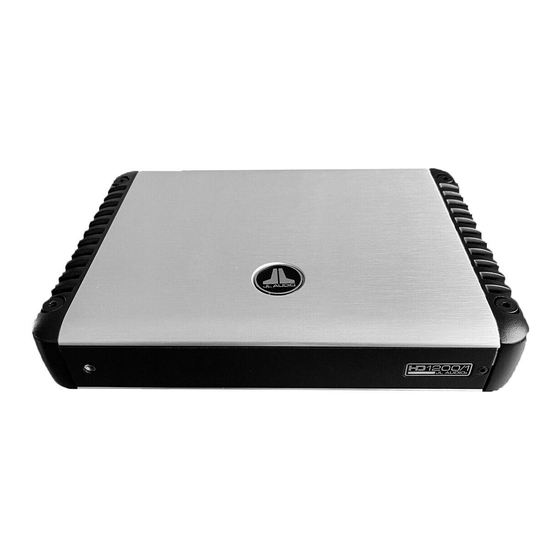
Monoblock Wide-Range Amplifier
Thank you for purchasing a JL Audio amplifier for
your automotive sound system.
Your amplifier has been designed and manufactured to exacting
standards in order to ensure years of musical enjoyment in your vehicle.
For maximum performance, we highly recommend that you have
your new amplifier installed by an authorized JL Audio dealer. Your
authorized dealer has the training, expertise and installation equipment
to ensure optimum performance from this product. Should you
decide to install the amplifier yourself, please take the time
to read this manual thoroughly so as to familiarize yourself
with its installation requirements and setup procedures.
If you have any questions regarding the instructions in this
manual or any aspect of your amplifier's operation, please contact your
authorized JL Audio dealer for assistance. If you need further assistance,
please call the JL Audio Technical Support Department
at (954) 443-1100 during business hours.
Advertisement
Table of Contents

Related Manuals for JL Audio HD1200/1


Summary of Contents for JL Audio HD1200/1
- Page 1 For maximum performance, we highly recommend that you have your new amplifier installed by an authorized JL Audio dealer. Your authorized dealer has the training, expertise and installation equipment to ensure optimum performance from this product.
-
Page 2: Protect Your Hearing
Left & Right Preamp Remote Level Connector Connector Output Jacks Control Knob (pgs. 6-7) (pgs. 6-7) (pg. 12) (pg. 13) +12 VDC Ground +12 VDC Ground Remote Remote Inputs Preouts Remote Level Control 2 | JL Audio - HD1200/1 Owner’s Manual... -
Page 3: Safety Considerations
Your JL Audio amplifier employs an Your amplifier needs to be installed in a dry, advanced type of heat management, called well-ventilated environment and in a manner RealSink™. This feature takes advantage of which does not interfere with your vehicle’s safety... -
Page 4: Product Description
JL Audio’s exclusive R.I.P.S. power supply design optimizes the output the amplifier for any impedance between 1.5 and 4 ohms, allowing you to get full use of the HD1200/1’s performance capabilities with a wide range of speaker systems. The tightly regulated power supply design also means that the HD1200/1’s clean power output... -
Page 5: Typical Installation Sequence
HD1200/1 and are being 14) Make necessary adjustments to the input powered from the same main power wire. sensitivity controls to obtain the right... -
Page 6: Battery Connection
JL Audio fused distribution block. acceptable. Please consult with your JL Audio If you are installing the HD1200/1 with other dealer to make sure that the wire, fuse amplifiers and wish to use a single main power... -
Page 7: Ground Connection
For optimal grounding, we is exposed. When using smaller wire, it may recommend the use of a JL Audio master ground be necessary to strip 1 inch of insulation from lug (XB-MGLU). Alternatively, a sheet metal the wire and fold the bare wire in half prior to screw or bolt can be used with a star washer. -
Page 8: Standard Mounting
Lateral Mounting Feet. Check before drilling any holes in your vehicle to make sure that you will not be drilling through a gas tank, brake line, wiring harness or other vital vehicle system. 8 | JL Audio - HD1200/1 Owner’s Manual... -
Page 9: Input Controls
OEM (factory-installed) systems. To use speaker-level sources, splice the speaker output wires of the source unit or small amplifier onto a pair of RCA plugs for each input pair or use the JL Audio ECS Speaker Wire to RCA adaptor (XD-CLRAIC2-SW). -
Page 10: Crossover Controls
While this may sound counter- critical to sound quality and reliability. intuitive, it is correct as described. The HD1200/1 has one filter, which can be configured as a high-pass filter (attenuates low “input sens.” control frequencies) or as a low-pass filter (attenuates Located to the left of the “Input Voltage”... -
Page 11: Infrasonic Filter
inFrasonic Filter 2) “Filter Slope” Control: This switch allows you The “Infrasonic Filter” is a 24 dB/octave high- to select from two filter slopes: pass filter, with a fixed cutoff frequency of 30 Hz. This filter is designed to conserve amplifier power “12dB”: Configures the filter to attenuate and protect subwoofer systems, without audibly frequencies above or below the selected... -
Page 12: Preamp Outputs
1200/1 allows you to quickly peform this polarity crossover filter or input sensitivity setting selected inversion without touching any wires. Simply on the HD1200/1 (if the input signal is full-range, flip the switch from the “0” (normal) to the “180 the Preamp Output will be full-range). These deg.”... -
Page 13: Speaker Connections
The HD1200/1 employs JL Audio’s exclusive Control (HD-RLC), you can control the volume of Regulated, Intelligent Power Supply (R.I.P.S.) the HD1200/1 from the front of the vehicle. This design. This sophisticated power supply allows is particularly useful for subwoofer level control. - Page 14 Do not chassis ground any speakers connected to this or any other JL Audio amplifier. Doing so will cause the amplifier to go into protection and mute the output.
- Page 15 JL Audio dealer so that may require service of the amplifier, its that it may be sent in to JL Audio for service. wiring or the vehicle’s charging system. Audio There are no user serviceable parts or fuses inside is muted when this fault occurs.
- Page 16 16 | JL Audio - HD1200/1 Owner’s Manual...
-
Page 17: Preamp Output
Hd1200/1 specifications Amplifier Topology: Class D, switching type with patented Single-Cycle Control™ technology. Power Supply: Pulse width modulation-regulated switching power supply Recommended Fuse Value / Type: 100A (MaxiFuse™) Rated Power: 1200W RMS x 1 @ 1.5-4Ω (11V - 14.5V) THD at Rated Power: <0.03% @ 4Ω... -
Page 18: Necessary Equipment
Sens.” for the affected channels if any equalizer boost is activated after setting the “Input Sens.” with this procedure. This applies to any EQ boost circuit, source unit tone controls or EQ circuits. EQ cuts will not require re-adjustment. 18 | JL Audio - HD1200/1 Owner’s Manual... - Page 19 The “Input Sens.” controls can to 3/4 of maximum output. This will allow for reasonable gain overlap with moderate clipping now be adjusted downward if the HD1200/1 at full volume. requires attenuation to achieve the desired 5) Using the chart below, determine the system balance.
-
Page 20: Appendix D: Troubleshooting
Check the input connectors to ensure that they all are making good contact with the input jacks on the amplifier. 20 | JL Audio - HD1200/1 Owner’s Manual... - Page 21 “my amplifier shuts off once in a while, usually at higher volumes” Check your voltage source and grounding point. The power supply of the HD1200/1 will operate with charging system voltages down to 9V. Shutdown problems at higher volume levels can occur when the charging system voltage drops below 9V.
-
Page 22: Installation Notes
22 | JL Audio - HD1200/1 Owner’s Manual... - Page 24 - amPliFiers (usa) JL AUDIO warrants this product to be free of defects in materials and workmanship for a period of two (2) years. The warranty is extended to three (3) years total if installation is performed by an authorized JL Audio dealer using a JL Audio Premium Power Connection System for power wiring.
Need help?
Do you have a question about the HD1200/1 and is the answer not in the manual?
Questions and answers