
Related Manuals for Canon LiDE 220


Summary of Contents for Canon LiDE 220
-
Page 1: Online Manual
LiDE 220 Online Manual Read Me First Useful Functions Available on the Machine Overview of the Machine Scanning Troubleshooting English... -
Page 2: Table Of Contents
Contents Read Me First........... . 6 How to Use the Online Manual. - Page 3 Saving after Checking Scan Results..........55 Sending Scanned Images via E-mail.
- Page 4 Updating the ScanGear (Scanner Driver)......... . . 199 Obtaining the Latest ScanGear (Scanner Driver).
- Page 5 Scanner Does Not Work after Upgrading Windows........245 Scanned Image Does Not Open.
-
Page 6: Read Me First
In addition, Canon may suspend or stop the disclosure of this guide due to unavoidable reasons. Canon shall not be liable for any damage suffered by customers as a result of changes in or deletion of information in this guide, or suspension/stoppage of disclosure of this guide. -
Page 7: How To Use The Online Manual
How to Use the Online Manual Symbols Used in This Document Warning Instructions that, if ignored, could result in death or serious personal injury caused by incorrect operation of the equipment. These must be observed for safe operation. Caution Instructions that, if ignored, could result in personal injury or material damage caused by incorrect operation of the equipment. -
Page 8: Trademarks And Licenses
• Photo Rag is a trademark of Hahnemühle FineArt GmbH. • Bluetooth is a trademark of Bluetooth SIG, Inc., U.S.A. and licensed to Canon Inc. Note • The formal name of Windows Vista is Microsoft Windows Vista operating system. - Page 9 1. Definitions. "License" shall mean the terms and conditions for use, reproduction, and distribution as defined by Sections 1 through 9 of this document. "Licensor" shall mean the copyright owner or entity authorized by the copyright owner that is granting the License.
- Page 10 their Contribution(s) with the Work to which such Contribution(s) was submitted. If You institute patent litigation against any entity (including a cross-claim or counterclaim in a lawsuit) alleging that the Work or a Contribution incorporated within the Work constitutes direct or contributory patent infringement, then any patent licenses granted to You under this License for that Work shall terminate as of the date such litigation is filed.
- Page 11 goodwill, work stoppage, computer failure or malfunction, or any and all other commercial damages or losses), even if such Contributor has been advised of the possibility of such damages. 9. Accepting Warranty or Additional Liability. While redistributing the Work or Derivative Works thereof, You may choose to offer, and charge a fee for, acceptance of support, warranty, indemnity, or other liability obligations and/or rights consistent with this License.
-
Page 12: Search Tips
Enter keywords in the search window and click (Search). You can search for target pages in this guide. Search Tips You can search for target pages by entering keywords in the search window. Note • The displayed screen may vary. •... - Page 13 Note • The displayed screen varies depending on your product. • Searching for Application Functions Enter your application's name and a keyword for the function you want to learn about Example: When you want to learn how to print collages with My Image Garden Enter "My Image Garden collage"...
-
Page 14: Notes On Operation Explanations
Notes on Operation Explanations In this guide, most of the operations are described based on the windows displayed when Windows 8.1 operating system (called Windows 8.1 below) or Windows 8 operating system (called Windows 8 below) is used. -
Page 15: Useful Functions Available On The Machine
Useful Functions Available on the Machine View Photos Easily Using My Image Garden Connection Methods Available on the Machine... -
Page 16: View Photos Easily Using My Image Garden
View Photos Easily Using My Image Garden Organize Images Easily In My Image Garden, you can register the names of people and events to photos. You can organize photos easily as you can display them not only by folder but also by calendar, event, and person. - Page 17 Other Various Functions My Image Garden has many other useful functions. Refer to "What You Can Do with My Image Garden" for details.
-
Page 18: Connection Methods Available On The Machine
Connection Methods Available on the Machine The following connection methods are available on the machine. USB Connection USB Connection Connect the scanner and a computer with a USB cable. Prepare a USB cable. -
Page 19: Overview Of The Machine
Overview of the Machine Safety Guide Safety Precautions Regulatory and Safety Information Main Components Placing Items Place the Item on the Platen Items You Can Place & How to Place Items Maintenance Precautions for Safe Transport of the Machine Legal Limitations on Use of Your Product and Use of Images Specifications... -
Page 20: Safety Guide
Safety Guide Safety Precautions Regulatory and Safety Information... -
Page 21: Safety Precautions
Safety Precautions Choosing a location • Do not install the machine in a location that is unstable or subject to excessive vibration. • Do not install the machine in locations that are very humid or dusty, in direct sunlight, outdoors, or close to a heating source. -
Page 22: Regulatory And Safety Information
Do not make any changes or modifications to the equipment unless otherwise specified in the manual. If such changes or modifications should be made, you could be required to stop operation of the equipment. Canon U.S.A., Inc. One Canon Park... -
Page 23: Environmental Information
For more information about where you can drop off your waste equipment for recycling, please contact your local city office, waste authority, approved WEEE scheme or your household waste disposal service. For more information regarding return and recycling of WEEE products, please visit www.canon- europe.com/weee. -
Page 24: Energy Star
Canon does not recommend extending the Activation Times from the optimum ones set as default. ®... -
Page 25: Main Components
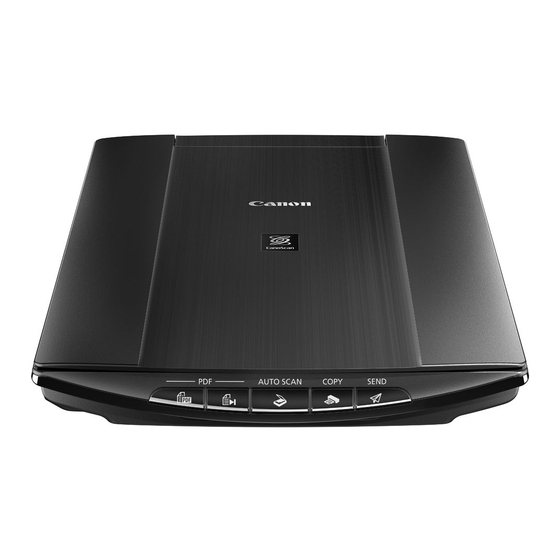
Main Components (1) document cover Presses down the placed item. (2) scanning unit The main part of the scanner that emits light and scans items. (3) platen Place the item to be scanned. (4) alignment mark Align a corner of the item with this mark. (5) scanner buttons You can scan easily according to your purpose by simply pressing a button. - Page 26 PDF buttons SCAN START button FINISH button AUTO SCAN button COPY button SEND button (6) scanner lock switch Lock or unlock the scanning unit. (7) stand locking slot Insert the hook of the stand when setting the scanner upright. (8) USB connector Connect the supplied USB cable.
-
Page 27: Placing Items
Placing Items Place the Item on the Platen Items You Can Place & How to Place Items... -
Page 28: Place The Item On The Platen
Place the Item on the Platen Place the item you want to scan on the platen. Note • To scan by using the stand, refer to "Using the Stand". 1. Place the item on the platen. 1. Open the document cover. 2. -
Page 29: Using The Stand
Using the Stand 1. Place the item on the platen. 1. Open the document cover. 2. Place the item with the side to scan facing the platen and align it with the alignment mark. Items You Can Place & How to Place Items Important •... - Page 30 Important • When scanning with the scanner positioned upright, do not subject it to vibration during operation. The correct image results may not be obtained (for example, images blur). • When using the scanner in the upright position, the item type may not be detected automatically. Specify the item type and scan.
-
Page 31: Items You Can Place & How To Place Items
Items You Can Place & How to Place Items The position to place an item may vary depending on the item to be scanned. Place the item in the correct position according to the item to be scanned. If you do not place the item correctly, it may not be scanned correctly. - Page 32 Portions placed on the diagonally striped area cannot be scanned. Placing Multiple Items When scanning multiple printed photos, postcards, or business cards Place the items at least 0.4 inch (1 cm) away from the edges of the platen, with the side to scan facing down.
-
Page 33: Maintenance
Maintenance Important • Disconnect the USB cable from the computer before cleaning the machine. • Do not use tissue paper, paper towels, rough-textured cloth, or similar materials for cleaning so as not to scratch the surface. • Never use alcohol, thinner, benzene, etc. The exterior may deform, discolor, or dissolve. With a soft dry cloth, wipe the platen (A), the inner side of the document cover (white sheet) (B), and the exterior (C). -
Page 34: Precautions For Safe Transport Of The Machine
Precautions for Safe Transport of the Machine When relocating the machine, make sure of the following. Important • Pack the machine in a sturdy box so that it is placed with its bottom facing down, using sufficient protective material to ensure safe transport. •... -
Page 35: Legal Limitations On Use Of Your Product And Use Of Images
Legal Limitations on Use of Your Product and Use of Images It may be unlawful to make copies of, scan, print, or use reproductions of the following documents. The list provided is non-exhaustive. When in doubt, check with a legal representative in your jurisdiction. •... -
Page 36: Specifications
Specifications General Specifications Scanner type Flatbed Sensor type Light source 3-color (RGB) LED 4800 x 4800 dpi Optical resolution * * Optical resolution represents the maximum sampling rate based on ISO 14473. Selectable resolution 25 - 19200 dpi (ScanGear) Color: 48 bit (16 bit input for each color (RGB))/48 bit or 24 bit output (16 bit or 8 bit output for each color (RGB)) Scanning bit depth Grayscale: 16 bit or 8 bit output... - Page 37 Internet Explorer 8 or later Browser 3.1 GB Note: For bundled software installation. Hard disk space The necessary amount of hard disk space may be changed without notice. Display XGA 1024 x 768 Mac OS Operating system Mac OS X v10.6.8 or later Browser Safari 5 or later 1.5 GB...
-
Page 38: Scanning
Scanning Scanning from a Computer Scanning Using the Scanner Buttons... -
Page 39: Scanning From A Computer
Scanning from a Computer Scanning with IJ Scan Utility Scanning with Application Software that You are Using (ScanGear) Useful Information on Scanning Other Scanning Methods Placing Items (When Scanning from a Computer) -
Page 40: Scanning With Ij Scan Utility
Scanning with IJ Scan Utility What Is IJ Scan Utility (Scanner Software)? Starting IJ Scan Utility Easy Scanning with Auto Scan Basic Scanning Documents Scanning Photos Scanning with Favorite Settings Scanning Items Larger than the Platen (Image Stitch) Scanning Multiple Items at One Time Saving after Checking Scan Results Sending Scanned Images via E-mail Extracting Text from Scanned Images (OCR) -
Page 41: What Is Ij Scan Utility (Scanner Software)
What Is IJ Scan Utility (Scanner Software)? IJ Scan Utility is an application that allows you to easily scan documents, photos, etc. You can complete from scanning to saving at one time by simply clicking the corresponding icon in the IJ Scan Utility main screen. - Page 42 Important • Some functions are available only when My Image Garden is installed. Note • Refer to "Settings Dialog Box" for how to set the applications to integrate with.
-
Page 43: Starting Ij Scan Utility
If IJ Scan Utility is not displayed on the Start screen, select the Search charm, then search for "IJ Scan Utility". Windows 7/Windows Vista/Windows XP: From the Start menu, select All Programs > Canon Utilities > IJ Scan Utility > IJ Scan Utility to start IJ Scan Utility. -
Page 44: Easy Scanning With Auto Scan
Easy Scanning with Auto Scan You can scan easily by automatically detecting the item type. Important • The following types of items may not be scanned correctly. In that case, adjust the cropping frames (scan areas) in whole image view of ScanGear (scanner driver) and scan again. •... -
Page 45: Scanning Documents
Scanning Documents You can scan items placed on the platen with settings suitable for documents. 1. Place the item on the platen. Placing Items (When Scanning from a Computer) Start IJ Scan Utility. 3. Click Settings..., then set the paper size, resolution, etc. in the Settings (Document Scan) dialog box as required. -
Page 46: Scanning Photos
Scanning Photos You can scan photos placed on the platen with settings suitable for photos. 1. Place the photo on the platen. Placing Items (When Scanning from a Computer) Start IJ Scan Utility. 3. Click Settings..., then set the paper size, resolution, etc. in the Settings (Photo Scan) dialog box as required. -
Page 47: Scanning With Favorite Settings
Scanning with Favorite Settings You can scan items placed on the platen with your favorite settings saved beforehand. This is convenient for saving frequently used settings or when specifying scan settings in detail. Start IJ Scan Utility. 2. Click Settings..., then set the item type, resolution, etc. in the Settings (Custom Scan) dialog box as required. -
Page 48: Scanning Items Larger Than The Platen (Image Stitch)
Scanning Items Larger than the Platen (Image Stitch) You can scan the left and right halves of an item larger than the platen and combine them back into one image. Items up to approximately twice as large as the platen are supported. Note •... - Page 49 6. Place the item that is to be displayed on the left side of the screen face-down on the platen. 7. Click Start Scanning Image 1. The first item is scanned and appears in 1. Note • Click Cancel to cancel the scan. 8.
- Page 50 9. Click Start Scanning Image 2. The second item is scanned and appears in 2. Note • Click Cancel to cancel the scan. 10. Adjust the scanned images as required. Use the Toolbar to rotate or zoom in/out, or drag the images to adjust their positions. Note •...
- Page 51 Adjusting Cropping Frames in the Image Stitch Window • To scan an item again, select the image in the Preview area or the thumbnail at the top of the screen, then click (Delete). The selected image is deleted, allowing you to scan the item again.
-
Page 52: Scanning Multiple Items At One Time
Scanning Multiple Items at One Time You can scan two or more photos (small items) placed on the platen at one time and save each image individually. Important • The following types of items may not be scanned correctly. In that case, adjust the cropping frames (scan areas) in whole image view of ScanGear (scanner driver) and scan again. - Page 53 5. Select Select Source according to the items to be scanned. 6. Select Auto scan for Paper Size, then click OK.
- Page 54 The IJ Scan Utility main screen appears. Note • Refer to the following pages for details on the setting items in the Settings dialog box. Settings (Document Scan) Dialog Box Settings (Photo Scan) Dialog Box Settings (Custom Scan) Dialog Box 7.
-
Page 55: Saving After Checking Scan Results
Saving after Checking Scan Results You can check the scan results, then save the images to a computer. Important • You cannot check the scan results before saving when scanned using Auto scan or the scanner buttons. Note • The screens for scanning photos are used as examples in the following descriptions. Start IJ Scan Utility. - Page 56 The IJ Scan Utility main screen appears. Note • Refer to the following pages for details on the setting items in the Settings dialog box. Settings (Document Scan) Dialog Box Settings (Photo Scan) Dialog Box Settings (Custom Scan) Dialog Box Settings (Scan and Stitch) Dialog Box Settings (ScanGear) Dialog Box 5.
- Page 57 Note • The default save folders are as follows. • Windows 8.1: Documents folder • Windows 8: My Documents folder • Windows 7: My Documents folder • Windows Vista: Documents folder • Windows XP: My Documents folder 7. Click OK. Scanned images are saved according to the settings.
-
Page 58: Sending Scanned Images Via E-Mail
Sending Scanned Images via E-mail You can send scanned images via e-mail. Note • The screens for scanning photos are used as examples in the following descriptions. Start IJ Scan Utility. 2. Click Settings..Settings dialog box appears. 3. Click Photo Scan. 4. - Page 59 Note • You can add e-mail clients to use for attachments from the pull-down menu. • If None (Attach Manually) is selected, manually attach scanned and saved images to e-mail. 5. Click OK. The IJ Scan Utility main screen appears. Note •...
- Page 60 Settings (Photo Scan) Dialog Box Settings (Custom Scan) Dialog Box Settings (ScanGear) Dialog Box 6. Click Photo. Scanning starts. When scanning is completed, the specified e-mail client starts and the images will be attached to a new message. Note • Click Cancel to cancel the scan. •...
-
Page 61: Extracting Text From Scanned Images (Ocr)
Extracting Text from Scanned Images (OCR) Scan text in scanned magazines and newspapers and display it in your text editor. Note • You can extract text when scanning via Document, Custom, or ScanGear. • The screens for scanning documents are used as examples in the following descriptions. Start IJ Scan Utility. - Page 62 Note • If a compatible application is not installed, the text in the image is extracted and appears in your text editor. Text to be displayed is based on Document Language in the Settings (General Settings) dialog box. Select the language you want to extract in Document Language and scan. •...
- Page 63 Note • Refer to the following pages for details on the setting items in the Settings dialog box. Settings (Document Scan) Dialog Box Settings (Custom Scan) Dialog Box Settings (ScanGear) Dialog Box 6. Click Document. Scanning starts. When scanning is completed, the scanned images are saved according to the settings, and the extracted text appears in the specified application.
-
Page 64: Ij Scan Utility Screens
IJ Scan Utility Screens IJ Scan Utility Main Screen Settings Dialog Box Settings (Auto Scan) Dialog Box Settings (Document Scan) Dialog Box Settings (Photo Scan) Dialog Box Settings (Custom Scan) Dialog Box Settings (Scan and Stitch) Dialog Box Settings (ScanGear) Dialog Box Settings (AUTO SCAN) Dialog Box Settings (PDF) Dialog Box Settings (COPY) Dialog Box... -
Page 65: Ij Scan Utility Main Screen
Utility". Windows 7/Windows Vista/Windows XP: From the Start menu, select All Programs > Canon Utilities > IJ Scan Utility > IJ Scan Utility to start IJ Scan Utility. You can complete from scanning to saving at one time by simply clicking the corresponding icon. - Page 66 Scan/save settings and the response after scanning can be specified in the Settings (Scan and Stitch) dialog box. ScanGear Starts ScanGear (scanner driver) in which you can make image corrections and color adjustments when scanning. Scan/save settings and applications can be specified in the Settings (ScanGear) dialog box.
-
Page 67: Settings Dialog Box
Settings Dialog Box There are three tabs in the Settings dialog box: (Scanning from a Computer), (Scanning Using the Scanner Buttons), and (General Settings). When you click a tab, the view in the red frame switches and you can make advanced settings to functions on each tab. (Scanning from a Computer) Tab You can specify how to respond when scanning from IJ Scan Utility or My Image Garden. - Page 68 Important • When the Settings dialog box is displayed from My Image Garden, the (Scanning Using the Scanner Buttons) tab does not appear. (General Settings) Tab You can set the product to use, file size restriction on e-mail attachment, language to detect text in images, and folder in which to save images temporarily.
- Page 69 Settings (Auto Scan) Dialog Box Click Auto Scan on the (Scanning from a Computer) tab to display the Settings (Auto Scan) dialog box. In the Settings (Auto Scan) dialog box, you can make advanced scan settings to scan by automatically detecting the item type.
- Page 70 • Reflective disc labels may not be scanned as expected. • Place items to be scanned on the platen correctly. Otherwise, items may not be scanned correctly. Refer to "Placing Items (When Scanning from a Computer)" for how to place items. Note •...
- Page 71 • Magazines, newspapers, and documents: PDF Important • The save format may differ depending on how you place the item. Placing Items (When Scanning from a Computer) JPEG Image Quality You can specify the image quality of JPEG files. PDF Compression Select the compression type for saving PDF files.
- Page 72 Do not start any application Saves to the folder specified in Save in. Note • Specify the application or folder in the Select Application or Select Destination Folder dialog box displayed by selecting Add... from the pull-down menu. Instructions Opens this guide. Defaults You can restore the settings in the displayed screen to the default settings.
- Page 73 Settings (Document Scan) Dialog Box Click Document Scan on the (Scanning from a Computer) tab to display the Settings (Document Scan) dialog box. In the Settings (Document Scan) dialog box, you can make advanced scan settings to scan items as documents.
- Page 74 Paper Size Select the size of the item to be scanned. When you select Custom, a screen in which you can specify the paper size appears. Select a Unit, then enter the Width and Height, and then click OK. Note •...
- Page 75 Printed materials are displayed as a collection of fine dots. "Moire" is a phenomenon where uneven gradation or a stripe pattern appears when such photos or pictures printed with fine dots are scanned. Note • Scanning takes longer than usual when you enable Reduce moire. Reduce gutter shadow Reduces gutter shadows that appear between pages when scanning open booklets.
- Page 76 (2) Save Settings Area File Name Enter the file name of the image to be saved. When you save a file, the date and four digits are appended to the set file name in the "_20XX0101_0001" format. Note • When you select the Save to a subfolder with current date checkbox, the date and four digits are appended to the set file name.
- Page 77 Create a PDF file that supports keyword search Select this checkbox to convert text in images into text data and create PDF files that support keyword search. Important • This appears only when PDF or PDF (Multiple Pages) is selected in Data Format. Note •...
- Page 78 Note • Specify the application or folder in the Select Application or Select Destination Folder dialog box displayed by selecting Add... from the pull-down menu. Instructions Opens this guide. Defaults You can restore the settings in the displayed screen to the default settings.
- Page 79 Settings (Photo Scan) Dialog Box Click Photo Scan on the (Scanning from a Computer) tab to display the Settings (Photo Scan) dialog box. In the Settings (Photo Scan) dialog box, you can make advanced scan settings to scan items as photos. (1) Scan Options Area (2) Save Settings Area (3) Application Settings Area...
- Page 80 Note • Click Defaults to restore the specified settings to the default settings. Resolution Select the resolution of the item to be scanned. The higher the resolution (value), the more detail in your image. Resolution Image Processing Settings Click (Plus) to set the following. Important •...
- Page 81 Data Format Select the data format in which to save the scanned images. You can select JPEG/Exif, TIFF, or PNG. Important • You cannot select JPEG/Exif when Color Mode is Black and White. JPEG Image Quality You can specify the image quality of JPEG files. Important •...
- Page 82 Instructions Opens this guide. Defaults You can restore the settings in the displayed screen to the default settings.
- Page 83 Settings (Custom Scan) Dialog Box Click Custom Scan on the (Scanning from a Computer) tab to display the Settings (Custom Scan) dialog box. In the Settings (Custom Scan) dialog box, you can make advanced scan settings to scan according to your preference.
- Page 84 • To scan the following types of items, specify the item type or size. You cannot scan correctly with Auto. • A4 size photos • Text documents smaller than 2L (5 inches x 7 inches) (127 mm x 178 mm), such as paperback pages with the spine cut off •...
- Page 85 Image Processing Settings Click (Plus) to set the following. Available setting items vary by Select Source. • When Select Source is Auto: Apply recommended image correction Applies suitable corrections automatically based on the item type. Important • The color tone may differ from the source image due to corrections. In that case, deselect the checkbox and scan.
- Page 86 Reduce gutter shadow Reduces gutter shadows that appear between pages when scanning open booklets. Note • Use ScanGear (scanner driver)'s Advanced Mode tab to correct gutter shadows when scanning non-standard size items or specified areas. Refer to "Gutter Shadow Correction" for your model from Home of the Online Manual for details.
- Page 87 Note • When you select the Save to a subfolder with current date checkbox, the date and four digits are appended to the set file name. Save in Displays the folder in which to save the scanned images. To change the folder, specify the destination folder in the Select Destination Folder dialog box displayed by selecting Add...
- Page 88 Create a PDF file that supports keyword search Select this checkbox to convert text in images into text data and create PDF files that support keyword search. Important • This appears only when PDF, PDF (Multiple Pages), or Auto is selected in Data Format. Note •...
- Page 89 Note • Specify the application or folder in the Select Application or Select Destination Folder dialog box displayed by selecting Add... from the pull-down menu. Instructions Opens this guide. Defaults You can restore the settings in the displayed screen to the default settings.
- Page 90 Settings (Scan and Stitch) Dialog Box Click Scan and Stitch on the (Scanning from a Computer) tab to display the Settings (Scan and Stitch) dialog box. In the Settings (Scan and Stitch) dialog box, you can make advanced scan settings for scanning items larger than the platen.
- Page 91 Color Mode Select the color mode in which to scan the item. Resolution Select the resolution of the item to be scanned. The higher the resolution (value), the more detail in your image. Resolution Image Processing Settings Click (Plus) to set the following. Available setting items vary by Select Source. Important •...
- Page 92 • Windows 7: My Documents folder • Windows Vista: Documents folder • Windows XP: My Documents folder Important • When the Settings dialog box is displayed from My Image Garden, this option does not appear. Data Format Select the data format in which to save the scanned images. You can select JPEG/Exif, TIFF, PNG, PDF, or PDF (Multiple Pages).
- Page 93 Important • When the Settings dialog box is displayed from My Image Garden, this option does not appear. (3) Application Settings Area Open with an application Select this when you want to enhance or correct the scanned images. You can specify the application from the pull-down menu. Send to an application Select this when you want to use the scanned images as they are in an application that allows you to browse or organize images.
- Page 94 Settings (ScanGear) Dialog Box Click ScanGear on the (Scanning from a Computer) tab to display the Settings (ScanGear) dialog box. In the Settings (ScanGear) dialog box, you can specify how to save images when scanning items by starting ScanGear (scanner driver) and how to respond after saving them. (1) Save Settings Area (2) Application Settings Area Important...
- Page 95 • Windows 8.1: Documents folder • Windows 8: My Documents folder • Windows 7: My Documents folder • Windows Vista: Documents folder • Windows XP: My Documents folder Important • When the Settings dialog box is displayed from My Image Garden, this option does not appear. Data Format Select the data format in which to save the scanned images.
- Page 96 If this checkbox is not selected, files are saved directly in the folder specified in Save in. Enable large image scans Select this checkbox to scan images up to 50000 pixels x 50000 pixels and 4.0 GB. Important • When this checkbox is selected, you cannot select Send to an application, Send to a folder, Attach to e-mail, or Start OCR.
- Page 97 Defaults You can restore the settings in the displayed screen to the default settings.
- Page 98 Settings (PDF) Dialog Box Click PDF on the (Scanning Using the Scanner Buttons) tab to display the Settings (PDF) dialog box. In the Settings (PDF) dialog box, you can specify how to respond when saving images to a computer as PDF files after scanning them using the scanner button.
- Page 99 Note • Click Defaults to restore the specified settings to the default settings. Resolution Select the resolution of the item to be scanned. The higher the resolution (value), the more detail in your image. Resolution Image Processing Settings Click (Plus) to set the following. Note •...
- Page 100 Note • Use ScanGear (scanner driver)'s Advanced Mode tab to correct gutter shadows when scanning non-standard size items or specified areas. Refer to "Gutter Shadow Correction" for your model from Home of the Online Manual for details. Correct slanted text document Detects the scanned text and corrects the angle (within -0.1 to -10 degrees or +0.1 to +10 degrees) of the document.
- Page 101 Note • When you select the Save to a subfolder with current date checkbox, the date and four digits are appended to the set file name. Save in Displays the folder in which to save the scanned images. To change the folder, specify the destination folder in the Select Destination Folder dialog box displayed by selecting Add...
- Page 102 You can specify the application from the pull-down menu. Send to an application Select this when you want to use the scanned images as they are in an application that allows you to browse or organize images. You can specify the application from the pull-down menu. Send to a folder Select this when you also want to save the scanned images to a folder other than the one specified in Save in.
- Page 103 Settings (AUTO SCAN) Dialog Box Click AUTO SCAN on the (Scanning Using the Scanner Buttons) tab to display the Settings (AUTO SCAN) dialog box. In the Settings (AUTO SCAN) dialog box, you can specify how to respond when saving images to a computer after scanning them using the scanner button by automatically detecting the item.
- Page 104 Note • To reduce moire, set Select Source to Magazine in the Settings (Document Scan) dialog box, then click Document in the IJ Scan Utility main screen. (1) Scan Options Area Apply recommended image correction Applies suitable corrections automatically based on the item type. Important •...
- Page 105 PDF Compression Select the compression type for saving PDF files. Standard It is recommended that you normally select this setting. High Compresses the file size when saving, allowing you to reduce the load on your network/server. Create a PDF file that supports keyword search Select this checkbox to convert text in images into text data and create PDF files that support keyword search.
- Page 106 Defaults You can restore the settings in the displayed screen to the default settings.
- Page 107 Settings (COPY) Dialog Box Click COPY on the (Scanning Using the Scanner Buttons) tab to display the Settings (COPY) dialog box. In the Settings (COPY) dialog box, you can specify how to respond when printing images on a printer after scanning them using the scanner button.
- Page 108 • Items printed on thin white paper • Long narrow items such as panoramic photos • Reflective disc labels may not be scanned as expected. • Place items correctly according to the type of item to be scanned. Otherwise, items may not be scanned correctly.
- Page 109 Refer to the manual of your printer for details. Brightness Adjust the image brightness. Move the slider to the left to darken and right to brighten the image. Important • This function is available only when Magazine or Document is selected for Select Source. •...
- Page 110 Note • Use ScanGear (scanner driver)'s Advanced Mode tab to correct gutter shadows when scanning non-standard size items or specified areas. Refer to "Gutter Shadow Correction" for your model from Home of the Online Manual for details. • When Select Source is Auto: Apply recommended image correction Applies suitable corrections automatically based on the item type.
- Page 111 Settings (SEND) Dialog Box Click SEND on the (Scanning Using the Scanner Buttons) tab to display the Settings (SEND) dialog box. In the Settings (SEND) dialog box, you can specify how to respond when attaching images to an e-mail, sending them to an application, or saving them to a folder after scanning them using the scanner button. (1) Scan Options Area (2) Save Settings Area (3) Application Settings Area...
- Page 112 Note • Click Defaults in the screen in which you can specify the paper size to restore the specified settings to the default settings. Resolution Select the resolution of the item to be scanned. The higher the resolution (value), the more detail in your image. Resolution Image Processing Settings Click...
- Page 113 Printed materials are displayed as a collection of fine dots. "Moire" is a phenomenon where uneven gradation or a stripe pattern appears when such photos or pictures printed with fine dots are scanned. Note • Scanning takes longer than usual when you enable Reduce moire. Reduce gutter shadow Reduces gutter shadows that appear between pages when scanning open booklets.
- Page 114 (2) Save Settings Area File Name Enter the file name of the image to be saved. When you save a file, the date and four digits are appended to the set file name in the "_20XX0101_0001" format. Note • When you select the Save to a subfolder with current date checkbox, the date and four digits are appended to the set file name.
- Page 115 Important • This appears only when PDF or PDF (Multiple Pages) is selected in Data Format. Note • PDF files that are searchable in the language selected in Document Language on the (General Settings) tab of the Settings dialog box are created. Save to a subfolder with current date Select this checkbox to create a current date folder in the folder specified in Save in and save scanned images in it.
- Page 116 Settings (General Settings) Dialog Box Click the (General Settings) tab to display the Settings (General Settings) dialog box. In the Settings (General Settings) dialog box, you can set the product to use, file size restriction on images to be attached to an e-mail or to be sent, language to detect text in images, and folder in which to save images temporarily.
-
Page 117: Save Settings Dialog Box
Save Settings Dialog Box Select the Check scan results checkbox in Save Settings of the Settings dialog box to display the Save Settings dialog box after scanning. You can specify the data format and destination while viewing the thumbnails of scan results. Important •... - Page 118 (3) Save Settings Area File Name Enter the file name of the image to be saved. When you save a file, the date and four digits are appended to the set file name in the "_20XX0101_0001" format. Note • When you select the Save to a subfolder with current date checkbox, the date and four digits are appended to the set file name.
- Page 119 Create a PDF file that supports keyword search Select this checkbox to convert text in images into text data and create PDF files that support keyword search. Important • This appears only when PDF or PDF (Multiple Pages) is selected in Data Format. Note •...
-
Page 120: Image Stitch Window
Image Stitch Window Click Stitch in the IJ Scan Utility main screen to display the Image Stitch window. You can scan the left and right halves of an item larger than the platen and combine them back into one image. You can scan items up to approximately twice as large as the platen. (1) Settings and Operation Buttons (2) Toolbar (3) Thumbnail View Area... - Page 121 Scan Image 1 Start Scanning Image 1 Scans the first item. Scan Image 2 Start Scanning Image 2 Scans the second item. Adjust cropping frames You can adjust the scan area in preview. If no area is specified, the image of the size selected in Select Output Size will be saved. If an area is specified, only the image in the cropping frame will be scanned and saved.
- Page 122 Save Save Saves the two scanned images as one image. Cancel Cancels Stitch scan. (2) Toolbar You can delete the scanned images or adjust the previewed images. (Delete) Deletes the scanned image. (Enlarge/Reduce) Allows you to enlarge or reduce the preview image. Left-clicking the Preview area enlarges the displayed image.
- Page 123 When no image has been scanned: After scanning the first item by clicking Start Scanning Image 1: The image is scanned in the direction specified in Scan Direction, and 2 appears next to it. After scanning the second item by clicking Start Scanning Image 2: The two scanned images appear.
-
Page 124: Scanning With Application Software That You Are Using (Scangear)
Scanning with Application Software that You are Using (ScanGear) What Is ScanGear (Scanner Driver)? Scanning with Advanced Settings Using ScanGear (Scanner Driver) Starting ScanGear (Scanner Driver) Scanning in Basic Mode Scanning in Advanced Mode Scanning Multiple Documents at One Time with ScanGear (Scanner Driver) Correcting Images and Adjusting Colors with ScanGear (Scanner Driver) ScanGear (Scanner Driver) Screens Placing Items (When Scanning from a Computer) -
Page 125: What Is Scangear (Scanner Driver)
What Is ScanGear (Scanner Driver)? ScanGear (scanner driver) is software required for scanning documents. It enables you to specify the output size and make image corrections when scanning. ScanGear can be started from IJ Scan Utility or applications that are compatible with a standard interface called TWAIN. -
Page 126: Advanced Mode
Advanced Mode Use the Advanced Mode tab to specify the color mode, output resolution, image brightness, color tone, etc. when scanning. -
Page 127: Scanning With Advanced Settings Using Scangear (Scanner Driver)
Scanning with Advanced Settings Using ScanGear (Scanner Driver) Starting ScanGear (Scanner Driver) Scanning in Basic Mode Scanning in Advanced Mode Scanning Multiple Documents at One Time with ScanGear (Scanner Driver) -
Page 128: Starting Scangear (Scanner Driver)
Starting ScanGear (Scanner Driver) Use ScanGear (scanner driver) to make image corrections and color adjustments when scanning. ScanGear can be started from IJ Scan Utility or other applications. Starting IJ Scan Utility Follow these steps to start ScanGear from IJ Scan Utility. 1. -
Page 129: Scanning In Basic Mode
Scanning in Basic Mode Use the Basic Mode tab to scan easily by following the on-screen steps. Refer to "Scanning Multiple Documents at One Time with ScanGear (Scanner Driver)" to scan multiple documents at one time. Important • The following types of documents may not be scanned correctly. In that case, click (Thumbnail) on the Toolbar to switch to whole image view and scan. - Page 130 Note • Colors are adjusted based on the document type selected in Select Source. 4. Set Destination. 5. Set Output Size according to purpose. Output size options vary by the item selected in Destination. 6. Adjust the cropping frames (scan areas) as required. Adjust the size and position of the cropping frames on the preview image.
-
Page 131: Scanning In Advanced Mode
Scanning in Advanced Mode Use the Advanced Mode tab to specify the color mode, output resolution, image brightness, color tone, etc. when scanning. Refer to "Scanning Multiple Documents at One Time with ScanGear (Scanner Driver)" to scan multiple documents at one time. Important •... - Page 132 4. Click Preview. Preview images appear in the Preview area. 5. Set Output Settings. 6. Adjust the cropping frame (scan area), correct image, and adjust colors as required. Adjusting Cropping Frames (ScanGear) Image Settings Color Adjustment Buttons 7. Click Scan. Scanning starts.
-
Page 133: Scanning Multiple Documents At One Time With Scangear (Scanner Driver)
Scanning Multiple Documents at One Time with ScanGear (Scanner Driver) You can scan two or more photos (small documents) on the Platen at one time on the Basic Mode tab and Advanced Mode tab. This section explains how to scan multiple documents from the Basic Mode tab. Important •... - Page 134 3. Click Preview. Thumbnails of the preview images appear in the Preview area. Cropping frames are specified automatically according to the document size. 4. Set Destination. 5. Set Output Size according to purpose. 6. Adjust the cropping frames and set Image corrections as required. Note •...
- Page 135 7. Select the images you want to scan. Select the checkboxes of the images you want to scan. 8. Click Scan. Scanning Multiple Documents in Whole Image View Follow these steps if thumbnails are not displayed correctly when previewed or if you want to scan multiple documents as a single image.
- Page 136 Adjust the size and position of the cropping frames on the preview image. You can also create two or more cropping frames. If an area is not specified, the document will be scanned at the document size (Auto Crop). If an area is specified, only the portion in the specified area will be scanned.
-
Page 137: Correcting Images And Adjusting Colors With Scangear (Scanner Driver)
Correcting Images and Adjusting Colors with ScanGear (Scanner Driver) Correcting Images (Unsharp Mask, Reduce Dust and Scratches, Fading Correction, etc.) Adjusting Colors Using a Color Pattern Adjusting Saturation and Color Balance Adjusting Brightness and Contrast Adjusting Histogram Adjusting Tone Curve Setting Threshold... -
Page 138: Correcting Images (Unsharp Mask, Reduce Dust And Scratches, Fading Correction, Etc.)
Correcting Images (Unsharp Mask, Reduce Dust and Scratches, Fading Correction, etc.) The Image Settings functions on the Advanced Mode tab of ScanGear (scanner driver) allow you to enhance the outline of the subjects, reduce dust/scratches, and correct faded colors when scanning images. Setting Items Click (Arrow) of a function and select an item from the pull-down menu. - Page 139 Reducing show-through in text documents or lightening the base color in recycled paper, newspapers, etc. when scanning documents Set Reduce Show-through to ON. Sharpening slightly out-of-focus images Set Unsharp Mask to ON. Reducing gradations and stripe patterns Set Descreen to ON.
- Page 140 Note • Printed photos and pictures are displayed as a collection of fine dots. "Moire" is a phenomenon where uneven gradation or a stripe pattern appears when such photos or pictures printed with fine dots are scanned. Descreen is the function for reducing this moire effect. Reducing dust and scratches Set Reduce Dust and Scratches to Low, Medium, or High according to the degree of dust and scratches.
-
Page 142: Adjusting Colors Using A Color Pattern
Adjusting Colors Using a Color Pattern You can preview color changes and reproduce natural colors by using the color pattern function in ScanGear (scanner driver)'s Basic Mode tab. Color Adjustment Correct colors that have faded with time or due to colorcast. "Colorcast" is a phenomenon where a specific color affects the entire picture due to the weather or ambient strong colors. - Page 143 Preview image appears in the center. Preview image colors change as you adjust them. Below is an example of correcting a bluish image. Since Blue and Green are too strong, click the Yellow and Magenta arrows to correct. Before After Note •...
-
Page 144: Adjusting Saturation And Color Balance
Adjusting Saturation and Color Balance You can brighten colors that have faded with time or due to colorcast by using (Saturation/Color Balance) in ScanGear (scanner driver)'s Advanced Mode tab. Note • Click Defaults to reset all adjustments in the current window. Saturation Adjust the image's saturation (vividness). - Page 145 Move (Slider) under Color Balance to the left or right to emphasize the corresponding color. Cyan & Red Magenta & Green Yellow & Blue These are complementary color pairs (each pair produces a shade of gray when mixed). You can reproduce the natural colors of the scene by reducing the cast color and increasing the complementary color.
-
Page 146: Adjusting Brightness And Contrast
Adjusting Brightness and Contrast You can adjust images that are too dark or bright, or too flat due to lack of contrast by using (Brightness/Contrast) in ScanGear (scanner driver)'s Advanced Mode tab. Note • Click (Down arrow) to switch to detailed view. Click (Up arrow) to return to the previous view. - Page 147 Brightness Adjust the image brightness. Move (Slider) under Brightness to the left to darken and right to brighten the image. You can also enter a value (-127 to 127). Darkened Original image Brightened Note • Highlights may be lost if you brighten the image too much, and shadows may be lost if you darken the image too much.
-
Page 148: Adjusting Histogram
Adjusting Histogram You can adjust the image color tone by using a graph (histogram) showing brightness distribution, via (Histogram) in ScanGear (scanner driver)'s Advanced Mode tab. Note • Click Defaults to reset all adjustments in the current window. Channel Each dot of an image is a mixture of Red, Green, and Blue in various proportions (gradation). These colors can be adjusted individually as a "channel."... - Page 149 (1) Bright area (2) Dark area (3) Whole image More data is distributed to the More data is distributed to the Data is widely distributed between the highlight side. shadow side. highlight and shadow. Adjusting Histograms (Using the Slider) Select a Channel, then move (Black-point Slider) or (White-point Slider) to specify the level to be set as the shadow or highlight.
- Page 150 Moving the Mid-point Slider Move the Mid-point Slider to specify the level to be set as the middle of the tonal range. Images with more data distributed to the highlight side Move the Mid-point Slider toward the highlight side. Images with more data distributed to the shadow side Move the Mid-point Slider toward the shadow side.
- Page 151 • The point clicked with (White-point Dropper) will be the brightest point. You can also enter a value (10 to 255). • Click (Dropper) for Gray Balance and click the area you want to adjust the color in the preview image.
-
Page 152: Adjusting Tone Curve
Adjusting Tone Curve You can adjust the brightness of an image by selecting the type of graph (tone curve) showing the balance of tone input and output, via (Tone Curve Settings) in ScanGear (scanner driver)'s Advanced Mode tab. Note • Click Defaults to reset all adjustments in the current window. Channel Each dot of an image is a mixture of Red, Green, and Blue in various proportions (gradation). - Page 153 Adjusting Tone Curve In Select Tone Curve, select a tone curve from No correction, Overexposure, Underexposure, High contrast, Reverse the negative/positive image, and Edit custom curve. No correction (No adjustment) Overexposure (Convex curve) The midtone data of the input side is stretched toward the highlight of the output side, resulting in a bright- toned image when viewed on a monitor.
- Page 154 Edit custom curve You can drag specific points on the Tone Curve to freely adjust the brightness of the corresponding areas.
-
Page 155: Setting Threshold
Setting Threshold You can sharpen text in a document or reduce show-through in newspapers by adjusting the threshold level (Threshold) in ScanGear (scanner driver)'s Advanced Mode tab. Note • This function is available when Color Mode is Black and White. •... -
Page 156: Scangear (Scanner Driver) Screens
ScanGear (Scanner Driver) Screens Basic Mode Tab Advanced Mode Tab Input Settings Output Settings Image Settings Color Adjustment Buttons Preferences Dialog Box Scanner Tab Preview Tab Scan Tab Color Settings Tab... -
Page 157: Basic Mode Tab
Basic Mode Tab This mode allows you to scan easily by following the on-screen steps. This section describes the settings and functions available on the Basic Mode tab. (1) Settings and Operation Buttons (2) Toolbar (3) Preview Area Note • The displayed items vary by document type and view. (1) Settings and Operation Buttons Select Source Photo (Color) - Page 158 Note • When using the machine for the first time, scanner calibration starts automatically. Wait a while until the preview image appears. Destination Select what you want to do with the scanned image. Print Select this to print the scanned image on a printer. Image display Select this to view the scanned image on a monitor.
- Page 159 Paper Size (L, A4, etc.) Select an output paper size. The portion within the cropping frame will be scanned at the size of the selected paper size. You can drag the cropping frame to enlarge/reduce it while maintaining the aspect ratio. Monitor Size (1024 x 768 pixels, etc.) Select an output size in pixels.
- Page 160 Adjust cropping frames You can adjust the scan area within the Preview area. If an area is not specified, the document will be scanned at the document size (Auto Crop). If an area is specified, only the portion in the cropping frame will be scanned. Adjusting Cropping Frames (ScanGear) Image corrections Allows you to apply corrections to images.
- Page 161 Close Closes ScanGear (scanner driver). (2) Toolbar You can adjust or rotate preview images. The buttons displayed on the Toolbar vary by view. In thumbnail view: In whole image view: (Thumbnail) / (Whole Image) Switches the view in the Preview area. (3) Preview Area (Rotate Left) Rotates the preview image 90 degrees counter-clockwise.
- Page 162 (Select All Cropping Frames) Available when two or more cropping frames are specified. Turns the cropping frames into thick broken lines and applies the settings to all of them. (Remove Cropping Frame) Removes the selected cropping frame. (Information) Displays the version of ScanGear and the current scan settings (document type, etc.). (Open Guide) Opens this page.
- Page 163 When (Whole Image) is displayed on the Toolbar: Items on the Platen are scanned and displayed as a single image. All portions in the cropping frames will be scanned. Note • You can specify the cropping frame on the displayed image. In thumbnail view, you can only create one cropping frame per image.
-
Page 164: Advanced Mode Tab
Advanced Mode Tab This mode allows you to make advanced scan settings such as the color mode, output resolution, image brightness, and color tone. This section describes the settings and functions available on the Advanced Mode tab. (1) Settings and Operation Buttons (2) Toolbar (3) Preview Area Note... - Page 165 When you click Save, the item appears in the Favorite Settings list and can be selected, along with the predefined items. To delete an item, select it in Favorite Settings List and click Delete. Click Save to save the settings displayed in Favorite Settings List.
- Page 166 Scan Starts scanning. Note • When scanning starts, the progress will be displayed. Click Cancel to cancel the scan. • When scanning is completed, a dialog box prompting you to select the next action may appear. Follow the prompt to complete. For details, refer to Status of ScanGear dialog after scanning Scan Tab (Preferences dialog box).
- Page 167 (3) Preview Area (Clear) Deletes the preview image from the Preview area. It also resets the Toolbar and color adjustment settings. (Crop) Allows you to specify the scan area by dragging the mouse. (Move Image) Allows you to drag the image until the part you want to see is displayed when an image enlarged in the Preview area does not fit in the screen.
- Page 168 (Remove Cropping Frame) Removes the selected cropping frame. (Information) Displays the version of ScanGear and the current scan settings (document type, etc.). (Open Guide) Opens this page. (3) Preview Area This is where a trial image appears after you click Preview. You can also check the results of the settings (image corrections, color adjustments, etc.) made in "(1) Settings and Operation Buttons."...
- Page 169 Note • You can specify the cropping frame on the displayed image. In thumbnail view, you can only create one cropping frame per image. In whole image view, you can create multiple cropping frames. Adjusting Cropping Frames (ScanGear) Related Topic Scanning in Advanced Mode...
-
Page 170: Input Settings
Input Settings Input Settings allows you to set the following items: Select Source The type of document to be scanned is displayed. Paper Size Select the size of the document to be scanned. This setting is available in whole image view only. When you select a size, the Preview area size changes accordingly. - Page 171 Grayscale Select this mode to scan black and white photos or to create black and white images. This mode renders the image in 256 levels (8 bit) of black and white. Black and White Select this mode to scan photos and documents in black and white. This mode renders the image in black and white.
-
Page 172: Output Settings
Output Settings Output Settings allows you to set the following items: Output Resolution Select the resolution to scan at. The higher the resolution (value), the more detail in your image. Select a resolution from the options displayed by clicking the button, or enter a value within the range of 25 dpi to 19200 dpi (in 1 dpi increments). - Page 173 % depends on the Output Resolution, it can be specified for up to 19200 dpi (the maximum available output resolution). Paper Size (L, A4, etc.) & Monitor Size (1024 x 768 pixels, etc.) (Width), (Height), and scale cannot be specified. The preview image will be cropped according to the selected output size and resolution.
- Page 174 Click this button to rotate the cropping frame. Click again to return it to the original orientation. Data Size The data size when scanned with the current settings is displayed. Note • When the data size exceeds a certain size, the value appears in red. In that case, a warning message appears when you click Scan.
-
Page 175: Image Settings
Image Settings Important • Do not apply these functions to images without moire, dust/scratches, or faded colors. The color tone may be adversely affected. • Image correction results may not be reflected in the preview image. Note • Selectable settings depend on Color Mode settings. •... - Page 176 Important • You can set Image Adjustment after preview. • You can set this setting when Recommended is selected on the Color Settings tab of the Preferences dialog box. Note • If the image is not adjusted properly with Auto, specify the document type. •...
- Page 177 Select this to reduce small dust particles and scratches. Large ones may remain. Medium It is recommended that you normally select this setting. High Select this to reduce large dust particles and scratches; however, evidence of the reduction process may remain or delicate parts of the image may be removed. Important •...
- Page 178 Gutter Shadow Correction Use this function to correct shadows that appear between pages when scanning open booklets. When you set the Gutter Shadow Correction setting in the preview image, the result will be reflected. Preview the effects before scanning, as results vary depending on the type of document and how it is pressed.
- Page 179 • If the shadow is not corrected properly, adjust the cropping frame (scan area) on the preview image. Adjusting Cropping Frames (ScanGear)
-
Page 180: Color Adjustment Buttons
Color Adjustment Buttons The Color Adjustment Buttons allow you to make fine corrections to the image brightness and color tones including adjustments to the image's overall brightness or contrast and adjustments to its highlight and shadow values (histogram) or balance (tone curve). Important •... - Page 181 (Histogram) A histogram allows you to see the data concentration at each brightness level of an image. You can specify the brightest level (highlight) and darkest level (shadow) within an image, cut the levels and expand the middle of the tonal range of the image. Adjusting Histogram (Tone Curve Settings) Adjust the brightness of an image by selecting the type of graph (tone curve) showing the balance of...
- Page 182 Enter Setting Name and click Add; the name appears in Tone Curve Settings List or Threshold Settings List. Click Save to save. To delete an item, select it in Tone Curve Settings List or Threshold Settings List and click Delete. Click Save to save the settings displayed in Tone Curve Settings List or Threshold Settings List.
-
Page 183: Preferences Dialog Box
Preferences Dialog Box In the Preferences dialog box, you can make advanced settings to ScanGear (scanner driver) functions via the Scanner, Preview, Scan, and Color Settings tabs. Click Preferences... in the ScanGear screen to open the Preferences dialog box. Scanner Tab Allows you to set the quiet mode, specify the folder in which to save images temporarily, and set the music file to play during or at the end of a scan. -
Page 184: Scanner Tab
Scanner Tab On the Scanner tab, you can specify the following settings. Select Folder Where Temporary Files are Saved Displays the folder in which to save images temporarily. To change the folder, click Browse... to specify another one. Sound Settings You can set the machine to play music during/at the end of a scan. - Page 185 Test Scanner... Opens the Scanner Diagnostics dialog box from which you can run the scanner performance test. Click Start to start the diagnostics.
-
Page 186: Preview Tab
Preview Tab On the Preview tab, you can specify the following settings. Preview at Start of ScanGear Select what to do with Preview when ScanGear (scanner driver) is started. Automatically Execute Preview ScanGear will automatically start previewing at startup. Display Saved Preview Image The previously previewed image will be displayed. - Page 187 Larger Displays 105 % (in width and height) of the area displayed for the standard size. Standard The standard size. Smaller Displays 95 % (in width and height) of the area displayed for the standard size. Note • When you change the Cropping Size for Thumbnail View setting, the preview images will be refreshed and cropped to the new size.
-
Page 188: Scan Tab
Scan Tab On the Scan tab, you can specify the following settings. Status of ScanGear dialog after scanning Select what to do with ScanGear (scanner driver) after scanning images. Close ScanGear automatically Select this to return to the original application when scanning is completed. Do not close ScanGear automatically Select this to return to the ScanGear screen for another scan when scanning is completed. - Page 189 Note • When Color(48bit) is selected for Color Mode, deselecting this checkbox changes Color(48bit) to Color. • When using a model supporting 16 bit output, Grayscale(16bit) appears in Color Mode.
-
Page 190: Color Settings Tab
Color Settings Tab On the Color Settings tab, you can specify the following settings. Color Adjustment Select one of the following. Recommended Select this to vividly reproduce the tone of a document on the screen. It is recommended that you normally select this setting. - Page 191 • Color Matching is available when ScanGear, monitor, color management-compliant application (such as Adobe Photoshop), and printer are set up correctly. Refer to the corresponding manual for the monitor, printer, and application settings. Monitor Gamma By setting the gamma value of a monitor, you can adjust the input data to the brightness characteristics of the monitor.
-
Page 192: Placing Items (When Scanning From A Computer)
Placing Items (When Scanning from a Computer) Learn how to place items on the platen of your scanner. Place items correctly according to the type of item to be scanned. Otherwise, items may not be scanned correctly. Important • Do not place objects that weigh 4.4 lbs (2.0 kg) or more on the platen. Also, do not press on the item with a force exceeding 4.4 lbs (2.0 kg). - Page 193 Important Important • Large items (such as A4 size photos) that cannot be • Refer to "Items You Can Place & How to Place placed away from the edges/arrow (alignment mark) Items" for your model from Home of the Online of the platen may be saved as PDF files.
-
Page 194: Adjusting Cropping Frames (Scangear)
Adjusting Cropping Frames (ScanGear) "Cropping" is the act of selecting the area you want to keep in an image and discarding the rest when scanning it. On the Basic Mode tab and Advanced Mode tab, you can specify cropping frames (scan areas) on the image(s) displayed in the Preview area of the screen. - Page 195 In whole image view: Represents an unselected cropping frame. The settings on the Basic Mode tab or Advanced Mode tab will not be applied. Adjusting a Cropping Frame The cursor will change into (Arrow) when it is positioned over a cropping frame. If you click and drag the mouse in the direction of the arrow, the cropping frame will expand or contract accordingly.
- Page 196 In whole image view: Click and drag the mouse in a space outside the existing cropping frame to create a new cropping frame in the Preview area. The new cropping frame will be the active cropping frame, and the old cropping frame will be the unselected cropping frame.
- Page 197 In whole image view: To delete a cropping frame, select it and click (Remove Cropping Frame) on the Toolbar. Alternatively, press the Delete key. When there are multiple cropping frames, all the selected cropping frames (active cropping frame and selected cropping frames) are deleted simultaneously.
-
Page 198: General Notes (Scanner Driver)
General Notes (Scanner Driver) ScanGear (scanner driver) is subject to the following restrictions. Keep these points in mind when using it. Scanner Driver Restrictions • When using the NTFS file system, the TWAIN data source may not be invoked. This is because the TWAIN module cannot be written to the winnt folder for security reasons. -
Page 199: Updating The Scangear (Scanner Driver)
Updating the ScanGear (Scanner Driver) Obtaining the Latest ScanGear (Scanner Driver) Deleting the Unnecessary ScanGear (Scanner Driver) Before Installing the ScanGear (Scanner Driver) Installing the ScanGear (Scanner Driver) -
Page 200: Obtaining The Latest Scangear (Scanner Driver)
Obtaining the Latest ScanGear (Scanner Driver) Upgrading your current ScanGear (scanner driver) to the latest ScanGear may solve some problems you have experienced. Checking the Version of ScanGear Start ScanGear and click (Information) to display the version of ScanGear. Obtaining ScanGear To obtain ScanGear, access our website and download the ScanGear for your model. -
Page 201: Deleting The Unnecessary Scangear (Scanner Driver)
Deleting the Unnecessary ScanGear (Scanner Driver) You can delete the ScanGear (scanner driver) you no longer use. When deleting ScanGear, close all running applications and remove the USB cable connecting the machine and computer. Windows 8.1 / Windows 8: 1. From the Settings charm, select Control Panel > Programs > Programs and Features. 2. - Page 202 4. When a confirmation appears, click Yes. 5. When uninstallation is complete, click Complete. ScanGear is deleted.
-
Page 203: Before Installing The Scangear (Scanner Driver)
Before Installing the ScanGear (Scanner Driver) Check the following points before installing ScanGear (scanner driver). Check these also when you cannot install ScanGear. Machine Status • If the machine and computer are connected with a USB cable, disconnect the USB cable from the computer. -
Page 204: Installing The Scangear (Scanner Driver)
Installing the ScanGear (Scanner Driver) Access our website via the Internet to download the latest ScanGear (scanner driver). Follow these steps to install the downloaded ScanGear. 1. Double-click the icon of the downloaded file. The installation program starts. Note • In Windows 8.1, Windows 8, Windows 7, or Windows Vista a confirmation/warning dialog box may appear when installing, uninstalling, or starting up software. -
Page 205: Useful Information On Scanning
Useful Information on Scanning Adjusting Cropping Frames in the Image Stitch Window Resolution Data Formats Color Matching... -
Page 206: Adjusting Cropping Frames In The Image Stitch Window
Adjusting Cropping Frames in the Image Stitch Window "Cropping" is the act of selecting the area you want to keep in an image and discarding the rest when scanning it. In the Image Stitch window, you can specify a cropping frame on the image displayed in the Preview area. Note •... -
Page 207: Resolution
Resolution The data in the image you have scanned is a collection of dots carrying information about brightness and color. The density of these dots is called "resolution", and resolution will determine the amount of detail your image contains. The unit of resolution is dots per inch (dpi). Dpi is the number of dots per inch (2.5 cm). The higher the resolution (value), the more detail in your image;... - Page 208 Important • If you double the resolution, the data size of the scanned image quadruples. If the file is too large, the processing speed will slow down significantly, and you will experience inconvenience such as lack of memory. Set the minimum required resolution according to the use of the image. Note •...
-
Page 209: Data Formats
Data Formats You can select a data format when saving scanned images. You should specify the most suitable data format according to how you want to use the image on which application. Available data formats vary by application and operating system (Windows or Mac OS). See below for the characteristics of each image data format. -
Page 210: Color Matching
Color Matching "Color Matching" is the act of making adjustments so that the color tones match between the original item, the monitor display, and the color printout. On your scanner or printer, the color tones are adjusted as shown below. Example: When sRGB is selected as the output profile (target): The image's color space is converted from the scanner's color space to sRGB by ScanGear. -
Page 211: Other Scanning Methods
Other Scanning Methods Scanning with WIA Driver Scanning Using the Control Panel (Windows XP Only) -
Page 212: Scanning With Wia Driver
Scanning with WIA Driver You can scan an item from a WIA (Windows Image Acquisition)-compliant application. WIA is a driver model implemented in Windows XP or later. It allows you to scan items without using an application. The procedure varies depending on the application. The following procedures are examples only. Refer to the application's manual for details. - Page 213 Preview or scan images as separate files Select this checkbox to preview or scan multiple images as separate files. 4. Click Preview to preview the image. The preview image appears on the right. 5. Click Scan. When scanning is completed, the scanned image appears in the application. Scanning with WIA Driver 1.0 The following is an example of scanning using "Paint."...
- Page 214 6. Click Scan. When scanning is completed, the scanned image appears in the application.
-
Page 215: Scanning Using The Control Panel (Windows Xp Only)
Scanning Using the Control Panel (Windows XP Only) You can scan images via the Control Panel of Windows XP using the WIA driver. 1. From the Start menu, select Control Panel. 2. Click Printers and Other Hardware > Scanners and Cameras, then double-click CanoScan XXX (where "XXX"... - Page 216 Contrast Move the slider to adjust the contrast. Moving it to the left will decrease the contrast of the image, thus softening the image. Moving it to the right will increase the contrast of the image, thus sharpening the image. You can also enter a value (-127 to 127). Resolution (DPI) Enter the resolution.
-
Page 217: Placing Items (When Scanning From A Computer)
Placing Items (When Scanning from a Computer) Learn how to place items on the platen of your scanner. Place items correctly according to the type of item to be scanned. Otherwise, items may not be scanned correctly. Important • Do not place objects that weigh 4.4 lbs (2.0 kg) or more on the platen. Also, do not press on the item with a force exceeding 4.4 lbs (2.0 kg). - Page 218 Important Important • Large items (such as A4 size photos) that cannot be • Refer to "Items You Can Place & How to Place placed away from the edges/arrow (alignment mark) of Items" for details on the portions in which items the platen may be saved as PDF files.
-
Page 219: Scanning Using The Scanner Buttons
Scanning Using the Scanner Buttons What Are Scanner Buttons? Scanning Items and Saving the Scanned Images (AUTO SCAN Button) Scanning and Saving Items as PDF Files (PDF Buttons) Scanning and Printing/Copying Items (COPY Button) Scanning Items and Sending the Scanned Images (SEND Button) Scanner Button Settings Scanner Button Settings via IJ Scan Utility... -
Page 220: What Are Scanner Buttons
What Are Scanner Buttons? The five buttons on the scanner are referred to as scanner buttons. You can create PDF files, print items, send images, etc. by simply placing the item on the platen and pressing a scanner button. Important •... -
Page 221: Scanning And Saving Items As Pdf Files (Pdf Buttons)
Scanning and Saving Items as PDF Files (PDF Buttons) You can save scanned images as PDF files. 1. Place the item on the platen. Placing Items (When Scanning from a Computer) 2. Press (SCAN START button). Descriptions of the PDF buttons on the scanner appear. 3. -
Page 222: Scanning Items And Saving The Scanned Images (Auto Scan Button)
Scanning Items and Saving the Scanned Images (AUTO SCAN Button) You can scan items by automatically detecting the item type and save them to a computer. 1. Place the item on the platen. Placing Items (When Scanning from a Computer) 2. -
Page 223: Scanning And Printing/Copying Items (Copy Button)
Scanning and Printing/Copying Items (COPY Button) You can scan items and print them on a printer. Note • Prepare the printer when printing with the COPY button. Refer to the manual of your printer to prepare 1. Place the item on the platen. Placing Items (When Scanning from a Computer) 2. -
Page 224: Scanning Items And Sending The Scanned Images (Send Button)
Scanning Items and Sending the Scanned Images (SEND Button) You can attach scanned images to an e-mail, or send the images to compatible applications. 1. Place the item on the platen. Placing Items (When Scanning from a Computer) 2. Press the SEND button. Scanning starts. -
Page 225: Scanner Button Settings
3. In the User Account Control dialog box, click Yes. 4. In Actions on the Events tab, set IJ Scan Utility as the application to start. Set Canon IJ Scan Utility for all events in Select an event. If IJ Scan Utility is already set, click Cancel to end. - Page 226 Events tab. 5. In Actions on the Events tab, set IJ Scan Utility as the application to start. Set Canon IJ Scan Utility for all events in Select an event. If IJ Scan Utility is already set, click Cancel to end.
-
Page 227: Scanner Button Settings Via Ij Scan Utility
Scanner Button Settings via IJ Scan Utility IJ Scan Utility allows you to specify how to respond when scanning using the scanner buttons. Note • The screens for specifying the AUTO SCAN button responses are used as examples in the following descriptions. - Page 228 Settings (AUTO SCAN) Dialog Box Settings (PDF) Dialog Box Settings (COPY) Dialog Box Settings (SEND) Dialog Box 4. Set Scan Options. 5. Specify the file name and other settings in Save Settings.
- Page 229 6. Select the application you want to start after scanning in Application Settings. 7. Click OK. The responses will be executed according to the specified settings when you start scanning using the scanner buttons.
-
Page 230: Troubleshooting
Troubleshooting Search Each Function Problems with Scanning Problems with Installation/Downloading... -
Page 231: Problems With Scanning
Problems with Scanning Problems with Scanning Scan Results Not Satisfactory Software Problems... -
Page 232: Problems With Scanning
Problems with Scanning Error Message "Release the lock switch..." Is Displayed Scanner Does Not Work ScanGear (Scanner Driver) Does Not Start Error Message Appears and the ScanGear (Scanner Driver) Screen Does Not Appear Scanner Buttons Do Not Work "Select the program to launch for this action" Is Displayed When a Scanner Button Is Pressed When a Scanner Button Is Pressed, an Unexpected Application Starts Cannot Scan Multiple Items at One Time... -
Page 233: Error Message "Release The Lock Switch
Error Message "Release the lock switch..." Is Displayed The scanner may be locked. Check Exit the application, then unlock the scanner, and then reconnect the USB cable. Refer to the printed manual: Getting Started for how to unlock the scanner. -
Page 234: Scanner Does Not Work
Scanner Does Not Work Connect the USB cable to a different USB port on the computer. Check 1 If the USB cable is connected to a USB hub, remove it from the USB hub and Check 2 connect it to a USB port on the computer. Restart the computer. -
Page 235: Scangear (Scanner Driver) Does Not Start
ScanGear (Scanner Driver) Does Not Start Make sure that ScanGear (scanner driver) is installed. Check 1 If not installed, install ScanGear from the Setup CD-ROM or the web page. Select your scanner on the application's menu. Check 2 Important • If your scanner name is displayed multiple times, select the one that does not include WIA. Note •... -
Page 236: Error Message Appears And The Scangear (Scanner Driver) Screen Does Not Appear
Error Message Appears and the ScanGear (Scanner Driver) Screen Does Not Appear Connect the USB cable to a different USB port on the computer. Check 1 If the USB cable is connected to a USB hub, remove it from the USB hub and Check 2 connect it to a USB port on the computer. -
Page 237: Scanner Buttons Do Not Work
The IJ Scan Utility screen may be hidden behind other windows. Check 5 Click Canon IJ Scan Utility on the taskbar to bring the IJ Scan Utility screen to the front. Applications may not be assigned to the scanner buttons. -
Page 238: Select The Program To Launch For This Action" Is Displayed When A Scanner Button Is Pressed
"Select the program to launch for this action" Is Displayed When a Scanner Button Is Pressed If IJ Scan Utility is not installed, install ScanGear (scanner driver) from the Check 1 Setup CD-ROM or the web page. Set to start IJ Scan Utility when a scanner button is pressed. Check 2 Scanner Button Settings... -
Page 239: When A Scanner Button Is Pressed, An Unexpected Application Starts
When a Scanner Button Is Pressed, an Unexpected Application Starts Change the IJ Scan Utility settings. Check Applications that correspond with the scanner buttons are managed by IJ Scan Utility. To change the assigned applications, click Settings... in the IJ Scan Utility main screen and change Application Settings on the (Scanning Using the Scanner Buttons) tab of the Settings dialog box. -
Page 240: Cannot Scan Multiple Items At One Time
Cannot Scan Multiple Items at One Time Make sure that the items are placed correctly. Check 1 Placing Items (When Scanning from a Computer) Check if you can properly scan one item. Check 2 Some applications do not support multiple image scanning. In that case, scan each item individually. -
Page 241: Cannot Scan Properly With Auto Scan
Cannot Scan Properly with Auto Scan Make sure that the items are placed correctly. Check 1 Placing Items (When Scanning from a Computer) Multiple items scanning may not be supported. Check 2 Some applications do not support multiple image scanning. In that case, scan each item individually. -
Page 242: Slow Scanning Speed
Slow Scanning Speed To view the image on a monitor, set the output resolution to around 150 dpi. To Check 1 print, set it to around 300 dpi. Resolution Set Fading Correction, Grain Correction, etc. to None. Check 2 Refer to "Image Settings" for your model from Home of the Online Manual for details. In IJ Scan Utility, deselect the Correct slanted text document / Detect the Check 3 orientation of text document and rotate image checkbox and scan again. -
Page 243: There Is Not Enough Memory." Message Is Displayed
"There is not enough memory." Message Is Displayed Exit other applications and try again. Check 1 Reduce the resolution or output size and scan again. Check 2 Resolution... -
Page 244: Computer Stops Operating During Scanning
Computer Stops Operating during Scanning Restart the computer, reduce the output resolution in ScanGear (scanner Check 1 driver) and scan again. Refer to "Output Settings" for your model from Home of the Online Manual for details. Delete unnecessary files to obtain sufficient free hard disk space, then scan Check 2 again. -
Page 245: Scanner Does Not Work After Upgrading Windows
If you are logged on to an administrator account, follow the on-screen instructions. • Windows XP: 1. From the Start menu, select Control Panel > Add or Remove Programs. 2. Select Canon IJ Scan Utility, then click Change/Remove. 3. When a confirmation appears, click Yes. 4. When uninstallation is complete, click OK. -
Page 246: Scanned Image Does Not Open
Scanned Image Does Not Open If the data format is not supported by the application, scan the image again and Check select a popular data format such as JPEG when saving it. Refer to the application's manual for details. If you have any questions, contact the manufacturer of the application. -
Page 247: Buttons
Position or Size of the Image Cannot be Detected Correctly When Scanning Using the Scanner Buttons Make sure that the items are placed correctly. Check 1 Placing Items (When Scanning from a Computer) Check that the settings match the item to be scanned. Check 2 If you cannot scan properly using the AUTO SCAN button, specify the item type in IJ Scan Utility and scan again. -
Page 248: Scan Results Not Satisfactory
Scan Results Not Satisfactory Scan Quality (Image Displayed on the Monitor) Is Poor Scanned Image Is Surrounded by Extra White Areas Cannot Scan at the Correct Size Item Is Placed Correctly, but the Scanned Image Is Slanted Scanned Image Is Enlarged (Reduced) on the Computer Monitor... -
Page 249: Scan Quality (Image Displayed On The Monitor) Is Poor
Scan Quality (Image Displayed on the Monitor) Is Poor Increase the scanning resolution if the image is jagged. Check 1 Resolution Set the display size to 100 %. Check 2 Some applications do not display images clearly if the display size is too small. Update the calibration data. - Page 250 If the color tone of images is different from the original document, take the Check 8 following measures and scan again. • On the Advanced Mode tab of ScanGear, set Image Adjustment in Image Settings to None. Refer to "Image Settings" for your model from Home of the Online Manual for details. •...
-
Page 251: Scanned Image Is Surrounded By Extra White Areas
Scanned Image Is Surrounded by Extra White Areas Specify the scan area. Check Click (Auto Crop) in whole image view of ScanGear (scanner driver) to automatically display the cropping frame (scan area) according to the item size. You can also manually specify the scan area in thumbnail view or when there are white margins along the item (for example, in photos), or when you want to create custom cropping frames. -
Page 252: Cannot Scan At The Correct Size
Cannot Scan at the Correct Size Make sure that the items are placed correctly. Check Placing Items (When Scanning from a Computer) -
Page 253: Item Is Placed Correctly, But The Scanned Image Is Slanted
Item Is Placed Correctly, but the Scanned Image Is Slanted When Document or Magazine is selected for Select Source, deselect the Check Correct slanted text document checkbox and scan the item again. Settings (Document Scan) Dialog Box Settings (Custom Scan) Dialog Box Settings (PDF) Dialog Box Settings (SEND) Dialog Box... -
Page 254: Scanned Image Is Enlarged (Reduced) On The Computer Monitor
Scanned Image Is Enlarged (Reduced) on the Computer Monitor Change the display setting in the application. Check 1 Refer to the application's manual for details. If you have any questions, contact the manufacturer of the application. Note • You cannot reduce the image size in Paint. To reduce the display size, open the images in an application. Change the resolution setting in ScanGear (scanner driver) and scan again. -
Page 255: Software Problems
Software Problems The E-mail Client You Want to Use Does Not Appear in the Screen for Selecting an E-mail Client... -
Page 256: The E-Mail Client You Want To Use Does Not Appear In The Screen For Selecting An E-Mail Client
The E-mail Client You Want to Use Does Not Appear in the Screen for Selecting an E-mail Client Check that the e-mail client's MAPI is enabled. Check Refer to the e-mail client's manual for how to set MAPI. If the problem is not solved even when MAPI is enabled, select None (Attach Manually) in the screen for selecting an e-mail client, then manually attach the image to the outgoing e-mail. -
Page 257: Problems With Installation/Downloading
Problems with Installation/Downloading Cannot Install the MP Drivers The Found New Hardware Screen Appears When the Scanner Is Connected to a Computer Installation Is Unsuccessful (Insufficient Free Hard Disk Space) Installation Is Unsuccessful (Insufficient Memory) About Inkjet Printer/Scanner/Fax Extended Survey Program... -
Page 258: Cannot Install Scangear (Scanner Driver)
Cannot Install ScanGear (Scanner Driver) If the installation does not start even after the Setup CD-ROM is inserted into your computer's disc drive: Start the installation following the procedure below. 1. Follow the procedures as shown below. • In Windows 8.1 or Windows 8, select the Explorer icon in taskbar on Desktop, then select Computer from the list on the left. - Page 259 Note • The scanner is not detected. Check the connection. may be displayed depending on the computer you use. Make sure that the USB cable is securely connected to the machine and the Check 1 computer. Disconnect the USB cable from the machine and the computer, then connect Check 2 it again.
-
Page 260: The Found New Hardware Screen Appears When The Scanner Is Connected To A Computer
The Found New Hardware Screen Appears When the Scanner Is Connected to a Computer The scanner may have been connected before installing the applications from Check the Setup CD-ROM or the web page. Disconnect the USB cable from the computer, then click Cancel in the Found New Hardware (Windows XP: Found New Hardware Wizard) screen to close it. -
Page 261: Installation Is Unsuccessful (Insufficient Free Hard Disk Space)
Installation Is Unsuccessful (Insufficient Free Hard Disk Space) Delete unnecessary files to obtain sufficient free hard disk space, then try again. Check • From the Start menu, select All Programs > Accessories > System Tools > Disk Cleanup to delete unnecessary files in the hard disk drive (C:). -
Page 262: Installation Is Unsuccessful (Insufficient Memory)
Installation Is Unsuccessful (Insufficient Memory) Exit other applications or restart the computer and try again. Check... -
Page 263: About Inkjet Printer/Scanner/Fax Extended Survey Program
About Inkjet Printer/Scanner/Fax Extended Survey Program If you installed the Inkjet Printer/Scanner/Fax Extended Survey Program upon installing software from the Setup CD-ROM or the web page, a confirmation screen for sending the usage status of the scanner and applications appears every month for approximately 10 years. Read the descriptions in the displayed screen and select one of the options below. - Page 264 Windows 8.1/Windows 8: 1. Click the Settings charm > Control Panel > Programs > Programs and Features. 2. Double-click the Canon Inkjet Printer/Scanner/Fax Extended Survey Program. 3. When a confirmation appears, click Yes. 4. When uninstallation is complete, click OK.
Need help?
Do you have a question about the LiDE 220 and is the answer not in the manual?
Questions and answers