Table of Contents
Advertisement
1. INTRODUCTION --------------------------------------------------------------------------- 3 - 6
2. CONNECTIONS ----------------------------------------------------------------------------- 7 - 8
3. MAKING A SOUND ----------------------------------------------------------------------- 9 - 11
4. EDITING --------------------------------------------------------------------------------------- 12 - 34
5. BASIC USER SETUPS --------------------------------------------------------------------- 35 - 39
Table of Contents
Volume Knob
Get the Pads to Play with the Velocity Response You Want
Get the Pads to Play with the Gate Time You Want
Advertisement
Table of Contents

Related Manuals for Alternate Mode malletKAT PRO With Sounds

Summary of Contents for Alternate Mode malletKAT PRO With Sounds
-
Page 1: Table Of Contents
Table of Contents 1. INTRODUCTION --------------------------------------------------------------------------- 3 - 6 About This Manual Unpacking Registration Card Mounting Cases Optional Accessories and Other KAT Products Product Overview 2. CONNECTIONS ----------------------------------------------------------------------------- 7 - 8 Power Headphone Out Volume Knob Breath Control Input Audio Outs Audio Inputs Footswitch Inputs FootControl Inputs... - Page 2 6. ADVANCED USER SETUPS ----------------------------------------------------------- 40 - 44 Layer Modes Hang Layer (Double) Split Pressure Modes Normal Dampen Aftertouch Other Tricks External Sound Sources Program Change Banks FootControl and Breath Control 7. MIDI PRIMER -------------------------------------------------------------------------------- 45 - 48 Connections Signals Concepts &...
-
Page 3: Introduction
1. Introduction. Welcome to the malletKAT PRO With Sounds. Plug in your AC Adaptor, your headphones and play. Freedom at last! It’s quick, it’s simple, it’s convenient, and it sounds great! Congratulations on your purchase! You have purchased a product that has grown and expanded over the 9 years since it was introduced. -
Page 4: Unpacking
1. Introduction UNPACKING: When you unpack your malletKAT PRO With Sounds, you should find the following: 1 3-octave malletKAT PRO With Sounds 1 manual 1 locking 1.2A AC Adaptor 2 KF1 footswitches REGISTRATION CARD: You should find a registration card enclosed in your manual. Please fill it out and send it in so we can keep track of you for product updates, new product information, and the KATtales Newsletter. -
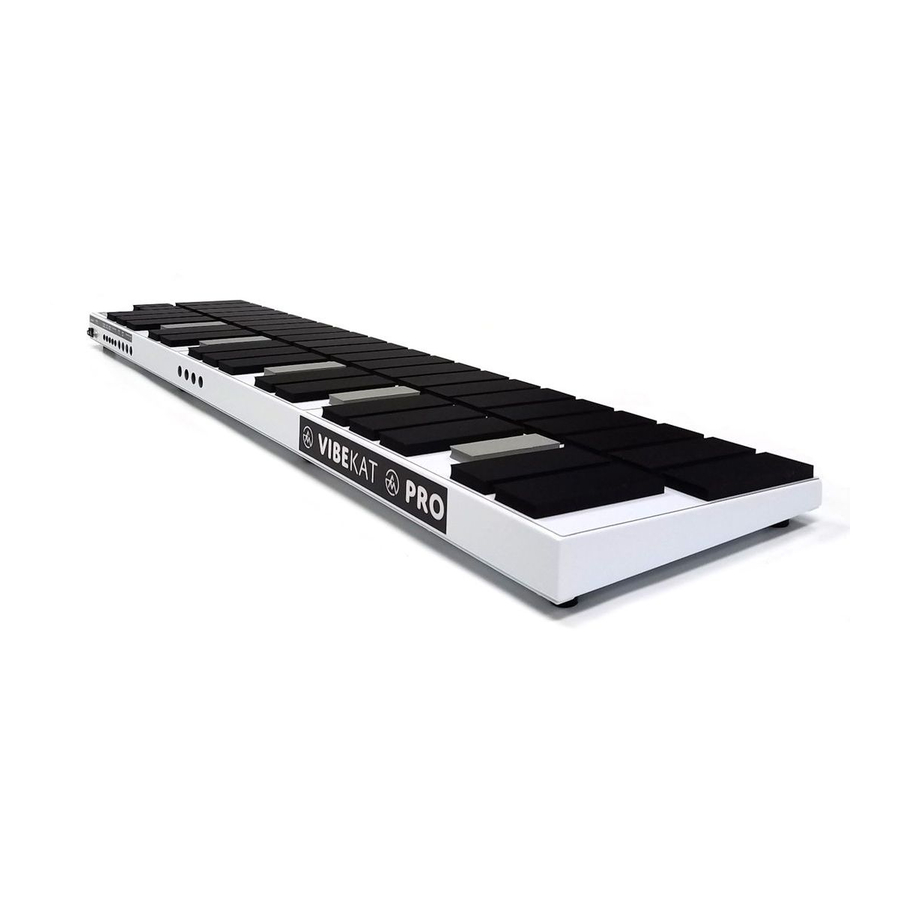
Page 5: Product Overview
CD ROMS - Vintage, Ditto Disks, KATkits Software Products (drumTUTOR, trapTUTOR) PRODUCT OVERVIEW: The malletKAT PRO With Sounds is a velocity sensitive MIDI controller with a layout that is comfortable for mallet players. The playing surface responds to a wide dynamic range and is very comfortable to play on. - Page 6 The built-in sound card gives you a new convenience you will appreciate. Pack up your mallet case and you are complete! The malletKAT PRO With Sounds was conceived to answer the mallet player's need for a transportable, responsive, and powerful means to enter the exciting world of electronic percussion.
-
Page 7: Connections
POWER ( back The malletKAT PRO With Sounds comes supplied with an external AC Adaptor with a locking plug on one end and a separate AC cord on the other end (takes up only one outlet of a power strip). -
Page 8: Footcontrol Inputs
If you are not using KAT footswitches, plug in the footswitch before turning on the malletKAT PRO With Sounds. The malletKAT will read the type of footswitch you are using on power-up and automatically adjust for the type you have. -
Page 9: Making A Sound
• Turn on the power to your malletKAT PRO With Sounds. • Plug in headphones. • Play! If your malletKAT PRO With Sounds does not play properly, see the helpful suggestions in the Appendix p.49-50 or call us at 413-594- 7466, we’ll be glad to help you get started. -
Page 10: Play Mode Display
“setup” of the malletKAT PRO With Sounds. There are 128 Factory Setups & 128 User Setups in the malletKAT PRO With Sounds. The “F” or “U” at the beginning of the top line tells you whether Factory or User Setups are selected. - Page 11 3. Making A Sound The last entry on the first line is the Pressure Mode being used on the keyboard in this Setup by both Controllers. This setting can be either NORMAL, DAMPEN, or AFTERTOUCH. When DAMPEN is selected, mallet dampening gestures will deaden notes you wish to “dampen.”...
-
Page 12: Editing
GENERAL EDITING CONCEPTS: The malletKAT PRO With Sounds has no buttons or knobs for changing settings (other than the Volume buttons). All changes in the malletKAT PRO’s settings are done with the Playing Pads. That is why the Pads have names like Setup, Octave, and Channel, etc. -
Page 13: User Setups
1. Depress the EDIT footswitch. The Screen will look like: (001-128) Setup 001 Edit Controller1 2. Hit “Factory/User Setups” (the “F” of the lowest octave of your 3-octave malletKAT PRO With Sounds) (in the malletKAT PRO without sounds this pad was “Mono Type”): FACTORY SETUPS Have Been Selected 3. - Page 14 4. Editing EXAMPLE 1: Lower the “Octave” setting for Controller 1. 1. Depress the EDIT footswitch. The Screen will look like: (001-128) Setup 001 Edit Controller1 2. Hit “1” to select Controller 1 (if not already selected): Setup 001 (1 or 2) Edit Controller1 3.
- Page 15 4. Editing EXAMPLE 2: Select Setup 47. 1. Depress the EDIT footswitch. The Screen will look like: (001-128) Setup 001 Edit Controller1 2. Hit Setup (the C on the highest octave) to select the setting we want to change: (001-128) Setup 001 (1 or 2) Edit Controller1...
- Page 16 4. Editing EXAMPLE 3: Select Controller 1, Setup 5, Increment the Octave, put in the Default value for Minimum Velocity, and set the Maximum Velocity at 127. Depress EDIT footswitch. Enter EDIT MODE Hit #1 (for Controller 1) Controller 1 selected Hit Setup.
-
Page 17: Editing Tips
4. Editing EDITING TIPS: • All changes you make to your User Setups are saved immediately when you change them. You do not need to do any specific action to “save” your changes - it happens automatically. • To recover from unwanted changes, simply hit “Cancel” (A# on the highest octave). - Page 18 4. Editing To put your Channel back to the Channel you want (and put Default setting to the Channel you want) do steps 1 to 9 above again, except at step 4 put in the Channel number you want to use. Now you should put in the Defaults for all the values you use.
-
Page 19: Editing Pad Layout
4. Editing EDITING PAD LAYOUT: Default SETUP Cancel Back Frwd Copy SETUP Gate Octave MinVel MaxVel VCurv Volume Prog Highest Octave Hang Split Layer Mono Poly Transpose Channel ‘------Layer Mode------’ Middle Octave AllNotesOff Global Setup Factory Normal Dampening Aftertouch /User ‘-------Pressure Mode------’ Lowest Octave EDITING PAD DESCRIPTIONS:... - Page 20 PRO With Sounds holds down or sustains notes for you. SETUP (1-128) - An entire collection of settings that defines one state of the malletKAT PRO With Sounds. Channel (1-16) - Setting for a Controller to select specific sound sources or instruments in multi-timbral sound sources.
- Page 21 128 User Setups (which can be changed to any settings of your choice) are being used in the malletKAT PRO With Sounds. Indicated by an “F” or a “U” on the beginning of the top line on the display when you are playing.
-
Page 22: Accessing Setup Auxiliary Settings
4. Editing ACCESSING THE SETUP AUXILIARY SETTINGS: The Setup Auxiliary (actually “Kit Auxiliary” on your label!) settings are settings that can be changed per Setup, like Channel, Gate, Octave, etc. There were more settings than pads, so some of the Setup settings had to be collected into a general group. - Page 23 4. Editing There are two types of Aftertouch messages that may be selected. One type is Channel Pressure and will affect all notes playing on the current channel. The other type is Polyphonic Key Pressure and affects only the note that is associated with the pad that is currently being pressed.
- Page 24 4. Editing FOOT CONTROLLER 1 CURVE (screen “10”) The response curve for FootController 1 may be selected from any of the Curves available in the malletKAT PRO. Curve 8 was made specially to be used as the Curve for FootControl. The reverse curves (3 and 5) will provide surprising, but often useful results.
- Page 25 4. Editing BREATH CONTROLLER CHANNEL (screen “21”) The Channel for the effect to be sent on may be selected to be the same as for Controller 1 or any MIDI channel between 1 and 16. REVERB SELECT (screen “22”) The internal sound source has built in digital time-based effects. There are 48 separate effects algorithms.
-
Page 26: Accessing Global Auxiliary Settings
4. Editing ACCESSING THE GLOBAL AUXILIARY SETTINGS: The Global Auxiliary settings are a collection of overall or “global” settings that are used for the instrument as a whole. Some are simply preferences, while others, like “Permanent Memory Protect / Unprotected” and “Data Dumping” you may access frequently. To access the Global Auxiliary Settings for editing, hold down the EDIT footswitch and strike the GLOBAL AUX pad. - Page 27 4. Editing / FORWARD (F1 & F2) pads. The lower the Threshold, the more sensitive the pad (& more likely to false trigger). (To REINITIALIZE your malletKAT PRO Pad sensitivity Thresholds back to safe settings, simply hold the EDIT footswitch and the Sustain 2 footswitch both down, and while they are depressed hold down both the “Backward”...
- Page 28 4. Editing BREATH CONTROLLER TRAINING (screen “10”) The response of the breath controller may be set at this screen by `Training’ the breath controller. Your first step is to adjust the trimpots on the BC2 itself - see p.64. To Train the breath controller, strike any pad one more time and release the Edit footswitch.
- Page 29 4. Editing DAMPEN MODE COUNT (screen “16”) This setting is used to adjust the time between striking a pad and when the pad may be dampened when in DAMPEN MODE. Making this setting greater makes dampening more difficult, lowering it makes dampening easier.
- Page 30 4. Editing The 27 is the Velocity in hex (39 decimal) - so it was a soft hit. The 4636 is a time relative time measurement. Each time step represents .005 seconds. < 90 4A 00 4668 > The 90 says “MIDI Note On Command (9X) on Channel 1 (the 0)”.
- Page 31 MIDI IN be mapped to either the malletKAT PRO With Sounds 128 Setups or to a General MIDI Map of 128 of the Internal Sounds. If you are using your malletKAT PRO With Sounds to produce sounds as a General MIDI sound source, controlled by an extermal controller such as a drumKAT (especially using Textural Drumming kits) or a computer or sequencer, use the General MIDI Map setting.
-
Page 32: Listing Of Internal Sound Programs
4. Editing LISTING OF INTERNAL SOUND PROGRAMS: 1. Piano 1 44. Contra Bass 87. 5th Saw Wave 2. Piano 2 45. Tremolo String 88. Bass and Lead 3. Piano 3 46. Pizzicato String 89. Fantasia 4. Honky-Tonk Piano 47. Harp 90. - Page 33 4. Editing 129. Acoustic Piano 1 172. Echo Pan 215. Bassoon 130. Acoustic Piano 2 173. Doctor Solo 216. Harmonica 131. Acoustic Piano 3 174. School Daze 217. Trumpet 1 132. Elec. Piano 1 175. Bellsinger 218. Trumpet 2 133. Elec. Piano 2 176.
- Page 34 4. Editing 257. no sound 300. Brass Section 1 343. Fast Strings 4 258. Grand Piano 301. Brass Section 2 344. String Layer 259. Bright Piano 302. Synth Brass 345. Stereo Strings 2 260. Rock Piano 1 303. Synth Brass Pad 346.
-
Page 35: Basic User Setups
5. Basic User Setups: What if all you want to do is make a couple of Setups of your own and get playing? This section will point you to other sections to help solve any problems you may be having, then advise you on making basic changes to Setups to make them more useful to you. - Page 36 - it will ensure that you get the most amount of dynamic expression out of your malletKAT PRO With Sounds. GET THE PADS TO PLAY WITH THE GATE TIME YOU WANT: The other basic changes are to your Gate Time.
-
Page 37: Polyphony
5. Basic Setups POLYPHONY: Each of the 2 Controllers can be Monophonic or Polyphonic. You would select Monophonic if you want to play lead lines with sounds that have long sustains. If these sounds are played polyphonically, the sounds will “bleed” together when you play a fast melodic run and not sound right. -
Page 38: Setting Up Your Footcontrol Pedals
5. Basic Setups SETTING UP YOUR FOOTCONTROL PEDALS: You have a lot of choices of what to use the two FootController inputs for. Both of the two FootControllers are independently assignable in every Setup. The assignments of your FootControllers are Setup Auxiliary settings. -
Page 39: Moving Around Through Your Setups
5. Basic Setups MOVING AROUND THROUGH YOUR SETUPS: To move around through your Setups you have several choices: 1. Striking the Back and Frwd Function Pads (takes two hits to get going) to increment or decrement through the Setups. 2. Depress the EDIT footswitch, hit Setup, and then Increment or Decrement. -
Page 40: Advanced User Setups
PRO until you start using the advanced features of the malletKAT PRO. LAYER MODES: The malletKAT PRO With Sounds is divided into two Keyboard Controllers - Controller 1 and Controller 2. Each controller may be assigned it’s own set of operating settings, effectively giving you two instruments to play on simultaneously. -
Page 41: Layer (Double)
6. Advanced Setups chord. Release the footswitch and play over that chord. Etc. Hang Mode EXAMPLE 2: 1. Select Hang Mode. 2. Have Controller 1 playing a xylophone sound. 3. Have Controller 2 playing a vibe sound. 4. Set the Gate Time on Controller 1 and Controller 2 to “0.300 S”. 5. -
Page 42: Pressure Modes
6. Advanced Setups PRESSURE MODES: The malletKAT PRO may be set to operate in one of the following three Pressure Modes: Normal Mode - The normal playing mode. In this mode, if you apply continued pressure on one or more playing pads, those pads will sustain until you release them. -
Page 43: Other Tricks
6. Advanced Setups OTHER TRICKS: External Sound Sources - If your external sound source is not changing sounds when you change the Program setting in your malletKAT PRO there are several things to check: 1. Make sure your sound source is set to receive Program Change values. - Page 44 6. Advanced Setups globally disable Bank Select in the Global Auxiliary screens - (see p.44) FootControl Pedals and Breath Controller - The FootControl pedals and the Breath Controller can all greatly increase your ability to be expressive with the malletKAT PRO. Here are some tips: •...
-
Page 45: Midi Primer
7. MIDI Primer: If you connect to external sound sources, you will need to use MIDI. What is MIDI anyway? First, MIDI is an acronym for Musical Instrument Digital Interface. It is a standard or an agreement among the various musical instrument manufacturers that we will all use the same kind of connections and electrical signals so that any two musical instruments can be connected together and work. - Page 46 7. MIDI Primer to be the same Channel as your sound source is set to receive on. Most commonly used Channel is Channel 1. If you have two sound sources you would set Controller 2 to another MIDI Channel (probably Channel 2). •...
-
Page 47: So What's The Big Deal
7. MIDI Primer SO WHAT’S THE BIG DEAL?: The big deal is that MIDI is new. It’s not only new for you, but it is new to the music business. It’s only been around for 10 years - drumming has been around since we lived in caves. It takes time for people to get used to change - especially change that is powerful and technical. -
Page 48: Midi Delay
7. MIDI Primer MIDI DELAY: Because drummers and percussionists have a highly developed sense of time, they are more sensitive to time delays. A drummer is very sensitive to where a Sound is played with respect to the beat. This brings us to MIDI Delay. -
Page 49: Appendix
8. Appendix Appendix A: Trouble-Shooting Help - What if it isn’t Working? Symptom: No Sounds out of Sound Source when you play on malletKAT PRO. What To Do: Here is a list of things to try to help isolate your problem: •... - Page 50 8. Appendix Symptom: Your malletKAT PRO WS playing surface is not responding well: What To Do: • Adjust thresholds of your Pads - see p.26-27 • Train your Pads to your personal dynamic range (p.27). • Disconnect the MIDI cable. Turn the malletKAT PRO and Sound Source Off.
-
Page 51: Glossary Of Terms
Information (separate from your Setup information) which has one setting for the entire instrument and is used by all Setups. Interface Mode: For each of the two Controllers in the malletKAT PRO With Sounds, you may choose to have its Note and Program information sent to the INTERNAL sound source ONLY, EXTERNAL MIDI ONLY, or BOTH Internal and External MIDI. - Page 52 Usually this is about 1 to 20mS. User Setups: In the malletKAT PRO With Sounds there are 128 User Setups which can be changed to any settings you desire to suit your specific needs.
- Page 53 8. Appendix malletKAT PRO/WS SETUP TEMPLATE Setup #:______ LAYER MODE PRESSURE MODE Hang / Split / Double ________________ Split Point_________ CONTROLLER 1 CONTROLLER 2 Octave:__________________ Octave:_________________ Gate:___________________ Gate:___________________ Channel:_________________ Channel:_________________ Min. Velocity:______________ Min. Velocity:_____________ Max. Velocity:______________ Max. Velocity:_____________ Curve#:__________________ Curve#:__________________ Volume:__________________ Volume:__________________ Program Change Send:________...
-
Page 54: D: Midi Implementation Chart
8. Appendix Appendix D: MIDI Implementation Chart. Function Transmitted Recognized Remarks Basic Channel - Default 1 -16 1-16 Changed 1 -16 1-16 Mode: Default Mode 3 Messages Altered Poly/Mono Note Number: 0 - 127 Velocity: Note On 1 - 127 AfterTouch: Keys By Pad Pressure... -
Page 55: System Exclusive Documentation
8. Appendix Appendix E: System Exclusive Documentation. MIDI allows you to SAVE your settings from MIDI instruments to data disks and computers so you can back up your work. This is called a Data Dump. The malletKAT PRO will send one of four different types of Data Dumps of its settings out the MIDI OUT if you go to Global Auxiliary Screen #3, see p.26. -
Page 56: Velocity Curve Documentation
8. Appendix Appendix F: Velocity Curve Documentation. For those of you who are truly gluttons for punishment, we will now get mathematical about Velocity. This will include tables and formulas explaining how the malletKAT PRO determines the MIDI Velocity values that it sends out for the Pads you play on the malletKAT PRO. - Page 57 8. Appendix Velocity Curve 1: Steps 1 - 8 Steps 9 - 16 Steps 17 - 24 Steps 25 - 32 Steps 33 - 40 Steps 41 - 48 Steps 49 - 56 Steps 57 - 64 Steps 65 - 72 Steps 73 - 80 Steps 81 - 88 Steps 89 - 96...
- Page 58 8. Appendix Velocity Curve 4: Steps 1 - 8 Steps 9 - 16 Steps 17 - 24 Steps 25 - 32 Steps 33 - 40 Steps 41 - 48 Steps 49 - 56 Steps 57 - 64 Steps 65 - 72 Steps 73 - 80 Steps 81 - 88 Steps 89 - 96...
- Page 59 8. Appendix Velocity Curve 7: Steps 1 - 8 Steps 9 - 16 Steps 17 - 24 Steps 25 - 32 Steps 33 - 40 Steps 41 - 48 Steps 49 - 56 Steps 57 - 64 Steps 65 - 72 Steps 73 - 80 Steps 81 - 88 Steps 89 - 96...
- Page 60 8. Appendix...
- Page 61 8. Appendix Appendix G: Inserting New Software Chips For Software Updates. HOW TO PHYSICALLY CHANGE YOUR SOFTWARE CHIP: Tools Needed: 1 small & 1 medium flat screwdriver. 1) First, remove the AC adaptor from the back of the malletKAT PRO! 2) Find a smooth, clean, flat surface and place your malletKAT PRO upside down on it, the jacks facing away from you.
-
Page 62: Care And Maintenance
8. Appendix Appendix H: Warranty Policies The malletKAT PRO has a limited warranty. The malletKAT PRO is warranted against defects due to materials or workmanship for 90 days on labor, 6 months on FSR and rubber, and 1 year on all other parts. - Page 63 8. Appendix Appendix I: KAT, Inc. KAT is a company dedicated to making the most powerful Controllers in the world. We have a commitment to quality and responsiveness. Our designs are responsive and we as a company are responsive. Feel free to call us with questions or suggestions. Our products are designed to be upgradeable.
-
Page 64: Breath Controller Adjustments
8. Appendix Appendix J: Breath Control Adjustments To actually use a Breath Control you should first adjust the two trimpots in the headset to match the following diagram, then train First, match these settings: GAIN OFFSET Output Cable Breath Tube Now go to p.28 for details on training your BC-2 BreathController for optimum response. - Page 65 Notes...
- Page 66 Notes...
-
Page 67: Index
GlobalAuxScreens 19,21, 26-31 Polyphony 11, 20, 23, 37 14. Index. Pressure Modes Aftertouch 11, 19, 21, 23,31,42 -----------------H--------------- Dampening 11, 19, 21, 28-29, -----------------A---------------- Hang - see Layer 36, 42 AC Adaptor 7, 9, 49 Holding Down Pads 36, 42, 50, 54 Normal 11, 19, 21, 42 Accessories 4 Program Change - see MIDI...
Need help?
Do you have a question about the malletKAT PRO With Sounds and is the answer not in the manual?
Questions and answers