
Related Manuals for COMAC INNOVA 55B


Summary of Contents for COMAC INNOVA 55B
- Page 1 USE AND MAINTENANCE MANUAL INNOVA 55B ED. 03-2013 ORIGINAL INSTRUCTIONS Doc. 10035670 Version...
- Page 2 The descriptions contained in this document are not binding. The company therefore reserves the right to make any modifications at any time to elements, details, or accessory supply, as considered necessary for reasons of improvement or manufacturing/commercial requirements. The reproduction, even partial, of the text and drawings contained in this document is prohibited by law.
-
Page 3: Table Of Contents
CONTENTS ON CONSIGNMENT OF THE MACHINE............................. 5 SERIAL NUMBER PLATE ................................. 5 INTRODUCTORY COMMENT ................................5 INTENDED USE ....................................5 TECHNICAL DESCRIPTION ................................6 SYMBOLS USED ON THE MACHINE ..............................7 GENERAL SAFETY REGULATIONS ..............................8 MACHINE PREPARATION ................................9 1. - Page 4 TROUBLESHOOTING ..................................29 42. THE MACHINE DOES NOT START ............................. 29 43. INSUFFICIENT WATER ON THE BRUSHES ..........................29 44. THE SQUEEGEE DOES NOT DRY PERFECTLY ........................... 29 45. THE MACHINE DOES NOT CLEAN WELL ............................ 29 46. EXCESSIVE FOAM PRODUCTION ............................. 29 47.
-
Page 5: On Consignment Of The Machine
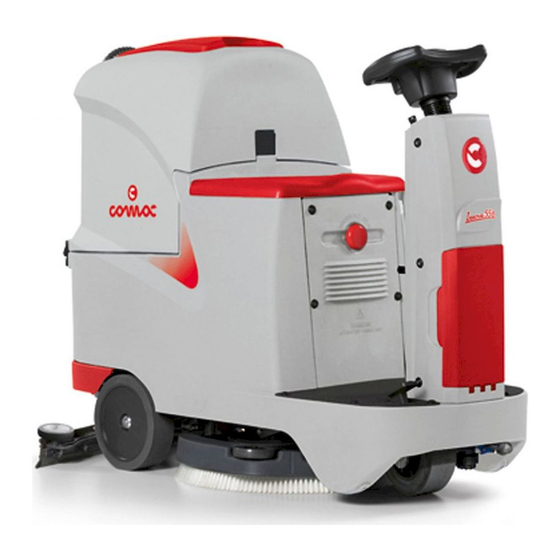
Introductory comment INNOVA 55B is a floor scrubbing machine which, by means of the mechanical action of the rotating brush and the chemical action of a water/detergent solution, can clean any type of flooring. As it advances, it also collects any removed dirt as well as the detergent solution not absorbed by the floor. -
Page 6: Technical Description
TECHNICAL DESCRIPTION INNOVA 55B Working width Squeegee width Squeegee width optional Working capacity, up to 2632 No. / Ø mm 1 / 560 Disc brush Disc brush rotations Brush motor 24 / 450 Maximum pressure on the brushes Traction motor... -
Page 7: Symbols Used On The Machine
SYMBOLS USED ON THE MACHINE Main switch or key switch symbol Used on the instrument panel, to indicate the key switch for machine operation on (I) or off (0) Symbol denoting acoustic alarm Used to indicate the acoustic alarm button Symbol of the reverse movement selector Used to indicate the button for engaging the reverse gear Brush coupling/uncoupling symbol... -
Page 8: General Safety Regulations
GENERAL SAFETY REGULATIONS The regulations below must be carefully followed in order to avoid harm to the operator and damage to the machine. WARNING: Read the labels on the machine carefully. Do not cover them for any reason and replace them immediately if they become damaged. ... -
Page 9: Machine Preparation
The machine is contained in specific packaging with a pallet for the handling with fork trucks. The packages cannot be placed on top of each other. The total weight of the machine and packaging is 135kg The dimensions of the packaging is as follows: INNOVA 55B A : 1200 mm 660 mm C : 1430 mm 1. -
Page 10: Instrument Panel Elements
MACHINE PREPARATION 3. INSTRUMENT PANEL ELEMENTS The instrument panel components are identified as follows: 1. Level indicator for battery/hour meter 2. Horn button 3. Reverse button 4. Brush coupling/uncoupling button 5. "ECO" function button 4. STEERING COLUMN ELEMENTS The elements on the left side of the steering column are: 6. -
Page 11: Side Machine Elements
MACHINE PREPARATION The components on the rear part of the footboard are: 11. Emergency button 12. Detergent solution level tube 13. Recovery tank release button 6. SIDE MACHINE ELEMENTS The elements on the left-hand side of the machine are: 14. Fast water-detergent filling cap 15. -
Page 12: Front Machine Elements
MACHINE PREPARATION 8. FRONT MACHINE ELEMENTS The elements on the front of the machine are: 21. Item-holder tray 22. Storage compartment carter 23. Detergent solution filter 24. Detergent tank drainage tap 9. TYPE OF BATTERY To power the machine it is necessary to use: ... -
Page 13: Handling - Inserting Batteries
MACHINE PREPARATION 11. HANDLING - INSERTING BATTERIES The batteries must be housed in the special compartment beneath the seat carter. They should be handled using lifting equipment that is suitable in terms of both weight and coupling system. They must also satisfy the requirements of Standard CEI 21-5. -
Page 14: Battery Connection And Battery Connector
MACHINE PREPARATION 12. BATTERY CONNECTION AND BATTERY CONNECTOR 1. Connect the batteries in series to the "+" and "-" poles using the supplied jumper cable 2. Connect the battery connector cable to the "+" and "-" poles in order to obtain the terminal voltage of 24V 3. -
Page 15: Battery Charger Connection (Versions With Bc)
MACHINE PREPARATION WARNING: Danger of gas exhalation and leakage of corrosive liquids. WARNING: Danger of fire: do not go near with free flames 14. BATTERY CHARGER CONNECTION (VERSIONS WITH BC) In order not to cause permanent damage to the batteries, it is essential to avoid their complete discharge: arrange the recharge within a few minutes of the switching on of the "discharged batteries"... -
Page 16: Hour Meter
MACHINE PREPARATION WARNING: a few seconds after the battery charge level reaches 20%, the brush motor switches off automatically. With the remaining charge it is still possible, however, to complete the drying process before recharging WARNING: a few seconds after the battery charge level reaches 10%, the vacuum motor switches off automatically. -
Page 17: Filling The Solution Tank
MACHINE PREPARATION 19. FILLING THE SOLUTION TANK The solution tank can be filled in two different ways: 1. removing the inlet cap (1) and filling with the aid of a rubber tube 2. using the rubber cap (2); this supports the water hose on its own, but be sure to remove the inlet cap (1) to allow the proper vent of air. -
Page 18: Adjusting The Squeegee Inclination
MACHINE PREPARATION 3. Remove the key from the instrument panel 4. Loosen the knobs (2) and (3) in the squeegee pre-assembly 5. Insert the left-hand squeegee pin in the left-hand slit of the squeegee connection, then tighten the knob (2), making sure the washer and spring adhere in the upper part of the squeegee support 6. -
Page 19: Blinking Light (Optional)
MACHINE PREPARATION 3. Position the brush on the floor, near the machine brush head 4. Lower the brush head, turning the right-hand lever (1) to move it clockwise. 5. Press the brush release button (2) intermittently WARNING: During this operation, check there are no people or objects near the brush. -
Page 20: Work
WORK 28. WORK Before beginning to work, it is necessary to: 1. make sure the recovery tank is empty, otherwise empty it completely 2. check the key switch (3) is on “0”; if this is not the case, turn the key of the main switch anticlockwise to “0”... -
Page 21: Eco" Device
WORK 13. To make a reverse movement, press the button (9) on the steering wheel simultaneously with the pedal (8). WARNING: During reverse movements, the squeegee must be lifted off the floor. To do this, turn the lever (7) clockwise. During the first metres, check there is sufficient solution and that the squeegee dries perfectly. -
Page 22: At The End Of The Work
AT THE END OF THE WORK 32. AT THE END OF THE WORK At the end of the work, and before carrying out any type of maintenance, perform the following operations: 1. Close the tap by moving the knob (1) upwards 2. - Page 23 AT THE END OF THE WORK 17. sit on the driver’s seat 18. Insert the key into the main switch block and turn it a quarter turn clockwise (to position I) 19. Park the machine in a closed place, in an area where it cannot cause damage to people or other property, but also be protected from an accidental fall of objects.
-
Page 24: Daily Maintenance
DAILY MAINTENANCE PERFORM ALL MAINTENANCE OPERATIONS IN SEQUENCE 33. CLEANING THE RECOVERY TANK 1. Disconnect the tube (1) from its seat, unscrew the drainage cap and empty the recovery tank. 2. Press the button (2) to release and rotate the recovery tank WARNING: Before performing any maintenance, remove the keys from the panel and disconnect the battery connector of the machine. -
Page 25: Cleaning The Squeegee
DAILY MAINTENANCE 5. Remove the float cover (4) 6. Remove the vacuum filter (5) from the float body 7. Clean the filter and float body with a jet of water 8. Reassemble all the elements 35. CLEANING THE SQUEEGEE The careful cleaning of the whole vacuum unit ensures better drying and cleaning of the floor as well as greater duration of the vacuum motor. - Page 26 DAILY MAINTENANCE WARNING: Before performing any maintenance, remove the keys from the panel and disconnect the battery connector WARNING: These operations must be carried out using gloves to protect against contact with dangerous solutions. 3. Close the water tap by shifting the relevant knob (on the left part of the steering column) upwards 4.
-
Page 27: Weekly Maintenance
WEEKLY MAINTENANCE 37. CLEANING THE VACUUM HOSE Whenever vacuum seems to be unsatisfactory, check that the vacuum tube is not obstructed. If necessary clean with a jet of water as follows: 1. Make sure the recovery tank is empty, otherwise empty it completely 2. -
Page 28: Extraordinary Maintenance
EXTRAORDINARY MAINTENANCE 39. REPLACING THE FRONT SQUEEGEE RUBBER Vacuum will be poor and the machine will not dry perfectly if the front squeegee rubber is worn. Proceed as follows to replace: 1. Check the main switch is on “0” (turn it to this position if necessary) 2. -
Page 29: Troubleshooting
TROUBLESHOOTING 42. THE MACHINE DOES NOT START 1. Check that batteries are charged 2. Make sure the electric system connector is connected to the battery connector 3. Check the key switch is ON/I 43. INSUFFICIENT WATER ON THE BRUSHES 1. Check there is water in the solution tank 2. -
Page 30: Disposal
DISPOSAL To dispose of the machine, take it to a demolition centre or an authorised collection centre. Before scrapping the machine it is necessary to remove and separate the following materials and send them to the appropriate collection centres in accordance with the environmental hygiene regulations currently in force: ... -
Page 31: Choosing And Using The Brushes
CHOOSING AND USING THE BRUSHES POLYPROPYLENE BRUSH (PPL) Used on all types of floor, it has good resistance to wear and tear and hot water (no greater than 60°C). PPL is non-hygroscopic and therefore retains its characteristics even when working in wet conditions. NYLON BRUSH Used on all types of floors. -
Page 32: Ec Declaration Of Conformity
COMAC S.p.A. Via Maestri del Lavoro, 13 37059 Santa Maria di Zevio (VR) - ITALY declares under its sole responsibility that the products SCRUBBING MACHINES - mod. INNOVA 55B complies with the requirements of the following Directives: 2006/42/EC: Machinery Directive.
Need help?
Do you have a question about the INNOVA 55B and is the answer not in the manual?
Questions and answers