Table of Contents
Advertisement
Quick Links
Advertisement
Table of Contents
Troubleshooting

Related Manuals for Oce 9400-I


Summary of Contents for Oce 9400-I
- Page 1 Océ 9400-I User Manual...
- Page 2 Océ-Technologies B.V. This manual contains a description of the Océ 9400-II system and a detailed explanation of the plot functions. The introduction (chapter 1), gives a general description of the working methods employed in using the copier and we recommend that you read at least this chapter. Overview of copier parts on the covers To assist you in quickly identifying the various parts of the copier/printer and the functions on the operating panel, there is an illustration of the Océ...
-
Page 3: Table Of Contents
Table of Contents Chapter 1 Getting started The Océ 9400-II printe r10 The printer operating panel Buttons 12 Display 12 The Océ 9400-II copi er14 Image logic 1 4 Optiona l14 The scanner operating p anel15 Stand-by mode16 Buttons and funct ions16 Turning the copier on a nd off18 Switching the printer on/ off20 Chapter 2... - Page 4 Chapter 3 (Re)load media and toner Inserting a new print material roll 40 Automatic roll switch ing40 Reloading rol ls41 Cutting the paper to get a straight leading edge Printing using the manual f eed48 Programming media setti ngs49 Refilling to ner52 Chapter 4 Copy jobs Introductio n56...
- Page 5 Chapter 6 Use of the Scan-to-File option Introduct ion76 Related documentation 77 Chapter 7 Customizing the printer Defining pen setti ngs80 Defining language se ttings82 Automatic language sensi ng82 Data format recogniti on83 Manual data format selection 84 HP-GL 85 HP-GL print origin 85 HP-GL page advance Merge mod e86...
- Page 6 Chapter 8 Advanced printer menu functions Introductio n100 Selecting the media save r101 Nestin g101 Autopositi on103 Media saver time-out 104 Flush media saver 104 Media saver plot size 105 Replot 106 Setting the number of copies 106 Quality set up107 Poster mode 1 0 7 Renderin g107 Image typ e108...
-
Page 7: Poster Mode 1 0
Appendix A Overview and tables Product specifications for the print er128 Product specifications for the scan ner129 Interface s130 Centronics protoco l130 SCSI-2 protoco l130 Ethernet protocol 130 Centronics port configurat ion131 SCSI-2 port configuratio n132 Ethernet port configura tion133 Originals that can be used 134 Copy material that can be use d135 Overview of standard zoom formats 137... - Page 8 Océ 9400-II User Manual...
-
Page 9: Getting Started
Océ 9400-I User Manual Chapter 1 Getting started This chapter contains a general description of the Océ 9400-II and instructions on how to install the printer and prepare it for use. Also, it describes how to get the copier ready for copying operations. -
Page 10: The Océ 9400-Ii Printe R10
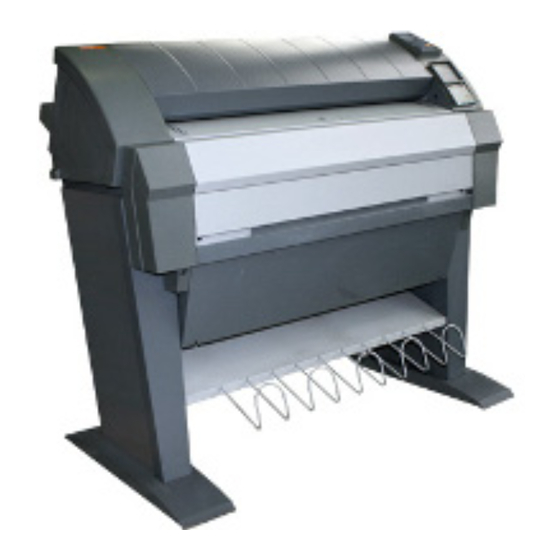
The Océ 9400-II printer The Océ 9400-II is the successor of the Océ 9400. It has an improved, faster controller and more memory. The Océ 9400-II is a wide-format printing system. The machine is equipped with an automatic 1- or 2-roll dispenser. The Océ 9400-II prints on paper, transparencies, vellum, and polyester film. -
Page 11: The Printer Operating Panel
The printer operating panel The operating panel located on the right-hand side of the printer console is easy to use (see figu re1). The panel consists of buttons and a display. READY previous next/select program cancel/ continue [1] Printer operating panel During normal operation, the printer can process print jobs and display the current printer status (e.g. -
Page 12: Buttons
Buttons To activate the program mode and to enter the top level menu. In ‘Program’ this mode, the user can use next/select’ the ‘previous’ and buttons to step through the menu. Press Program’ again. If no action takes place for 1 minute in Program mode, the machine will return to the status mode. - Page 13 The printer stops and the user must take action, e.g. ‘PAPER Error messages JAM’. An action message prompts the user to perform an action Action messages before the print job resumes. e.g. ‘FEED SHEET’ in the case of manual feed. Getting started...
-
Page 14: The Océ 9400-Ii Copi Er14
The Océ 9400-II copier The Océ 9400-II is also a digital copier for large documents (such as architectural orengineering drawings). The machine is easy to use and makes copies on paper, transparencies, vellum and polyester film with the quality and reliability that you have come to expect from Océ. -
Page 15: The Scanner Operating P Anel15
The scanner operating panel The easy-to-use operating panel is located on the right-hand side of the scanne (see figur e2). standard trailing synchro leading steps edge zoom manual lighter roll 2 roll 1 auto media darker darker exposure please printer wait error start... -
Page 16: Stand-By Mode16
Stand-by mode The operating panel (see the illustration on inside back cover) on the Océ 9400-II is easy to use and has been specially designed to perform copy jobs. After switching on the scanner, (see p age18), the machine is ready for continuous operation. - Page 17 During the copying process: If you press this button while an original is being fed in, the process will stop immediately. If you want to abort a multi-copy job after the scanning of the original is finished, you must abort the copying process by pressing the 'cancel/continue' button on the printer.
-
Page 18: Turning The Copier On And Off
Turning the copier on and off Switching on the copier involves: turning on the scanner turning on the printer (see page 20). Once the system has been turned on, it is ready for operation. In this state, the machine is in stand-by mode. There is no need to turn it off after each copy job. You can leave the copier turned on for the rest of the day. - Page 19 Turning off the scanne Set the on/off switch, located at the back of the scanner, to position ‘0’ (see figure 3 ) Getting started...
-
Page 20: Switching The Printer On/ Off20
Switching the printer on/of Once the printer has been switched on, it is ready for operation. Turning the printer o Set the on/off switch, located at the back of the printer to position ‘1’ (see figur e4). If the electrical supply is correctly connected, the green switch will light up. -
Page 21: Installing The Printer
Océ 9400-I User Manual Chapter 2 Installing the printer This chapter describes how to connect your printer to your host environment and how to configure the printer to meet your specific needs. -
Page 22: Connect The Printer To Your Host Environment
Connect the printer to your host environment The Océ 9400-II supports several types of interfaces (Centronics, Ethernet 10 & 100 Mb/s, TCP/IP). Novell and Ethertalk are supported through the optional print server. To ensure proper operation, please follow the steps below when connecting your host to the Océ... -
Page 23: Centronic S23
Centronics Connection through the Centronics interface is straightforward and data transfer is fast. You must set two parameters: the transmission type and the plot time-out. Connecting Centronics Turn off the printer and host. Connect one end of the Centronics cable to the computer's Centronics parallel port. - Page 24 Press ‘next/select’ to enter the ‘ ’ menu. CONNECTION Select the ‘ ’ item using the button. CENTRONICS Press ‘next/select’ to enter the ‘ ’ menu. CENTRONICS Select the ‘ ’ mode using the or button. Press ‘next/select’ to enter the ‘ ’...
-
Page 25: Scsi
SCSI-2 If you are using the SCSI-2 port (for the scan-to-file option), you must configure two parameters; the SCSI-2 ID and the terminator. The SCSI-2 port is used only for the scan-to-file option, which allow you Note: to upload data from the controller to the connected PC. Connecting SCSI-2 Turn off the printer and the host. - Page 26 Select the ‘ ’ item using the or button. Press ‘next/select’ to enter the ‘ ’ menu. Select the required ‘ ’ (a value from 0 to 7) using the or button. Press ‘next/select’ to confirm the selected ‘ ’. Press ‘Program’...
-
Page 27: Ethernet
Ethernet Your controller includes both an AUI transceiver connector (10 MB/s) and an RJ45 connector (10 or 100Mb/s). Ethernet connections can therefore use Thin or Thick Ethernet or UTP cabling. We recommend using the RJ45 100 Mbit to achieve the highest possible Note: performance. - Page 28 UTP (unshielded twisted pair) cable looks much like standard phone cable. The cable should have RJ45 plugs. If you are using the Ethernet port, you will need to configure a list o parameters. All required parameters are described in the following procedures. Connecting Etherne Connect one end of the Ethernet cable to the computer’s Ethernet port.
-
Page 29: Supported Printing Protoco Ls29
Press ‘next/select’ to confirm the required selection. Press ‘previous’ to go up one level. Repeat steps 10 to 14 for ‘ 3’. FIELD FIELD FIELD Press ‘previous’ to go up one level. Select the ‘ ’ menu using the button. SUBNET MASK Press ‘next/select’... - Page 30 to the rest of the network. You might want to do this if, for example, if you printer is to be accessed by several important clients. TCP/IP network. TCP/IP is commonly used for the Unix, Win 95/98/NT and OS/2 operating systems.
- Page 31 Printing via LPD Once the network connection for the Océ 9400-II has been set up (see ‘ Connect the printer to your host environment’ on page 2 2 ), you can print via LPD. The Line Printer Daemon (LPD) protocol has been implemented as Note: specified in RCF 1179.
-
Page 32: Printing Via L Pd31
Printing via FTP Once the network connection for the Océ 9400-II has been set up, you can print via FTP. File Transfer protocol (FTP) has been implemented as specified in RCF Note: 959. We are also web browser compatible, so the Océ 9400-II printer can be accessed like any Ftp site from your web browser. - Page 33 Two other directories are provided: Help and Status. Putting files in Note: these directories will result in an ‘access denied’ message. Installing the printer...
-
Page 34: Setting Up Smb On Windows 95/98 And Nt
Right-click on the desired queue, and then click on Install. Select OCE 9400-IIPS to be associated with the Océ PS driver. Select OCE 9400-II to be associated with the Océ Windows Raster driver. You will be prompted to provide the driver. -
Page 35: Troubleshootin G35
Troubleshooting If the device cannot be accessed in the network neighborhood (either because the device cannot be opened or the workgroup the device belongs to does not appear), follow the procedure below: Click on the "Start" icon. Click on the "Find" icon. Click on the "Computer..."... -
Page 36: Set Up The Memory Configuration
Set up the memory configuration The printer’s memory partitions can be configured based on the anticipated complexity of print jobs. Input buffer This option enables you to set the print spool input buffer size. You can select a small or large buffer. A small buffer leaves more memory available for processing more complex files. -
Page 37: Bitmap Buffe R37
Bitmap buffer This buffer defines a percentage of the total RAM memory that can be used as the bitmap partition. This value will be set between two values, depending on the RAM configuration. The installed RAM can be divided into the following sections: bitmap partition processing area for files The size of the bitmap partition determines the maximum length of the image... - Page 38 Press ‘next/select’ to enter the ‘ ’ menu. BUFFER Select the ‘ ’ item using t he or button. BITMAP BUFFER Press ‘next/select’ to enter the ‘ ’ menu BITMAP BUFFER Select the required bitmap partition using the or button Press ‘next/select’...
-
Page 39: (Re)Load Media And Toner
Océ 9400-I User Manual Chapter 3 (Re)load media and toner This chapter describes how to insert new media, how to add toner and how to program the media settings. -
Page 40: Inserting A New Print Material Roll
Inserting a new print material roll Before using the copier for the first time, you must specify the order in which the paper formats appear on the scanner operating panel. You can do this by choosing between ISO, ANSI or ARCHITECT paper format on the printe operating panel. -
Page 41: Reloading Rol Ls41
Defining automatic roll switchin Press ‘Program’ to enter the main menu. Select the ‘ ’ item using the or button. MEDIA SETTINGS Press ‘next/select’ to enter the ‘ ’ menu. MEDIA SETTINGS Select ‘ ’ using the button. MEDIA MODE Press ‘next/select’... - Page 42 Remove the roll holder from the drawer (see figure 10 on page42) [10] Removing the roll holder from the drawer While pressing the knob, remove the empty core from the roll holder (see figur e11). Slide the roll holder into the new roll of material while pressing the knob (see figur e11).
- Page 43 Place the roll holder with the material in the drawer (see figu re12). [12] Repositioning the roll Feed the material between the input guide plates against the rollers. Turn the rollers until the material is visible (see f igure13). You can also refer to the sticker inside the drawer.
-
Page 44: Cutting The Paper To Get A Straight Leading Edge
Cutting the paper to get a straight leading edge If the paper does not have a straight leading edge, you can cut it off at right angles from the roll. Cutting the paper from roll 1 or roll Open the drawer. Feed the paper manually until it is approximately 5 cm above the top drawer. - Page 45 Reloading roll Open the cover to get access to roll 2 (see fi gure14). [14] Opening the lower drawer Remove the roll holder (see fig ure15). [15] Removing the roll holder from the lower drawer While pressing the knob, remove the empty core from the roll holder (see figure 1 1 on page 42).
- Page 46 While pressing the knob, slide the roll holder into the roll of print material (see figur e11 on pa ge42). Make sure that the knob is to the right, and that the paper appears as shown in figure 11. While pressing the knob, align the roll with the appropriate lines on the roll holder Place the roll holder with the material in the lower paper compartment (see figur e16).
- Page 47 If you want to cut the paper to get a straight leading edge, see ‘Cutting the paper to get a straight leading edge’ on page 4 4 . Otherwise, continue with the next step. Close the lower paper compartment. Press the ‘Cancel/Continue’ button. (Re)load media and toner...
-
Page 48: Printing Using The Manual F Eed48
Printing using the manual feed Manual feed can be selected in two ways: via remote control commands added to the print file (by means of Plot Director, drivers (see ‘Use of the Scan-to-File option’ on page 7 5 ). by changing the ‘MEDIA MODE’ in program mode. If the user wants to use manual feed, he or she must: program the media settings on the printer;... -
Page 49: Programming Media Setti Ngs49
Programming media settings If you have inserted a new roll with a different material or of a different width, you must program the new roll specifications. These specifications are: width of the material. You can select A0 (841 mm), A1 (594 mm), A2 (420 mm), A3 (297), E (34”), D (22”), C (17”), B (11”), E+ (36”), D+ (24”), C+ (18”), B+ (12”), 30”, 500 mm, 700 mm and B1 (707 mm). - Page 50 Programming media width setting Press ‘Program’ to enter the main menu. Select the ‘ ’ item using t he or button. MEDIA SETTINGS Press ‘next/select’ to enter the ‘ ’menu. MEDIA SETTINGS Select ‘ 1’, ‘ 2’, ‘ ’ using th e or button.
- Page 51 Select ‘ ’ using the button. MEDIA MODE Press ‘next/select’ to enter the ‘ ’ menu. MEDIA MODE Select ‘ ’ using the button. AUTO ROLL Press ‘next/select’ to enter the ‘ ’ menu. AUTO ROLL Select on or off using the or button.
-
Page 52: Refilling To Ner52
Refilling toner If the message REFILL TONER’ --- > Press Continue appears in the display, you must refill the toner immediately. Refilling tone Use only Océ B4 toner (B4 toner is equivalent to Océ 9400 Attention: toner). Unscrew the access nut on the left side of the printer and open the left cover (see figure 19) [19] Unscrewing the access nut and opening the cover Shake the toner bottle thoroughly and then open it. - Page 53 Screw the bottle in clockwise, in a slanted position (see fig u re20). [20] Screwing the bottle into place Move the toner bottle to a vertical position (s ee figure20) and 21). [21] Adding toner Empty the toner out of the bottle by tapping it. When the toner bottle is completely empty, return it to its original position.
- Page 54 Replacing the waste toner ba Pull the waste toner bag from the holder and seal the bag with the cap provided (see figure 22) [22] Replacing the waste toner bag Slide a new waste toner bag over the holder. Close the cover and tighten the access nut. Press the ‘Continue’...
-
Page 55: Copy Jobs
Océ 9400-I User Manual Chapter 4 Copy jobs This chapter describes how to make copies... -
Page 56: Introductio N56
Introduction With the Océ 9400-II, you can make copies on paper, transparencies, vellum and polyester film; Océ's Image Logic Technology ensures optimal copy quality. Depending on its configuration, your system will be equipped with a 1- or 2-roll dispenser. The media’ button allows you to select the roll that you want to copy from, or feed a sheet of paper manually. -
Page 57: Making Copi Es57
Making copies The copying process starts after you press the ‘start’ button. You can change the settings before pressing the ‘start’ button. Feeding in the origina Insert the original, face down and aligned to the right, along the original guide on the scanner feed table, so that the line is completely visible (see f igure23). -
Page 58: Activating/De-Activating The Rewind Fun Ction58
no leading /trailing edge auto exposure on; exposure setting 0. Default settings are used in the following situations: after turning the machine on after pressing stop/correct twice after a time-out of 1 minute (beginning from the completion of the previous copy job). - Page 59 De-activating the rewind function (in situation 3 Insert the original face-down and aligned to the right. Choose the required settings. Press the ‘start’ button. During scanning, press the ‘start’ button again. The indicator light above the Start button will flash. The original will be held at the back of the scanner.
-
Page 60: Changing Setti Ngs60
Changing settings In order to perform special copy jobs, the Océ 9400-II allows you to change the settings to fit your requirements. This section explains in detail how to change these specific settings. Number of copies If you want multiple copies from one original, you will need to enter the desired number of copies on the scanner operating panel. -
Page 61: Copying Using Manual Fee D61
Copying using manual feed If you want to copy a job on a media type and/or size that is not available on the media rolls, you might prefer to feed the sheets manually instead of changing the rolls. The sheet feeder is a special slot located just above the paper roll drawers on the print engine. -
Page 62: Reduction/Enlargeme Nt62
If you do not wait until the‘FEED SHEET’ message appears, you Attention: may get a paper jam, or the print job may use the wrong sheet of paper. Manual feed time-out (see ‘Setting the time-out for manual feed’ on Note: page 51). - Page 63 In standard cut mode, the copy is cut at a standard format (portrait). You select the width of the standard format with the ‘up’ or ‘down’ button. Example: selecting 36 inches means that you select a 36-inch width format and a corresponding 48-inch length. The material is cut to a length of 48 inches regardless of the roll width.
-
Page 64: Adjusting The Leading/Trailing Ed G E64
Adjusting the leading/trailing edge You can increase the length of the copy to accommodate a filing strip, by selecting a positive leading/trailing edge. If you don’t want the filing strip to show on the copy, you can remove it by selecting a negative leading or trailing edge. - Page 65 Leading/trailing edge when copying on rolls of paper Leading edge Null Positive Negative Copy Original [25] Using rolls Copy jobs...
- Page 66 Leading/trailing edge when copying onto a sheet of paper Leading edge Null Positive Negative Copy Original [26] Using sheets Océ 9400-II User Manual...
-
Page 67: Modifying The Exposure
Modifying the exposure The automatic exposure setting ensures the production of background-free copies of most line drawings. This setting activates automatic background compensation. The background is constantly measured while scanning the original. However, the results from some originals may not match your requirements. Normally, automatic background compensation is active and the exposure level is 0. -
Page 68: Poster Mode
Press the correction’ and the ‘zoom’ button at the same time. The inverted copy mode is now active. The copy quantity is reset to 1 (this value cannot be changed), and will flash. The auto exposure mode is automatically switched off. Press the start’... -
Page 69: Print Jobs
Océ 9400-I User Manual Chapter 5 Print jobs This chapter describes how to print files. -
Page 70: Printing File S70
Printing files The Océ 9400-II can be connected to a host environment, which may be either a standalone PC/Workstation or a PC/Workstation connected to a network. It accepts various standard format CAD/CAM vector and EDMS raster data files from the host environment and converts these into high quality plots (see figur e27). -
Page 71: Océ Applicati On71
The following application is available: Plot Director (MS-Windows 95/98 and NT) Océ drivers Please refer to the Océ website (www.oce.com) to obtain the latest drivers. Note: In order to meet the highest performance standards, the Océ 9400-II only supports 32-bit applications and operating systems. The following drivers are... -
Page 72: Cut Metho D72
Cut method This setting can be used to select standard cut or synchro cut (see ‘Order of standard sizes for using standard cut’ on pag e138). Use Synchro Cut when you must define a non-standard paper size in your Note: application. -
Page 73: Leading/Trailing Edge
Select ‘ ’ item using the or button. MEDIA SETTING Press ‘next/select’ to enter the ‘ ’ menu MEDIA SETTING Select the ‘ ’ item using the or button. PLOT POSITION Press ‘next/select’ to enter the ‘ ’ menu. PLOT POSITION Select the ‘... -
Page 74: Demo Plot
Demo plot After installing the Océ 9400-II, we recommend that you generate a demo plot in order to make sure that the printer works properly. Making a demo plo Press ‘Program’ to enter the main menu. Select the ‘ item using the or button. -
Page 75: Use Of The Scan-To-File Option
Océ 9400-I User Manual Chapter 6 Use of the Scan-to-File option This chapter describes how to use the Océ 9400-II to digitize analog drawings... -
Page 76: Introduct Ion76
This option consists of the following components: Océ Scan Station software Océ View Station software SCSI-2 board (option) in the PC to connect to the Océ 9400-I SCSI-2 cable (option) Making upload After everything has been installed correctly on the Océ 9400-II and on the PC, both systems must be connected with a SCSI-2 cable before uploads can take place. -
Page 77: Related Documentation
The following buttons are disabled on the Océ 9400-II scanner operating panel when it is in Upload mode: ‘Cut’ ‘Edge’, except in the case of a negative leading edge ‘Zoom The displayed number of copies is set to "1" if checkplot is enabled on the Scan Station application. - Page 78 Océ 9400-II User Manual...
-
Page 79: Customizing The Printer
Océ 9400-I User Manual Chapter 7 Customizing the printer This chapter explains how to set certain Océ 9400-II defaults, such as pen settings and languages, to accommodate frequently-used print jobs. -
Page 80: Defining Pen Setti Ngs80
Defining pen settings You can change the pen settings for the files you want to print in the pen menu. The default width and pattern for each pen number can be changed in this menu. These settings apply to all vector languages: HP-GL, HP-GL/2, and CalComp. - Page 81 For each pen setup, proceed as follows: Select the ‘ ’ item using the or button. PEN NUMBER Press ‘next/select’ to enter the ‘ ’menu. PEN NUMBER Select the required ‘ ’ using th e or button PEN NUMBER Press ‘next/select’ to confirm the selected pen number. Press ‘previous’...
-
Page 82: Defining Language Se Ttings82
Defining language settings The Océ 9400-II accepts print files in various data formats (languages). You can change the settings for PostScript, HP-GL, HP-GL/2, HP-RTL, CalComp, CALS, TIFF or EDMICS. Automatic language sensing Automatic language sensing (ALS) is the mechanism which the system uses to detect the language (data format) of a file for which the format has not been specified in the file header. -
Page 83: Data Format Recogniti On83
Data format recognition To optimize your printer’s language recognition capabilities and reduce the risk of errors, each of the above-mentioned data formats can be individually set ‘ON’ or ‘OFF’. The default is ‘ON’. Optimizing data format recognitio Press ‘Program’ to enter the main menu. Select the ‘C ’... -
Page 84: Manual Data Format Selection
Manual data format selection If necessary, each of the data formats can be selected manually. In this case, ALS is inactive. Note: Setting manual data forma Press ‘Program’ to enter the main menu. Select the ‘C ’ item using the or button. -
Page 85: Hp-Gl
HP-GL This function allows you to define settings for HP-GL file types. HP-GL print origin The term “print origin” refers to the point on the paper at which printing starts. You can choose among the following options: upper right, upper left, center, lower right and lower left. - Page 86 Setting the HP-GL page advanc Press ‘Program’ to enter the main menu. Select the ‘C ’ item using the or button. ONFIGURATION Press ‘next/select’ to enter the ‘C ’ menu. ONFIGURATION Select the ‘ ’ item using the or button. DATA FORMAT Press ‘next/select’...
-
Page 87: Hp-Gl
HP-GL/2 HP-GL/2 print origin The term “print origin” refers to the point on the paper at which printing starts. You can choose among the following options: upper right, upper left, center, lower right and lower left. The default is lower right. Defining the HP-GL/2 print origi Press ‘Program’... -
Page 88: Hp-Gl/2 Pen Priorit Y88
Select the ‘C ’ item using the or button. ONFIGURATION Press ‘next/select’ to enter the ‘C ’ menu. ONFIGURATION Select the ‘ ’ item using the or button. DATA FORMAT Press ‘next/select’ to enter the ‘ ’ menu. DATA FORMAT Select the ‘... -
Page 89: Designjet Compatibili Ty89
Designjet compatibility If you print a color data file on a black-and-white printer, the result may not be satisfactory. If you emulate the HP 650C, all information which is defined in color is printed in black; if you emulate the HP 750C, all information which is defined in color will be printed in gray-scale levels. -
Page 90: Hp-Rtl
Press ‘next/select’ to enter the ‘ ’ menu. MERGE Select ‘ ’ or ‘ ’ using th e or button. Press ‘next/select’ to confirm the selected setting. Press ‘Program’ to exit the main menu. HP-RTL HP-RTL is a subset of HP-GL/2. Therefore, all HP-RTL plot data files must start with ESC%-1BBPIN: or BPIN. -
Page 91: Calcomp
CalComp The Océ 9400-II supports use of the CalComp graphics language. CalComp print origin The term “print origin” refers to the point on the paper at which a drawing starts: upper right, upper left, center, lower right and lower left. The default CalComp origin is lower right. -
Page 92: Calcomp Pen Priorit Y92
Select the ‘ ’ item using the or button. DATA FORMAT Press ‘next/select’ to enter the ‘ ’ menu. DATA FORMAT Select the ‘ ’ item using the or button. CALCOMP SETUP Press ‘next/select’ to enter the ‘ ’menu. CALCOMP SETUP Select the ‘... -
Page 93: End Of Message Parame Ter93
Only the last color specified is printed for a given line or area. The Merge Off other colors specified for the same line or area are transparent. All the specified colors are blended together. Merge On Setting the merge mod Press ‘Program’... -
Page 94: Synchronization Code Parame Ter94
Press ‘next/select’ to confirm the selected value. Press ‘Program’ to exit the main menu. Synchronization code parameter The synchronization code parameter is significant in all cases where CalComp format is selected or auto-recognized, when select format is set to Auto or a remote control command for CalComp has been sent. -
Page 95: Calcomp Step Size
Setting the double synchronization code paramete Press ‘Program’ to enter the main menu. Select the ‘C ’ item using t he or button. ONFIGURATION Press ‘next/select’ to enter the ‘C ’ menu. ONFIGURATION Select the ‘ ’ item using t he or button. -
Page 96: Raster Format S96
Raster formats CALS CALS stands for Computer Aided Acquisition and Logistics Support. The Océ 9400-II printer supports CALS type 1 files. (Untiled, compatible with CCITT Group 4 format). NIRS NIRS is a subset of CALS. The data format consists of a CALS header followed by an NIRS header, followed by TIFF raster data. -
Page 97: Postscript Level 2
PostScript level 2 The Océ PostScript level 2 printer option can be used to print PostScript files on the Océ 9400. Océ provides host software which enables you to print from Windows or Macintosh applications. This option enables your printer to become a true wide-format printer, producing monochrome posters from Illustrator, Word, Excel, QuarkXpress, Powerpoint, Pagemaker, etc., as well as CAD or electronic design applications, among others. -
Page 98: Default Postscript Page Size
Press ‘next/select’ to enter the ‘C ’ menu. ONFIGURATION Select the ‘ ’ item using the or button. DATA FORMAT Press ‘next/select’ to enter the ‘ ’ menu. DATA FORMAT Select the ‘ ’ item using the or button. PS SETUP Press ‘next/select’... -
Page 99: Advanced Printer Menu Functions
Océ 9400-I User Manual Chapter 8 Advanced printer menu functions This chapter describes certain advanced printi functions. - Page 100 Introduction The Océ 9400-II makes certain advanced printer menu functions available to the user, such as: Media saver (see pag e101). Replot (see page 106). Quality Setting (se e page107). Transformation (see page 109). Password setting for display (see page 113) Dump configuration (see page11 4) Service (see pag e115) Océ...
-
Page 101: Selecting The Media Save R101
Selecting the media saver The Océ 9400-II offers two options for optimizing usage of print media: Nesting and Autoposition. This applies to both vector and raster formats. The media saver can also be disabled. The media saver is flushed in the following situations: after a time-out when a copy job interrupts the printing process when selecting another roll or manual feed... - Page 102 Select the ‘ ’ item using the or button. MEDIA SAVER Press ‘next/select’ to enter the ‘ ’ menu. MEDIA SAVER Select the ‘ ’ item using the or button. S MODE Press ‘next/select’ to enter the ‘ ’ menu. S MODE Select the ‘...
- Page 103 Autoposition This option ignores the origin contained in the print file and automatically shifts the print data to the lower right-hand corner of the media. If necessary, prints are rotated 90 ° to make better use of the available media. The autoposition feature helps eliminate the need to clip prints and reduces media waste.
-
Page 104: Media Saver Time-Out
Media saver time-out As explained in the previous section, when the media saver queue is full, the drawings are printed. However, to prevent unnecessary delays for prints in partially filled queues, a time-out of 1 to 60 minutes can be set, after which the contents of the queue are printed. -
Page 105: Media Saver Plot Size
Media saver plot size When the media saver is set to Nesting, three paper size options are available: The print is scaled to fit on the selected paper size. It is not ‘STD NO CLIP’ clipped. If necessary, the print is clipped to fit onto the selected paper ‘STD CLIPPED’... -
Page 106: Replot
Replot Normally, files are discarded after being processed and printed. The replot function overrides this feature, preventing the file from being discarded. To make extra copies/prints from the operating panel, you must select ‘ REPLOT ’. ENABLE The default is ‘off’. Enabling replo Press ‘Program’... -
Page 107: Quality Set Up107
Quality setup Quality setup includes: Poster mode, to print documents with large black areas. Rendering, to change the first 16 pen patterns into another 16 gray-shaded patterns. Image type, to use the correct scaling method. Poster mode Poster mode is useful when you must make prints which contain large black areas. -
Page 108: Image Typ E108
[31] [The rendering function gray shaded patterns Clustered must be used if your originals contain large gray Attention: areas. Use cloud to get an optimal result with line drawings Defining renderin Press ‘Program’ to enter the main menu. Select the ‘ ’... -
Page 109: Transformatio N109
Transformation The Océ 9400-II allows the user to change the position of the image on the print in the following ways: Image rotation and scaling functions. This applies only to vector languages and is possible only when the media saver is switched off. - Page 110 Press ‘next/select’ to enter the ‘ ’ menu. PLOT MANAGER Select the ‘ ’ item using the or button. TRANSFORM Press ‘next/select’ to enter the ‘ ’ menu. TRANSFORM Select the ‘ ’ item using t he or button. SCALING Press ‘next/select’...
- Page 111 Best fit Mode In this mode, the drawing will be reduced to match either the length or the width of the format loaded in the machine, with no loss of information (no clipping). Only plots larger than the loaded media size are scaled or rotated; all others are printed without scaling.
- Page 112 Press ‘next/select’ to enter the ‘ ’ menu. PLOT MANAGER Select the ‘ ’ item using the or button. TRANSFORM Press ‘next/select’ to enter the ‘ ’ menu. TRANSFORM Select the ‘ ’ item using t he or button. SCALING Press ‘next/select’...
-
Page 113: Passwor
Password Because the printer may be operated in your work environment by users with differing skill levels, three menu access levels can be set for security reasons. The display menu allows fully authorized users to access these different printer menu levels, from the locked level to the full menu levels, by means of passwords. -
Page 114: Dump Configuratio N114
Dump configuration Dumping the configuration is an easy way to obtain a list of the current print settings on paper. The dump configuration cannot be performed while a file is being processed. Note: Dumping the configuratio Press ‘Program’ to enter the main menu. Select the ‘C ’... -
Page 115: Service 1
Service This menu is intended only for the Océ service technician. Advanced printer menu functions... - Page 116 Océ 9400-II User Manual...
-
Page 117: Troubleshooting
Océ 9400-I User Manual Chapter 9 Troubleshooting This chapter describes problems that may occur while using the Océ 9400-II. -
Page 118: Troubleshooting The Pri Nter118
Troubleshooting the printer This chapter documents problems that may occur with the Océ 9400-II, and describes how to solve them. There are three types of printer warnings/errors: Warnings Operator-recoverable errors (printer) Machine-recoverable errors Printer warnings Warnings appear in the display. The printer will continue to print, but print quality may diminish. -
Page 119: Operator-Recoverable Errors (Printe
Operator-recoverable errors (printer) The printer stops immediately when it detects an operator-recoverable error. An error message displays on the panel. The user must take action to solve the problem. Message Description ERROR FEED TA- Print media in feed table or feed table not closed Remove the paper and/or close the feed table PAPER REMOVED The paper has been removed from the feed table dur-... -
Page 120: Clearing Paper Jams
Clearing paper jams When a jam occurs, a message appears on the operating panel. If paper misfeeds occur frequently, make sure that: The roll(s) are loaded correctly and the media is fed as indicated. The correct media is used (see ‘Copy material that can be used’ o n page135). No scraps of material are blocking the paper path. - Page 121 If the paper jam cannot be cleared by opening the feed table, then open the fuser section. Clearing paper jams in the fuser sectio Switch the printer off. Unscrew the access nut on the left-hand side of the machine and open the cover (see figur e34).
-
Page 122: Machine-Recoverable Error S122
Open the fuser unit (see figur e 3 6). If the printer has been used recently, the fuser may be hot Caution: [36] Opening the fuser unit Remove the jammed material. Be careful! The toner is not fused. Attention: Lift the green handle and close the fuser unit. Close the left cover and tighten the access nut. -
Page 123: Troubleshooting The Scanner Erro R123
Troubleshooting the copier When an error occurs, the scanner operating panel displays information about the nature of the problem: if the printer error indicator is on, a jam has occurred in the printer (see ‘Troubleshooting the printer’ on pa ge118) for information about how to solve the problem. -
Page 124: Operator-Recoverable Scanner Errors
Operator-recoverable scanner errors Message Description The original is in scanner when the machine is turned on Original too long Stop/Correction button pressed during original transport Please wait If the user wants to scan, but the printer is busy printing files or producing a copy job, the 'please wait' indicator will light up. -
Page 125: Cleaning The Glass Platen
Raise the cover (see fig ure37). [37] Opening the top cover of the scanner Remove the original. Lower the top cover. Lock the cover by pushing the front side down and pushing it back to the rear until you hear a click. To ensure proper transport of originals, make sure that the cover i Note: closed correctly. - Page 126 Gently clean the glass platen and the white pressure platen with a soft cloth, moistened with a small amount of “Cleaner A” (see fig ure38). For safety information, see the safety data sheet in Appendix B. [38] Cleaning the glass platen and the pressure platen Lower the top cover.
-
Page 127: Overview And Tables
Océ 9400-I User Manual Appendix A Overview and tables... -
Page 128: Product Specifications For The Print Er128
Product specifications for the printer The Océ 9400-II is a wide-format, low- to mid-volume copying and printing system. Printer Technolog electrophotography (LED head) Photoconductive dru organic photoconductor (OPC) Printing speed 3 m/min (10 feet/min) Warm-up time none, once the printer is turned on Media feed manual and single- or double-roll automatic Toner syste... -
Page 129: Product Specifications For The Scan Ner129
Product specifications for the scanner Scanner Free-standing un can only be used in combination with the printer en- gine Digital retention up to 19 copies from a single scan Digital zoom 25-400% in fixed steps or 1% increments Paper selecti Roll 1, Roll 2, or Manual feed Automatic Background Compensa- the standard setting is 'on,' but it can be turned off... -
Page 130: Interface S130
Interfaces Centronics protocol Centronics supports P1284-compatible and ECP modes. SCSI-2 protocol When the printer is attached to a SCSI-bus, it functions as a standard SCSI tape device. SCSI tape commands are used to address the Océ 9400-II for upload. Ethernet protocol You can connect the printer to: TCP/IP NETBIOS (over TCP/IP). -
Page 131: Centronics Port Configurat Ion131
Centronics port configuration The Centronics parallel port is located at the rear of the printer. It is a DB25 female connector. The following table describes the Centronics port pin assignments. For further details, refer to the IEEE P1284 standard. Printer Pin No. Signal Name STROBE Data 1... -
Page 132: Scsi-2 Port Configuratio N132
SCSI-2 port configuration The SCSI-2 connector is located on the optional SCSI board at the rear of the printer. It is a mini Subd 50-pin female connector. The following table describes the SCSI port pin assignment. For further details, refer to the ANSI X3.131 standard. Printer Pin No. -
Page 133: Ethernet Port Configura Tion133
Ethernet port configuration The Ethernet connector is a 10/100 base T connector (RJ45). The following table describes the Ethernet RJ45 pin assignments. Printer Pin No. Signal Name Common mode Term Common mode Term Common mode Term Common mode Term The following table describes the AUI connector (DB15 female with locking mechanism). -
Page 134: Originals That Can Be Used
Originals that can be used Overview of originals Originals Minimum Maximum recommended Width 210 mm 1020 mm (40"), of which an image width of 914 (8.5") mm (36") can be copied without loss of informa- tion Length 210 mm Guaranteed copy quality 3 meters or 10 feet. (8.5") Maximum length limited by the worst-case speed difference between scanner and printer;... -
Page 135: Copy Material That Can Be Use D135
Copy material that can be used Océ machines and media are designed to complement each other for optimal quality and performance. We therefore recommend using only approved Océ media in the Océ 9400-II. A full list of Océ materials suitable for use in the Océ 9400-II, including plain paper, transparencies, colored paper and various polyester films is available from your Océ... - Page 136 Overview of copy material Width 279 mm 914 mm (11”) (36”) Length 420 mm Guaranteed print quality up to ca. 3 meters (16.5") or 10 feet. This is also the limit for prints (A3) and multiple copies made on the Océ 9400-II.
-
Page 137: Overview Of Standard Zoom Formats
Overview of standard zoom formats Standard zoom fixed steps ISO Origi- Copy Standard zoom fixed steps, ANSI Origi- Copy Standard zoom fixed steps, Architectural Origi- Copy Overview and tables... -
Page 138: Order Of Standard Sizes For Using Standar D Cut138
Order of standard sizes for using standard ANSI ARCH (841x1189 mm 34” (34x44”) 36” (36x48” (594x841 mm 22” (22x34”) 24” (24x36” (420x594 mm 17” (17x22”) 18” (18x24” (297x420 mm 11” (11x17”) 12” (12x18” (34x44”) 36” (36x48”) 34” (34x44” (22x34”) 24” (24x36”) 22”... -
Page 139: Controller Firmware Upgrade
Océ 9400-I User Manual Appendix B Controller firmware upgrade... - Page 140 Controller firmware upgrade Please refer to the Océ website (www.oce.com) to obtain the most recent Note: firmware. The Océ 9400-II offers you the ability to upgrade the firmware version of the controller by uploading the firmware through the Centronics port. You must connect a terminal to the controller port Com 1.
- Page 141 Open a terminal session on your host (e.g. WINDOWS terminal) with the following settings: baud rate 9600 data b stop b parity none flow control none Turn the printer on. You will be prompted to press the CTRL-P key with the following message: “Press CTRL-P to update the application / fls/EPC-M1..”...
-
Page 142: Troubleshootin G142
Disconnect the terminal and the serial cable. Turn on the machine. The new firmware is operational. Troubleshooting If you do not send the correct file, if the file is corrupted, or if you switch off the printer during the upgrade procedure, you will be prompted with an error message and asked to upgrade again. -
Page 143: Safety Information
Océ 9400-I User Manual Appendix C Safety information... -
Page 144: Instructions For Safe Use
Make sure that the machine is placed on a level, horizontal surface, stable and strong enough to support the weight of the machine. See the Océ 9400-I safety data sheet in this appendix for information about the weight of the machine. -
Page 145: Safety Data Sheets
Safety data sheets The disclaimer below is valid for all safety data sheets in this Disclaimer manual. These safety data sheets have been compiled to the best of our knowledge as a compact guide to safe handling of this product. We reserve the right to revise safety data sheets as new information becomes available. -
Page 146: Safety Data Sheet Océ 9400-Ii For The Prin Ter146
Safety data sheet Océ 9400-II for the printer PRODUCT SAFETY DATA SHEET Number E-661-e-US Date March 1999 Model Océ 9400/9400-II Printer Description Electrostatic printer, instant printing, console model, plain paper, organic photoconductive drum, powder toner Max. process speed 3 m/min 1 roll 2 roll Dimensions... - Page 147 Safety data sheet for the Océ 9400-II Printer and Scanner PRODUCT SAFETY DATA SHEET Number E-685-b-US Date March 1999 Model Océ 9400/9400-II Printer - Océ 9400/9400-II Scanner Description Multifunction device, instant copying/printing, consisting of an electrostatic printer, console model, plain paper, organic photoconductive drum, powder toner and a free standing scanner, maximum original size 1020 mm x 3000 mm.
-
Page 148: Epa Energy Star
TAR ® EPA E NERGY ® Océ-Technologies B. V . has joined the E Program of the United NERGY States Environmental Protection Agency (EPA). The purpose of the E NERGY ® . Program is to promote the manufacture and marketing of energy-efficient equipment, thereby potentially reducing combustion-related pollution. - Page 149 ® is a U.S. registered mark NERGY Safety information...
- Page 150 Océ 9400-II User Manual...
- Page 151 Océ 9400-I User Manual Appendix D Miscellaneous...
-
Page 152: How To Read This Manua L152
How to read this manual The consistent style that is used in this manual enables you to quickly become familiar with the use of this manual and ultimately the Océ 9400-II. Each section or subsection contains a description of the feature or Description operation identified in the title. -
Page 153: User Survey
User survey Did you find this manual to be accurate? Were you able to operate the product after reading this manual? Does this manual provide adequate background information? Is the format of this manual convenient in size, easy to read and layed out well? Did you find the information you were looking for? Always Most of the times... - Page 154 Please return this sheet to: Océ-Technologies B.V. Attn: ITC-User Documentation P.O. Box 101 5900 MA Venlo The Netherlands Send you comments by E-mail to : itc-userdoc@oce.nl For the addresses of local Océ organizations see : www.oce.com Océ 9400-II User Manual...
- Page 155 Addresses of local Océ organizations Océ-Australia Ltd. Océ-Danmark A.S. P.O.Box 363 Kornmarksvej 6 Brøndby Ferntree Gully MDC VIC 3165 DK 2605 Australia Denmark Océ-Österreich GmbH Océ-France S.A. Postfach 95 32, Avenue du Pavé Neuf, 1233 Vienna 93161 Noisy-le-grand, Cedex Austria France Océ-Belgium N.V./S.A.
- Page 156 Océ-Nederland B.V Océ (Taiwan) Ltd. P.O.Box 800 No. 99-24 Nan Kang Road Sec.2 5201 AV ‘s-Hertogenbosch Taipeh, Taiwan The Netherlands Taiwan, RO Océ Norge A/S Océ (Thailand) Ltd. Postboks 53, Grefsen 16th Floor, B.B. Building 0409 Oslo 4 54 Asoke Road, Sukhumvit 21 Norway Bangkok 10110 Thailand...
- Page 157 dump configuration 114 Index end of message 93 end of print 24 end-of-plot time-out 24 auto roll selection 49, 50 Ethernet automatic language sensing 82 connector 133 automatic roll switch 51 Ethernet connection 27 autoposition 103 ethernet port 28 Ethernet protocol 130 bitmap buffer 37 feeding in the original 57 firmware upgrade 140...
- Page 158 leading edge 73 HP-GL/2 88 programming 73 pen settings 80 load plot cente print material 40 port configuration locked menu 113 centronics 131 LPD 31 Poster mode 68 poster mode 107 PostScript data format selection 97 page layout 97 page size 98 media saver 101 PostScript level 2 10 media saver plot size 105...
- Page 159 safety information 144 scaling 109 scan to file 76 scanner feed table 57 SCSI connector 132 SCSI port 25 SCSI-2 ID 25 SCSI-2 terminato serial protocols 130 Setting up TCP/IP 28 short menus 113 SMB 34 standard cut 56, 72 standard cut mode 17 step size 95 CalComp 95...
Need help?
Do you have a question about the 9400-I and is the answer not in the manual?
Questions and answers