
Related Manuals for Orla KARAWAN


Summary of Contents for Orla KARAWAN
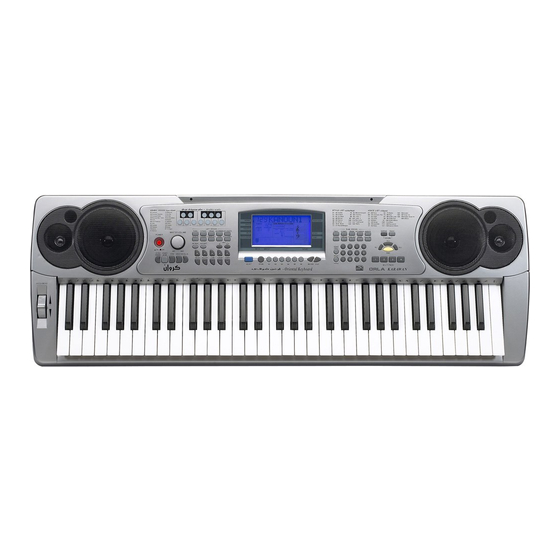
- Page 1 M u s i c a l I n s t r u m e n t s KARAWAN Oriental Keyboard O w n e r’ s M a n u a l...
-
Page 3: Safety Precautions And Instructions
SAFETY PRECAUTIONS AND INSTRUCTIONS WARNING Make sure that the voltage set is suitable for the instrument (the voltage is indicated next to the power inlet). When using electric products, always follow basic precautions, including the following: Read all of these instructions before using the product. To reduce the risk of injury, close supervision is necessary when the product is used near children. - Page 4 DANGER Do not modify the plug provided with the product - if it will not fit - have a proper outlet installed by a qualified electrician. TEMPO / VALUE DISPLAY The messages contained in the Display may not always match the display pages They are merely examples of the many features of the product.
-
Page 5: Power Supply
PREPARATION This section contains information about setting up your instrument and preparing to play. Be sure to go through this section carefully before using this instrument. POWER SUPPLY Your instrument will run from a power adapter (DC12V ). Plug the DC output cable from the Power adapter into the DC IN jack on the rear panel of your instrument, then plug the Power adapter (or the AC cable of the Power Adapter) into a convenient wall AC power socket. -
Page 6: Panel Display Indications
PANEL DISPLAY INDICATIONS Your instrument features a large multi-function display (MULTI DISPLAY) that shows all important settings for the instrument. The section below briefly explains the various icons and indications in the display. Message Display Finger Select Record & Play Song Memory NORMAL RIGHT VOICE... -
Page 7: Multi Pads
DEMO SONGS AND FX BUTTONS Listen to the pre-programmed demonstration songs - they'll give you a good idea of what the instrument can do. playing demo song NORMAL RIGHT VOICE SINGLE FINGERED SPLIT STYLE PERCUSSION DEMO MIDI IN MIDI OUT Turn the Power ON and Set the Master Volume at half way. -
Page 8: Selecting And Playing The Voices
SELECTING AND PLAYING THE VOICES Your instrument has 128 sounds in the internal sound library numbered from 01 to 128, and 10 Drum Kits numbered from 150 to 159. Sound 160 is the SOUND EFFECT preset. It is possible to play up to two sounds for the right hand (DUAL) and one sound for the left hand (SPLIT). - Page 9 SETTING THE ARABIC SCALE These 12 buttons allows to select in real time the desired Arabic Scale. Each one of the buttons is related to one of the 12 semitones of the Octave. Press the desired buttons and the related notes of the instrume nt keyboard, or the right part of the keyboard when in Split or Auto Accompaniment mode, will be lowered by a ¼...
-
Page 10: Split Point
SPLIT POINT The default Left Sound Split point and Auto Accompaniment Split point are in the same position: the G1 key. The Left Sound Split point can be set to any other key as follows: Using the SELECT button select the SPLIT function on the display and when in the SPLIT position hold the SELECT button pressed. - Page 11 NORMAL RIGHT VOICE SINGLE FINGERED SPLIT STYLE PERCUSSION DEMO MIDI IN MIDI OUT Touch Flag Press [TOUCH] button, you can turn ON/OFF the touch function. When the touch function is ON, the volume will be varied according to how hard you play on the keyboard. SUSTAIN Press SUSTAIN button so that its flag appears to turn Sustain ON.
-
Page 12: Pitch Bend
The display indicates all changes. The PITCH value on the display can be changed between –64 ant +63. The normal pitch value (00) can be recalled by pressing both the two [Tune] buttons at the same time. MAIN VOICE VOLUME The volume of the MAIN VOICE can be controlled with the related volume buttons. -
Page 13: Auto Accompaniment
AUTO ACCOMPANIMENT Your instrument has 130 (01-130) accompaniment styles which can be used to provide fully-orchestrated Auto Accompaniment. When the Auto Accompaniment function is turned ON, the left part of the keyboard will be used to play automatic accompaniments with orchestrated chords and bass lines, the right part of the keyboard is available for normal playing. - Page 14 NORMAL RIGHT VOICE SINGLE FINGERED SPLIT STYLE SELECT PERCUSSION DEMO MIDI IN MIDI OUT See a sequence of C chords using SINGLE FINGER mode C Major Press the key C. C minor Press the key C + any black key to the left C Seventh Press the key C + any white key to the left C minor 7th...
- Page 15 FINGERED Press the SELECT button to select FINGERED function in the display. Play the desired chords using the standard configurations with three or more fingers. The keyboard recognize the following chords: Note that when in Fingered mode the keyboard will recognizes the chords also played with a second different Single Finger system.
-
Page 16: Style Selection
C chord - press C key C minor - press C + 3rd key to right C 7th - press C + 2nd key to left C m 7th - press C + 2nd key to left and 3rd to right The Auto Accompaniment will continue playing even if you lift your fingers from the keyboard. -
Page 17: Accompaniment Volume Control
INTRO/ENDING If you press the Intro button before you start the rhythm, the normal rhythm pattern will be preceded by a special introduction (INTRO). If you press the Ending button when the rhythm is already running, the instrument plays a final variation (ENDING) and the style will stop automatically. -
Page 18: Automatic Setup
Use the [ACC+/-] buttons to set the desired volume. The volume range is from 0 (no sound) to 31 (Max volume). The default volume value (28) can be recalled instantly by pressing both the [ACC+/-] buttons at the same time. METRONOME CONTROL The metronome feature is activate by pressing the METRONOME button. -
Page 19: Registration Memory
REGISTRATION MEMORY Your instrument REGISTRATION MEMORY can be used to store six sets of VOICE and AUTO ACCOMPANIMENT settings that can be recalled during you playing at the touch of a button. It is possible to reprogram the settings to suite your personal taste. The new settings will be stored in the internal memory and remembered when the instrument is switched off. -
Page 20: Recording Function
RECORDING FUNCTION Your instrument allows you to record and playback what you have played on the keyboard. Four melody tracks and one accompaniment track can be recorded separately and they can be addressed using the number [1] to [5] in the numeric key pad: nr. [1] is for the auto accompaniment and number [2] to [5] to address four separate melody tracks. - Page 21 Play flag NORMAL RIGHT VOICE SINGLE FINGERED SPLIT STYLE PERCUSSION DEMO MIDI IN MIDI OUT Press and holding [PLAY] button and then press [1] - [5] number buttons, can be able to turn on or off that corresponding track. Press [PLAY] button or all the song is played, the playing will be ended. RESET If it should be necessary to completely erase the internal RAM memory, a very simple reset feature is provided.
- Page 22 MIDI MIDI, the Musical Instrument Digital Interface, is a world-standard communication interface that allows MIDI-compatible musical instruments and equipment to share musical information and control one another. This makes it possible to create "systems" of MIDI instruments and equipment that offer far greater versatility and control than is available with isolated instruments.
- Page 23 KARAWAN SOUND LIST 51 Synth Strings 1 101 Brightness Grand Piano 52 Synth Strings 2 102 Goblins Brigth Piano 53 Choir Aahs 103 Echoes Electric Grand 54 Choir Oohs 104 Sci-Fi Honky Tonk 55 Synth Voice 105 Sitar El. Piano 1...
- Page 24 Karawan Style List ARABIC DANCE LATIN 2 SAIDI Swing House Rhumba 1 KATAKOFTI Club Latin Rhumba 2 WEHDA KABIRA UK Pop Beguine WEHDA SAGHIRA HH Groove Disco Mambo BALADI Club Dance 100 Cha Cha MAKSOUM Techno Party 101 Bolero MAKSOUM,S...
- Page 25 Oriental Percussions Arab Mix Arab Percussions 24 - C1 Bass Drunm03 25 - C#1 Snare07 Zarb 1 26 - D1 Snare01 Zarb2 27 - D#1 Clap3 Zarb3 28 - E1 Snare02 Zarb4 29 - F1 Tom01 Zarb5 30 - F#1 Closed Hihat01 Dadol1 31 - G1...
- Page 26 GM Drum Kit - a - STANDARD PC=1 ROOM PC=9 POWER PC=17 ELECTRIC PC=25 TR-808 PC=26 24 - C1 Fingers Snap Left Fingers Snap Left Fingers Snap Left Fingers Snap Left Fingers Snap Left 25 - C#1 Finger Snap Right Finger Snap Right Finger Snap Right Finger Snap Right...
- Page 27 GM Drum Kit - b - JAZZ PC=33 BRUSH PC=41 ORCHES. PC=49 SOUND FX PC=57 24 - C1 Fingers Snap Left Fingers Snap Left Fingers Snap Left xxxxxxxxxxxxx 25 - C#1 Finger Snap Right Finger Snap Right Finger Snap Right xxxxxxxxxxxxx 26 - D1 Snare Roll...
- Page 28 KARAWAN Midi Chart Recognized Function Transmitted Remarks Basic Default (*1) 1-16CH Channel Changed (*1) 1-16CH Default Mode 3 Mode 3 Mode Messages Altered ********** Note 0-127 0~127 Number :True voice ********** 0~127 Velocity Note ON O 9nH,v=1~127 O 9nH,v=1~127 Note OFF...
- Page 30 ORLA srl - Italy www.orla.it info@orla.it...
Need help?
Do you have a question about the KARAWAN and is the answer not in the manual?
Questions and answers