Table of Contents
Advertisement
Advertisement
Table of Contents

Related Manuals for Sangean PR-D4


Summary of Contents for Sangean PR-D4
- Page 1 PR-D4 Version 1...
-
Page 2: Important Safety Instructions
IMPORTANT SAFETY INSTRUCTIONS 1. Read these instructions. 2. Keep these instructions. 3. Heed all warnings. 4. Follow all instructions. 5. Do not use this apparatus near water. 6. Clean only with dry cloth. 7. Do not block any ventilation openings. Install in accordance with the manufacturer’... - Page 3 10. Protect the power cord from being walked on or pinched particularly at plugs, convenience receptacles, and the point where they exit from the apparatus. 11. Only use attachments/accessories specified by the manufacturer. 12. Use only with the cart, stand, tripod, bracket, or table specified by the manufacturer, or sold with the apparatus.
-
Page 5: Lcd Display
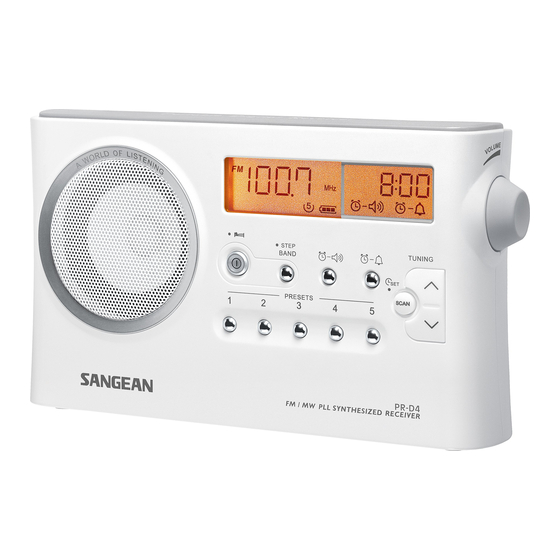
Controls Tuning Up/Down Scan tuning and Time setting Preset buttons Volume Control LCD display Buzzer alarm set Radio alarm set Band and Tuning step selection Power button Headphone socket DC input socket Telescopic aerial Battery compartment LCD Display Sleep and snooze status Radio alarm Frequency Buzzer alarm... -
Page 6: Battery Operation
Battery operation 1. Remove the battery cover on the rear of the unit by pressing the catch. 2. Insert four UM-1 (D size) batteries into the spaces in the compartment. 3. Take care to ensure all batteries are inserted with correct polarity as shown on the rear cabinet. -
Page 7: Setting The Clock
Setting the clock 1. Clock can be set either the radio is power on or off. 2. Display will show “ - : - - “ when the batteries are installed or when the radio is connected to the mains supply. 3. -
Page 8: Storing Stations In Preset Memories
Manual tuning/station searching 1. Press the Power button to turn on the radio. 2. Select the required waveband by pressing the Band button. Adjust the antenna as described above . 3. A single press on either the Tuning up or down button will change the frequency in the following increments: FM: 50 or 100 kHz MW: 9 or 10 kHz... -
Page 9: Setting The Radio Alarm
Recalling stations from preset memories 1. Press the Power button to turn on the radio. 2. Select the required waveband. 3. Momentarily press the required Preset button, the preset number and station frequency will appear in the display. Setting the radio alarm When the radio alarm is selected, the radio will turn on and play the chosen radio station at the chosen alarm time. - Page 10 b. Setting radio alarmed station: 1. During setting radio alarm time and radio alarm symbol is flashing, press Band button to activate the radio to select required wake-up band and station by manual tuning and recall the preset stations. 2. When above radio alarm time and station are set, press and hold radio alarm button for 2 seconds followed by a beep tone to switch alarm on or off.
-
Page 11: Snooze Function
4. Using Tuning Up/Down button to select required alarm hour, then press Scan button again. The Minute digit will then flash. 5. Using Tuning Up/Down button to select required alarm minute, then press button again to complete alarm setting. 6. Press and hold down Buzzer alarm button for more than 2 seconds followed by a beep tone to switch on or off the alarm. -
Page 12: Display Backlight
Display backlight Press any buttons will illuminate the LCD display for approx. 15 seconds. During scanning stations and alarm activated, will also automatically illuminate the display. Setting tuning step Tuning steps on some countries are different from where you purchase the radio. If you buy the radio in Europe and intend to use in Northern America or some Southern American countries, you may have to adjust tuning step so the radio may continue to serve you well. -
Page 13: Specifications
Specifications Power Requirements AC Power adaptor DC 6V 400mA center pin negative Batteries 4 X UM-1 (D size) Battery Life Approx . 170 hours of listening for 4 hours a day at normal volume using alkaline cells Frequency Coverage FM 87.50 – 108 MHz MW 522 –... - Page 14 IMPORTANT SAFETY INSTRUCTIONS 1. Read these instructions. 2. Keep these instructions. 3. Heed all warnings. 4. Follow all instructions. 5. Do not use this apparatus near water. 6. Clean only with dry cloth. 7. Do not block any ventilation openings. Install in accordance with the manufacturer’...
- Page 15 10. Protect the power cord from being walked on or pinched particularly at plugs, convenience receptacles, and the point where they exit from the apparatus. 11. Only use attachments/accessories specified by the manufacturer. 12. Use only with the cart, stand, tripod, bracket, or table specified by the manufacturer, or sold with the apparatus.
- Page 17 Controls Tuning Up/Down Scan tuning and Time setting Preset buttons Volume Control LCD display Buzzer alarm set Radio alarm set Band and Tuning step selection Power button Headphone socket DC input socket Telescopic aerial Battery compartment LCD Display Sleep and snooze status Radio alarm Frequency Buzzer alarm...
- Page 18 Battery operation 1. Remove the battery cover on the rear of the unit by pressing the catch. 2. Insert four UM-1 (D size) batteries into the spaces in the compartment. 3. Take care to ensure all batteries are inserted with correct polarity as shown on the rear cabinet.
- Page 19 Setting the clock 1. Clock can be set either the radio is power on or off. 2. Display will show “ - : - - “ when the batteries are installed or when the radio is connected to the mains supply. 3.
- Page 20 Manual tuning/station searching 1. Press the Power button to turn on the radio. 2. Select the required waveband by pressing the Band button. Adjust the antenna as described above . 3. A single press on either the Tuning up or down button will change the frequency in the following increments: FM: 50 or 100 kHz MW: 9 or 10 kHz...
- Page 21 Recalling stations from preset memories 1. Press the Power button to turn on the radio. 2. Select the required waveband. 3. Momentarily press the required Preset button, the preset number and station frequency will appear in the display. Setting the radio alarm When the radio alarm is selected, the radio will turn on and play the chosen radio station at the chosen alarm time.
- Page 22 b. Setting radio alarmed station: 1. During setting radio alarm time and radio alarm symbol is flashing, press Band button to activate the radio to select required wake-up band and station by manual tuning and recall the preset stations. 2. When above radio alarm time and station are set, press and hold radio alarm button for 2 seconds followed by a beep tone to switch alarm on or off.
- Page 23 4. Using Tuning Up/Down button to select required alarm hour, then press Scan button again. The Minute digit will then flash. 5. Using Tuning Up/Down button to select required alarm minute, then press button again to complete alarm setting. 6. Press and hold down Buzzer alarm button for more than 2 seconds followed by a beep tone to switch on or off the alarm.
- Page 24 Display backlight Press any buttons will illuminate the LCD display for approx. 15 seconds. During scanning stations and alarm activated, will also automatically illuminate the display. Setting tuning step Tuning steps on some countries are different from where you purchase the radio. If you buy the radio in Europe and intend to use in Northern America or some Southern American countries, you may have to adjust tuning step so the radio may continue to serve you well.
- Page 25 Specifications Power Requirements AC Power adaptor DC 6V 400mA center pin negative Batteries 4 X UM-1 (D size) Battery Life Approx . 170 hours of listening for 4 hours a day at normal volume using alkaline cells Frequency Coverage FM 87.50 – 108 MHz MW 522 –...
Need help?
Do you have a question about the PR-D4 and is the answer not in the manual?
Questions and answers