
Related Manuals for MTN Nexus FS

Summary of Contents for MTN Nexus FS
-
Page 1: Installation Guide
Nexus FS Point of Use Installation Guide ® Nexus FS POU Install Guide:12152011:rev-12152011... -
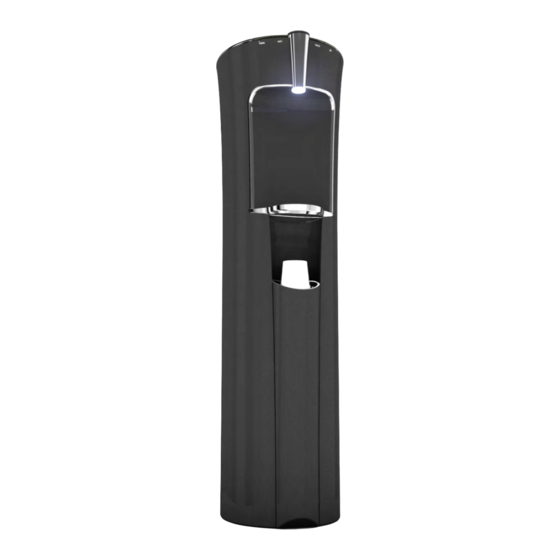
Page 2: Technical Specifications
POU Install Technical Specifications Dimensions: Height: 43.5” Width: 11.65” Depth: 15” Weight: 34.39 LBS Electrical Specs: Voltage: 115 VAC, 60 HZ Current: 5.6 Amps Wattage: 640 ® R e l i a b l y S e r v i n g a T h i r s t y W o r l d 1770 Brackett St., La Verne CA 91750 USA 909-629-7301 909-629-7380... - Page 3 Enhanced sanitization with “SIP-Inside” - Integrates the SIP sanitization system inside the MTN water cooler and sanitizes the cold reservoir, waterways and faucets. The entire waterway system can be cleaned and refreshed daily, weekly or monthly based on customer requirements ®...
-
Page 4: General Information
POU Install General Information • Filtration units must be connected to a known potable water supply. • Unit to be used indoors only. • Ensure cooler is installed on a level floor. • Do not locate cooler in direct sunlight or next to a heat source. Always maintain 4”... - Page 5 POU Install Cooling & Heating Capacities ARI Capacities ARI Capacities (90˚F Ambient Temp) (90˚F Ambient Temp) Cooling Capacity 27 5oz cups Heating Capacity 45 6oz cups ® R e l i a b l y S e r v i n g a T h i r s t y W o r l d 1770 Brackett St., La Verne CA 91750 USA 909-629-7301 909-629-7380...
- Page 6 POU Install Cooling & Hot Water Systems • Compressor uses R134a refrigerant. 1.6 ounces. • Cold water reservoir is manufactured from stainless steel. • Cold water temperature is preset at 45˚F range. Adjustments can be made on rear of cooler (slotted screw.) Turn clockwise for colder; counterclockwise for warmer (¼...
-
Page 7: Cold Water Dispensing
POU Install Cold Water Dispensing • Press “Cold” water button once to select cold function. Then press Cold water selector “Water” (energizes cold water pump & solenoid) to dispense water. The “Water” Dispense dispense button glows blue. • Stay-Cool: Cold water pump turns on for 5 seconds every 30 minutes to keep water cold in the waterways and suppress algae growth. -
Page 8: Hot Water Dispensing
POU Install Hot Water Dispensing • Press and hold the “Hot” water button for about 3 seconds to select hot function. Then press “Water” (energizes hot water pump & solenoid) to dispense water. Dispense Hot water selector • The ring at the “Water” dispense button will glow red. - Page 9 i-Boil POU Install Feature • Provides hotter water suitable for tea, instant soups, etc. • Press & hold i-Boil and wait for short beep ( about 3 seconds. ) • Illuminated ring around “Water” button will flash Red while water is heating to i-Boil temperature. You will hear 1 long beep and the ring around “Water”...
- Page 10 POU Install Light Brightness Control Brightness Control • Current version has two brightness settings: • Full • ® R e l i a b l y S e r v i n g a T h i r s t y W o r l d 1770 Brackett St., La Verne CA 91750 USA 909-629-7301 909-629-7380...
- Page 11 POU Install Filter Panel Access • Accessed via the cup dispenser: Unscrew the screw at the bottom of the cup dispenser Grasp top of cup dispenser and lift up. ® R e l i a b l y S e r v i n g a T h i r s t y W o r l d 1770 Brackett St., La Verne CA 91750 USA 909-629-7301 909-629-7380...
-
Page 12: Installation
POU Install Installation • Follow the guidelines that the manufacturer provides for filter flushing. • Ensure installation complies with all local plumbing codes. • Inline shutoff valves should always be used. Tag shutoff and make customer aware of location. • Install pressure regulator prior to filter and flush water line prior to connecting to filter. - Page 13 POU Install Installation (Continued) • Access for installation of filtration is gained by removing the cup dispenser. • Mounting is provided for bulkhead fittings for external External Bulkhead fittings filtration installation. (can be added) Internal Bulkhead fittings • (can be added) Additional fitting can be used for plumbed coffee units.
- Page 14 POU Install Installation (Continued) • Current float lid assembly is plumbed with ¼” tubing. Connect this line to the outlet of the filter head. • Verify hot tank switch is in off position. ¼” line to filter head • Connect power. •...
- Page 15 POU Install Installation Dispense (Continued) • Purge hot tank Press to dispense • Press and hold hot water button for about 3 seconds to unlock. • Press the dispense button and allow hot tank reservoir to fill with water. Press to unlock •...
- Page 16 POU Install ® Dispense • SIP (Sanitize in Place) provides nightly cooler sanitization. • Two Modes: SIP component 1. Auto clean - SIP must be programmed at the initial ® time of cooler installation. Refer to page 17 for programming instructions. 2.
- Page 17 POU Install ® Auto Clean Setup: 1. Press and hold auto clean button on rear of cooler until beep is heard (approximately 7 seconds.) This will activate auto clean setup mode and white light on the “Water” dispense button will start to flash. 2.
- Page 18 POU Install (X) Explained • X ranges from 0 to 24. 0 means turn off SIP mode. Example: If initial POU ® installation was completed at 12 noon, entering setup mode and pushing auto clean button 12 times (1 push of the button equals 1 hour) and then pressing the “Water”...
- Page 19 POU Install Determining Auto SIP Set Time ® • On a operating unit, press the Auto Clean button once and release (less than 3 seconds). There will be a one second delay and the system will beep (Y) times. If Y=6 check current time. Example current time is 6 PM + 6 beeps indicates the system will start at 12 AM •...
- Page 20 POU Install Manual Full Clean Mode • Place a vessel capable of holding 4 cups of water under the dispense nozzle. • Press the Manual Full Clean button (white button located on the back of the cooler) and hold for 3 seconds until beep is heard.
- Page 21 POU Install Logic • When auto SIP® starts, the compressor stops and Nexus FS will wait 30 minutes for possible ice bank in cold reservoir to melt. • When SIP® is powered, the cold water pump will run for approximately 10 seconds every 2 minutes to circulate ozonated water through the cold water reservoir and Accu-Temp tubing and through the dispense nozzle.
-
Page 22: Troubleshooting
POU Install Troubleshooting Water not dispensing: ALWAYS VERIFY THAT UNIT IS NOT IN MANUAL OR AUTO CLEAN MODE Check to ensure float assembly is not tripped. Verify cooler is connected to a working outlet. Verify water shut off valve is in open position. Ensure filters are not blocked.
Need help?
Do you have a question about the Nexus FS and is the answer not in the manual?
Questions and answers