Table of Contents
Advertisement
Advertisement
Table of Contents

Related Manuals for Masport inbuilt gas fires


Summary of Contents for Masport inbuilt gas fires
- Page 1 Masport Inbuilt Gas Fireplace - 1 -...
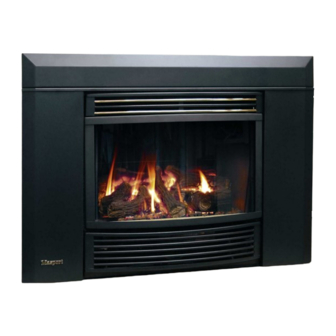
- Page 2 TO THE NEW OWNER Congratulations! You are the owner of a state-of-the-art Gas Fire by Masport. The Masport Inbuilt Gas Fires have been approved by the Australian Gas Association for both safety and efficiency. Please take time to acquaint yourself with these instructions and the many features of your Masport Fire.
-
Page 3: Table Of Contents
Glass Removal – Flush Front ....11 Servicing ..........15 - Bay Front....11 Log Replacement ........16 Glass Gasket..........16 Gold Plated Trim ........16 Glass Replacement ........16 Fan Maintenance ........16 NG to LPG Conversion ......17 Cleaning Instructions .......17 Troubleshooting ........18 Masport Inbuilt Gas Fireplace - 3 -... -
Page 4: Wiring Diagrams
MAINS IN EIS SCHEMATIC ELECTRICAL LAYOUT If the supply cord is damaged, it must be replaced by the manufacturer or its service agent or a similarly qualified person in order to avoid a hazard. Masport Inbuilt Gas Fireplace - 4 -... -
Page 5: For Your Safety
IMPORTANT: guard is required. SAVE THESE INSTRUCTIONS Do not place articles on or against this appliance. The Masport Gas Fire must be installed in accordance Do not use or store flammable materials near this with these instructions. -
Page 6: Electrical Requirements
Use only the Masport INSTALLATION SEQUENCE approved flue kit. The Masport Gas Insert is installed in the steps as 5) Inspect the flue system annually for blockage and listed below. Detailed instructions follow. any signs of deterioration. -
Page 7: Installation Procedure
1288 1275 CLEARANCES Mantel F The following are for both Fascia options; All Masport heaters are tested to New Zealand and Australian standards. Clearances are for fire Maximum Mantel Depth hazard only. For durability of finishes and Minimum Hearth Height... -
Page 8: Flue System
B-Vent flue must be supported by a flue support - supplied by flue manufacturer. The Masport Insert incorporates its own internal draft hood, so no additional external draft hood is required. -
Page 9: Fascia Installation - Sofia & Madrid
10) Lower the top panel assembly into place with the - Black wire lower terminal. locating prongs pointing down so that they fit inside the top edges of each side panel. Fasten the top Masport Inbuilt Gas Fireplace - 9 -... -
Page 10: Piccolo
Next the Fascia stiffener is attached to the Fascia using the screws provided. See Diagram 1. 4) If not already fitted push the Masport logo badge into the holes in the bottom left corner of the fascia and attach it using the clips provided. See diagram... -
Page 11: Glass Removal - Flush Front
This will now free the glass for removal from the the bottom edge clear of its retaining channel. This fire and give access to the logs, burner etc. will give access to the logs, burner etc. Masport Inbuilt Gas Fireplace - 11 -... -
Page 12: Log & Ember Placement
Place the Top log, positioned as shown with its butt end sitting against the raised front lip of the burner. Verify the correct distances to the right side of the firebox.5. Piccolo EIS Models Masport Inbuilt Gas Fireplace - 12 -... -
Page 13: Optional Wall Thermostat
ASSEMBLY REMOVED. OPTIONAL REMOTE CONTROL LIGHTING PROCEDURE INSTALLATION (EIS Models Only) Piccolo Use the Optional Masport Remote Control Kit IMPORTANT: The gas control knob cannot be approved for this unit. Use of other systems may void your warranty. turned from "PILOT" to "OFF" unless it is partially depressed. -
Page 14: Shutdown Procedure
This is particularly useful when a thermostat is fitted, as the 1) Use the top rocker switch to turn off the main fan will not be running unnecessarily. Because the burner. Masport Inbuilt Gas Fireplace - 14 -... -
Page 15: Normal Operating Sounds Of Gas Appliances
CAREFULLY SUPERVISED WHEN THEY ARE Fan: IN THE SAME ROOM AS THE APPLIANCE. Masport gas appliances use high tech blowers to push heated air further into the room. It is not unusual for CAUTION: ANY SAFETY SCREEN OR GUARD the fan to make a "whirring" sound when ON. This... -
Page 16: Log Replacement
To remove fan: If the glass gasket requires replacement use 25mm flat glass gasket for the Flush Front, Masport part number 1) Turn the unit and/or pilot off and allow it to cool to 786774 or 10mm flat glass tape for the curved window room temperature. -
Page 17: Ng To Lpg Conversion
Any other Remove the main injector and discard. lifting, floating or lighting back should be checked by a recognised Masport gas fire Technician. 7) Reinstall the new LP injector marked “1.7” and tighten. Again avoid twisting the pipe work. -
Page 18: Troubleshooting
The following table lists possible problems and their likely causes. Most of these will require a professional serviceman and we recommend that this work be performed by an Authorised Installer. If a problem cannot be solved after referring to this table, please call your Masport gas fire Dealer for help. PROBLEM... - Page 19 Ignition spark continues after the Phase and Neutral connections Get a qualified person to fire has lit. (EIS models only) reversed in the house power supply. correct the house wiring. Masport Inbuilt Gas Fireplace - 19 -...
- Page 20 SERVICED BY INSTALLED BY: ____________________________ DATE: ____________________________ Masport Gasfires are manufactured in New Zealand by MASPORT LTD. 1/37 MT WELLINGTON HIGHWAY. P.O. Box 14-349 Panmure, Auckland New Zealand. A.G.A. Approvals: Piccolo, Sofia & Madrid - All Certificate No 6361 Masport Inbuilt Gas Fireplace...
Need help?
Do you have a question about the inbuilt gas fires and is the answer not in the manual?
Questions and answers