
Related Manuals for Spypoint SMART


Summary of Contents for Spypoint SMART
- Page 1 USER MANUAL INTELLIGENT TRAIL CAMERA Models: SMART SMART-8 v1.3 support.spypoint.com 1-888-779-7646 tech@spypoint.com ...
- Page 2 This manual will guide you through all the features of your device GG Telecom’s mission is to offer products that are easy so that you will get optimal use out of your SPYPOINT product. to use, innovative, affordable and of exceptional quality.
-
Page 3: Table Of Contents
Mounting bracket ..............8 Settings ..................9 I.T.T. mode ................10 I.T.T. mode (Advanced configuration) ........11 File transfer to a computer ............14 Troubleshooting ..............15 Error message .................15 Available accessories ...............16 Specifications SMART ..................18 SMART-8 ...................19 Regulations ................20 Limited warranty ..............21 Repair service ................21... -
Page 4: Package Contents
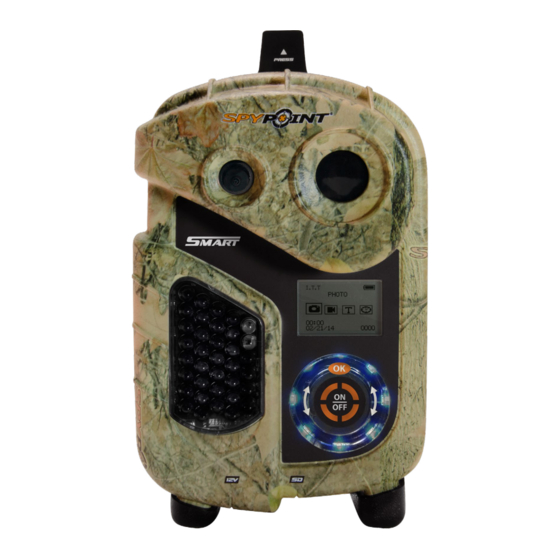
Models: LIT-09: Battery only LIT-C-8: LIT-09 Battery & charger RECHARGEABLE 7.4 VOLT LI-ION POLYMER BATTERY 2.0 Ah RECYCLE OR DISPOSE OF PROPERLY Smart series screen recorded files, error messages and options. WARNING: To reduce risk of fire or burns, - Do not attempt to open, disassemble, or service the battery pack. - Page 5 Components Photo lens Access to the time Mounting bracket 12V power jack battery Fresnel lens Slot for installation SD card slot strap Battery case Configuration screen Tripod mount Cable lock hole Test light Light sensor OK button ON/OFF button Touch wheel Invisibles LEDs...
-
Page 6: Components
Components Photo lens Image sensor and infrared filter. 12V power jack This camera can be powered from an external 12-volt DC input such as a 12V battery or a Fresnel lens Expands the detection area and increases the 12V adapter, sold separately. sensitivity of the camera’s motion sensor. SD card slot An SD card is required to record photos/ Configuration screen... -
Page 7: Power
LITHIUM BATTERY PACK This SPYPOINT camera can be powered by a rechargeable lithium battery pack LIT-09/LIT-C-8 (sold separately). This type of battery is less affected by cold temperatures and lasts up to 3 times longer than an alkaline bat- 4. Using a flat screwdriver, push the battery upwards and lift to remove it... -
Page 8: Memory Card
REMOVING THE MEMORY CARD Note: This SPYPOINT camera is equiped with continuous file Lightly press the memory card into the camera once to pop it out of the slot recording. When the memory card is full, the camera will continue to record and remove it. -
Page 9: Settings
Settings VIDEO Gently slide one finger on the wheel Touch the top of the wheel (OK) to Allows the user to take videos. When the VIDEO mode is selected, clockwise or counterclockwise to select an option. the initialization countdown appears on the screen and the test light in front navigate on the interface and to of the camera will flash for 60 seconds to allow the user to leave the area change option. -
Page 10: I.t.t. Mode
I.T.T. mode The camera is configured by default in I.T.T. I.T.T. mode (Intelligent Triggering Technology) for the PHOTO or VIDEO mode. PHOTO To change the settings, see the ADVANCED CONFIGURATION USING THE SMARTSET oo:oo oooo o2/21/14 SOFTWARE section. PHOTO (I.T.T.) On detection, one photo is taken. If a new movement is detected by the camera, a second photo is taken within 60 seconds after taking the first photo. -
Page 11: Mode (Advanced Configuration)
I.T.T. mode (Advanced configuration) Refer to ADVANCED CONFIGURATION USING THE SMARTSET SOFTWARE section for details on each specification. When using a new memory card, insert it into the camera.Then, turn the camera on and a copy of the SMARTSET software will be saved into the SD/SDHC card. The SMARTSET software is always automatically copied from the camera to the memory card. - Page 12 I.T.T. mode (Advanced configuration) Here are the advanced settings of the software: Time format: (12h/24h) Some settings are only available when the I.T.T. Technology option is Allows the user to select the time display over a period of 12 or 24 hours deactivated. These parameters are identified by an asterisk*. on the photos (e.g. 6:00 pm or 18:00). Delay* Start time/Stop time: (10s/30s/1m/5m/15m/30m) Allows the user to set the operation period of the camera. The start and Allows the user to choose the time interval between each detection before stop time programmed hours are the hours during which the camera is in the camera records the next photo or video.
- Page 13 I.T.T. mode (Advanced configuration) Quality: (Low/Medium/High) Allows the user to set the photo and video resolution. The low resolution allows the user to save space on the card and the high resolution allows the user to get a better photo quality. When the quality is set to" High", the video resolution is automatically set to 640 x 480 and when is set to "Medium" or "Low", the video resolution is automatically set to 320 x 240.
-
Page 14: File Transfer To A Computer
File transfer to a computer To transfer photos to a computer, remove the memory card (sold separa- tely) out of the camera and insert it into the computer slot. MEMORY CARD 1. Click on "My Computer" and select "Removable Disk". 2. Then click on "DCIM" and "100DSCIM" to find all the recorded photos. 3. Drag or save the files to the desired location. The names of the photos recorded by the camera starts by PICT. -
Page 15: Troubleshooting
• Verify if the batteries are correctly installed. setting. camera • Install the latest update (available on www.spypoint. • Small animals may trigger the unit. Reduce sensitivity com under SUPPORT section). setting and/or raise height of camera. -
Page 16: Available Accessories
#AD-12V, AC adaptor (6V to 12V). Powers the camera from an elec- volts or 12 volts output. Compa- trical outlet. tible with all SPYPOINT products or any other products equipped with An extension cable is required a 6 volts or 12 volts power jack. 6 to use this accessory. - Page 17 Max. height: 4.9 ft (1.5 m), min. height: 1.7 ft (0.5 m), max. load weight: 11 lbs (5 kg). Fits most SPYPOINT products. Camera mount #MA-360, Adjustable...
-
Page 18: Specifications Smart
Specifications (SMART) Photo recording Night time illumination system LEDs 36 LEDs Photo resolution 3 MP, 5 MP, 10 MP Type Invisible LEDs File format Exposure Automatic infrared level adjustment Time lapse mode Predefined intervals from 30 s to 30 min Interface Multi-shot mode Up to 6 photos per detection Touch wheel Stamp (only on photos) Date, time, temperature (°C/°F) and... -
Page 19: Smart-8
Specifications (SMART-8) Photo recording Night time illumination system LEDs 36 LEDs Photo resolution 3 MP, 5 MP, 8 MP Type Invisible LEDs File format Exposure Automatic infrared level adjustment Time lapse mode Predefined intervals from 30 s to 30 min Interface Multi-shot mode Up to 6 photos per detection... -
Page 20: Regulations
(1) this device may not cause harmful interference, and (2) this device must accept any interference received, including interference that may cause undesired operation. Hereby, GG Telecom declares that this camera is in compliance with the essential requirements and other relevant provisions of Directive 2004/108/EC. The user can obtain a copy of the Declaration of Conformity by e-mail at info@spypoint.com. -
Page 21: Limited Warranty
Limited warranty and repair This SPYPOINT product designed by GG Telecom, is covered by a one (1) INSTRUCTIONS FOR REPAIR SERVICE year warranty on material and workmanship starting from the original date GG Telecom will repair the product without charge or replace it at its discre- of purchase.
Need help?
Do you have a question about the SMART and is the answer not in the manual?
Questions and answers