Table of Contents
Advertisement
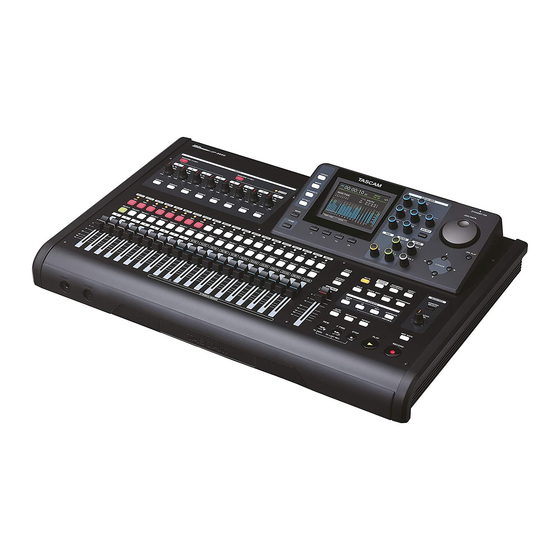
Quick Links
Advertisement
Table of Contents

Related Manuals for Tascam DP-32SD


Summary of Contents for Tascam DP-32SD
- Page 1 D01219420B DP-32SD Digital Multitrack Recorder OWNER'S MANUAL...
-
Page 2: Important Safety Precautions
Consult the dealer or an experienced radio/TV techni- cian for help. CAUTION Changes or modifications to this equipment not expressly approved by TEAC CORPORATION for compliance could void the user's authority to operate this equipment. TASCAM DP-32SD... -
Page 3: Important Safety Instructions
TASCAM DP-32SD... -
Page 4: Safety Information
“環境保護使用年限” • If the battery fluid leaks, wipe away any fluid on 产品有毒有害物质或元素的名称及含量 the battery case before inserting new batteries. If 机种 : DP-32SD 有毒有害物质或元素 the battery fluid gets in an eye, it could cause loss 铅 汞 镉... -
Page 5: Table Of Contents
Contents 1 – Introduction ..........7 Note for customers using both DP-32SD and DP-24 units ..................28 Features ....................7 Editing names ................28 Items included with the product ..........7 Loading a song ................28 Conventions used in this manual ..........7 Creating a new song ..............29 Trademarks..................8... - Page 6 Level diagram ................74 Saving send effects in the library ........53 10 - Mixing Down and Mastering Songs ..54 Mixing down tracks ..............54 Levels and balance .............. 54 Fader group ................54 Stereo position (panning) ..........54 TASCAM DP-32SD...
-
Page 7: Introduction
1 – Introduction Thank you very much for purchasing the TASCAM DP-32SD Items included with the product Digital Multitrack Recorder. Before connecting and using the unit, please take time to read The DP-32SD package contains the following items. this manual thoroughly to ensure you understand how to Take care when opening the package not to damage the items. -
Page 8: Trademarks
• Do not place any object on the unit for heat dissipation. • Avoid installing this unit on top of any heat-generating Customers in the USA, please visit the TASCAM website (http:// electrical device such as a power amplifier. tascam.com/) to register as a user online. -
Page 9: Quick Guide
Use of a different adapter could cause malfunction, fire or electric shock. By connecting an amplifier or powered speakers to the MONITOR OUT jacks, you can monitor using speakers. 3. Connect headphones to the PHONES jack on the front panel. Headphones TASCAM DP-32SD... -
Page 10: Listening To The Demo Song
3. Finally, we will mix down the tracks to stereo. We will assume that you have already followed the instructions in the previous section, and that you have connected headphones or other monitoring equipment, started the unit and inserted an SD card. TASCAM DP-32SD... -
Page 11: Creating A New Song
When connecting an electric-acoustic guitar with a built-in preamp or an active-type electric guitar, or when using an effects pedal, for example, between the guitar and this unit, set the LINE-GUITAR switch to LINE on the rear panel. TASCAM DP-32SD... -
Page 12: Setting The Guitar As The Recording Source For Track 1
1. To return to the beginning of the song (ZERO point), press and hold the STOP ( ) button and press the REW ( ) (TO ZERO) button. 2. Press the PLAY ( ) button to play back the recording on TRACK 1. TASCAM DP-32SD... -
Page 13: Recording A Guitar To Track 2
Its REC indicator blinks and the unit enters recording standby. When you play the guitar, the input level is shown by the level meter (TRACK 2). 4. Press the REC button for TRACK 3. The REC indicator blinks and the unit enters recording standby. TASCAM DP-32SD... -
Page 14: Mixing The Tracks
The recorded file is saved in the folder of the currently loaded song. 10. Press the REC button for TRACK 3 so that the REC button NOTE becomes unlit. When in Mixdown mode, appears in the upper left of Mixdown the Home screen. TASCAM DP-32SD... -
Page 15: Mastering A Recording
2. Press the F3 ( ) button to open the library list. LIBRARY equalizer” on page 57 and “Using mastering compression” on page 57.) mode, the STEREO fader cannot be used to • In Mastering adjust the level. TASCAM DP-32SD... -
Page 16: Shutting Down
Re-record the master file with equalization and compression applied to create a new master file. mode, press the RECORD ( 1. When in Mastering button. 2. This will record over the master file and create a new master file with equalization and compression applied. TASCAM DP-32SD... -
Page 17: Names And Functions Of Parts
• Do not connect or disconnect a microphone when phantom power is turned on. • Turn phantom power on only when using a condenser microphone that requires phantom power. • Do not supply phantom power to an unbalanced dynamic microphone. TASCAM DP-32SD... -
Page 18: Display Area
) button and press to locate the Use this button to turn the equalizer on and off. (See “Using last recording position (LAST REC point). (See “Returning to the input equalizer” on page 35.) zero or the last recording position” on page 43.) TASCAM DP-32SD... -
Page 19: Operation Buttons
Use this knob to adjust the level of the signals output from JOG PLAY button the MONITOR OUT jacks. Press to switch to Search mode. MARK SET button During recording or playback, press to set a mark manually. (See “Setting a location mark” on page 43.) TASCAM DP-32SD... -
Page 20: Front Panel
REMOTE jack (2.5mm TRS) Use this standard stereo jack to connect stereo headphones. Connect a TASCAM RC-3F footswitch (sold separately) here to remotely control a variety of operations, including punching Use the MONITOR LEVEL knob on the top panel to adjust in and out (starting and stopping recording). -
Page 21: Rear Panel
If the input signal of any INPUT A to H source is too loud, the Home screen with track level meters corresponding indicator lights. Counter mode Shows the currently selected time counter mode: Recorder time counter Shows the elapsed time from the start of the song. TASCAM DP-32SD... -
Page 22: Menu Structure
Song Name Type (switch METER Page 61 between DATE and WORD) SAVE function Date/Time (system time Press the F2 ( ) button to open the pop- Page 26 SAVE SONG SAVE setting) up window. Initialize (restore default Page 61 settings) TASCAM DP-32SD... -
Page 23: Navigating Screens
When an item has a menu, “ ” appears on the right side, and the F4 ( ) button is used to open it. In the menu, you can press the F1 ( ) button to return to the previous screen. TASCAM DP-32SD... -
Page 24: Preparation
When the protect switch is in the LOCK position, files cannot be recorded or edited on the card. Slide the switch away from the LOCK position if you want to record, erase or otherwise change files on a card. TASCAM DP-32SD... -
Page 25: Starting Up & Shutting Down
Home screen turned off (put in standby). You can even undo and redo previous When the unit starts up, it defaults to multitrack mode, operations. regardless of the mode used last before shutting down. TASCAM DP-32SD... -
Page 26: Setting The Date And Time
• You can automatically add the date to file names by setting the When in any mode other than multitrack mode, many of the in the menu. Song Name Type DATE PREFERENCE onscreen operations are unavailable. In this manual, explanations are given for multitrack mode unless otherwise noted. TASCAM DP-32SD... -
Page 27: Connecting Other Equipment
• Recorder functions cannot be used when the unit is connected to a computer via USB. When connecting an electric-acoustic guitar with a built-in preamp TASCAM RC-3F Footswitch or an active-type electric guitar, or when using an effects pedal, for (Optional) example, between the guitar and this unit, set the LINE-GUITAR switch on the rear panel to LINE. -
Page 28: Song Management
Before using a song created on a DP-24 with a DP-32SD, always backup the song data or copy the song. When a song created on a DP-24 is loaded on a DP-32SD, the song data is overwritten in DP-32 format, making it unusable by a DP-24. -
Page 29: Creating A New Song
If you press the F1 ( ) button, the pop-up window disappears from the screen. SONG LIST 9. Once the song is created, the pop-up window disappears from the screen. SONG LIST 10. Press the HOME button to return to the Home screen. TASCAM DP-32SD... -
Page 30: Viewing Song Information
5. Change the song name as you want and press the F2 ( button. NOTE To cancel copying, press the F1 ( ) button instead of the F2 ( button. 6. When copying completes, the pop-up window disappears from the screen. SONG LIST TASCAM DP-32SD... -
Page 31: Protecting Songs
4. Next, press the F4 ( ) button to open the menu. Use the JOG/DATA dial or the CURSOR ( ) buttons to select from the menu, and then press the F4 DELETE UNUSED ) button. A confirmation message appears. TASCAM DP-32SD... -
Page 32: Changing A Song Name
5. Change the song name as you want and press the F2 ( button. NOTE To cancel changing a song name, press the F1 ( ) button instead of the F2 ( ) button. 6. Once the song name is changed, the pop-up window disappears from the screen. SONG LIST TASCAM DP-32SD... -
Page 33: Basic Recording
) button. to mix up to 8 input signals with the playback tracks. A “Erase selected tracks. Are you sure?” pop-up message 1. When the recorder is stopped, press the ASSIGN button to appears. open the Assign screen. TASCAM DP-32SD... -
Page 34: Checking Assignments
• Turn phantom power on only when using a condenser meter, the level is too high (it stays on screen for a while before microphone that requires phantom power. automatically disappearing). If the level is too loud, the sound TASCAM DP-32SD... -
Page 35: Peak Hold Display
2. Press the SOURCE button of an INPUT (A to H) or the screens. SELECT button of a track to open the Mixer screen with the 1. When the recorder is stopped, press the MENU button to corresponding equalizer. open the screen. MENU TASCAM DP-32SD... -
Page 36: Digital Trim Setting (Track Only)
2. Turn the JOG/DATA dial to set the value. Insert effect Setting range: (Default: indicator -42dB +6dB 2. Turn the JOG/DATA dial to enable/disable the insert effect. Options OFF: indicator unlit (default) INSERT EFFECT indicator lit INSERT EFFECT TASCAM DP-32SD... -
Page 37: Setting The Stereo Position
Press the REC button of a muted track to unmute it (and turn its MUTE/SOLO indicator off ). NOTE If you solo a muted track, you can hear its sound, but its muted status is retained. So, it will be muted again when you end soloing. TASCAM DP-32SD... -
Page 38: Rehearsing A Recording
5. After rehearsing your recording, press the STOP ( ) button. 6. Press the REHEARSE button to exit Rehearsal mode. disappears from the upper left corner of the Rehearsal Home screen. TASCAM DP-32SD... -
Page 39: Setting Input Levels
After doing this, the UNDO/REDO button lights, showing that redo (see below) is possible. ª Canceling an undo operation (redo) Press the UNDO/REDO button when it is lit. The undone operation is redone, restoring the state before the undo, and the UNDO/REDO button becomes unlit. TASCAM DP-32SD... -
Page 40: Undoing Older Operations (Multiple Undo)
HISTORY LIST to the last event not undone. If the most recent event in the is selected, pressing the F4 ( ) button HISTORY LIST returns to the state before the multiple undo was executed. TASCAM DP-32SD... -
Page 41: Recorder Functions
Playback resumes (punch out). 4. Use the JOG/DATA dial to select the function that you want to assign to the right pedal of the TASCAM RC-3F footswitch. You can also press the STOP ( ) button to punch out at the end of Options: the replacement recording. -
Page 42: Using The Bounce Function
JOG/DATA dial to set it to . This destination, the audio signals of the bounce sources will cause to appear on the Home screen. will not be output from the STEREO OUT or MONITOR OUT jacks until you select the bounce destination. TASCAM DP-32SD... -
Page 43: Locating A Specified Bar/Beat Directly
3. Press the SELECT button for the track that you want to view. NOTE The waveform of the selected track appears. The marks are numbered in the order that you enter them. They are not numbered according to their positions in the song. TASCAM DP-32SD... -
Page 44: Jogging While Listening To Audio
Moreover, these points are used as the start and end points of the mixed-down master file when creating a master file. screen opens. You can set these points when the unit is recording, playing back PREFERENCE or stopped. TASCAM DP-32SD... -
Page 45: Previewing Cue Points
While playback is stopped, hold the PREVIEW button and press the OUT button to play from the current point for the preview time, and then return to the current point and stop. To preview before the cue point: TASCAM DP-32SD... -
Page 46: Checking Punch-In/Out Points
After recording, you can choose your favorite take from one of tracks is in recording standby, press the REHEARSE button. the 8 takes recorded on virtual tracks. (See "Checking takes" The REHEARSE button lights. below.) NOTE You can undo auto punch in/out operations. TASCAM DP-32SD... -
Page 47: Checking Takes
2. Press the VIRTUAL TRACK button. 3. Select UNUSED 4. Press the F4 ( ) button to assign the virtual track to be LOAD recorded to. 5. Once you have completed the setting, press the HOME button to return to the Home Screen. TASCAM DP-32SD... -
Page 48: Track Editing
: Every track from 1 to 32 • The TO point is the current playback position. NOTE If you press the JOG PLAY button to enable jog mode, you can set IN and OUT points with subframe (1/10 frame) precision. COPY PASTE window TASCAM DP-32SD... -
Page 49: Copy/Paste
In other words, you can overwrite the target track from the TO point with a designated number of repetitions of the source data. The following parameters are used in this operation. • SOURCE Track • IN/OUT/TO • TARGET • TIMES TASCAM DP-32SD... -
Page 50: Move/Paste
This operation inserts recorded data into the target track starting • IN/OUT from the TO point. Therefore, the target track becomes longer. The following parameters are used in this operation. • SOURCE Track • IN/OUT/TO • TARGET Track TASCAM DP-32SD... -
Page 51: Silence (Erase Part)
The following parameters are used in this operation. • SOURCE Track • TARGET Track NOTE If you choose the same track for both the and the SOURCE track, a notification appears and the TARGET Same Track operation will not be executed. TASCAM DP-32SD... -
Page 52: Using Internal Effects
Use the CURSOR ( ) buttons to select the parameter that you want to change, and then use the JOG/DATA dial to set the value. NOTE There is no preset or library function for dynamic effects. TASCAM DP-32SD... -
Page 53: Adjusting Guitar Effects
The internal send effect can be applied to signals sent to Send Names in the PRESET library cannot be changed. Effect 1. You can use one of the three types of send effects (REVERB, DELAY and CHORUS) available. You cannot use multiple types of effects simultaneously. TASCAM DP-32SD... -
Page 54: 10 - Mixing Down And Mastering Songs
If you press the GROUP button before turning off all the 3. After making the settings, press the HOME button to return buttons (a button is still lit), the GROUP button will blink, to the Home screen. indicating that tracks are still grouped. TASCAM DP-32SD... -
Page 55: Send Effects
A new master file will be created, and the previous master file will be overwritten. NOTE After recording the master file, you can play back the master file to check it. (See “Checking the master file” in the following section.) TASCAM DP-32SD... -
Page 56: Exiting Mixdown Mode
If you are not satisfied with this master file, you can perform band. a new mixdown. Make the necessary settings for each tool. (For further details, see "Using the mastering equalizer," "Using mastering compression" and "Using normalize," below.) TASCAM DP-32SD... -
Page 57: Using The Mastering Equalizer
(Default: 0 dB) kHz (Default: 100 Hz) Use the HIGH, MID and LOW GAIN knobs to adjust the gain of each band. Use the HIGH, MID and LOW FREQ knobs to adjust the center frequency of each band. TASCAM DP-32SD... -
Page 58: Using Normalize
Mastering Multi Track RELEASE press the MIXDOWN/MASTERING button. Adjusts how fast the compressor disengages after the level drops below the threshold. AUTO MAKE This feature automatically adjusts the volume to prevent it from being reduced by the compressor. TASCAM DP-32SD... -
Page 59: 11 - Various Other Functions
A bar appears to the left or right of the center if the sound is lower or higher than the target pitch. The bar becomes longer as the sound shifts away from the target pitch. TASCAM DP-32SD... -
Page 60: Preference Menu Settings
OFF (default): Input sounds are not muted even when playback starts. When recording is enabled, input and playback sounds are mixed. When playback starts, input sounds are muted. When recording is enabled, only playback sounds can be heard. TASCAM DP-32SD... -
Page 61: Setting The Song Name Format
WORD: The characters set are used for the beginning of the song name. Viewing information Example (set to “TASCAM”): “TASCAM0001” DATE: The date is used for the beginning of the song name. You can view information about the current song (currently Example (created on July 10, 2012): “201207100001”... -
Page 62: 12 - Sd Card Management
F1 ( ) button. 5. Once the quick format completes, the message closes, but screen remains open. FORMAT NOTE When a card is formatted, one song is automatically created in the MUSIC folder. TASCAM DP-32SD... -
Page 63: Full Formatting An Sd Card
F1 ( ) button. 5. Once the full format completes, the message closes, but the screen remains open. FORMAT NOTE When a card is formatted, one song is automatically created in the MUSIC folder. TASCAM DP-32SD... -
Page 64: 13 - Exchanging Data With A Computer
MENU inside the MUSIC folder). This unit appears as an external drive named DP-32SD on the Only export of the master file is possible. computer's display. Clicking on the DP-32SD drive will display the MUSIC, UTILITY, and AudioDepot folders. -
Page 65: Disconnecting
Empty tracks that can be imported appear. Depending on the OS version and settings you might also be able to eject the DP-32SD icon by clicking on an eject icon next to it in a Finder window or by using a control key. -
Page 66: Exporting Tracks
F2 (4) button. A check mark 4 appears in the box next to the selected track. 3. Press the F2 ( ) button to confirm deletion. If you want to delete multiple files, repeat the procedure above. TASCAM DP-32SD... -
Page 67: 14 - Troubleshooting
If there is a power amplifier or other device that uses a large transformer, a fluorescent light or something similar nearby, you might be able to reduce the noise by changing the distance and orientation of this unit in relation to such equipment. TASCAM DP-32SD... -
Page 68: 15 - Messages
USB to format the card in FAT format and if an unformatted card is inserted in the unit. Format Error Always use the DP-32SD to format cards to be used with it. Replace the card or format it using the Format CARD FORMAT menu. - Page 69 (See “Undoing an operation” on page SONG 39.) Virutal Track has Since a virtual track has been recorded, the track type cannot be changed. If you want to change it, clear different Track the recorded virtual track. Type TASCAM DP-32SD...
- Page 70 If these error messages continue to appear, please contact a TEAC Service Center. System Error 2 System Error 3 System Error 4 System Error 5 System Error 6 System Error 7 System Error 8 System Error 9 Writing Failed TASCAM DP-32SD...
-
Page 71: 16 - Specifications
PHONES jack Mac OS X Mountain Lion (10.8) Connector: 6.3 mm stereo jack Mac OS X Lion (10.7) Maximum output level: 70 mW+70 mW or more Mac OS X Snow Leopard (10.6) (THD+N 0.1% or less, 32 Ω load) TASCAM DP-32SD... -
Page 72: Dimensional Drawings
6.2 kg/13.67 lb Operating temperature range 5 to 35ºC/41 to 95ºF Dimensional drawings * Illustrations in this manual may differ from the actual product. * In order to improve the product, specifications and appearance could be changed without prior notice. TASCAM DP-32SD... -
Page 73: Block Diagram
16 – Specifications Block diagram TASCAM DP-32SD... -
Page 74: Level Diagram
16 – Specifications Level diagram TASCAM DP-32SD... - Page 75 Ce produit est sujet aux réglementations concernant la garantie légale dans le pays d’achat. En cas de défaut ou de problème, veuillez Your unit must be serviced by an authorized TASCAM service station in Except as specified below, this warranty covers all defects in materials contacter le revendeur chez qui vous avez acheté...
- Page 76 ✂ WARRANTY Model/Modèle/Modell Owner’s name/Nom du possesseur/Name des Eigentümers Modello/Modelo/型号 Nome del proprietario/Nombre del propietario/顾客姓名 DP-32SD Serial No./No de Série/Seriennummer Address/Adresse/Adresse Numero di serie/Número de serie/序列号 Indirizzo/Dirección/顾客地址 Date of purchase/Date de l’achat/Datum des Kaufs Dealer’s name/Nom du détaillant/Name des Händlers Data dell’acquisto/Fecha de compra/购买日期...
Need help?
Do you have a question about the DP-32SD and is the answer not in the manual?
Questions and answers