Table of Contents
Advertisement
0234 5673
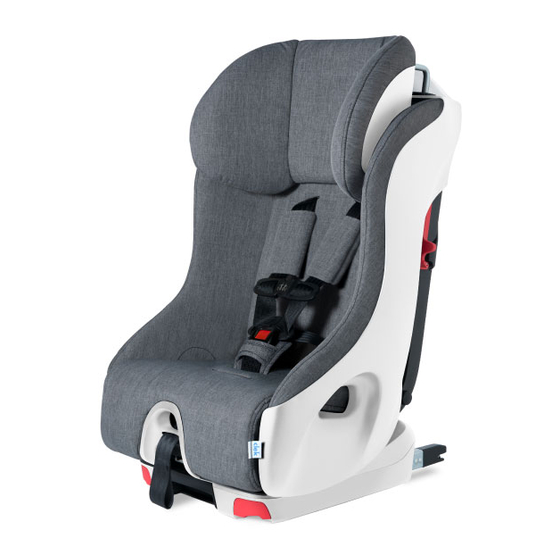
Fllo Instruction Manual
This car seat is designed for use either Rear-Facing or Forward-Facing by children who meet
all of the following requirements:
HEIGHT
64 – 110 cm
6.4 – 18.1 kg
25 – 43 in.
14 – 40 lb
HEIGHT
WEIGHT
76 – 124 cm
10 – 29.5 kg
30 – 49 in.
22 – 65 lb
C03-1422-B1-CA
WEIGHT
AGE
Able to sit
upright alone
AGE
2+ years
recommended
(min. 1 year)
WARNING
• Read and understand product
labels and all instructions in
this manual and in your vehicle
owner's manual before installing
or using this car seat.
• Failure to properly install or
use this car seat or follow these
warnings and those on this car
seat's labels can result in serious
injury or death to the child
in a sharp turn, sudden stop
or crash.
November 2014
Advertisement
Table of Contents

Related Manuals for Clek Car Seat


Summary of Contents for Clek Car Seat
- Page 1 0234 5673 Fllo Instruction Manual This car seat is designed for use either Rear-Facing or Forward-Facing by children who meet all of the following requirements: WARNING • Read and understand product labels and all instructions in this manual and in your vehicle owner’s manual before installing...
-
Page 2: When Using This Car Seat In Rear-Facing Mode
Clek Inc. √ Shoulder Harness Straps MUST be through Shoulder √ The top of the child’s head is at least 2.5 cm (1”) below the top of the car seat Headrest. Attn: Customer Service Harness Slots at or above and closest to the child’s 226 Lesmill Rd. -
Page 3: Table Of Contents
Vehicle Belt Requirements ................28 Vehicle Belt Systems ................... 29 ® Clek and Clek logos, Olli, Ozzi, Oobr, Foonf and Fllo are registered trademarks of Clek Inc. Installing/Removing Rear-Facing Car Seat ............32 For a complete list of Clek Inc. trademarks please visit www.clekinc.ca/trademarks. -
Page 4: Car Seat Features
000002 Foonf Instruction Manual WARNING Car Seat Features – Front Car Seat Features – Back HEIGHT WEIGHT HEIGHT WEIGHT RECOMMENDED JULY2012 21 Seat Seat Cushion 22 Top Tether Shoulder Harness Slots 23 Tether Adjuster Shoulder Harness Covers 24 Tether Hook... -
Page 5: Registration & Recall Information
Fill out the prepaid registration postcard attached to the car seat and mail it today. restraint (car seat) to be reached in a recall. Child restraints could be recalled for safety reasons. You must register this restraint to be reached in a recall. Send your name, address, e-mail address if available, and the restraint’s... -
Page 6: Warnings
– Child’s head is less than 2.5 cm (1") from the top of the car seat’s death of the child in a sharp turn, sudden stop or crash. - Page 7 • Never use a second-hand car seat or a car seat whose history you do not • Do not use this car seat after a crash of any kind. A crash can cause know. damage to this car seat that you cannot see.
-
Page 8: Certification
Vehicle Classification • This car seat is for use only in the following classes of vehicles: passenger cars, trucks, and multi-purpose vehicles such as SUVs (sport utility vehicles) and CUVs (crossover utility vehicles). -
Page 9: When Using This Car Seat In Forward-Facing Mode
(22 and 65 lb), AND in the highest adjustment position, your • Child’s height is between 76 to 124 cm child is too large for using this car seat (30 and 49 in.), AND Rear-Facing and must be transitioned to Forward-Facing use with this car seat. -
Page 10: Adjusting Car Seat To Fit Your Child
SERIOUS INJURY can occur the Headrest into the desired position (2) as shown in Figure 6. Figure 6 • Never use this car seat without the Headrest. Step 2 Check for proper adjustment of Headrest. 2.5 cm The bottom of the Headrest must always be at or above the Harness Slots in use. -
Page 11: Crotch Strap Adjustment
Step 3 NOTE: For larger children, the Crotch Strap can be lengthened and installed in the Crotch Strap Adjustment forward Crotch Strap Slot. IMPORTANT: NEVER use the longer Crotch Check position of Crotch Strap: Strap length in the rear Crotch Strap Slot. •... -
Page 12: Shoulder Harness Adjustment
Shoulder Harness Adjustment SHOULDER HARNESS SLOT SELECTION Place child in seat and select the appropriate set of Shoulder Harness Slots for the direction WARNING — DEATH or child is facing. SERIOUS INJURY can occur For Rear-Facing Use: Choose the Shoulder Harness Slots at or just below and closest to the shoulders of your child as shown in •... -
Page 13: Shoulder Harness Rethreading
(1) as shown in Figure 23. strap out through slot in Metal Harness Plate as shown in Figure 21. Step 5 From front of car seat, pull Shoulder Harness Straps out of seat back. Figure 23 Figure 21... - Page 14 Figure 28 Figure 25 Step 5 TO SHORTEN THE SHOULDER HARNESS WEBBING If installing this car seat rear-facing, store the Top Tether. See “Top Tether Storage” on For smaller children: to make the page 78. Harness shorter, attach the Metal...
-
Page 15: Vehicle Information
• 2003 or newer model year vehicles have at least two Figure 29 seating locations with a UAS Anchorage System. Some • Before using this car seat, reference your vehicle owner’s 2001 and 2002 model year vehicles have UAS Anchorage manual for: Systems. -
Page 16: Vehicle Belt Requirements
INJURY can occur. The back seat is the safest place for children 12 and under. • Never use this car seat with a vehicle belt that is cut, damaged, frayed or • Never use this car seat in a front vehicle seat location NO coloque el asiento infantil para el automóvil orientado hacia atrás en el... -
Page 17: Vehicle Belt Systems
Figure 35. installation as shown in Figure 37a. – May not allow for secure installation of this car seat Figure 37a in some cases. Check for movement of car seat after installation. -
Page 18: Installing/Removing Rear-Facing Car Seat
(6”). Figure 38a • UAS or vehicle belt must stay tightly adjusted around car seat at all times. 3. Pull out on shoulder belt again. If the belt will not pull • Failure to properly install or use this car seat increases the risk of serious... -
Page 19: Installing Rear-Facing Car Seat With Uas
SERIOUS INJURY can occur (continued) WARNING — DEATH or • Never leave this car seat unsecured in your vehicle. This car seat must SERIOUS INJURY can occur remain secured even when not in use. In a sharp turn, crash or sudden stop, an unsecured car seat can be thrown around and could severely •... - Page 20 Check that Crotch Strap is not under UAS Belt position. Refer to vehicle owner’s manual for as shown in Figure 44a. recommended seat back angle. DO NOT install or use this car seat while the vehicle Figure 44a seat back is excessively reclined, as shown in Figure 41.
- Page 21 Reference Line (top line) parallel to the Tighten UAS Belt to secure the car seat. ground • Press down in center of car seat to • If using with an older child who is over depress the vehicle seat cushion and...
-
Page 22: Removing Rear-Facing Car Seat Installed With Uas
Removing Rear-Facing Car Seat Installed With UAS Step 11 Check for secure installation. Gripping car seat at top of armrests, pull car seat front Step 1 to back and left to right to check for secure installation as shown in Figure 49. UAS belt... -
Page 23: Installing Rear-Facing Car Seat With Vehicle Belt
Figure 53. Figure 28 Figure 53 • Not all vehicle belts are safe for use with this car seat. Read the “Vehicle Step 4 Belt Requirements” section in this manual. • Vehicle Belt must be routed through Rear-Facing Belt Path when car seat is Remove Seat Cushion, see “Removing/... - Page 24 Step 7 Tighten vehicle belt to secure the car seat If installing with a lap/shoulder belt, open • Press down in center of car seat to one (1) Rear-Facing Belt Lock-off as shown depress the vehicle cushion and pull the in Figure 56.
- Page 25 IMPORTANT: If Lock-off will not close easily, • Press down in center of car seat to it may be necessary to loosen the belt slightly depress the vehicle cushion and pull the in order to properly position the belt under shoulder portion of lap/shoulder belt to the Belt Tabs and close the Lock-off.
-
Page 26: Removing Rear-Facing Car Seat Installed With Vehicle Belt
Removing Rear-Facing Car Seat Installed With Vehicle Belt Step 10 Check for secure installation. Gripping car seat at top of armrests, pull car seat front Step 1 to back and left to right to check for secure installation as shown in Figure 65. Vehicle Unbuckle vehicle belt. -
Page 27: Installing/Removing Forward-Facing Car Seat
• To avoid injury, this car seat must be installed by an adult. • Failure to properly install or use this car seat increases the risk of serious injury or death to the child and others in a sharp turn, sudden stop or crash. -
Page 28: Installing Forward-Facing Car Seat With Uas
Step 2 Raised recline foot seat Forward-Facing. • Only use the car seat UAS system in vehicle seating locations designated Select a Forward-Facing vehicle seating location which has UAS. by the vehicle manufacturer for use with UAS and that have a standard anchor spacing of 280 mm (11 in.). - Page 29 • Pull UAS Belt and Lower Connectors out recommended seat back angle. DO NOT the right side of the Rear-Facing belt path, install or use this car seat while the vehicle as shown in Figure 72. seat back is excessively reclined, as shown in Figure 72 Figure 70.
- Page 30 Figure 77 Figure 77a Step 11 vehicle UAS anchor. For each connector: Gripping car seat at top of armrests, pull car • Press the UAS Connector against the seat front to back and left to right to check Figure 51 UAS anchor until you hear the UAS for secure installation as shown in Figure 78.
-
Page 31: Removing Forward-Facing Car Seat Installed With Uas
Loosen UAS Belt by pressing the adjuster button and pulling out on UAS Belt as shown in Figure 81. • Pressing down in center of car seat to reduce tension on UAS Belt will make it easier to loosen UAS Belt. -
Page 32: Installing Forward-Facing Car Seat With Vehicle Belt
Figure 85. • Not all vehicle belts are safe for use with this car seat. Read the “Vehicle Belt Requirements” section in this manual. Step 4 • Always install with a Top Tether. - Page 33 Harness and back of seat, and buckle seat belt, as • Press down in center of car seat to shown in Figure 87. depress the vehicle cushion and pull end lap belt only or shoulder portion of •...
-
Page 34: Removing Forward-Facing Car Seat Installed With Vehicle Belt
Check for secure installation. Gripping car Figure 97 Remove Tether Hook from vehicle tether seat at top of armrests, pull car seat front anchor. to back and left to right to check for secure installation as shown in Figure 96. Vehicle •... -
Page 35: Securing Your Child In Car Seat
• The bottom of the Headrest must always be at or above the Shoulder Harness Slots in use. • Always use the Buckle Pad supplied with this car seat for children weighing up to 10 kg (22 lb). • Never use the longer Crotch Strap length in the rear Crotch Strap Slot. - Page 36 If the child’s shoulders are above the highest set of Shoulder Harness Slots in NOTE: If the Harness cannot be adjusted the car seat’s seat back, your child is too large enough, switch the Metal Harness Plate large for this car seat.
- Page 37 106. If the tops of the ears are above • Insert Buckle Tongues into Buckle one the top of this car seat’s Headrest in the at a time as shown in Figure 109. You highest adjustment position, your child is should hear a click.
-
Page 38: Removing Your Child From Car Seat
(2) as shown in Figure 112. Figure 112 SERIOUS INJURY can occur • Never use this car seat without the Seat Cushion in place. Step 2 Unbuckle Harness by pressing red release button on Buckle as shown in Figure 113. -
Page 39: Installing/Removing Anti-Rebound Bar
TO INSTALL SEAT CUSHION Step 2 Remove Seat Cushion, see “Removing/ Step 1 Installing Seat Cushion” on page 72. Insert the Buckle through the slot in the Seat Remove UAS Push-on Connectors from their Cushion that matches the slot the Crotch storage location, see “UAS Belt Storage”... -
Page 40: Uas Belt Storage
UAS Belt Storage TO REMOVE ANTI-REBOUND BAR Step 1 REMOVAL OF UAS BELT FROM STORAGE Remove the Seat Cushion, see “Removing/ Installing Seat Cushion” on page 72. Step 1 If UAS Push-on Connectors are stored, Remove the Seat Cushion, see “Removing/ remove them from their storage location, see Installing Seat Cushion”... -
Page 41: Top Tether Storage
Figure 124. Instruction Manual Storage 0234 5673 Fllo Instruction Manual This car seat is designed for use either Rear-Facing or Forward-Facing by children who meet all of the following requirements: Step 5 WARNING • Read and understand product... -
Page 42: Aircraft Installation
Harness Covers, and then rethreaded into anchors. The Top Tether should be stored in the back of the proper Shoulder Harness Slots. See the car seat and not used on an aircraft, see “Top Tether “Shoulder Harness Adjustment” section on Figure 128 Storage”... -
Page 43: Removing/Installing Seat Cushion Cover
Removing/Installing TO INSTALL SEAT CUSHION COVER Seat Cushion Cover Step 1 Place Seat Cushion Cover on a flat surface TO REMOVE SEAT CUSHION COVER with Seat Cushion Cover attachments facing up, as shown in Figure 133. Step 1 Step 2 Remove the Seat Cushion from the Seat, Figure 133 see “Removing/Installing Seat Cushion”... -
Page 44: Car Seat Cleaning
Use a soft cloth with warm water and soap. Apply light light mist. pressure with cloth in small circular motions. Do NOT remove the labels from this car seat. They are Step 3 meant to be permanent so they can remind you and others of Work area using soft brush or edge of spoon from outside of important information. -
Page 45: Recycling Your Car Seat
(1) year from the For instructions on how to recycle your Clek Fllo child seat, date of original purchase (the “Warranty Period”). During please visit http://www.clekinc.ca/recycle/ the Warranty Period, Clek Inc. - Page 46 This limited warranty is conditional upon strict compliance with the provisions of the Instruction Manual. In no event will Clek Inc. or the dealer selling this product be liable to you for any damages, including incidental or consequential damages, arising out of the use or inability to use this product.
Need help?
Do you have a question about the Car Seat and is the answer not in the manual?
Questions and answers