Table of Contents
Advertisement
Advertisement
Table of Contents

Related Manuals for Generic Ideo 50


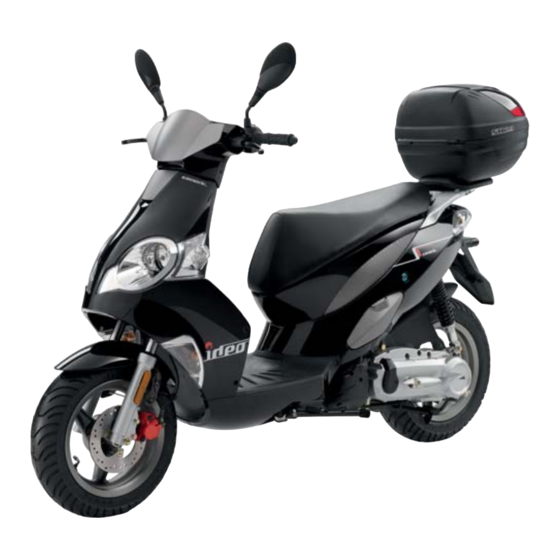
Summary of Contents for Generic Ideo 50
- Page 1 Ideo 50 Type FCC...
-
Page 2: Table Of Contents
CONTENTS Before Riding..............................1 2. Safety Riding..............................1 3. Riding Tips..............................2 4. Use Genuine Spare Parts .......................... 3 5. Use of Each Component ........................... 3 Gauges..............................3 Operation of Ignition Switch........................5 Use of Buttons ............................5 Saddle Lock...............................7 Storage Box ..............................7 Fuel Tank Cap ............................7 Brake ................................. -
Page 3: Before Riding
1. BEFORE RIDING This manual describes the correct usage of this motorcycle including safety riding, simple inspection methods and so on. For a more comfortable and safety riding, please read this manual carefully. Thank you very much for your trust in our product In order to maximize your motorcycle’s performance, a periodical inspection and maintenance should be completely carried out. -
Page 4: Riding Tips
CAUTION: Modified motorcycle will affect its structure or performance, and cause poor engine operation or exhaust noise, which will result in shortening the motorcycle’s service life. Besides, modification is illegal and does not conform to the original design and specifications. A modified motorcycle will not be covered by warranty. -
Page 5: Use Genuine Spare Parts
In order to maintain the motorcycle’s best performance, each part’s quality, material, and machined precision must conform to the design requirements. “GENERIC Spare Parts” were made from the same high quality materials used for the original motorcycle. No parts would be sold to the market until they could meet the designed specifications through sophisticated engineering and stringent quality control. - Page 6 2. Turn Signal Indicator The left or right Indicator will be flashing according to the operated directions of turn signal light switch when it is turned on. 3. High Beam Indicator This indicator comes on with high beam headlight is turned on. 4.
-
Page 7: Operation Of Ignition Switch
OPERATION OF IGNITION SWITCH “Start” position Engine can be started in this position. Ignition Switch Ignition switch key can not be removed. “Stop” position Engine is shut off and can not be started in this position. Ignition switch key can be removed. LOCK “Lock”... - Page 8 Light Switches When the switch is turned to this position, headlight, rear light, instrument panel light, and position light will go on. When the switch is turned to this position, rear light, instrument panel light, and position light will go on. When the switch is turned to this position, all lights will go off.
-
Page 9: Saddle Lock
SADDLE LOCK CAUTION: Please do not put the key into the Unlock: storage compartment after saddle is Insert ignition switch key into the lock on the lower left unlocked to prevent the key from of the saddle, and turn the key to the right. Then, the being locked inside and can not be saddle can be lifted up. -
Page 10: Brake
BRAKE Use front and rear wheel brakes simultaneously when braking. Front BRAKE Rear BRAKE Avoid unnecessary sudden braking. Using only the front brake or the rear brake increases risk falling because motorcycle is tend to pulled to one side. Avoid brake continuously for a long period of time because that may overheat the brakes and reduce its braking efficiency. -
Page 11: Important Points And Cautions For Starting Engine
6. IMPORTANT POINTS AND CAUTIONS FOR STARTING ENGINE CAUTION: Please check if the engine oil and fuel volume are adequate or not, before starting engine. To start engine the main parking stand must be firmly on the ground and the brake is applied on the rear wheel to prevent the motorcycle from moving forward suddenly. -
Page 12: The Best Way To Drive Off
Abnormal Points Do the previous troubles still exist? CAUTION: If any problem found during routine inspection, correct the problem before using the motorcycle again, have your motorcycle checked and repaired by the “GENERIC dealer or authorized service personnel” if necessary. -
Page 13: Inspection And Replenishment Of Engine Oil
Add oil note: Use only 2-cycle engine oil form a GENERIC dealer. Otherwise, this company will not assume any responsibility for damages resulted from using substandard engine oil. When adding oil, do not let foreign materials, dust, dirt enter into the oil system, do not use different brands mixed oil, because this will affect the engine’s performance. -
Page 14: Transmission Oil Inspection
TRANSMISSION OIL INSPECTION AND CHANGE INSPECTION: The transmission oil level can only be checked by an authorized Dealer. If the Oil will be changed 0,1L must be filled in the transmission. OIL CHANGE: Never change the Oil by your own. Let your dealer do each modification and service. If you do any change by your own you will loose all your assurance Recommended Oil: Castrol Manual EP 80W90 INSPECTION AND ADJUSTMENT OF BRAKE FREE PLAY... -
Page 15: Disc Brake Inspection [Depending On Models]
Visual Inspection for leakage or damage. If there is Park the motorcycle on a level ground, and check if fluid any, take your motorcycle to GENERIC Authorized level is under the “LOWER” mark. Recommended Brake Dealer for a check or repair. -
Page 16: Throttle Valve Handle Clearance Adjustment
INSPECTION AND MAINTENANCE OF BATTERY This motorcycle is equipped with a maintenance-free type battery, so it is unnecessary to check and add electrolyte. Have your motorcycle checked by GENERIC Authorized Dealer or Franchised Dealer should any abnormality is found. Remove the battery terminals and clean if there are dirt and corrosion on them. -
Page 17: Tire Inspection
CAUTION: This is a closed type battery. Never remove the caps. In order to prevent electric leakage and self-discharge when the battery sits idle for long periods. Remove battery from motorcycle, store it in a well- ventilated and dimly lighted place after the battery has been fully charged. -
Page 18: Steering Handle Front Shock Absorbers Inspection
Check steering handle if it is being pulled too tight by the brake cables. Take your motorcycle to GENERIC Authorized Dealer for a check or adjustment if any abnormal conditions are found. Figures on the right are for operation checks only CHECKING AND CHANGING FUSES Turn off ignition switch, and check fuses if they are intact. -
Page 19: Checking The Turn Signal Lights And Horn
CHECKING THE TURN SIGNAL LIGHTS AND HORN Turn the ignition switch key to “ON” position. Turn on the turn signal light switch, and make sure that the front & rear and left & right signal lights flashes and also check if the warning buzzer sounds. Check turn signal light covers if they are dirty, crack, or loosen. -
Page 20: Checking The Spark Plug
CHECKING THE SPARK PLUG Remove the cap of high tension cable. (Use a plug wrench in tool box to remove the spark plug by turning it counterclockwise.) Check the electrode if it is dirty or fouled by carbon deposits. Remove the carbon deposits on the electrode with steel wire, and clean the spark plug with gasoline, then, wipe dry with a rag. -
Page 21: When There Is An Abnormal Condition Or A Trouble
Turn the ignition switch key “ON”, and press hold when pressing starting button? horn button. The fuse may blow if horn not sounding. Please go to GENERIC authorized dealer immediately if there are no problems on above conditions and engine still can without function. -
Page 22: Index
INDEX: Description Page adjustment of brake free play air cleaner battery before riding brake brake light check check for fuel leakage disc brake inspection drive off electrical start button engine oil warning light fuel gauge fuel level fuel tank cap fuses high beam indicator high/low beam switch... - Page 23 odometer oil inspection parking riding tips saddle lock safe riding spare parts spark plug speedometer start engine with starting lever starting the engine steering handle storage box throttle valve adjustment tire inspection turn signal indicator turn signal lights and horn turn signal switch use of buttons use of each component...
Need help?
Do you have a question about the Ideo 50 and is the answer not in the manual?
Questions and answers