Table of Contents

Related Manuals for Miller W-250(WP-20)


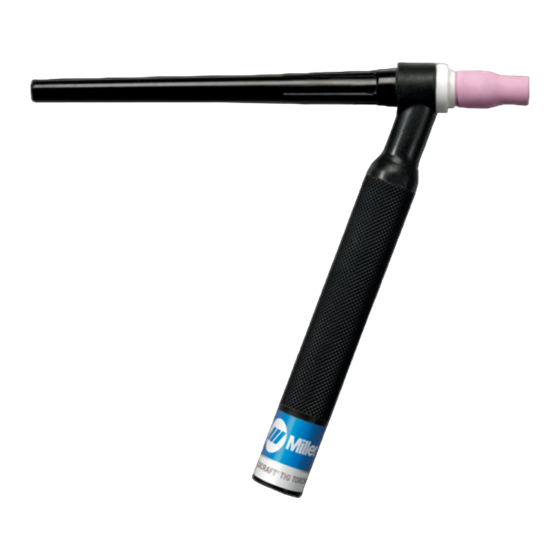
Summary of Contents for Miller W-250(WP-20)
- Page 1 OM-225 425F 2015−03 Processes TIG (GTAW) Welding Description Hand-Held Water-Cooled TIG (GTAW) Torch W-250 Series (WP-20 Series) W-250 (WP-20) W-250V (WP-20V) (WP-20P) W-225 W-200 (WP-25) File: TIG (GTAW) Visit our website at www.MillerWelds.com...
- Page 2 From Miller to You Thank you and congratulations on choosing Miller. Now you can get the job done and get it done right. We know you don’t have time to do it any other way. That’s why when Niels Miller first started building arc welders in 1929, he made sure his products offered long-lasting value and superior quality.
-
Page 3: Table Of Contents
TABLE OF CONTENTS SECTION 1 −SAFETY PRECAUTIONS FOR GTAW TORCHES − READ BEFORE USING ....1-1. Symbol Usage ............... . 1-2. -
Page 5: Section 1 −Safety Precautions For Gtaw Torches − Read Before Using
SECTION 1 −SAFETY PRECAUTIONS FOR GTAW TORCHES − READ BEFORE USING SR6 (TIG) 2013-09 Protect yourself and others from injury — read, follow, and save these important safety precautions and operating instructions. 1-1. Symbol Usage DANGER! − Indicates a hazardous situation which, if Indicates special instructions. -
Page 6: Proposition 65 Warnings
1-3. Proposition 65 Warnings Welding or cutting equipment produces fumes or gases This product contains or produces a chemical known to the which contain chemicals known to the State of California to State of California to cause cancer or birth defects (or other cause birth defects and, in some cases, cancer. -
Page 7: Section 2 − Consignes De Sécurité − Lire Avant Utilisation
SECTION 2 − CONSIGNES DE SÉCURITÉ − LIRE AVANT UTILISATION SR6(TIG)_2013−09fre Pour écarter les risques de blessure pour vous−même et pour autrui — lire, appliquer et ranger en lieu sûr ces consignes relatives aux précautions de sécurité et au mode opératoire. 2-1. -
Page 8: Proposition Californienne 65 Avertissements
LES PIÈCES CHAUDES peuvent LIRE LES INSTRUCTIONS. provoquer des brûlures. D Lire et appliquer les instructions sur les D Laisser refroidir la torche avant de le toucher. étiquettes et Mode d’emploi avant D Ne pas toucher d’objets métalliques chauds. l’installation, l’utilisation ou l’entretien de D Abriter les objets métalliques contre tout l’appareil. -
Page 9: Informations Relatives Aux Cem
2-5. Informations relatives aux CEM Le courant électrique qui traverse tout conducteur génère des champs Ne pas courber et ne pas entourer les câbles autour de votre corps. électromagnétiques (CEM) à certains endroits. Le courant issu d’un soudage à l’arc (et de procédés connexes, y compris le soudage par Maintenir la tête et le torse aussi loin que possible du matériel du points, le gougeage, le découpage plasma et les opérations de circuit de soudage. - Page 10 OM-225 425 Page 6...
-
Page 11: Section 3 − Specifications
SECTION 3 − SPECIFICATIONS 3-1. Specifications Model W-250 (WP-20) W-250V (WP-20V) Amperage Rating 250 Amps W/Argon Gas At 100% Duty Cycle DCEN; 180 Amps W/Argon Gas At 100% duty Cycle ACHF Cooling Method Liquid Cooled Cooling Requirements 1.7 L/min (1.8 qt/min or .45 gal/min) Tungsten Size .020 Thru 1/8 In. -
Page 12: Duty Cycle
3-2. Duty Cycle 100% Duty Cycle At 250 Amperes Using Argon Gas w/DCEN For WP-20 And WP-20V And WP-20M Models. 100% Duty Cycle At 225 Amperes Using Argon Gas For WP-20P Models. Definition Duty Cycle is percentage of 10 minutes that torch can weld at rated load without overheating. -
Page 13: International Style Connector Assembly
4-2. International Style Connector Assembly Weld Output Cable Insulating Boot Sleeve Slide insulating boot onto cable; strip cable and install sleeve. 1 in (26 mm) Connector Body Setscrew Insert cable with sleeve fully into connector body, tighten setscrew, and slide insulating boot over connector. -
Page 14: Connecting Torch
4-3. Connecting Torch A. Connecting Torch To A PipeWorx With A PipeWorx Cooler Turn Off welding power source power before installing torch.. Welding Power Source Gas Hose If applicable, install high-frequency unit. TIG Block (Customer Supplied) Coolant In Hose 237 416 (Short Red Hose Supplied With Cooler) TIG (−) Weld Cable/Coolant In Coolant Out Hose... - Page 15 B. Connecting Torch To A Dynastyt 200 Or MaxstarR 200 TIGRunnert Unit Turn Off welding power source and cooling system power be- fore installing torch. Tools Needed: Gas Hose With 5/8-18 Right-Hand Fittings (Customer Supplied) Connections: Regulator/Flowmeter Gas Cylinder Coolant System 5/8, 7/8, 1-1/8 in.
-
Page 16: Section 5 − Maintenance & Troubleshooting
SECTION 5 − MAINTENANCE & TROUBLESHOOTING 5-1. Routine Maintenance Disconnect torch before maintaining. n = Check Z = Change ~ = Clean l = Replace * To be done by Factory Authorized Service Agent Daily n Nozzle For Cracks − l If Necessary n Check Tungsten Preparation (See Section 6) Weekly n Collet Body Threads −... - Page 17 Trouble Remedy Excessive tungsten electrode con- Select proper size and type tungsten. Properly prepare tungsten according to Section 6. sumption. Check polarity setting on welding power source (see welding power source Owner’s manual). Check for proper gas flow rate. Check manufacture’s recommendations. If torch is water cooled, check torch and cables for water leaks.
-
Page 18: Section 6 − Selecting And Preparing A Tungsten
SECTION 6 − SELECTING AND PREPARING A TUNGSTEN FOR DC OR AC WELDING gtaw_Phase_2011−06 Whenever possible and practical, use DC weld output instead of AC weld output. 6-1. Selecting Tungsten Electrode ( Wear Clean Gloves To Prevent Contamination Of Tungsten Not all tungsten electrode manufacturers use the same colors to identify tungsten type. -
Page 19: Positioning The Torch
SECTION 7 − GUIDELINES FOR TIG WELDING (GTAW) 2007−04 7-1. Positioning The Torch Grinding the tungsten elec- trode produces dust and fly- ing sparks which can cause injury and start fires. Use lo- cal exhaust (forced ventila- tion) at the grinder or wear an approved respirator. -
Page 20: Torch Movement During Welding
7-2. Torch Movement During Welding Tungsten Without Filler Rod ° Welding direction Form pool Tilt torch Move torch to front of pool. Repeat process. Tungsten With Filler Rod ° ° Welding direction Form pool Tilt torch Add filler metal Remove rod Move torch to front of pool. -
Page 21: Section 8 − Parts List
SECTION 8 − PARTS LIST 12 13 14 10 11 WC0203-B Figure 8-1. Complete Torch Assembly OM-225 425 Page 17... - Page 22 Quantity/Model W-250 W-250V W-200 W-225 Item Part Description (WP20) (WP20V) (WP25) (WP20P) Figure 8-1. Complete Torch Assembly ♦57N75 ....Nozzle, Alumina GL LG #6 (3/8 in.) .
- Page 23 Quantity/Model W-250 W-250V W-200 W-225 Item Part (WP20) (WP20V) (WP25) (WP20P) Description Figure 8-1. Complete Torch Assembly (continued) 13 ♦598 882 ....Insulator, Nozzle ......
- Page 24 Effective January 1, 2015 (Equipment with a serial number preface of MF or newer) This limited warranty supersedes all previous Miller warranties and is exclusive with no other guarantees or warranties expressed or implied. Warranty Questions? LIMITED WARRANTY − Subject to the terms and conditions below, 6 Months —...
- Page 25 Contact the Delivering Carrier to: File a claim for loss or damage during shipment. For assistance in filing or settling claims, contact your distributor and/or equipment manufacturer’s Transportation Department. © ORIGINAL INSTRUCTIONS − PRINTED IN USA 2015 Miller Electric Mfg. Co. 2015−01...
Need help?
Do you have a question about the W-250(WP-20) and is the answer not in the manual?
Questions and answers