Table of Contents
Advertisement
Advertisement
Table of Contents

Related Manuals for TVonics Digital tv recorder


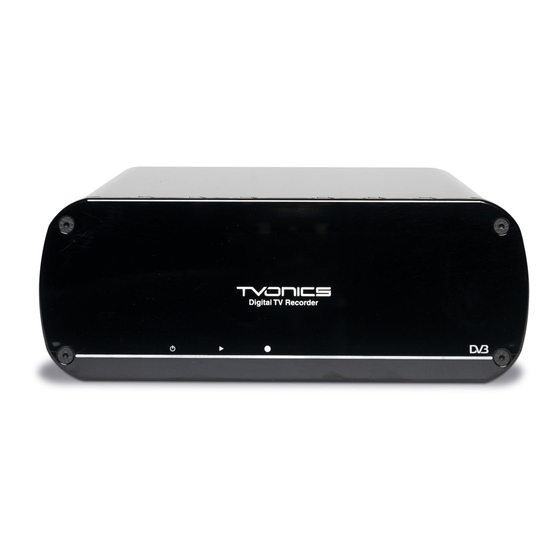
Summary of Contents for TVonics Digital tv recorder
- Page 1 Digital TV Recorder Instruction Manual...
-
Page 2: Overview Of The Remote Control
Overview of the Remote Control... - Page 3 DTV/RADIO - Switches between Digital TV channels and Digital Radio channels. % - Turns the TV’s sound on/off*. MODE buttons - Sets the remote control to operate the Digital TV Recorder, a TV or DVD*. HELP - Displays/exits the Help pages.
-
Page 4: Introduction
Introduction Thank you for choosing this TVonics Digital TV Recorder. This Digital TV Recorder will revolutionise the way you watch TV, allowing you to watch what you want, when you want. • Access all available free-to-air Digital TV and Radio channel with no monthly subscription. -
Page 5: Table Of Contents
Overview of the Remote Control ........................2, 3 Introduction ................................4 Important Safety Information ..........................4 Environmental Information ..........................4 Getting Started Package Contents ..............................6 Inserting the Batteries into the Remote Control ..................6 Attaching the Supplied Feet ..........................7 Safe Installation ..............................7 Connecting to your TV and VCR/DVD Recorder ..................8 Connecting to your Hi-Fi/Surround Sound System ..................8 Automatically Tuning ............................9 Daily Use... -
Page 6: Package Contents
Package Contents Digital TV Recorder Remote Control 2xAA Batteries Power Supply Quick Start Guide Instruction Manual SCART Lead RF Lead Stand 4xRubber Feet Inserting the Batteries into the Remote Control... -
Page 7: Attaching The Supplied Feet
(installing horizontally): Always use the supplied stand when installing Always install the Digital TV Recorder the Digital TV Recorder vertically, as shown. horizontally as shown, on a stable surface. NEVER attempt to install the Digital TV Failure to do so may result in damage to the Recorder vertically without the supplied stand, Digital TV Recorder. -
Page 8: Connecting To Your Tv And Vcr/Dvd Recorder
Recorder’s ‘RF OUT’ socket to your TV’s ‘RF IN’ socket *Socket names may vary according to make and model of your equipment. **If you don’t want to connect a VCR/DVD Recorder, connect the RF lead from the Digital TV Recorder’s ‘8 OUT’ socket to your TV’s ‘RF IN’ socket. -
Page 9: Automatically Tuning
If the remote control does not work, press the DTV button and try again. The Digital TV Recorder will now scan and store all available channels. Depending on the quality of your reception, this may take several minutes. Please be patient and do not press any buttons. -
Page 10: Basic Operations
TEXT button button Basic operations Press Switch the Digital TV Recorder on/off... 1 button. Select a channel... CH. +/ − or 0-9 buttons. Adjust the volume.. VOL. +/− buttons*. Mute the volume..% button. Press again to restore*. -
Page 11: Common Symbols
Common Symbols The following symbols may be visible in the Electronic Programme Guide, Channel List, Info display, Timers screen and Library menu. Locked channel. Multiple audio languages available. Encrypted/scrambled channel. Teletext available. Radio Channel. Timer has been set. Channel selected for moving. Timer is set to repeat (daily/weekly). -
Page 12: Timeshifting
Timeshifting Timeshifting, also known as Pause live TV, lets you pause a broadcast programme and continue watching it later. The maximum length of time you can pause is 2 hours. Timeshift banner Pausing live TV Press X to pause live TV. Press B to resume. When live TV is pause, the timeshifting banner is displayed indicating how long the programme has been paused. -
Page 13: Recording Programmes
Recording Programmes There are 4 different ways to record programmes: The Digital TV Recorder will automatically start recordings 1 minute early and end recordings 3 minutes later. To change these settings refer to ‘Start Recordings’ and ‘End Recordings’ on page 25. -
Page 14: The Electronic Programme Guide (Epg)
The Electronic Programme Guide (EPG) The EPG displays programme information for the next 8 days (when transmitted by broadcasters). You can also set programmes to be recorded from the EPG. Today’s date Current and current channel time Date of Time of currently currently displayed... -
Page 15: The Info Display
The Info display When watching TV, the Info display gives brief information on the current and future programmes (when the programme information is transmitted by broadcasters). You can also set programmes to be recorded from the Info display. When watching a recording, the Info display gives brief information on the recorded programme. Today’s date Channel and current... -
Page 16: The Channel List
The Channel List The Channel List displays all the available channels. List of channels Highlighted channel Press Access the Channel List... OK button while watching TV. Select channels... UP/DOWN buttons. Display the previous nine channels in the list... RED button. Display the next nine channels in the list... -
Page 17: The Timers Screen
The Timers screen The Timers screen displays all the programmes that are currently set to record. You can also set a manual timer and modify or cancel an existing timer from the Timers screen. Today’s date and current time List of timers symbol indicates that... - Page 18 ‘Change/Delete’ options: ‘Allowed’ The timer can be changed or deleted. ‘Disallowed’ The PIN must be entered correctly before the timer can be changed/deleted. symbol will be added to recordings that have been protected from change or deletion.) ‘Playback’ options: ‘Allowed’ The recording can be viewed (even if it was recorded from a locked channel).
-
Page 19: The Library Menu
The Library menu The Library menu displays all the recordings currently stored on the hard disk. You can also browse and manage your recordings from the Library menu. The Library menu will take longer to load if you have lots of recordings stored on the hard disk. - Page 20 Setting protection and playback options You can prevent a recording from being deleted or played unless the PIN is entered correctly. This can be used to stop accidental deletion or prevent children watching inappropriate recordings. With the required recording highlighted, press GREEN. Press UP or DOWN to highlight the required setting.
-
Page 21: Navigating The Menu
Navigating the menu MENU button BACK button button UP/DOWN/ LEFT/RIGHT buttons Press Access the Menu... MENU button. Highlight an option... UP/DOWN buttons. Select an option... OK button. Adjust an option’s settings..LEFT/RIGHT buttons. Go back a step... BACK button. Exit the Menu... MENU button. -
Page 22: Overview Of The Menu
Overview of the menu Edit Channel List Parental Control Hide Channels Set Pin Edit Channel List Lock Channels Sort Channels Tuning Sort Channel List Automatic Search Settings Manual Search Language Service Country Manufacturers Details Subtitle Signal Strength Audio Software Upgrade TV Out Picture Mode Picture Format... -
Page 23: Edit Channel List
With ‘Language’ highlighted, press LEFT or RIGHT to highlight the required language (if available). Country You can select the country in which you are using the Digital TV Recorder to ensure that the time and channel information is correct. Press MENU. With ‘Settings’ highlighted, press OK. -
Page 24: Picture Format
Enter your PIN (default 0000) to continue or press BACK to return to the Menu. CAUTION ! Resetting the Digital TV Recorder will clear all settings and all channel information. After resetting, the Digital TV Recorder will need to retune all channels. Only recorded programmes stored on the hard disk will be kept. -
Page 25: Dvr Settings
DVR Settings Start Recordings To avoid missing the start of a programme you can set the Digital TV Recorder to start recording a programme earlier than the actual start time. Press MENU. With ‘DVR Settings’ highlighted, press OK. With ‘Start Recordings’ highlighted, press LEFT or RIGHT to highlight the required setting. -
Page 26: Parental Control
‘Automatic Search’ will overwrite any changes made to the channel order. Manual Search You can manually tune the Digital TV Recorder. This may be useful to search for any new channels that may have been launched. Press MENU. With ‘Tuning’ highlighted, press OK. -
Page 27: Service
Service Manufacturers Details If you encounter problems with your Digital TV Recorder, you may be required to provide this information to service personnel. Check the Troubleshooting section of this instruction manual before contacting service personnel. Press MENU. With ‘Service’ highlighted, press OK. -
Page 28: Programming The Remote Control
Programming the Remote Control The Digital TV Recorder’s remote control can be programmed to operate certain TVs and DVD players. Follow the procedure below to programme the remote control. button button button button buttons Find the 4 digit code for brand of TV or DVD player from the brand codes, starting on page 33. -
Page 29: Automatically Programming The Remote Control
Automatically Programming the Remote Control If your TV or DVD brand is not included in the code list or the brand codes in the list do not operate your equipment it may still be possible to programme the remote control to operate your equipment. If you want to programme the remote control to operate a TV: Press the TV button. -
Page 30: Controlling A Tv
Use the buttons in the table below to operate your DVD player. When you have fi nished controlling your DVD player, press the DTV button to allow the remote control to operate the Digital TV Recorder again. Button Function in TV Mode... -
Page 31: Specifi Cations
Specifi cations Physical Specifi cation Size (W) 185mm x (H) 70mm x (D) 210mm Weight 1.9 kg Power Requirements Input Voltage 12V DC (with supplied Power Supply) Power Consumption (On) 20W Max Power Consumption (STBY) Operating Temperature +10˚C to +40˚C Storage Temperature -20˚C to +60˚C Twin Tuners... -
Page 32: Troubleshooting
Troubleshooting Should you experience a problem with your Digital TV Recorder which can’t be resolved using the table below, put the unit into Standby mode, then unplug completely from the mains. Leave the unit unplugged for at least one minute before connecting again to the mains. -
Page 33: Remote Control Brand Codes
Remote Control Brand Codes Use the brand codes in the following list when programming the remote control to operate your TV or DVD player (refer to page 28). TV Brand List Brand Code(s) Brand Code(s) Brand Code(s) Aiwa: 1938 Hitachi: 0255, 1255, 0379, 0608, 0066, Samsung: 0648, 0617, 0067, 0208, 0586, 0386, 0138, 0503, 0193, 0373,... - Page 34 DVD Brand List Brand Code(s) Brand Code(s) Brand Code(s) Aiwa: 0671, 0725, 0899, 0563 JVC: 0653, 0588, 1931, 1970, 1194, Samsung: 0603, 0774, 1962, 0850, 1105, 0569, 0533, 0897, 1271 2038, 0520 Akai: 0820, 0809, 0818, 1145, 0928, Kenwood: 0564, 0520 Sanyo: 0700, 0725, 0820, 0903, 0743 0796, 0746, 0914, 0743, 0882,...
- Page 35 U-MAN-001-03 © 2006 TVonics Ltd. Printed in UK 71-800-003-10...
Need help?
Do you have a question about the Digital tv recorder and is the answer not in the manual?
Questions and answers