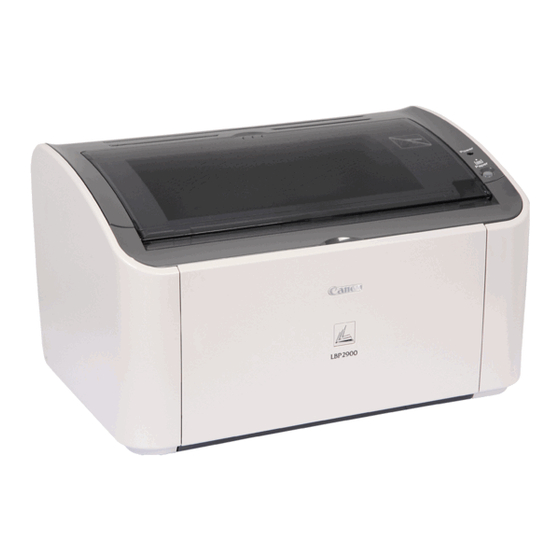
Canon Laser Shot LBP2900 Getting Started Manual
Laser beam printer
Hide thumbs
Also See for Laser Shot LBP2900:
- Specifications (2 pages) ,
- User manual (314 pages) ,
- User manual (316 pages)
Table of Contents
Advertisement
Quick Links
See also:
User Manual
Laser Beam Printer
Getting Started Guide
Read This Manual First.
Thank you for purchasing the Canon LASER SHOT LBP2900.
Please read this manual thoroughly before operating the printer.
After reading this manual, keep it in a safe place for future reference.
Taking the Printer out of the Package and Installing
the Printer
Step1
Installing the Toner Cartridge
Step2
Connecting the Power Cord
Step3
Loading Paper
Step4
Connecting the Printer to a Computer and Installing
the Software
Step5
p. 6
p. 10
p. 14
p. 15
p. 22
Advertisement
Table of Contents

Related Manuals for Canon Laser Shot LBP2900


Summary of Contents for Canon Laser Shot LBP2900
- Page 1 22 the Software Step5 Read This Manual First. Thank you for purchasing the Canon LASER SHOT LBP2900. Please read this manual thoroughly before operating the printer. After reading this manual, keep it in a safe place for future reference.
- Page 2 * The PDF manuals are available from "CD-ROM Setup". (See "About the CD-ROM," on p. 32) Canon makes no guarantees of any kind with regard to this manual. Canon shall not be held liable for errors contained herein or for consequential or...
-
Page 3: Installation Site
IMPORTANT Trademarks Water droplets (condensation) may form inside the printer in the following Canon, the Canon logo, LASER SHOT, and LBP are trademarks of Canon situations: To allow the printer to adjust to the surrounding temperature Inc. and humidity, leave the printer in the installation area for at least one hour Adobe, Adobe Acrobat, and Adobe Reader are trademarks of Adobe before use. -
Page 4: Installation Space
Installation Space CAUTION • Do not install the printer in any of the following locations. Doing so Choose an installation location where you can secure the following amount of free may cause fire or electrical shock. space around the printer, and on a surface that can support the weight of the printer. -
Page 5: System Requirements
• Windows Server 2003 x64 Editions As a result, Canon cannot guarantee printer operation when the printer is • Windows Vista (32-bit or 64-bit version) connected using unidirectional print servers, USB hubs and switching •... -
Page 6: Carrying The Printer To The Installation Site
Do not install the printer on a platform that could warp under the weight of CD-ROM [LBP2900 User Software] the printer and optional equipment, or where the printer is liable to sink CAPT (Canon Advanced Printer (such as on a carpet or mat) Printing Technology) software... - Page 7 • Do not lift the printer by the multi-purpose tray, manual feed tray, Carry the printer to the installation site. paper output tray or any other part of the printer except as directed. Step Hold both sides of the printer in your hands as shown in the diagram, making sure Doing so may cause the printer to fall, resulting in personal injury.
-
Page 8: Removing The Packing Materials
Open the output tray. Removing the Packing Materials Step Cellophane tape and packing materials are attached to the printer to protect it from vibrations and shocks during transport. Remove these pieces of tape and packing material after you carry the printer to the installation site. Remove the tape that is attached to the printer at four locations at the front and back of the printer a, then remove the protective sheet b . - Page 9 Open the multi-purpose tray. Grasp the groove in the center Close the multi-purpose tray. Step of the printer to open the multi-purpose tray. Remove the tape that is securing the rear paper guide.
- Page 10 Open the output tray. Installing the Toner Cartridge Step2 Step For details on handling the toner cartridges, refer to Chapter 5 "Routine Maintenance" in the User's Guide. CD-ROM WARNING The toner cartridge produces a weak magnetic field. If someone who is using a pacemaker feels any unusual sensations, they should stay clear of the toner cartridge and seek medical attention immediately.
- Page 11 • Do not expose the toner cartridge to direct sunlight or strong light. Take the toner cartridge out of the protective bag. Use scissors to open the protective bag so as not to damage the toner cartridge. Step Hold the toner cartridge as shown in the figure, and roll it gently from side to side 5 or 6 times to evenly distribute the toner inside.
- Page 12 • Be careful not to hold or touch sensitive areas such as the sensor or IMPORTANT electrical contacts. Doing so may damage the toner cartridge. • Do not bend the tape or pull it up or down. If you do, the sealing tape may break in the middle, and you won't be able to fully remove it.
- Page 13 Align the protrusions on the left and right ends of the toner Close the top cover. cartridge with the toner cartridge guides in the main printer, and push the cartridge all the way to the back a a a a , then pull it down towards you b b b b .
-
Page 14: Connecting The Power
Plug the supplied power cord firmly into the power socket. Connecting the Power Cord Step3 IMPORTANT • One AC power outlet should be used exclusively for the printer. • Do not plug the power cord into the auxiliary outlet on a computer. Step •... -
Page 15: Loading Paper
Loading Paper into the Multi-Purpose Tray Loading Paper The multi-purpose tray can hold up to approximately 150 sheets of A4, B5, A5, Legal, Letter, or Executive plain paper (64 g/m ). You can also load heavy Step4 paper, transparencies, label paper, envelopes (Envelope C5, Envelope COM10, Envelope DL, Envelope Monarch) or custom paper of width 76.2 to This printer can feed paper from the multi-purpose tray and the manual 215.9 mm and length 127.0 to 355.6 mm. - Page 16 Open the multi-purpose tray. IMPORTANT Before you close the multi-purpose tray, make sure that you return the rear Grasp the groove in the center of the printer to open the multi-purpose tray. paper guide to the position shown in the diagram. If you close the multi- purpose tray without returning the paper guide to the position shown, the printer may be damaged.
- Page 17 Push the side paper guides out a little wider than the actual CAUTION width of the paper. When loading paper, take care not to cut your hands with the edges of the paper. IMPORTANT • The number of sheets of plain paper that can be loaded in the multi- purpose tray is approximately 150 (for 64 g/m paper).
- Page 18 NOTE Slide the paper guides to fit both sides of the stack. To print on letterhead paper or paper with a logo already printed on it, load the paper so that the printed side is facing up and the top of the paper is at the far end.
-
Page 19: Loading Paper In The Manual Feed Tray
Adjust the rear paper guide to match the paper. IMPORTANT • You can only load a single sheet of paper in the manual feed tray. • You cannot print from the manual feed tray if the printer settings are set to multiple copies or multiple pages. - Page 20 NOTE Gently load the sheet of paper with the print side facing up until it touches the back of the tray. To print on letterhead paper or paper with a logo already printed on it, load the paper so that the printed side is facing up and the top of the paper is at Make sure that the paper passes under the paper limit guides.
-
Page 21: Paper Output
Close the output tray when you are not using the printer. IMPORTANT • Always make sure the paper guides match the width of the paper. If the paper guides are too loose or too tight, the paper will not feed properly and this will cause paper jams. - Page 22 NOTE • Connecting the Printer The screen shots shown in this section are taken from Windows XP Home Edition. to a Computer and • A USB cable is supplied with this printer only within countries and regions Step5 of Asia. In other countries and regions, prepare according to the Installing the Software specifications of your computer.
- Page 23 Connect the B-type (square) end of the USB cable to the Connect the A-type (flat) end of the USB cable to the USB USB connector on the rear side of the printer, and close the port on the computer. USB cover. Turn the computer on and start up Windows.
- Page 24 If you selected [Custom Installation] in Step 7, clear the [Online Manuals] check NOTE box, and then click [Install]. If you are using Windows Vista and the [User Account Control] dialog box appears, click [Allow]. Click [Easy Installation] or [Custom Installation]. [Easy Installation] allows you to install the printer driver and the instruction manuals simultaneously.
- Page 25 If you are using Windows XP Service Pack 2 or another operating system Click [Next]. equipped with Windows Firewall, the following screen is displayed. Specify whether to configure Windows Firewall to unblock communication with the client computers when sharing the printer on a network. Click [Yes] when you share the printer on a network.
- Page 26 When the following screen is displayed, turn the printer ON. If [Easy Installation] is selected in Step 7, the manuals are installed. Press "I" of the power switch to turn the printer ON. Confirm the installation results, then click [Next]. Step Installation of the USB class driver and the printer driver starts automatically.
- Page 27 [Restart]. When the CAPT software is finished installing, the following icons and folders will be created. ■ For Windows 2000 A [Canon LBP2900] printer icon is displayed in the [Printers] • folder. Windows restarts. The installation of the USB class driver and the printer driver is Step completed.
- Page 28 [LBP2900 Online Manuals] under created on the desktop, and [LBP2900 Online Manuals] under [Canon LBP2900] is added to [Programs] under the [Start] [Canon LBP2900] is added to [All Programs] under the [Start] menu. menu. ■ For Windows Vista The [Canon LBP2900] printer icon is displayed in the [Printers] •...
-
Page 29: Printing A Test Page
Printing a Test Page created on the desktop, and [LBP2900 Online Manuals] under [Canon LBP2900] is added to [All Programs] under the [Start] menu. Before using the printer for the first time, be sure to print a test page using the following procedure. - Page 30 Right-click the [Canon LBP2900] icon, then select If the page is printed correctly, click [OK] or [Close]. [Properties] from the pop-up menu. NOTE If the test page does not print correctly, refer to Chapter 6 "Troubleshooting" in the User's Guide for details on re-installing the CD-ROM CAPT driver.
- Page 31 When Displaying a Manual Installed on a Computer [LBP2900 Online Manuals] is displayed by double-clicking the shortcut icon created on the desktop when the manuals were installed or selecting [Canon LBP2900] - [LBP2900 Online Manuals] added to [All Programs] ([Programs] for Windows 2000) under the [Start] menu.
- Page 32 Setup. ■ CAPT (Canon Advanced Printing Technology) software The CAPT (Canon Advanced Printing Technology) software that is supplied on the included CD-ROM must be installed before you can print using your printer. Make sure that this software is installed on the computer that you are using.
- Page 33 ● Exit Clicking this button closes the CD-ROM Setup. NOTE • If you are using Windows Vista and the [AutoPlay] dialog box appears, click [Run AUTORUN.EXE]. • If CD-ROM Setup does not appear, display it using the following procedures. (The CD-ROM drive name is indicated as "D:" in this manual. The CD-ROM drive name may differ depending on the computer you are using.) - If you are using an operating system other than Windows Vista, select...
- Page 34 30-2, Shimomaruko 3-chome, Ohta-ku, Tokyo 146-8501, Japan CANON MARKETING JAPAN INC. 16-6, Konan 2-chome, Minato-ku, Tokyo 108-8011, Japan CANON U.S.A., INC. One Canon Plaza, Lake Success, NY 11042, U.S.A. CANON EUROPA N.V. Bovenkerkerweg, 59-61, 1185 XB Amstelveen, The Netherlands CANON CHINA CO. LTD.
Need help?
Do you have a question about the Laser Shot LBP2900 and is the answer not in the manual?
Questions and answers