Table of Contents
Advertisement
Quick Links
Advertisement
Table of Contents

Related Manuals for NextBase 9 Duo Professional


Summary of Contents for NextBase 9 Duo Professional
- Page 1 9 Duo Professional Instruction Manual...
- Page 3 Do not throw electronic devices into household waste, for detailed information contact your local civic office, household waste center or place of purchase. PIXEL FAILURE STATEMENT The LCD screen contains 1,152,000 pixels, pixels can fail during normal product life. 1 pixel = 0.0003% failure rate. One pixel failure per year or operation is considered normal and not a cause for concern or warrantable.
-
Page 4: Table Of Contents
PRECAUTIONS PRECAUTIONS ............1 TABLE OF CONTENTS TABLE OF CONTENTS ..........3 CAUTIONS ON USING CAUTIONS ON USING THIS PLAYER ......5 THIS PLAYER DISCS PLAYABLE DISCS PLAYABLE ON THIS DVD PLAYER ....6 PLAYABLE FORMATS ..........6 PACKAGE CONTENTS PACKAGE CONTENTS ..........7 PARTS AND REMOTE PLAYER CONTROL FRONT... - Page 5 SYSTEM SETUP OPTION MENU ............24 TURNING ON THE INFRA RED TRANSMITTER ..24 PLAYER DISPLAY ..........25 MONITOR DISPLAY ..........26 TV SYSTEM ............26 SCREEN SAVER ...........26 TV TYPE ..............27 PASSWORD ............27 RATING ..............28 FACTORY RESET ..........28 LANGUAGE ............29 SUBTITLE ............29 DIGITAL SETUP SOUND EFFECT ...........30 DYNAMIC RANGE...
-
Page 6: Back
1. DO NOT MOVE THE PLAYER DURING PLAYBACK During playback, the disc spins at high speed. Do not lift or move the player. doing so may damage the disc. 2. TRANSPORTING THE PLAYER Before transporting the player, please remove the disc, turn off the power, and disconnect from power source. - Page 7 DISCS PLAYABLE ON THIS DVD PLAYER...
-
Page 8: Monitor
After unpacking, please check the contents. Player Monitor Remote Control IR Headphone x 2 Carry Case Stanchion Mounts x 2 Car Power Cable Quick Start Guide Instruction Manual Optional accessories, available from you local dealer. Power Pack Additional (Battery & AC Adaptor) IR Headphones... - Page 9 When the power is connected, the LED indicator will be green to show the player is powered.
- Page 10 1. DCIN 12V Connect the AC Adaptor here, use the correct adaptor which is supplied with the ‘Power Pack’ optional accessory. 2. Earphone Jack Connect earphones or amplifier here. 3. iX (Interface Extend) Port Connect to other devices here. Connector / Cable is specific to the player, contact Technical Support for details.
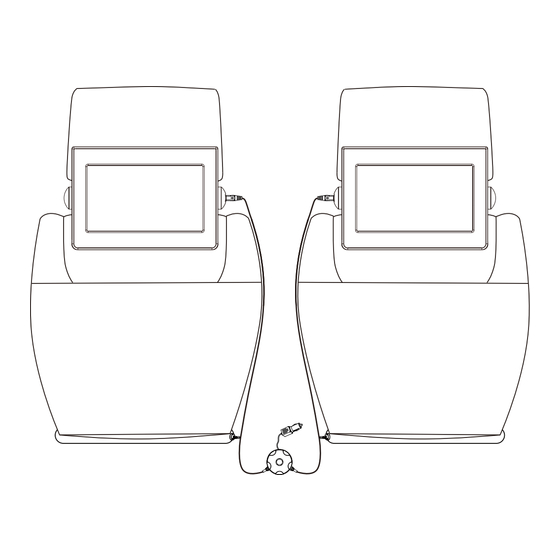
- Page 11 1. Lock Lock / unlock the player stand / stanchion mount. Unlock the stand and remove before mounting onto the stanchion mount. 1. Pull out the support of the stand. 2. Rotate 90degrees. 3. Lean the player back.
- Page 13 3. Audio 1. DC IN 12V Connect the AC Adaptor here, use Connect an audio cable for audio input here. the correct adaptor which is supplied 4. Video with the ‘Power Pack’ optional accessory Connect a video cable for video input here. 2.
- Page 15 language.
-
Page 17: Turning On The Player And Monitor
TURNING ON THE PLAYER AND MONITOR 1. Install the stanchion mounts, screens and connect the car power cable as shown in the supplied Quick Start Guide. 2. The player and monitor will turn on automatically once connected to the stanchion mounts. -
Page 18: Turning Off The Player And Monitor
TURNING OFF THE PLAYER AND MONITOR 1. Press OFF / on the unit for about 2 seconds. 2. Disconnect the car power cable from the vehicles 12Vdc socket. LOADING A DISC... -
Page 20: Playback
USB & SD PLAYBACK INSERTING A USB STICK Insert a USB stick as shown below. NOTE: Connect the USB stick directly to the player, do NOT use a USB hub, an external hard-drive or extension cable, etc. Maximum size is 32Gb and the USB stick must be formatted in FAT or FAT 32. INSERTING A SD CARD 4. -
Page 21: Multimedia File Playback
MULTIMEDIA PLAYBACK MULTIMEDIA PLAYBACK When a USB stick or SD card is inserted and there is an MP3 file upon it, the player will play the file automatically, as shown below. Press stop (OFF) to exit playback and enter the folder list menu screen PLAYING MUSIC FILES NOTE: Music files must be MP3 or WMA format, in order to play. -
Page 22: Viewing Jpeg Files
MULTIMEDIA PLAYBACK VIEWING JPEG FILES... -
Page 23: Playing Video Files
MULTIMEDIA PLAYBACK PLAYING VIDEO FILES... - Page 24 MULTIMEDIA PLAYBACK...
- Page 25 OPTION MENU USING THE INFRA RED TRANSMITTER The DVD player has an in-built Infra Red Transmitter to allow the use of the supplied infra red headphones, to get started simply follow the instructions on page 43 of this manual. The default setting for the IR transmitter is ‘Channel A’, to change this or turn the IR transmitter off, press the Option button on top of the DVD player and press to enter the IR Headphone menu.
- Page 26 PLAYER DISPLAY...
- Page 29 Rating FACTORY RESET Select this to reset all the settings back to their defaults.
- Page 32 DIX® VOD ® ® ® ® ® ®...
- Page 34 Mute...
- Page 37 During playback, if the option Repeat is selected, or the REPEAT button on the remote control is pressed, the title/chapter of a DVD or the track/entiredisc of a CD will be played repeatedly.
- Page 38 Zoom Zoom...
- Page 39 Select this if you want to watch video clips, listen to music or view photos from a USB stick. Navigate to , press to load the USB stick, and the menu below will pop up. The player can receive AV-IN signals, the correct connection cable is sold separately.
- Page 40 USB STICK AND SD CARD READING If a storage device is connected to the player whist another storage device is playing, playback will stop, and the player will play the media from the newly inserted storage device.
- Page 44 INFRA RED HEADPHONES USING THE INFRA RED HEADPHONES The default setting for the IR transmitter on the DVD player is ‘Channel A’, allowing the infra headphones to be used, by following the instructions below. 1. Remove the battery cover on the left earpiece and inset the AAA batteries provided as shown below, take care to match the terminals correctly.
-
Page 45: Optional Accessories
OPTIONAL ACCESSORIES POWER PACK (available from your local dealer) The Power Pack is an optional accessory available from your local dealer, containing a high-capcity Lithium-Polyer (7.4V / 300mAh) rechargeable battery and an AC/DC adaptor. The battery gives the option for using the DVD player outside of a vehicle and when a domestic DC outlet is not available, i.e. - Page 46 9 Duo Professional If LED is not lit, check the fuse Check that the RED LED light fitted within the car power cable No Power illuminates on the car power cable. body and replace as required. See next page for details.
- Page 47 TROUBLE SHOOTING continued Re-format the USB with FAT32 and verify Incompatible file format or USB stick File will not play media files are correct type as described has errors upon. within manual from USB Ensure USB is less than 32Gb in size. Car power cable is disconnected, Connect cable correctly.
- Page 49 NOTES...
- Page 50 To download this Instruction Manual in English, please visit the website detailed below. Um diese Bedienungsanleitung in deutscher Sprache herunterzuladen, besuchen Sie bitte die Website unten. Para descargar el manual de instrucciones en Español, por favor visite la siguiente web. Om du vill hämta den här bruksanvisningen på...
Need help?
Do you have a question about the 9 Duo Professional and is the answer not in the manual?
Questions and answers