Table of Contents
Advertisement
Instruction Manual
Wright Manufacturing
4600X Wedgewood Blvd
Frederick, Md 21703
Stander Intensity serial # 69788 and higher
P/N 79510001
WARNING: READ THIS MANUAL BEFORE USING
For your safety and for proper operation and maintenance read
carefully and keep readily available for future reference.
10/2013
1
Advertisement
Table of Contents

Related Manuals for Wright Manufacturing Stander T


Summary of Contents for Wright Manufacturing Stander T
-
Page 1: Instruction Manual
Instruction Manual Wright Manufacturing 4600X Wedgewood Blvd Frederick, Md 21703 Stander Intensity serial # 69788 and higher P/N 79510001 WARNING: READ THIS MANUAL BEFORE USING For your safety and for proper operation and maintenance read carefully and keep readily available for future reference. - Page 2 1998-2013 Wright Manufacturing, Inc. All rights reserved. This material may not be reproduced or copied, in whole or part, without written permission from Wright Manufacturing, Inc. Grass Gobbler, Gobbler, Leaf Gobbler, Velke, Pro 1, X2, Stander, and...
-
Page 3: Table Of Contents
TABLE OF CONTENTS PRE-DELIVERY SERVICE OF MOWER BY DEALER .....................5 ................................7 NTRODUCTION 1.1 T ..............................7 ECHNICAL 1.2 G ..........................8 ENERAL AFETY NSTRUCTIONS 1.2.1 D ..............................8 S AND 1.2.2 W ................................8 ARNINGS 1.3 I ............................8 MPORTANT NFORMATION 1.4 O ............................9 WNER OTICE 1.5 S ............................9... - Page 4 6.5 H ............................27 YDRAULIC YSTEM 6.6 H ..........................27 YDRO HECK 6.7 B ...................... 27 LEEDING IR FROM THE YDRAULIC YSTEM 6.8 B ............................... 28 ATTERY ERVICE 6.9 P ..........................28 ARKING RAKE DJUSTMENT 6.10 L ..............................28 UBRICATION 6.11 C ..............................
-
Page 5: Pre-Delivery Service Of Mower By Dealer
Pre-Delivery Service of Mower by Dealer If you are not completely familiar with the Safety Instruction Manual read it now before proceeding with the Pre-Delivery Service of the WARNING mower. Only your authorized Wright dealer should perform the Pre-Delivery Service of the mower. The Wright Stander Intensity is shipped completely assembled and has been adjusted and tested at the factory. - Page 6 Move the engine throttle control to ¾ RPM speed setting. Turn on the blade clutch switch. Run blades for approximately one minute. Next, engage and disengage the blades a few times about 10 seconds apart. If the blades do not start and stop in a few seconds each time, service the blade brake system.
-
Page 7: Introduction
1 Introduction This mower is built to the highest standards in the industry. However, carelessness or operator error may result in serious bodily injury or death. Accident and hazard prevention are dependent upon the awareness, concern, wisdom, and proper training of the personnel involved in the operation, transport, maintenance, and storage of the equipment. -
Page 8: General Safety Instructions
1.2 General Safety Instructions The Wright Stander Intensity is designed with your safety in mind. It has the following safety systems with which you should become familiar: The warning decals on the mower including the instrument panel warning DO NOT disable any of the safety features. ... -
Page 9: Owner/User Notice
Wright Manufacturing, Inc. before using or allowing others to operate the equipment. Do not operate this unit unless you carefully read, understand and follow the assembly, installation, and safety instructions contained in this manual and the warning decals provided on the unit. -
Page 10: Regular Mower Safety
1.9 Regular Mower Safety Keep your Wright mower in good operating condition, and keep safety devices and shields in place and in working condition. Replace worn tire(s) with less than 3/32” of any tread groove left. Use tires with the tread pattern specified by Wright Mfg., Inc. -
Page 11: Safety For Maintenance
Before attempting to start the engine, follow all starting instructions below and in the engine operator’s manual. Look behind before backing up. Before leaving the operator’s position, even momentarily, turn off the blade clutch engagement switch and apply the parking brake. -
Page 12: Operation In Reverse
WARNING 1.15 Operation in Reverse Always keep a firm grip on the mower stationary handlebar with both hands. Keep both feet firmly on the foot platform. Look behind you before backing to prevent injuring yourself or anyone behind you. Operate the mower very slowly, inching it backward until you become familiar with how the mower operates. -
Page 13: Fuel Safety
1.22 Replacement Parts WARNING Use of parts other than specified parts supplied by Wright Manufacturing, Inc. may compromise the safe use of the mower, are not recommended and their use could void the warranty. Always check with your Dealer or the Wright Mfg. -
Page 14: Warnings, Safety And Instructional Decals
2 Warning, Safety and Instructional Decals Specific safety warning decals are located on the equipment near immediate areas of potential hazards. Keep all safety signs legible. Remove all grease, dirt and debris from safety signs and instructional decals. ... -
Page 15: Specifications
3 Specifications Engine See your engine owner’s manual RPM: Full speed 3600 +/- 50 RPM (no load) / Idle: 1550 RPM Electrical System Charging System: Internal stator coil Battery Type: Maintenance free Battery Voltage: 12 Volts ... - Page 16 Fuel System Capacity: 5.5 Gal. (20.8 L) Type of Fuel: Unleaded regular gasoline, minimum 85 octane. Do not use gasoline containing more than 10% ethanol. Do not mix oil with gasoline. Fuel Filter: In line Fuel shut off: On, Off located on fuel tank Safety Interlock System ...
-
Page 17: Machine Description & Overview
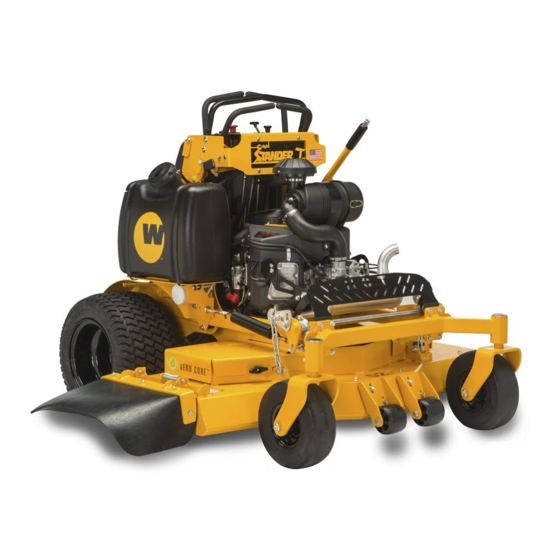
4 Machine Description & Overview The Wright Stander Intensity is meant to solely cut, bag or mulch grass. The use for any other purpose is not recommended. Do not disconnect any safety switches or remove any decals. 1. Flexible Chute Deflector 2. -
Page 18: Operator'sarea
4.1 Operator’s Area 1 - Anti-Tip Wheels 2 - Brake Handle 3 - Deck Lift Handle 4 - Dash/Control Panel 5 - Fuel Tank 6 - Upright Pad 7 - Battery Box 8 - Foot Platform 4.2 Model & Serial Location ... -
Page 19: Control Panel & Steering Control Levers
4.3 Control Panel & Steering Control Levers The Stander Intensity speed and direction are controlled by using the control handles. Moving the control handles equal distance forward or backward the machine moves in a straight line. By releasing the control handles during operation, the controls will return to the neutral position and the machine will stop. -
Page 20: Deck Lift Lever
4.6 Deck Lift Lever The “Quick Cut” height selector has fifteen different settings, ranging from 1.5” – 5.0” and will adjust the cut height in ¼” increments. To operate, insert detent pin (1) in desired cut height hole, grab deck lift handle and press the top button down (2) with thumb and lower to the selected cut height. -
Page 21: Operating Instructions
5 OPERATING INSTRUCTIONS If you are not completely familiar with the Safety Instruction Manual read it now before proceeding with the operation of the mower. WARNING REMEMBER THERE ARE CERTAIN PRECAUTIONS LISTED IN THIS MANUAL THAT YOU MUST NOW TAKE BEFORE STARTING THE MOWER. -
Page 22: How To Stop And Park The Mower
quicker; Use caution if it is your first time. Now try moving the hand control levers, one at a time, very slightly, forward and backward. Gradually increase your speed until you are well acquainted with the operation of the hand controls and the mower’s behavior. After gaining a good feel for how the mower handles, gradually attempt higher engine speeds until familiar with operation at full throttle engine speed. -
Page 23: Never Drive Straight Onto Or Off A Curb
WARNING 5.5.1 Never Drive Straight Onto or Off a Curb Never drive straight onto or off a curb. If you do the whole procedure at a very sharp angle it will tend to minimize the contact of the mower deck with the curb and you will be able to more safely control the mower. It is recommended to use ramps to drive on and off of curbs. -
Page 24: How To Test/Use The Blade Clutch/Brake Switch
the right-side rod) or the left side needs to go slower (by shortening the left-side rod). It is important that neither rod should be lengthened too far, as mentioned above. After getting the mower to track straight, readjust the neutral adjustment on the pump by using a ¼” allen wrench at the Return-to-Neutral (RTN) mechanism, if necessary. -
Page 25: Height Of Cut
6.2 Height-of-Cut Before adjusting the height-of-cut be sure the mower engine is off, and rear tires have proper air pressure. Check for even tire wear. The height-of-cut can be adjusted the following way: • While holding the deck lift lever grip to the left of the upright, push down (with thumb or other hand) on the button at the top of the deck lift lever. -
Page 26: Belt Tension Adjustment
6.3 Belt Tension Adjustment The pump drive belt is self-adjusting, and requires no adjustment, just replacement. The blade drive belt is self-adjusting also and requires no adjustment, just replacement. 6.3.1 Replacing the Drive Belt Stop the engine, remove the key and wait for all moving parts to stop. ... -
Page 27: How To Move The Mower If The Engine Won'tstart
6.4 How to Move the Mower if the Engine Won’t Start Rotate both of the hydro bypass valve levers on the side of each hydraulic pump about ½ turn counterclockwise. It is important not to over tighten these levers. Damage may occur to the pump if this valve is over tightened. 6.5 Hydraulic System Whenever servicing the hydraulic system, it is of the utmost importance to keep any dirt or debris from getting into the system. -
Page 28: Battery Service
6.8 Battery Service The battery is 12 volts and is a maintenance free battery. Charge the battery only if it will not start the mower properly. Remove the battery from the mower before charging. Follow the instructions of the battery charger for proper and safe charging of the battery. To access the battery, first, park the machine safely. -
Page 29: Fuel Evaporation System
6.12 Fuel Evaporation System All Wright Stander I’s need to have this mandatory feature. Do Not alter or remove. Do Not fill past the “Max Fill Level” line. Vent / Over-filling could result in clogging the roll-over vent and/or contaminating the purge Purge Tank canister. -
Page 30: Loading And Unloading
6.14 Loading and Unloading Use extreme caution when loading and unloading units on/off trailers or trucks. One full width ramp that extends beyond the rear tires is recommended rather than individual ramps for each side of the unit. The ramp should be long enough so that the angles between the ramp and the trailer or truck does not exceed 15 degrees. -
Page 31: Electrical Schematic
7 Electrical Schematic... -
Page 32: Decals
8 Decals 76490015 76490007 76490008 DECAL, 36” DECAL, 52” DECAL, 48” 76990006 DECAL, STANDER INTENSITY 76460001 76490007 DECAL, DANGER BLADE HAZARD DECAL, 52” 76490001 DECAL, SHIELD MISSING 76490100 DECAL, AERO-CORE DECK 76490023 DECAL, CIRCLE WITH W 76490051 DECAL, DECK COMMERCIAL BENEFITS 76490101 76410161 MOWER PATENT NUMBERS... -
Page 33: Maintenance Interval Chart
9 Maintenance Interval Chart MAINTENANCE ITEM Inspect for cracks in frame, cutter deck or other steel parts Inspect all belts for wear and alignment Check all bolts and nuts for tightness (tighten as necessary) Check hydraulic oil reservoir level and fill as needed (refer to Hydro Oil Tank Check &... -
Page 34: Maintenance Record
Maintenance Record Unit Date Maintenance/Service Performed Shop/Technician Hours... -
Page 35: Power Equipment Limited Warranty
Wright Manufacturing, Inc. within 14 days from the date of original retail have not been assembled or installed as specified in the Owner’s Manual. The purchase. -
Page 36: Federal & California Emmision Control Warranty Statement
The United States Environmental Protection Agency (EPA), California Air Resources Board (CARB) and Wright Manufacturing, Inc. (WMI) are pleased to explain the evaporative emission control system (EECS) warranty on your 2013 - 2014 commercial mower. In the United States, new equipment that use small off- road engines must be designed, built and equipped to meet the Federal’s stringent evaporative emissions... - Page 37 (2) Any warranted part that is scheduled only for regular inspection in the written instructions supplied is warranted for the warranty period stated above. Any such part repaired or replaced under warranty will be warranted for the remaining warranty period. (3) Any warranted part that is scheduled for replacement as required maintenance in the written instructions supplied is warranted for the period of time before the first scheduled replacement date for that part.
-
Page 38: Cut Quality And Mowing Tips
Cut Quality and Mowing Tips Problem Description Possible Cause Solution Streaking is when strips of uncut grass are left behind. Blades are not sharp Sharpen blades Blades are worn down too far Replace blades Streaking Engine RPM is too low Mow at full throttle GROUND SPEED IS TOO FAST SLOW DOWN... - Page 39 NOTES:...
Need help?
Do you have a question about the Stander T and is the answer not in the manual?
Questions and answers