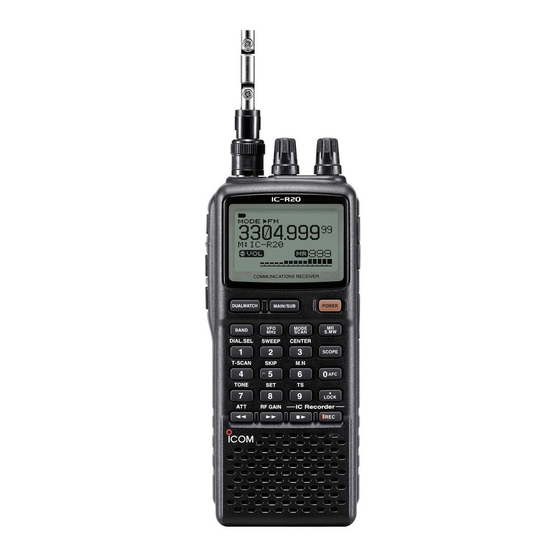
Icom IC-R20 Service Manual
Communications receiver
Hide thumbs
Also See for IC-R20:
- Service manual (117 pages) ,
- Instruction manual (108 pages) ,
- Price list (158 pages)
Table of Contents
Advertisement
Quick Links
Advertisement
Table of Contents

Related Manuals for Icom IC-R20


Summary of Contents for Icom IC-R20
-
Page 1: Service Manual
SERVICE MANUAL COMMUNICATIONS RECEIVER iC-r20... - Page 2 5. DO NOT keep power ON for a long time when the receiver is defective. 6. READ the instructions of test equipment thoroughly before connecting equipment to the receiver. Icom, Icom Inc. and are registered trademarks of Icom Incorporated (Japan) in the United States, the United Kingdom, Germany, France, Spain, Russia and/or other countries.
-
Page 3: Table Of Contents
TABLE OF CONTENTS SECTION SPECIFICATIONS SECTION INSIDE VIEWS SECTION DISASSEMBLY INSTRUCTIONS SECTION CIRCUIT DESCRIPTION RECEIVER CIRCUITS ......... . . 4 - 1 PLL CIRCUITS . -
Page 4: Specifications
SECTION 1 SPECIFICATIONS • IC-R20 RECEIVER GENERAL • Receiver system : Triple super heterodyne and down convertor • Frequency coverage • Intermediate frequency : 1st 266.7 and 429.1 MHz 2nd 19.65 MHz Receive coverage (MHz) Version 450 kHz [EUR], [UK], •... - Page 5 • BC-156 • Input voltage : 8.0–16.0 V • Charging current : 0.96–1.44 A (Rapid charging) • Usable temperature : 0˚C to +35˚C (+32˚F to +95˚F) • Timer device : 192–288 minutes (Rapid charging) 12–18 minutes (Reserve charging) • Protect function FUNCTION BP-206 CONDITION BC-156 ACTION...
-
Page 6: Inside Views
SECTION 2 INSIDE VIEWS 2-1 RF UNIT • Top view B-UHF RF amplifier A/B-UHF (pre-amplifier (Q551: PA805T) (Q548: 2SC5006) Highpass filter circuit (C854, C856, C858) Lowpass filter circuit (L123—L125) A-UHF RF amplifier 1G RF amplifier (Q35: 2SC5006) (Q26: 2SC5624) 30—300 MHz RF amplifier (Q36: 2SC5006) 470—833 MHz RF amplifier... - Page 7 2-2 LOGIC UNIT • Bottom view • Top view AF amplifier regulator (Q7: XP1501 Q9: 2SB1132) AF amplifier (IC15: TA31056F Q8: 2SA1588) (DS12: M3-0243TIY) BFO circuit IC6: SN74AHC1GU04DBVR X2: CSBFB543K AF pre-amplifiers (Q12, Q16: 2SC4617) +3 regulators (Q10, Q15: 2SA1362) Reset IC A-BAND AF circuit (IC2: BD5228G)
-
Page 8: Section 3 Disassembly Instructions
SECTION 3 DISASSEMBLY INSTRUCTIONS (1) REMOVING THE REAR PANEL (3) REMOVING THE REC UNIT q Unscrew 4 screws, A (2 × 115 mm, black). q Unscrew 4 flat-head screws, H (2 × 4 mm, silver). w Unscrew 2 screws, B (2 × 8 mm, black). w Unsolder 1 point, I. -
Page 9: Section 4 Circuit Description
SECTION 4 CIRCUIT DESCRIPTION 4-1 RECEIVER CIRCUITS • A-BAND CIRCUIT (1) MF (above 0.15 MHz, below 1.9 MHz) signals 4-1-1 BAND SWITCHING CIRCUIT (RF UNIT) RF signals (0.15–1.9 MHz) from an attenuator (D69) pass The RF signals from the antenna connector pass through through the low-pass filter (L123–L125 and C851–C853), the limiter (D68) and an attenuator* (D69). - Page 10 (3) HF-H (above 15 MHz, below 30 MHz) signals (3) 800M (above 470 MHz, below 833 MHz) signals RF signals (15–30 MHz) from an attenuator (D69) pass RF signals (470–833 MHz) from an attenuator (D69) pass through the low-pass filter (L123–L125 and C851–C853), through the high-pass filter (L126, L127 and C854–C858) band switch (D73) and bandpass filter (L81–L84 and and band switch (D11).
- Page 11 • B-BAND CIRCUIT 4-1-6 3RD MIXER AND DEMODULATOR CIRCUITS The RF signals from the band switch (D32, D36, D143 and (RF UNIT) D147) are amplified at the RF amplifier (IC18, pins 1, 4), and The 3rd mixer circuit converts the 2nd IF signal to a 3rd IF are mixed with 1st LO signals at the 1st mixer circuit (IC15, signal.
- Page 12 (3) AM MODE (1) FM MODE The 3rd IF signal is output from the FM IF IC (IC2, pin 3), The 3rd IF signal is output from the FM IF IC (IC17, pin 3), and passes through the mode switch (D109) and ceramic and passes through the mode switch (D134) and ceramic bandpass filter (FI2).
- Page 13 While in WFM/AM modes, AF signals from the demodulator (3) AM MODE circuit (RF unit) bypass the AF filter via the AF filter bypass The 3rd IF signal is output from the FM IF IC (IC17, pin 3), switch (Q27), and are then amplified at the AF amplifier and passes through the mode switch (D134) and ceramic (Q22).
- Page 14 (1) A-BAND CIRCUIT The A-AGC or B-AGC voltage is used for the the bias volt- A portion of the AF signals from the FM IF IC (RF unit; IC2, age of the IF and RF amplifiers. When receiving strong sig- pin 9) passes through the low-pass filter (LOGIC unit;...
-
Page 15: Pll Circuits
4-2 PLL CIRCUITS 4-2-2 REFERENCE OSCILLATOR CIRCUIT (RF UNIT) 4-2-1 PLL CIRCUIT The reference oscillator circuit (X1, Q556, D171) generates A PLL circuit provides stable oscillation of the 1st LO fre- a 19.2 MHz reference frequency which is stabilized within quencies. - Page 16 A portion of the signal from the buffer amplifier (IC2) is A part of oscillated signal from the 2nd C-VCO circuit is amplified at the buffer amplifier (Q8) and is then fed back to applied to the PLL IC (IC1, pin 8) as the comparison signal, the PLL IC (IC3, pin 11) as the comparison signal.
- Page 17 • B-BAND CIRCUIT (2NDDVCO BOARD) • B-BAND CIRCUIT The 2nd D-VCO circuit (Q1 and D1) generates 247.0500 The 19.2 MHz reference signal is amplified at the LO ampli- MHz and 286.3500 MHz. The oscillated signal is applied to fier (Q555), and is then applied to the FM IF IC (IC17, pin 2) the 2nd mixer (RF unit;...
-
Page 18: Other Circuits
4-2-7 BFO CIRCUIT (LOGIC UNIT) The oscillated signal at the BFO VCO circuit (IC6, X2) is applied to the MAIN unit via the J5 (pin 35) as the BFO, and is then amplified at the BFO amplifier (RF unit; Q530). The amplified signal is mixed with 3rd IF signal to demodulate to AF signal on SSB/CW modes. -
Page 19: Power Supply Circuits
4-4 POWER SUPPLY CIRCUITS 4-4-3 RF UNIT VOLTAGE LINES 4-4-1 LOGIC UNIT VOLTAGE LINES Description Line Description Receive 3 V line from the LOGIC unit via the J1, Line pin 37. The voltage is supplied to the RF (IC19), The voltage is same as connected battery pack. A_R3V IF (Q5) and LO (Q540) amplifiers, 1st (IC1) and The voltage is supplied to the charge controller... -
Page 20: Port Allocations
(LOGIC unit; IC3)–Continued 4-5 PORT ALLOCATIONS 4-5-1 MAIN CPU PORT ALLOCATIONS Port Description number name (LOGIC UNIT; IC3) Outputs strobe signal to the D/A con- STR2 verter IC (IC22, pin 1). Port Description number name 49–52 KS3–KS1 Output key matrix signals. DATAC Outputs data and clock control signal. - Page 21 4-5-4 D/A CONVERTER IC PORT ALLOCATIONS 4-5-2 SUB CPU PORT ALLOCATIONS (RF UNIT; IC14) (REC UNIT; IC2) Port Port Description Description number name number name RSTO Input port for the USB reset signal. Outputs VHF band selecting signal at A_VHFC the A-BAND circuit.
-
Page 22: Bc-156 Circuit Description
4-6-3 CHARGING CONTROL CIRCUIT (MAIN UNIT AND TANSHI BOARD) 4-6-1 DC/DC CONVERTER CIRCUIT (MAIN UNIT) • CHARGING THE BATTERY WITH IC-R20 Input voltage (8–16 V) from the BC-123A/E pass through The “DET2” signal from the TANSHI board is applied to the reverse protection circuit (D6) via the J1. -
Page 23: Section 5 Adjustment Procedures
0.1 V to 32 mV 3.5(d) mm ( 127 dBm to 17 dBm) 3-conductor 3.5(d) mm plug must be used. to [SP] jack Power supply to [DC] 6 V / 1 A jack IC-R20 5 - 1... -
Page 24: Software Adjustments
• Connect an SSG to the antenna connector and set as • Set an SSG’s level to 10 dB S/N sensitivity (A). SHIFT Frequency : 14.0990 MHz • Measure the AF output level while the IC-R20 [LSB-IFS] Modulation : OFF outputs 1 kHz signal (B). - Page 25 • RF UNIT BOTTOM VIEW • RF UNIT TOP VIEW L105 CP18 Center voltage adjustment (B-BAND) Reference frequency check point CP11 Center voltage check point (B-BAND) Center voltage adjustment (A-BAND) Center voltage check point (A-BAND) • BFO CHECK POINT (LOGIC UNIT TOP VIEW) BFO check point 5 - 3...
- Page 26 SOFTWARE ADJUSTMENTS–Continued ADJUSTMENT ADJUSTMENT CONDITION OPERATION • Mode : FM • Push [• LOCK] key. [AFC] • Connect an SSG to the antenna connector and set as Level : 1 mV* (–47 dBm) A-BAND) Frequency : 145.100 MHz Modulation : OFF •...
- Page 27 SOFTWARE ADJUSTMENTS–Continued ADJUSTMENT ADJUSTMENT CONDITION OPERATION S-METER • Mode : FM • Push [8 SET] key. [S-M] • Connect an SSG to the antenna connector and set as (1.81 MHz Level : 0.56 µV* (–112 dBm) FM mode) Frequency : 1.81 MHz Modulation : ±1 kHz Deviation...
- Page 28 SOFTWARE ADJUSTMENTS–Continued ADJUSTMENT ADJUSTMENT CONDITION OPERATION S-METER • Mode : FM • Push [8 SET] key. [S-M] • Connect an SSG to the antenna connector and set as (1400.1 MHz Level : 0.56 µV* (–112 dBm) FM mode) Frequency : 1400.1 MHz Modulation : ±1 kHz Deviation...
- Page 29 SOFTWARE ADJUSTMENTS–Continued ADJUSTMENT ADJUSTMENT CONDITION OPERATION S-METER • Mode : FM • Push [8 SET] key. [S-M] • Connect an SSG to the antenna connector and set as (2510.1 MHz Level : 0.56 µV* (–112 dBm) FM mode) Frequency : 2510.1 MHz Modulation : ±1 kHz Deviation...
-
Page 30: Section 6 Parts List
SECTION 6 PARTS LIST 6-1 IC-R20 [1STAVCO BOARD] ORDER [1STAVCO BOARD] DESCRIPTION ORDER DESCRIPTION 7030005120 S.RESISTOR ERJ2GEJ 102 X (1 kΩ) 7030005120 S.RESISTOR ERJ2GEJ 102 X (1 kΩ) 1110005180 S.IC µPC2746TB-E3 7030005120 S.RESISTOR ERJ2GEJ 102 X (1 kΩ) 1130011660 S.IC MB15T61ULPVA-G-ER 7030008300 S.RESISTOR... - Page 31 [1STAVCO BOARD] [1STBVCO BOARD] ORDER ORDER DESCRIPTION DESCRIPTION 4030017460 S.CERAMIC ECJ0EB1E102K 7030005210 S.RESISTOR ERJ2GEJ 822 X (8.2 kΩ) ERJ2GEJ 471 X (470 Ω) [EUR], [UK], [USA], [CAN] B 7030005000 S.RESISTOR 6910015520 CONNECTOR IMSA-9230B-1-07Z064-T 7030005290 S.RESISTOR ERJ2GEJ 682 X (6.8 kΩ) ERJ2GEJ 121 X (120 Ω) 6910015510 CONNECTOR IMSA-9230B-1-08Z064-T...
- Page 32 [1STBVCO BOARD] [2NDCVCO BOARD] ORDER ORDER DESCRIPTION DESCRIPTION 4030017460 S.CERAMIC ECJ0EB1E102K 7030008300 S.RESISTOR ERJ2GEJ 184 X (180 kΩ) 4030017460 S.CERAMIC ECJ0EB1E102K 7030005120 S.RESISTOR ERJ2GEJ 102 X (1 kΩ) 4030017770 S.CERAMIC ECJ0EB1E332K 7030005120 S.RESISTOR ERJ2GEJ 102 X (1 kΩ) 4550003220 S.TANTALUM TEESVA 1E 105M8L 7030005120 S.RESISTOR ERJ2GEJ 102 X (1 kΩ)
- Page 33 [2NDDVCO BOARD] [DOWNCONV BOARD] ORDER ORDER DESCRIPTION DESCRIPTION ERJ2GEJ 101 X (100 Ω) 7030005120 S.RESISTOR ERJ2GEJ 102 X (1 kΩ) 7030004980 S.RESISTOR 7030005120 S.RESISTOR ERJ2GEJ 102 X (1 kΩ) except [EUR], [UK] T ERJ2GEJ 331 X (330 Ω) ERJ2GEJ 181 X (180 Ω) [EUR], [UK] T 7030007280 S.RESISTOR 7030009160 S.RESISTOR ERJ2GEJ 471 X (470 Ω)
- Page 34 [DOWNCONV BOARD] [REC UNIT] ORDER ORDER DESCRIPTION DESCRIPTION 4030017730 S.CERAMIC ECJ0EB1E471K 4030016790 S.CERAMIC ECJ0EB1C103K 4030017730 S.CERAMIC ECJ0EB1E471K 4030016790 S.CERAMIC ECJ0EB1C103K 4030017730 S.CERAMIC ECJ0EB1E471K 4030017400 S.CERAMIC ECJ0EC1H220J 4030016790 S.CERAMIC ECJ0EB1C103K 4030017400 S.CERAMIC ECJ0EC1H220J 4030017420 S.CERAMIC ECJ0EC1H470J 4030016790 S.CERAMIC ECJ0EB1C103K 4030017420 S.CERAMIC ECJ0EC1H470J 4030017490 S.CERAMIC C1608 JB 1A 105K-T...
- Page 35 [LOGIC UNIT] [LOGIC UNIT] ORDER ORDER DESCRIPTION DESCRIPTION 1530003630 S.TRANSISTOR 2SC4617 TLS 7030005120 S.RESISTOR ERJ2GEJ 102 X (1 kΩ) 1590003290 S.TRANSISTOR UNR9213J-(TX) 7030005090 S.RESISTOR ERJ2GEJ 104 X (100 kΩ) 1520000650 S.TRANSISTOR 2SB1201-S-TL 7030005050 S.RESISTOR ERJ2GEJ 103 X (10 kΩ) 1590002950 S.FET HAT1023R-EL 7410001130 S.ARRAY EXB28V102JX...
- Page 36 [LOGIC UNIT] [LOGIC UNIT] ORDER ORDER DESCRIPTION DESCRIPTION ERJ2GEJ 471 X (470 Ω) R127 7030005170 S.RESISTOR ERJ2GEJ 474 X (470 kΩ) R211 7030005000 S.RESISTOR ERJ2GEJ 471 X (470 Ω) R128 7030008300 S.RESISTOR ERJ2GEJ 184 X (180 kΩ) R212 7030005000 S.RESISTOR R129 7030008300 S.RESISTOR ERJ2GEJ 184 X (180 kΩ)
- Page 37 [LOGIC UNIT] [LOGIC UNIT] ORDER ORDER DESCRIPTION DESCRIPTION 4030017460 S.CERAMIC ECJ0EB1E102K C161 4030017720 S.CERAMIC ECJ0EB1H331K 4030017490 S.CERAMIC C1608 JB 1A 105K-T C162 4030011600 S.CERAMIC C1608 JB 1E 104K-T 4030017490 S.CERAMIC C1608 JB 1A 105K-T C163 4030017720 S.CERAMIC ECJ0EB1H331K 4550006700 S.TANTALUM ECST1AY106R C164 4030017720 S.CERAMIC...
- Page 38 [RF UNIT] [RF UNIT] ORDER ORDER DESCRIPTION DESCRIPTION 1110005230 S.IC µPC2757TB-E3 1790001240 S.DIODE MA2S728-(TX) 1110003200 S.IC TA31136FN (EL) 1790001260 S.DIODE MA2S077-(TX) IC10 1110005230 S.IC µPC2757TB-E3 1790001260 S.DIODE MA2S077-(TX) IC12 1130011770 S.IC CD4066BPWR 1790001260 S.DIODE MA2S077-(TX) IC14 1110006360 S.IC M62366GP D60J 1790001260 S.DIODE MA2S077-(TX) IC15...
- Page 39 [RF UNIT] [RF UNIT] ORDER ORDER DESCRIPTION DESCRIPTION 2040001200 S.SAW EFCH266MKQP1 7030005240 S.RESISTOR ERJ2GEJ 473 X (47 kΩ) 2020001270 CERAMIC CFWLB450KE2A-B0 (CFWM450E) 7030007340 S.RESISTOR ERJ2GEJ 153 X (15 kΩ) 2010002280 S.MONOLITH FL-293 (19.650 MHz) 7030005070 S.RESISTOR ERJ2GEJ 683 X (68 kΩ) 2040001190 S.SAW EFCH429MKQP1 7030005240 S.RESISTOR...
- Page 40 [RF UNIT] [RF UNIT] ORDER ORDER DESCRIPTION DESCRIPTION R245 7030005220 S.RESISTOR ERJ2GEJ 223 X (22 kΩ) R445 7030005050 S.RESISTOR ERJ2GEJ 103 X (10 kΩ) R246 7030005110 S.RESISTOR ERJ2GEJ 224 X (220 kΩ) R446 7030005050 S.RESISTOR ERJ2GEJ 103 X (10 kΩ) ERJ2GEJ 2R7 X (2.7 Ω) ERJ2GEJ 221 X (220 Ω) R247...
- Page 41 [RF UNIT] [RF UNIT] ORDER ORDER DESCRIPTION DESCRIPTION ERJ2GEJ 150 X (15 Ω) R539 7030005300 S.RESISTOR C239 4030016790 S.CERAMIC ECJ0EB1C103K ERJ2GEJ 150 X (15 Ω) R540 7030005300 S.RESISTOR C241 4030011810 S.CERAMIC C1608 JB 1A 224K-T ERJ2GEJ 151 X (150 Ω) R541 7030007270 S.RESISTOR C242...
- Page 42 [RF UNIT] [RF UNIT] ORDER ORDER DESCRIPTION DESCRIPTION C674 4030017420 S.CERAMIC ECJ0EC1H470J C788 4030016790 S.CERAMIC ECJ0EB1C103K C676 4030017400 S.CERAMIC ECJ0EC1H220J C789 4030017460 S.CERAMIC ECJ0EB1E102K C677 4030017350 S.CERAMIC ECJ0EC1H020B C790 4030016790 S.CERAMIC ECJ0EB1C103K C678 4030017460 S.CERAMIC ECJ0EB1E102K C791 4550006200 S.TANTALUM ECST0JY106R C679 4030017460 S.CERAMIC ECJ0EB1E102K...
- Page 43 [RF UNIT] 6-2 BC-156 ORDER [TANSHI BOARD] DESCRIPTION ORDER DESCRIPTION C894 4030016790 S.CERAMIC ECJ0EB1C103K C895 4030017730 S.CERAMIC ECJ0EB1E471K 1710000050 DIODE 1SS53 C896 4030016790 S.CERAMIC ECJ0EB1C103K C897 4030017460 S.CERAMIC ECJ0EB1E102K C898 4030017460 S.CERAMIC ECJ0EB1E102K 7100000820 RESISTOR 2SG 0.15 C899 4030017460 S.CERAMIC ECJ0EB1E102K 7510000530 THERMISTOR ERT-D2FHL 103S...
-
Page 44: Main Unit
[MAIN UNIT] ORDER DESCRIPTION 4030006860 S.CERAMIC C1608 JB 1H 102K-T 4510004590 ELECTROLYTIC 16 MV 470 HC 4030006860 S.CERAMIC C1608 JB 1H 102K-T 4030006860 S.CERAMIC C1608 JB 1H 102K-T 4030006860 S.CERAMIC C1608 JB 1H 102K-T 4550000540 S.TANTALUM TEESVA 1V 154M8L 4030011600 S.CERAMIC C1608 JB 1E 104K-T 4030011600 S.CERAMIC C1608 JB 1E 104K-T... - Page 45 SECTION 7 SECTION 7 MECHANICAL PARTS AND DISASSEMBLY MECHANICAL PARTS AND DISASSEMBLY [2NDDVCO BOARD] [CHASSIS PARTS] REF. NO. ORDER NO. QTY. DESCRIPTION REF. NO. ORDER NO. QTY. DESCRIPTION 6510024470 Connector BNC-R168 8510016230 2699 C-VCO case 8900009640 Cable OPC-963 [DOWNCONV BOARD] 8210020700 2699 front panel assembly REF.
- Page 46 DOWNCONV BOARD MP2 (D) MP1 (D) 34.8 1STBVCO BOARD MP26 (C) 1STAVCO MP7 (C) BOARD MP1 (1B) MP19 (C) MP27 (C) MP1 (1A) S25 (L) S24 (L) EP1 (R) MP1 (2D) MP35 (C) N I T MP1 (RE) DS12 (L) J1 (C) 32.9 MP1 (R)
-
Page 47: Section 8 Semi-Conductor Information
SECTION 8 SEMI-CONDUCTOR INFORMATION • • TRANSISTOR AND FET’S DIODES IC-R20 IC-R20 2SA1362-GR 2SA1586-GR 2SA1588 GR 2SB1132 R 2SB1201-S-TL 1SS372 1SV172 1SV245 1SV308 1SV314 (Symbol: AEG) (Symbol: SG) (Symbol: ZG) (Symbol: BAR) (Symbol: B1201) (Symbol: N9) (Symbol: BE) (Symbol: T3) -
Page 48: Section 9 Board Layouts
The combination of this page and the next page shows SECTION 9 BOARD LAYOUTS the unit layout in the same configuration as the actual P.C. Board. 9-1 RF UNIT • TOP VIEW to LOGIC UNIT J5 B_DET B_R3V B_NOISE B_VCO2 B_RSSI B_VCO3 B_VCO4... -
Page 49: Rf Unit
The combination of this page and the previous page shows the unit layout in the same configuration as the to 1STBVCO BOARD J2 to 1STBVCO BOARD J1 actual P.C. Board. to 2NDDVCO BOARD J1 to 2NDDVCO BOARD J2 B_R3V B_VCO1 RF UNIT B_VCO2 PLLBSTB... - Page 50 The combination of this page and the next page shows the unit layout in the same configuration as the actual P.C. Board. 9-2 LOGIC UNIT • TOP VIEW to RF UNIT J1 B_DET B_R3V B_NOISE to REC UNIT J6 B_VCO2 B_RSSI AOUT B_VCO3...
-
Page 51: Logic Unit
The combination of this page and the previous page shows the unit layout in the same configuration as the actual P.C. Board. LOGIC UNIT • BOTTOM VIEW AFOUT – 9 - 4... - Page 52 The combination of this page and the next page shows the unit layout in the same configuration as the actual P.C. Board. 9-3 REC UNIT to LOGIC UNIT HJ8 • TOP VIEW AOUT B_AIN VL DOWN VL UP A_ATN SUB_3C VOL_UP_DOWN CPU_TX CPU_RX...
-
Page 53: Rec Unit
The combination of this page and the previous page shows the unit layout in the same configuration as the actual P.C. Board. REC UNIT • BOTTOM VIEW 9 - 6... - Page 54 9-4 1STAVCO BOARD 9-6 2NDCVCO BOARD The combination of this page and the next page shows • TOP VIEW • TOP VIEW the unit layout in the same configuration as the actual P.C. Board. to RF UNIT HJ5 9-8 DOWNCONV BOARD •...
- Page 55 2NDCVCO BOARD 1STAVCO BOARD The combination of this page and the previous page shows the unit layout in the same configuration as the • BOTTOM VIEW • BOTTOM VIEW actual P.C. Board. to RF UNIT HJ11 DOWNCONV BOARD • BOTTOM VIEW to RF UNIT HJ3 PLLCK A_VCO_OUT...
-
Page 56: 1Stavco Board
SECTION 10 BLOCK DIAGRAM ANTENNA B_DET B_R3V B_R3V 266.7 MHz B_R3V B MODEC 19.65 MHz B MODEC B_R3V B_R3V B MODEC 0.450 MHz B MODEC 0.1500 – 3304.9999 MHz Explanatory notes RF UNIT A_DET EFCH266MKQP1 Q542 IC17: TA31136FN MIXER MIXER FL-293 CFWM450E VOLTAGE LINE... -
Page 57: Explanatory Notes
B_DET B_DET A_DET A_DET X2: CSBF453K LCD DRIVE IC6: SN74AHC1CU04DBVR X2: CSBFB453K Q11: UNR9113J D18: HN2V02H BFOC D22–25: 1SS372 Q28: 2SC4617 IC11: TC7W04FU DC-DC REG MAIN CPU IC3: M30620 B_CTONE B_DET IC12: LM2904PWR B_RTONE B_DET TONE FIL CPU3V IC13: LM2904PWR CLOCK SHIFT A_RTONE A_DET... -
Page 58: Voltage Diagram
433 MHz 3.0V SECTION 11 VOLTAGE DIAGRAM B_R3V B_R3V Explanatory notes IC15 µPC2757TB VOLTAGE LINE IC16 µPC2757TB RX LINE IFO16 11-1 RF UNIT FI1 EFCH266MKQP1 C436 1 RFI 2 GND C746 C748 3 LO B_R3V 3.5p 0.001 R423 C750 0.001 A_R3V C749 47nH... - Page 59 B_R3V B_R3V B_R3V AM/NFM CONT AM/NFM CONT B_R3V B_R3V B_R3V AM/NFM_CONT C779 C780 C885 C757 R445 R446 Q553 B_R3V R430 0.01 0.001 C882 C775 C776 433 MHz R425 R435 CFWM450E XP1113 FI7 FL-293 0.001 L104 0.22 3.0V R521 L102 PLLDSTB 19.650 MHz R426 3.3µH...
-
Page 60: Logic Unit
11-2 LOGIC UNIT 23 25 LCD_CS LCD_RESET LCD_RS 3.1V DATA DATA C66 1 SN74AHC1GU04DBVR C67 1 BFO_SHIFT to_LCD C71 1 DS12 C72 1 XP4601 M3-0243TIY CW/BFO_ON B_TCON 2.8V C184 1 2SA1588 PCON C75 1 C76 1 C78 1 R201 0.01 C188 C79 1 BFOC... -
Page 61: Rec Unit
11-3 REC UNIT X2 CR-708 16.384 MHz 0.01 0.01 I/O7 I/O6 DVDD I/O5 I/O4 CBUSY CBUSY RESET DVDD ML2302TB RESET FIFOST TEST2 FIFOST TEST3 DGND TEST4 TEST5 P12/D10 TEST6 P42/A18 I/O3 P11/D9 P43/A19 I/O2 TEST7 SPVDD P10/D8 P44/CS0 I/O1 TEST8 AVDD P07/D7 P45/CS1... -
Page 62: 1Stavco Board
11-4 1STAVCO BOARD 11-5 1STBVCO BOARD PLLBSTB R57 JPW [SEA], [EXP] only R57 1k R57 JPW [SEA], [EXP] 0.01 PLLDATA RF unit R57 1k 0.001 R56 JPW [SEA], [EXP] PLLCK R56 1k 3.0V PLLASTB R56 JPW [SEA], [EXP] only R56 1k R55 JPW [SEA], [EXP] PLLDATA R55 1k... -
Page 63: 2Ndcvco Board
11-6 2NDCVCO BOARD 3.0V 2.4V 2SC4617 A _ R3V A _ R3V 1CVCO RF unit C _ VCO _ OUT 33nH 0.001 2.3V 0.001 C _ VCO _ OUT 0.001 22nH 0.22µH 18nH 1SV314 FH102 1.7V 0.33 PLLCSTB PLLCSTB PLLCSTB PLLDATA PLLDATA PLLDATA... -
Page 64: Downconv Board
11-8 DOWNCONV BOARD 2.8V RF _ IN RF _ IN RF _ IN 2.2V 0.01 RF _ IN 470p 0.01 0.01 180k PLLCK PLLCK PLLDATA PLLDATA RF unit 2SC5277 PLLESTB PLLESTB 0.7V HJ10 MB15E03SL 0.01 IF _ OUT OSCI OSCO 2.8V 2.3V XFIN... -
Page 65: Disassembly Information
SECTION 12 BC-156 DESKTOP CHAGER INFORMATION 12-1 DISASSEMBLY INFORMATION MP3 (C) [CHASSIS PARTS] REF. NO. ORDER NO. QTY. DESCRIPTION 8930062600 2708 holder 8110007620 2505 cover 8810009990 Screw PH BT M3 X 8 ZK MP1 (C) 8930039620 Stand/leg cushion (A) 8930051010 2308 terminal holder 8930051020 2308 A-terminal Y490 8930051030 2308 B-terminal 8010019600 2505 case (D) -
Page 66: Bc-156 Voltage Diagram
12-3 BC-156 VOLTAGE DIAGRAM • MAIN UNIT 3.0 Vp-p CHG ON 1.77 ms CHG OFF 0.6V 5.4V 5.2V 13.5V (EXT DC) SB20-03P 2SJ377 S-N5051 S-N5051 0.15 (1W) EXT. L1 HK- DC IN 08S050-2010 FGB 2A 2SB1184 13.5V 0.001 0.001 0.001 DTA114EE 0.22 0.22... -
Page 67: Bc-156 Board Layouts
12-4 BC-156 BOARD LAYOUTS • MAIN UNIT (TOP VIEW) CHGOUT CHGOUT DET2 BATT– DET1 BATT+ CONT to TANSHI BOARD J1 • TANSHI BOARD (TOP VIEW) CONT BATT+ DET1 BATT– DET2 CHGOUT CHGOUT to BC-156 MAIN UNIT J4 12 - 3... - Page 68 • MAIN UNIT (BOTTOM VIEW) 12 - 4...
- Page 69 Unit 9, Sea St., Herne Bay, Kent, CT6 8LD, U.K. Phone : +44 (01227) 741741 Fax : +44 (01227) 741742 : http://www.icomuk.co.uk Icom (Australia) Pty. Ltd. E-mail : info@icomuk.co.uk A.B.N. 88 006 092 575 290-294 Albert Street, Brunswick, Victoria, 3056, Australia Icom France S.a...
- Page 70 S-14104MZ-C1 1-1-32, Kamiminami, Hirano-ku, Osaka 547-0003, Japan © 2004 Icom Inc.
Need help?
Do you have a question about the IC-R20 and is the answer not in the manual?
Questions and answers