
Related Manuals for Thermos 461611514 C-21G0


Summary of Contents for Thermos 461611514 C-21G0
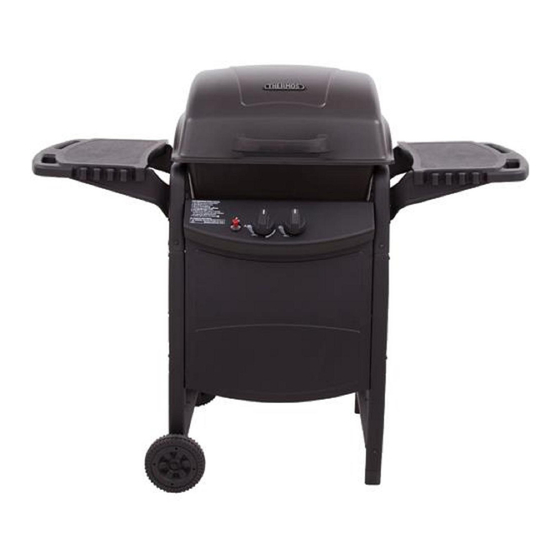
- Page 1 Thermos C-21G0 461611514 during assembly, please call 1-800-241-7548. 10/09/13 • G208-001-240802...
-
Page 2: Table Of Contents
THIS GRILL IS FOR OUTDOOR TABLE OF CONTENTS CAUTION USE ONLY. For Your Safety....... . 2 Grease Fires Grilling Guide. -
Page 3: Grilling Guide
Pre-Heating Your Grill Rotisserie Cooking GRILLING GUIDE – Getting Started Just like your home oven, your grill should be pre-heated Rotisserie cooking is best for 'round' meat, such as large to provide optimum performance. Pre-heat the grill on high roasts, whole poultry, and pork. It generally requires an for 10-15 minutes –... - Page 4 Skewers Painted surfaces: Wash with mild detergent or non-abrasive GRILLING GUIDE – Tips & Tricks Metal skewers should be flat, with long handles. Round cleaner and warm water. Wipe dry with a soft non-abrasive skewers allow food to roll when turned, so it may not cook cloth.
-
Page 5: Use And Care
LP Cylinder Filling USE AND CARE •Use only licensed and experienced dealers. •LP dealer must purge new cylinder before filling. OPD Hand Wheel LP Cylinder Removal, Transport and Storage •Dealer should NEVER fill LP cylinder more than 80% of Type 1 outlet with LP cylinder volume. -
Page 6: Leak Testing Valves, Hose And Regulator
Ignitor Lighting • If you notice grease or other hot material dripping from grill onto valve, hose or regulator, turn off gas supply WARNING • Do not lean over grill while lighting. at once. Determine the cause, correct it, then clean 1. -
Page 7: Burner Flame Check
Burner Flame Check Cleaning the Burner Assembly CAUTION Follow these instructions to clean and/or replace parts of • Remove cooking grates and heat tents. Light burners, burner assembly or if you have trouble igniting grill. rotate knobs from HIGH to LOW. You should see a smaller flame in LOW position than seen on HIGH. -
Page 8: Limited Warranty
LIMITED WARRANTY This warranty only applies to units purchased from an authorized retailer. Manufacturer warrants to the original consumer-purchaser only that this product shall be free from defects in workmanship and materials after correct assembly and under normal and reasonable home use for the periods indicated below beginning on the date of purchase*. -
Page 9: Parts List
PARTS LIST NOT Pictured Description … HARDWARE PACK FIREBOX … ASSEMBLY INSTRUCTION, ENGLISH LOGO PLATE VALVE/HOSE/REGULATOR ASSEMBLY CONTROL PANEL BURNER ELECTRODE/COLLECTOR SIDE SHELF MOUNTING BRACKET, F/ SIDE SHELF, (LF/RB) MOUNTING BRACKET, F/ SIDE SHELF, (LB/RF) CART LEG,UPPER LEFT WHEEL AXLE ROD SIDE BRACE CART LEG,UPPER RIGHT MATCH HOLDER... -
Page 10: Parts Diagram
PARTS DIAGRAM... -
Page 11: Assembly
ASSEMBLY #10-24x1-1/4" Machine Screw Qty. 1 #10-24 Flange Nut Qty. 1 1" Hitch Pin Qty. 2 Hinge Pin Qty. 2 #10-24x1-1/4" Machine Screw Qty. 3 #10-24 Flange Nut Qty. 3... - Page 12 # 18 # 19 # 14 #10-24x2" Machine Screw Qty. 4 # 15 # 24 #10-24 Flange Nut Qty. 4 #10-24x1-1/4" Machine Screw Qty. 8 #10-24 Flange Nut Qty. 8 1” Hitch Pin Qty. 1 Wheel Bushing Qty. 1...
- Page 13 # 11 # 15 #10-24x2" Machine Screw Qty. 4 # 23 #10-24 Flange Nut Qty. 4 # 31 #10-24x1/2" Machine Screw Qty. 2 # 31...
- Page 14 # 28 #8x3/8" Sheet Metal Screw Qty. 2 #10-24x1/2” Machine Screw Qty. 2 # 29 #10-24 Flange Nut Qty. 2 # 34 #10-24X3/8'’ Wing Screw Qty. 1...
- Page 15 #10-24x1-1/4" Machine Screw Qty. 4 #10-24 Flange Nut Qty. 8 5X15 Fiber Washer Qty. 10 #10-24x1/2” #10-24x2" Machine Screw Machine Screw Qty. 4 Qty. 2 # 30...
- Page 16 # 10 1/4-20x1-1/4" Machine Screw Qty. 4 1/4-20x1/2" Machine Screw Qty.4 1/4-20 Flange Nut Qty. 4 #8x3/8" Sheet Metal Screw Qty. 8 Side Shelf Bushing Qty. 8...
- Page 17 # 32 #10-24x1/2” Machine Screw Qty. 4 5X15 Fiber Washer Qty. 8 #10-24 Flange Nut Qty. 4 # 25 #10-24x1/2” Machine Screw Qty. 4 #10-24 Flange Nut Qty. 4 Insulation washers, fiber washers and wing nuts removed 5X15 Fiber Washer from handle Qty.
- Page 18 1" Hitch Pin Qty. 2 Hinge Pin Qty. 2 # 27 # 26 # 37...
- Page 19 # 36 # 35 CAUTION Cylinder valve must face to front of cart once tank is attached. Failure to install cylinder correctly may allow gas hose to be damaged in operation, resulting in the risk of fire. LP Cylinder (not included)
-
Page 20: Troubleshooting
EMERGENCIES: If a gas leak cannot be stopped, or a fire occurs due to gas leakage, call the fire department. Emergencies Possible Cause Prevention/Solution Gas leaking from •Damaged hose. •Turn off gas at LP cylinder or at source on natural gas systems. Discontinue use of product and replace valve/hose/regulator. - Page 21 Troubleshooting (continued) Problem Possible Cause Prevention/Solution Burner(s) will not light PIEZO PUSH-BUTTON AND ROTARY: using ignitor. •Push-button sticks at bottom. •Replace ignitor. •Rotary knob rotates without clicking. •Replace knob. •Sparking between ignitor and electrode. •Inspect wire insulation and proper connection. Replace wires if insulation is broken.
- Page 22 NOTES...
Need help?
Do you have a question about the 461611514 C-21G0 and is the answer not in the manual?
Questions and answers