Table of Contents
Advertisement
Instructions for
Installation and Use
GB
English, 2
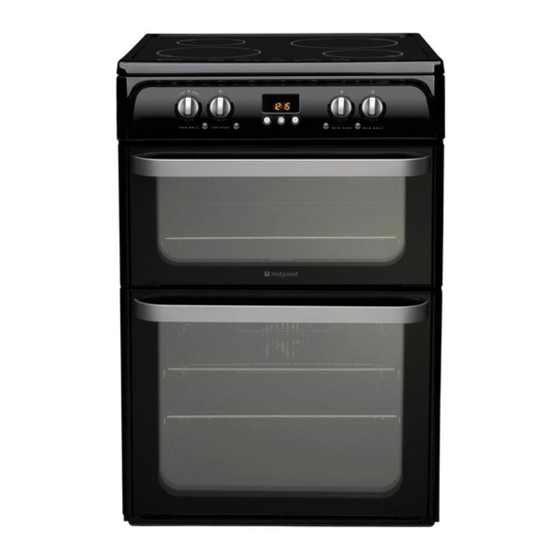
HUI614 K
Contents
WARNING,2
Introduction, 3
Installation, 4
Features, 6
The Controls, 7
Grill, 16
Oven Temperature Charts, 20-21
Care and Cleaning, 22-24
Something Wrong with your Cooker?, 26-27
60 cm Slot-in Cookers
Advertisement
Table of Contents

Related Manuals for Hotpoint HUI614 K


Summary of Contents for Hotpoint HUI614 K
-
Page 1: Table Of Contents
WARNING,2 Introduction, 3 English, 2 Installation, 4 Safety Information, 5 Features, 6 HUI614 K The Controls, 7 Clock/Minute Minder Operation8 Use and Care of the Ceramic Hob, 9-14 Grill, 16 Top Oven Cookery Notes, 17 Main Oven Cookery Notes, 18... -
Page 2: Warning
WARNING The internal surfaces of the compartment WARNING: The appliance and its (where present) may become hot. accessible parts become hot during use. Never use steam cleaners or pressure cleaners on the appliance. Care should be taken to avoid touching Remove any liquid from the lid before heating elements. -
Page 3: Introduction
Introduction * The guarantee is subject to the provisions that the To the Installer: appliance: Before installation, fill in the product details on the back (a) Has been used solely in accordance with cover of this book. the Users Instruction Book. The information can be found on the rating plate. -
Page 4: Installation
Installation WARNING - THIS APPLIANCE MUST BE not be nearer to the cooker than 150mm and should be EARTHED. protected by heat resistant material. Any overhanging surface or cooker hood should not be nearer than 650mm. Mains Connection Your cooker should have been checked to ensure that Note: This appliance must NOT be fitted on a platform. -
Page 5: Safety Information
Safety Information When used properly your appliance is completely safe but as with Never · Never stare at Halogen heating units. any electrical product there are certain precautions that must be · Never leave children unsupervised where a cooking appliance observed. -
Page 6: Features
Features 1200W (B1600) 1500W (B2000) Ceramic Ceramic 1500W (B2000) 1200W (B1600) Ceramic Ceramic Hob control panel Control panel Timer /Minute Minder Model number & Serial number label Conventional Grill Grill pan and food support Grill pan handle 'Stay Clean' liners Top oven/grill Top Oven door rod shelf... -
Page 7: The Controls
The controls TWIN GRILL TOP OVEN ELECTRONIC MAIN OVEN MAIN GRILL KNOB KNOB TIMER KNOB KNOB TWIN GRILL TOP OVEN MAIN OVEN MAIN GRILL PILOT LIGHT PILOT LIGHT THERMOSTAT LIGHT PILOT LIGHT Operating controls when the grill is in use Element and Fan cut off In common with all cookers having controls sited above The oven is fitted with a safety device which disconnects... -
Page 8: Clock/Minute Minder Operation8
Clock/Minute Minder Operation Programming cooking* ! A cooking mode must be selected before programming DISPLAY can take place. •• •• END OF CLOCK icon COOKING icon Programming the cooking duration DURATION TIMER icon 1. Press the button several times until the icon and icon the three digits on the DISPLAY begin to flash. -
Page 9: Use And Care Of The Ceramic Hob
Using the Ceramic Hob Hob Control Panel Before connecting the appliance to the power supply, make sure that: • The appliance is earthed and the plug is compliant with the law. • The socket can withstand the maximum power of the appliance, which is indicated on the data plate located on the appliance itself. - Page 10 Using the Ceramic Hob • Loud whistle: heard when two induction elements To switch the hob on, press and hold the button for of the same group function simultaneously at approximately one second. maximum power and/or when the booster function is set on the larger element while the other is auto- The cooktop is switched On when a beep sound is adjusted.
- Page 11 Using the Ceramic Hob If the power level is “0” press and hold the (+) button to increase the power level quickly. Starting Timer countdown. The countdown starts 10 seconds after the last ope- Fast Boil- “Booster” function ration over the INCREASE (+)/ REDUCE(-) TIME but- The booster function for some of the cooking zones may be tons...
-
Page 12: Safety Devices
Using the Ceramic Hob Switching off the hob • An incompatible pan • A pan whose diameter is too small Press the button to switch off the appliance - do not • The pan has been removed from the hotplate. rely solely on the pan sensor. -
Page 13: Practical Cooking Advice
Using the Ceramic Hob Technical description of the hob: Power level Maximum operating time in hours Cooking zone Power (W) Back Left I 1200 - B1600 Back Right I 1500 - B 2000 Front Left I 1500 - B 2000 Front Right I 1200 - B1600 Total power... -
Page 14: Care Of The Ceramic Hob
Care of the Ceramic Hob The Working of the Heating Zones place aluminium or plastic foil, or plastic Do not Heating only occurs within the marked circular cooking containers on the hob. zones. The zones heat up and cool down quicker, leave the hotplates or cooking areas switched Do not providing greater controllability for sensitive foods. - Page 15 Safety requirements for deep fat frying In the unfortunate event of a chip pan fire: 1. S w i t c h t h e e l e c t r i c i t y s u p p l y . O f f NEVER attempt to move the pan - burns and injuries are caused almost invariably by picking up the...
-
Page 16: Grill
Variable Grill Setting the Grill Grill Pan Handle The grill pan handle is detachable from the pan to CAUTION: Accessible parts may become hot during facilitate cleaning and storage. Fix the pan handle use. Young children should be kept away. securely before use: 1. -
Page 17: Top Oven Cookery Notes
Top Oven Cookery Notes The top oven should be used to cook small quantities of food.The oven is designed so that the grill element operates at a reduced heat output, this is combined with a heating element situated underneath the floor of the oven. To ensure even cooking of the food it is important that cooking utensils are positioned correctly on the oven shelf so that the element is directly above. -
Page 18: Main Oven Cookery Notes
Main Oven and Main Grill Cookery Notes Oven light The first time you use your appliance, heat the empty This is switched on by turning the SELECTOR knob to any oven with its door closed at its maximum temperature position other than “0”. It remains lit as long as the oven is for at least half an hour. -
Page 19: Using The Main Oven For Other Functions
Using The Main Oven for other Functions 'S' SLOW setting 5. Always ensure that joints of pork and poultry are thoroughly cooked by checking with a meat "Slow" cook is identified as 'S' on the oven temperature thermometer before serving. scale. -
Page 20: Oven Temperature Charts
Oven Cooking Charts - Baking Top Oven Cooking Baking Pre-heat Temperature °C Time in mins. Position in Oven Scones 210/220 10-15 Runner 2 from bottom of oven Small Cakes 180/190 20-25 Runner 2 from bottom of oven Victoria Sandwich 170/180 20-30 Runner 2 from bottom of oven Sponge Sandwich... -
Page 21: Oven Cooking Charts
Oven Cooking Charts - Meat Top Oven Cooking Meat Pre-heat Temperature °C Time (approx.) Position in Oven Beef/ Lamb 170/180 35 mins per 450g (1lb) + 35 mins over. (slow roasting) Beef/ Lamb 190/200 35-40 mins per 450g (1lb) (foil covered) Pork 170/180 40 mins per 450g (1lb) + 40 mins over... -
Page 22: Care And Cleaning
Care and Cleaning TURN OFF THE MAIN SWITCH AND ENSURE THE Do Conditioner' or 'Hob Brite'. Apply a small amount COOKER IS COLD BEFORE CLEANING. of conditioner with a clean damp cloth or paper BEFORE SWITCHING ON AGAIN, ENSURE THAT ALL towel. - Page 23 Care and Cleaning rinsing in clean water. Do not use enzyme/biological Doors Wipe over the outer door glass panels with a cloth wrung washing powder, harsh abrasives or oven chemical out in warm soapy water, then after wiping with a cloth cleaners of any kind.
- Page 24 Care and Cleaning Cleaning the glass doors Glass Inner Door with three Panels SIDE OPENING DOORS Open the door fully and carefully slide the Cleaning the door glass is the same as the drop down inner glass towards you, doors. taking care not to allow Open the lower door the glass to fall.
-
Page 25: Cooking Results Not Satisfactory
Cooking Results Not Satisfactory? Problem Check Ensure that the grill pan is positioned centrally below Grilling Uneven cooking front to back the grill element. Fat splattering Ensure that the grill is not set to too high a setting. Ensure that the oven shelves are level by using a spirit level on the rod shelf and adjusting the wheels/feet. -
Page 26: Something Wrong With Your Cooker
Something Wrong with your Cooker? Before contacting your nearest Service Centre/Installer, check the problem guide below; there may be nothing wrong with your cooker. Problem Check Slight odour or small amount of smoke This is normal and should cease after a short period. when grill / oven used for first time If you find that the timer display is blank, then it is likely that there is no electricity supply to... -
Page 27: Disposal Of The Product
Something Wrong with your Cooker? Problem Check The oven lamp is not covered by the guarantee. The part is easily changed (see the sec- Oven lamp does tion on oven lamp replacement). A new lamp may be obtained from our Parts department not work see Key Contacts, back page. -
Page 28: Guarantee Information
90 days of ownership. Simply call our Hotpoint Service Hotline on 08448 224 224 (ROI 0818 313 413) for telephone assistance, or, where necessary, to arrange for an engineer to call. -
Page 29: Service Information
After Sales Service No one is better placed to care for your Hotpoint appliance during the course of its working life than us - the manufacturer. Essential Contact Information Hotpoint Service We are the largest service team in the country offering you access to 400 skilled telephone advisors and 1100 fully qualified engineers on call to ensure you receive fast, reliable, local service. - Page 30 PLEASE PHONE US TO REGISTER YOUR APPLIANCE AND ACTIVATE YOUR PARTS GUARANTEE ON 08448 24 24 24...
- Page 31 PLEASE PHONE US TO REGISTER YOUR APPLIANCE AND ACTIVATE YOUR PARTS GUARANTEE ON 08448 24 24 24...
- Page 32 01/2014- 195118728.00 XEROX FABRIANO Indesit Company S.P.A. Viale Aristide Merloni,47 60044 Fabriano (AN) www.hotpoint.co.uk PLEASE PHONE US TO REGISTER YOUR APPLIANCE AND ACTIVATE YOUR PARTS GUARANTEE ON 08448 24 24 24...
Need help?
Do you have a question about the HUI614 K and is the answer not in the manual?
Questions and answers