Table of Contents
Advertisement
Available languages
Available languages
Quick Links
MANUAL DE INSTRUCTIUNI
CARACTERISTICI
rugam sa cititi acest manual inainte de a face conexiunile si de a
folosi acest produs. Pastrati acest manual pentru viitoare
referinte.
piata care produce imagini de calitate inalta si efecte audio HI FI.
Performantele lui sunt cu mult mai bune decat oricare din
echipamentele video anterioare. Ca cel mai bun semnal de sursa,
va v-a oferi cea mai inalta bucurie.
Note importante:
AD 70H
Va multumim pentru achizitionarea produsului nostru. Va
DVD player-ul este un video player din noua generatie pe
Decodor audio digital Dolby AC-3,MPEG,PCM,etc.
Procesor audio digital HI-FI, 96KHz/24bit.
Upgrade inteligent al software-ului.
Rezolutie inalta la iesirea componentelor video, suporta
echipamente video de viitor.
Iesire coaxiala audio digitala.
Slot USB
Compatibil cu DVD,VCD,DVCD,CD,DVD+R/RW,
DVD-R/RW,MP3,MPEG4,Kodak Picture CD, etc.
Sistem servo integrat de inalta calitate, tehnologie de
decodificare pe un singur cip, inalta fiabilitate si
stabilitate si super corector de erori.
Va rugam sa cititi acest manual inainte de a face
conexiunile si de a folosi acest produs. Pastrati acest
manual pentru viitoare referinte.
Nu deschideti carcasa produsului. Nu exista componente
care pot fi reparate de dumneavoastra. Pentru service va
rugam apelati doar la personal calificat.
Opriti aparatul cand nu este folosit. Opriti aparatul si
scoateti-l din priza cand nu este folosit o perioada mai
lunga de timp. Pentru folosirea zilnica a aparatului lasati-l
conectat la priza.
Nu instalati aparatul in locuri expuse la surse de caldura,
expunere directa a razelor soarelui,umezeala sau ploaie.
Pe aparat nu trebuie asezate obiecte umplute cu apa care
picura sau stropesc, cum ar fi vaze.
Advertisement
Table of Contents

Related Manuals for Akai AD 70H


Summary of Contents for Akai AD 70H
- Page 1 Nu deschideti carcasa produsului. Nu exista componente care pot fi reparate de dumneavoastra. Pentru service va AD 70H rugam apelati doar la personal calificat. Opriti aparatul cand nu este folosit. Opriti aparatul si scoateti-l din priza cand nu este folosit o perioada mai lunga de timp.
- Page 2 Instalati aparatul pe o suprafata orizontala, plata si solida CONTINUTUL PACHETULUI: si cu o ventilatie buna. Nu blocati gurile de aerisire, sau va cauza defecte rezultate de supraincalzire. Folositi o panza moale si curata pentru a sterge carcasa. Niciodata nu curatati cu chimicale sau detergent.
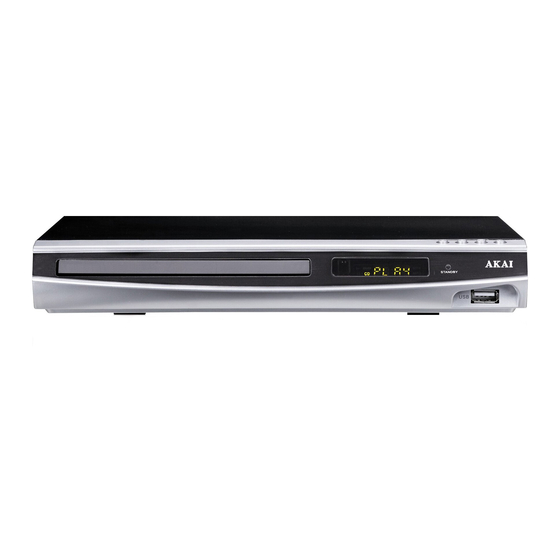
- Page 3 PANOU: PANOU FRONTAL: CONEXIUNI: SISTEM CONEXIUNI VIDEO: Urmatoarele iesiri video sunt valabile pentru acest produs. VIDEO COMPUS Folositi mufa galbena a unui cablu AV pentru a conecta iesirea video compusa a acestei unitati la intrarea video a unui 1 Disc tray door 6 Buton deschidere/inchidere TV/monitor.
- Page 4 Note: CONEXIUNI SISTEME AUDIO Din iesirile video de mai sus, HDMI este cea mai buna, Sunt doua tipuri de sisteme de iesire audio. Unul este sistem de iesire audio analog si celalalt sistem de iesire audio digital. componenta video a doua, SCART este mai buna, Sistemul de iesire audio analog include 2 canale de iesire stereo S-VIDEO este buna si video compus este standard.
- Page 5 INTRARE AUDIO TV/MONITOR/AMPLIFICATOR PAGINA DE CONFIGURARE GENERALA 1.1 AFISAJ TV Daca unitatea este conectata la un TV conventional, selectati imaginea 4:3 PANSCAN sau 4:3 LETTER BOX. Imaginea 4:3 va fi afisata in full screen in modul nativ. 4:3 PANSCAN : Imaginea ecran lat va fi afisata pe ecran in modul nativ cu niste parti din stanga si din dreapta taiate.
- Page 6 NOTA: Aceasta functie merge doar pe discurile codate cu closed 2.1.2 BOXE FRONTALE,CENTRALE,SPATE SI caption. SUBWOOFER Numai cand modul DOWNMIX este dezactivat (DOWNMIX 1.5 ECONOMIZATOR ECRAN este setat pe 5.1CH) boxele centrale si spate sunt activate. Boxele ON: Daca imaginea ramane fara miscare pe ecran, de exemplu fata pot fi setate pe LARGE sau SMALL.
- Page 7 NOTA: Unele amplificatoare nu suporta modul 96KHz, mod 2.5. PROCESAREA 3D care va afecta iesirea coaxiala. Procesarea 3D furnizeaza efectul virtual de sunet surround folosind doar doua boxe. 2.3. CHANNEL DELAY Aceasta functie este folosita pentru a seta timpul de intarziere 2.5.1 PRO LOGIC II pentru boxele centrale,spate si subwoofer.Intarzierea este pentru Pro Logic II: Aceasta unitate va permite sa configurati Dolby...
- Page 8 Cand modul panorama este pornit, boxele frontale sunt partial 4.PAGINA DE CONFIGURARE VIDEO redate in canale surround pentru un efect de invaluire. 4.1. IESIREA VIDEO OFF: Setati iesirea video pe CVSB (via iesirii compuse) sau pe 2.5.1.4. DIMENSIUNE S-Video daca conexiunea S-Video este facuta. Aceasta functie este disponibila numai cand modul este setat pe YUV: Setati iesirea video in formatul componenta video analog MUSIC.
- Page 9 transporte pana la 5Gbps (gigabits per second). Este de doua ori PAL: Daca TV este conectat la un sistem PAL, selectati acest mai mult decat o banda care transmite audio-video multi canal. mod. Semnalul video este NTSC va fi schimbat in format PAL. Acestea si multi alti factori, fac din HDMI un sistem mult mai MULTI: Daca TV este conectat la un multi sistem, selectati dorit decat predecesorii, componenta video, S-Video si video...
- Page 10 5.5. DEFAULT (IMPLICIT) Restaureaza setarile implicite exceptand setarile controlului parental si PAGINA DE CONFIGURARE A PAROLEI. OPERAREA TELECOMENZII Puneti la loc capacul Introduceti doua baterii AAA/1,5V in telecomanda. Indreptati telecomanda catre senzorul telecomenzii de pe panoul frontal. Telecomanda functioneaza pana la o distanta de 8 metri de la senzor si pana la un unghi de 30 de grade de la stanga la dreapta.
- Page 11 1 STANDBY 16 REPEAT 2 TASTE NUMERICE 17 OPEN/CLOSE 3 GO TO 18 OSD 4 PROGRAM 19 DEFAULT 5 PBC 20 V-MODE 6 SETUP 21 ANGLE 7 VOLUM +/- 22 MUTE 8 FAST FORWARD 23 PLAY/PAUSE 9 FAST REWIND 24 NEXT 10 TITLE 25 PREVIOUS 11 TASTE DIRECTIONALE...
- Page 12 In meniul programului, folositi tastele directionale si tastele numerice pentru a creea o lista de programe, apoi miscati bara de selectie pe START si apasati ENTER pentru a porni redarea Apasati pentru a porni unitatea. Apasati din nou pentru a programului.
- Page 13 Apasati repetat pentru a selecta limbile audio disponibile Puteti repeta o anumita sectiune a unui disc cu acest pe disc (pentru DVD). buton. Apasati acest buton pentru a marca punctul de inceput (A) si apasati din nou pentru a marca punctul de sfarsit (B). Apoi, unitatea va reda aceasta sectiune iar si iar.
- Page 14 REDAREA DE PE USB REDAREA CD-URILOR KODAK PICTURE Introduceti un disc Kodak Picture; unitatea va incarca Introduceti un stick USB in slot-ul USB, apoi apasati tasta USB pentru a citi USB-ul si pentru a reda fisierele. Apasati USB din automat discul.
- Page 15 REZOLVAREA PROBLEMELOR si scoateti stick-ul USB/card-ul. Apoi porniti din nou player- Inainte de a recurge la service, va rugam sa verificati ul. Va rezuma statusul urmatorul tabel: normal. PROBLEME CAUZE REMEDIERE Butoanele de pe unitate Unitatea interactioneaza Opriti si scoateti din Fara curent Cablul AC nu este Verificati daca cablul...
- Page 16 SPECIFICATII AKAI SURSA DE PUTERE AC~100-240V/50-60Hz CONSUM SISTEM TV PAL/NTSC LUNGIMEA UNDEI LASER 650nm, 780nm DVD: 4Hz~22kHz(48kHz PCM) 4Hz~44kHz(96kHz PCM) FRECVENTA AUDIO Reciclarea echipamentelor electrice şi CD: 4Hz~20kHz S/N RATIO ≥80dB electronice uzate: INTERVAL AUDIO DINAMIC ≥90dB Acest simbol prezent pe produs sau pe CONDITII DE OPERARE TEMP:0~40°C, orizontal...
- Page 17 DVD Player DVD Player DVD Player DVD Player DVD Player DVD Player DVD Player DVD Player DVD Player DVD Player DVD Player DVD Player DVD Player DVD Player DVD Player DVD Player AD70H...
-
Page 18: Table Of Contents
Contents Features........................2 For your Attention.......................3 Accessories.......................4 Panel........................5 Connections......................6-7 System Setup.......................8-16 Remote Control....................17-18 Remote Control Function..................19-21 Basic Playback....................22-23 Troubleshooting.......................24 Specifications......................25... -
Page 19: Features
Features Thanks for your purchase of our product. Please read through this manual before making connections and operating this product. Retain this manual for future reference. DVD player is a domestic video player of new generation which produces high quality pictures and Hi-Fi audio effect. -
Page 20: For Your Attention
For Your Attention IMPORTANT NOTES Please read through this manual before making connections and operating this product. Retain this manual for future reference. Don't open the cabinet of this unit. No user-serviceable parts inside. Refer servicing to qualified personnel only. Switch off the unit when you don't use it. -
Page 21: Accessories
Accessories Accessories User manual Remote control A/V cable Playable Disc and Media Types: Disc types Symbol Contents Audio + Video Audio Video-CD COMPACT Audio + Video DIGITAL VIDEO VIDEO CD CD-DA Audio Picture CD JPEG Photo CD Kodak Electronic Photo Picture CD Audio + Video MPEG-4... -
Page 22: Panel
Panel Front Panel 4 4 5 5 6 6 7 7 STANDBY STANDBY 1 DISC TRAY 5 OPEN/CLOSE BUTTON 2 DISPLAY SCREEN 6 PLAY/PAUSE BUTTON 3 USB SLOT 7 STOP BUTTON 4 STANDBY BUTTON Rear Panel SCART VIDEO U/Pb V/Pr HDMI MIX L MIX R... -
Page 23: Connections
Connections Connections Connections Connections Connections Connections Connections Connections Connections Connections VIDEO SYSTEM CONNECTION VIDEO SYSTEM CONNECTION VIDEO SYSTEM CONNECTION VIDEO SYSTEM CONNECTION VIDEO SYSTEM CONNECTION VIDEO SYSTEM CONNECTION VIDEO SYSTEM CONNECTION VIDEO SYSTEM CONNECTION VIDEO SYSTEM CONNECTION VIDEO SYSTEM CONNECTION TV/Monitor Video Input TV/Monitor Video Input TV/Monitor Video Input... - Page 24 Connections Connections Connections Connections Connections Connections Connections AUDIO SYSTEM CONNECTION TV/Monitor/Amplifier Audio Input TV/Monitor/Amplifier Audio Input TV/Monitor/Amplifier Audio Input TV/Monitor/Amplifier Audio Input TV/Monitor/Amplifier Audio Input TV/Monitor/Amplifier Audio Input TV/Monitor/Amplifier Audio Input There are two types of audio output systems. They are There are two types of audio output systems.
-
Page 25: System Setup
System Setup Menu Operation 1. Press [SETUP] on the remote control to show the setup menu. 2. Press [ ]/[ ] to select an item. The submenu of the selected item will be displayed below instantly. 3. Press [ ]/[ ] to select an item you desire to set in the submenu, then press [ENTER] /[ ]to enter. Use [ ]/[ ] to select an option, then press [ENTER] to confirm it, or press [ ] to cancel. - Page 26 System Setup 1.3 OSD LANGUAGE ( On-Screen Display Language) Set the on-screen display language in this item. 1.4 CLOSED CAPTIONS Set this item to ON to show the closed captions; Set it to OFF to hide it. You can also press [SUBTITLE] on the remote control to show or hide the closed captions. NOTE: This function only works with those discs encoded with closed captions.
-
Page 27: Audio Setup Page
System Setup 2 AUDIO SETUP PAGE ANALOG AUDIO SETUP 2.1.1 DOWNMIX LT/RT: The 5.1-channel audio is mixed into left channel and right channel and is output via the FL and FR speaker respectively. STEREO: The 5.1-channel audio is mixed into stereo signal and is output via the FL and FR speaker. 3D SURROUND : This mode creates a virtual surround effect from stereo or multi-channel audio contents. - Page 28 System Setup 2.2.2 LPCM OUTPUT When DIGITAL OUTPUT is set to SPDIF/PCM, this item is available. Select a sample rating for the digital audio output. There are two options, 48KHz and 96KHz. NOTE: Some amplifiers don't support 96KHz sampling which will affect the coaxial output. 2.3 CHANNEL DELAY This item is used to set the delay time for the center speaker, rear speakers and the subwoofer.
- Page 29 System Setup 2.4 EQUALIZER 2.4.1 SOUND MODE Select a sound mode, ROCK, POP, LIVE, DANCE, TECHNO, CLASSIC or SOFT, or select OFF to for no sound effect. 2.4.2 BASS BOOST Set it to ON to boost the bass sound. 2.4.3 SUPER BASS Set it to ON to get the super bass sound effect.
-
Page 30: Dolby Digital Setup
System Setup 2.5.1.3 PANORAMA This item is used to turn on/off panorama mode and is available only when MODE is set to MUSIC. When panorama mode is turned on, the front stereo audio is partially fed into the surround channels for an enveloping effect. -
Page 31: Video Setup Page
System Setup 4 VIDEO SETUP PAGE 4.1 VIDEO OUTPUT OFF: Set video output to S-Video if the S-Video connection is made. YUV: Set video output in analog component video format if the component video outputs are used. RGB: Set video output in Red/Green/Blue format if the SCART output is used. NOTE: If the composite video is your favorite, just make composite video connection only. -
Page 32: Preference Page
System Setup HDMI is an uncompressed, all-digital signal, while the aforementioned interfaces are all analog. With an analog interface, a clean digital source is translated into less precise analog, sent to the television, then converted back to a digital signal to display on screen. At each translation, the digital signal loses integrity, resulting in some distortion of picture quality. - Page 33 System Setup 5.2 AUDIO, SUBTITLE and DISC MENU Select a preferred audio language, subtitle language and disc menu language in these items. You can also make selection of the audio language by using the [AUDIO] and the subtitle language by the [SUBTITLE] on the remote control.
-
Page 34: Remote Control
Remote control Remote Control Operation Insert two AAA/1.5V batteries into the remote control. Point the remote control at the remote sensor on the front panel. The remote control works within a distance of about 8 metres from the sensor and within an angle of about 30 degrees from the left and right side. - Page 35 Remote control 1 STANDBY 18 OSD 2 DIGIT KEYS 19 DEFAULT 3 GOTO 20 V-MODE 4 PROGRAM 21 ANGLE 5 PBC 22 MUTE 6 SETUP 23 PLAY/PAUSE 7 VOLUME+/- 24 NEXT 8 FAST FORWARD 25 PREVIOUS 9 FAST REWIND 26 SUBTITLE 10 TITLE 27 ENTER 11 DIRECTION KEYS...
-
Page 36: Remote Control Function
Remote Control Function STANDBY Press to switch on the unit. Press it again to put the unit in standby mode. Note: Being in the standby mode uses a minimal amount of electricity, but ensures that the components of the unit operate at maximum efficiency from the moment you start. DEFAULT When the disc tray is open or the disc is stopped, press to restore the default settings except the settings in PASSWORD item and PARENTAL item. - Page 37 Remote Control Function Press it once to pre-stop a playback. Press [ ] to resume the playback from the pre-stopped status. Press it twice to stop a playback and the disc will be reset to the starting point. Press for fast forward playback. The available speeds are 2X, 4X, 8X, 16X and 32X. Press for fast reverse playback.
- Page 38 Remote Control Function Press to activate/ disable the PBC function. When playing disc encoded with PBC function, press to display the PBC menu. Press it again to disable the PBC function. (Note: This function only works with those discs encoded with PBC function such as VCD 2.0, etc. DVD, VCD1.1, CD-DA and MP3 discs have no PBC function.) RETURN Press to return to the upper disc menu.
-
Page 39: Basic Playback
Basic Playback USB DRIVE PLAYBACK Insert a USB drive into the USB slot. Press [USB] to enter the connected USB drive. Press it again to return to the DVD mode. NOTE: In case the player breaks down when you insert a USB drive into the player, turn off the player, disconnect the power cord from the AC outlet and unplug the USB drive from the player. - Page 40 Basic Playback KODAK PICTURE CD PLAYBACK Place a kodak picture CD in the disc tray; the unit will load the disc automatically. Press [ ] to enter the thumbnail mode to preview the pictures. In the thumbnail mode, use the direction keys to select a picture, then press [ENTER] to start the playback from the selected picture.
-
Page 41: Troubleshooting
Troubleshooting Before resorting to maintenance service, please kindly check by yourself with the following chart. Symptom Cause(s) Remedy No Power The AC power cord is not connected to the power Please check that the AC power cord supply or is not connected to a power supply is connected securely. -
Page 42: Specifications
Specifications AC~100-240V/50-60Hz Power supply Power consumption PAL /NTSC TV system 650nm, 780nm Laser wave length DVD: 4Hz~22kHz 48kHz PCM Audio frequency range 4Hz~ 44kHz 9 6kHz PCM 4Hz~20kHz 80dB S/N ratio Audio dynamic range 90dB Operating conditions Temperature: 0~40 , horizontally installed Video output 1.0V P-P Y 1.0V(P-P),75...
Need help?
Do you have a question about the AD 70H and is the answer not in the manual?
Questions and answers